How to Fix DNS Server Not Responding Error
It can be extremely frustrating to encounter the “DNS server not responding” error when you are trying to access a website on your browser. However, there is no need to worry - these issues are easily fixable if you understand the technicalities first. So, keep reading!
Basically, this error occurs when your web browser fails to connect to your desired site. This is because the DNS server is unable to map the hostnames (website addresses) to IP addresses. Hence, your browser tells you that the “server DNS address couldn’t be found.”
This is rarely a web backend error and most likely a user end that occurs due to a network connectivity issue or a misconfigured DNS setting.
In this article, we will discuss what this error means, the root causes of the “DNS server not responding” error, and how you can fix it.
What is DNS and How Does it Work?
Before getting familiar with the error, let’s first understand what DNS is and how it works.
DNS is a domain naming system that is used as a directory for converting human-readable website addresses/URLs (words) into the computed language, IP addresses (numbers). Here the DNS servers act as translators that translate the domain names into numeric data.
Simply put, when you enter a website address into the search bar of a browser, for example, web.com, the DNS converts this domain name address into numeric data, for example, 214.44.55.234. These numbers are then looked up in the Database of the DNS servers and converted into a webpage you will eventually see on your screen.

So, when you get the error, “DNS Server is not responding”, it means the problem lies here at the DNS lookup - When the DNS server looks up the IP address of the domain, the database becomes inaccessible, and you are unable to load the website.
What is a “DNS SERVER NOT RESPONDING” Error?
This error occurs when your browser can't make a connection with the internet servers. It’s because the domain resolution process is not fetched properly by the DNS servers, and you will get a screen with the message, “Server DNS address couldn’t be found”.
In simple terms, the DNS is unable to fetch the IP details of the domain you entered and your browser fails to develop a connection that eventually won’t load the webpage.
Let’s discuss the root causes of this error, so you can make an easy go-away with the fixes of the DNS error.
Causes
The common cause of the DNS server's failed-to-respond error is misconfigured DNS record. However, it can occur due to many other reasons.
● Internet connectivity issues
● Misconfigured network adapters
● Outdated network adapter
● Incorrect DNS address
● DNS Cache
● Unavailable DNS provider
● Antivirus interference
● VPN interference
● Other network interruptions
How To Fix “DNS Server Not Responding” Error On Desktop (15 Methods)
We have listed down the 15 methods that can help you to fix the DNS server not responding to errors on your desktop devices.
1. Force Refresh the Webpage
Force refreshing a webpage can be tested to check if the error is temporary or not. When you try to refresh the page, you send a new DNS query to the servers, which may somehow help in loading the webpage if the error was temporarily existing.
You can use the following shortcut combinations to force refresh a page on different browsers.
Chrome
Following are the Chrome shortcuts for Windows and macOS.
Windows: Ctrl + F5
Mac: command + shift + R
Firefox
Following are the Firefox shortcuts for Windows and Mac.
Windows: Ctrl + F5
Mac: command + shift + R
Safari
Use this shortcut combination: Command + Option + R.
Microsoft Edge
Use this shortcut combination: Ctrl + F5.
If this doesn’t work, it means the error is long-lasting and due to some potential reason. Now, you have to try another method.
2. Try a different Browser
It might be possible the issue is with the browser you are using for web surfing. So, it’s suggested to update the browser and see if you still can’t load the website. If not then, another solution is to use a different browser.
If you are on Chrome primarily, then you can use Microsoft Edge, Firefox, etc. Search the same website on another browser to see if the issue was from your previous browser. If you still can’t access the site, then go for the next troubleshooting method.
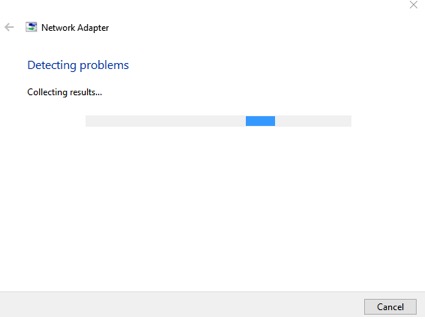
3. Troubleshoot Internet Connectivity
Troubleshooting the internet connection is usually considered a preliminary check to fix the error. The internet connectivity settings will help you to configure what’s the cause of the error, and what would be a potential step to opt for fixing the error.
The troubleshooting settings are done through the same process on Windows and Mac - using built-in tools and you can do so on Linux - by using.
Windows
This network diagnostics method is the same for all Windows versions. Here is how you can do this.
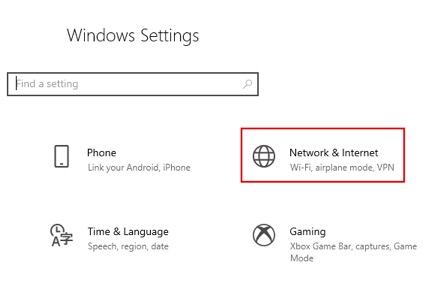
- Search Settings in the search menu or you can use the shortcut combination, Windows key + I.
- Then, navigate to Network & Internet.
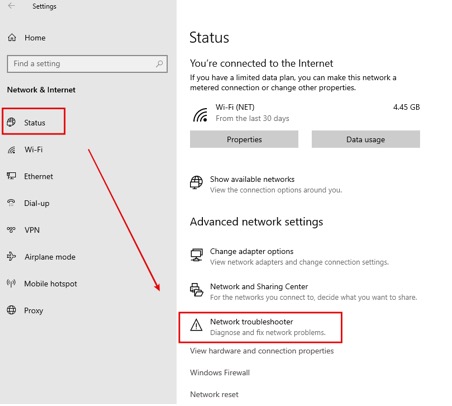
- Click on Status from the Network
& Internet tab and then click on Network Troubleshooter, this
will start diagnostics.

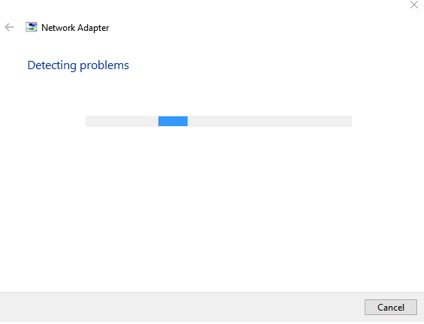
- It will take a few seconds and a pop-up will appear with connectivity options.
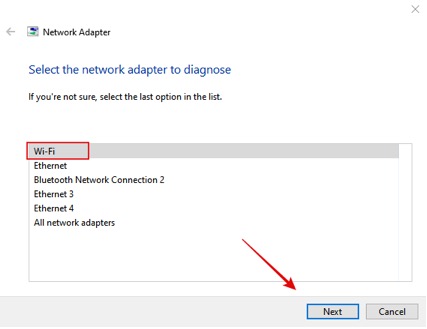
- Then, select WiFi as the Network
Adapter and click Next.

- Wait for the
process to be completed.

- When it is done, a pop-up will appear. If you see issues, fix them and try reconnecting to the WiFi.
Here is another way to troubleshoot the Internet on Windows 10.
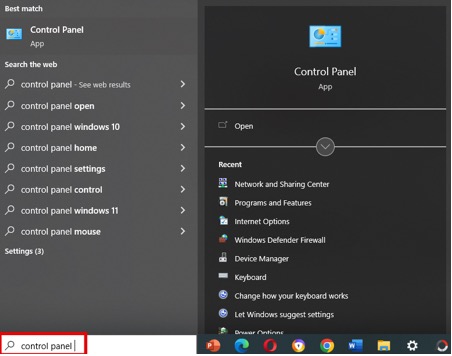
- Search Control Panel in the search
bar of Windows.

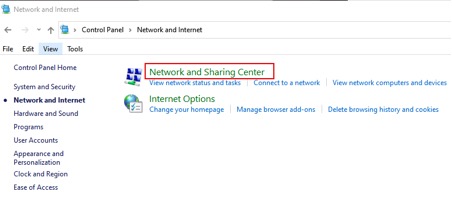
- Now, go to Network and Internet.


- Click on Network and Sharing Center.

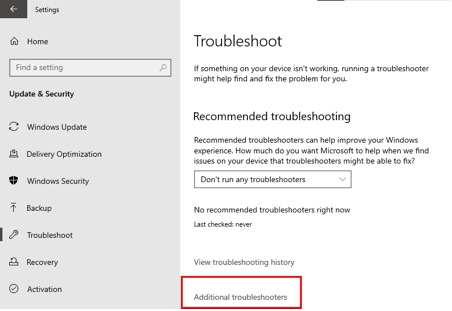
- Click on troubleshoot problems under the Change your network settings menu. It will open a Troubleshoot
panel in Settings.


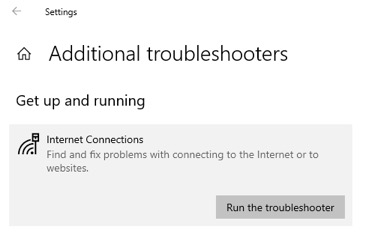
- Now click on Additional
troubleshooters and then Internet Connections.

- Click on Run
the Troubleshooter and wait for the process to be completed.

macOS
Troubleshooting on Mac is done through the Wireless Diagnostic settings in the following way.
- Turn off the apps on Mac and then shut down Mac.
- After a few seconds, turn it on by holding the Option key.
- Now, click on the WiFi status icon.
- Choose Wireless Diagnostics and then follow the screen pop-up instructions.
- After the scanning process, check the summary by clicking on the info button.
- Apply the suggestion fix if you see an error in the connection.
If you still see the DNS error, then go for the next method.
4. Restart Your Router
Improper functioning of the modem or the router may be causing the error and that’s why the connection fails. To fix this, you have to restart your router or the modem. This is not the potential solution; however, it can sometimes work.
Switch off the router by pressing the power button and then unplug it. Wait 30 seconds, plug the adapter back and turn the power button on. After that, you can also try restarting the device and then accessing the web. If you still can’t load the site, then you can try the following fix.
5. Update Network Driver
An outdated network driver can also cause bugs while loading the sites and interrupts connectivity issues. So, updating the outdated or corrupted drivers might fix the “DNS server not responding” error.
Windows
Here is the procedure to update the network driver on Windows.
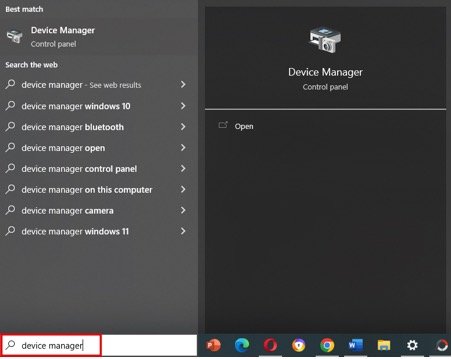
- Search Device Manager in the
search bar and open it.

- Now right click on the driver under the network adapter section.
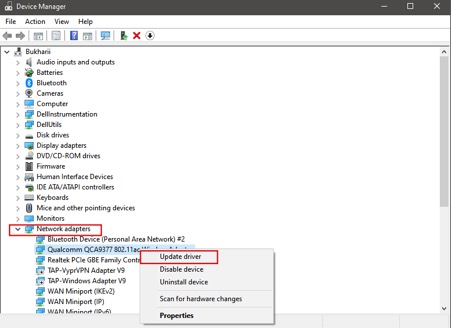

- Click on Update Driver for that option and follow the screen pop-up instructions.
macOS
You do not have to update the driver on Mac, because it requires a different process. First, check the Ethernet adapter in the System Preferences and Network. For example, it is en0, then follow the given below procedure.
- Open the terminal on Mac.
- Now, type in the following command: sudo ifconfig en0 down.
- Hit Enter.
- Type another command: sudo ipconfig en0 up.
- Hit Enter.
Check if this works, otherwise, try the next method.
6. Restart DHP Client
DHP client is one of those services of Windows that help run your computer or PC at every rundown time. It helps in working the DNS in the background, so restarting a DHP client might fix the DNS server not responding to the error.
Here is the procedure to restart a DHP client.
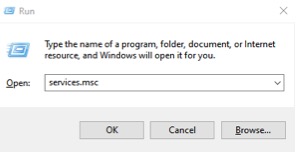
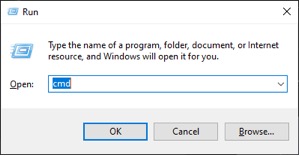
- Open the Run dialogue box by using the shortcuts, Windows key + R.
- Now, type services.msc in the box
and click ok.

- You will get a services window.
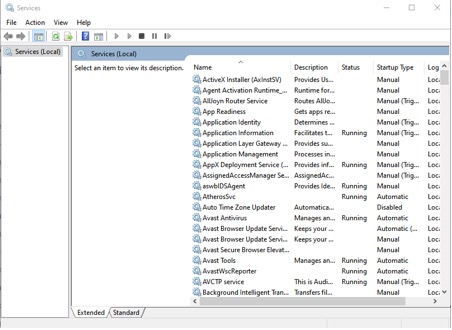
- Now, search for the DHP client.
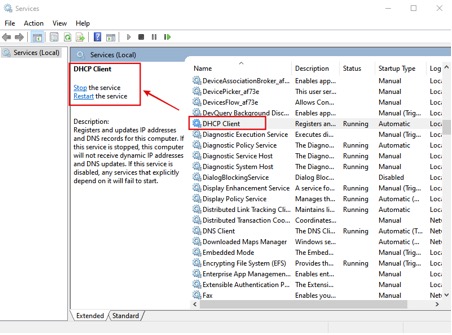

- Right-click on and click the Restart option.
Now, enter the web URL again in your browser, and see if the DNS error is fixed.
7. Flush DNS Cache
DNS data such as IP address and other domain records are collected as DNS cache by the operating system. This cache helps to accelerate the web surfing speed and you do not have to reenter the whole domain name again and again. Hence, there won't be a need to contact the server again for the page-loading process.
Along with the advantages, you can have disadvantages. When the DNS cache data becomes outdated and corrupted with malware or bugs, that interrupts web surfing for other sites as well.
One of the common DNS errors is the “DNS server not responding” error. It’s crucial to flush the DNS cache that is causing trouble.
Windows
You can flush the DNS cache on Windows by using the command prompt.
- To open the command
line, type Command Prompt or cmd in the search bar and open
it.
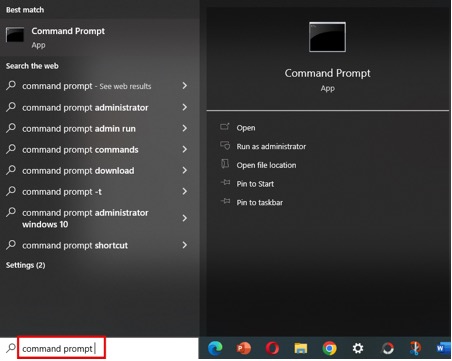

You can use shortcut keys as an alternative method to open the run dialog box and ultimately the command line. Press the Windows key + R to open a Run dialogue box, type cmd, and hit Ok.
- When the command windows get opened, type the following command: Ipconfig /flushdns.
- Now, hit Enter to execute the command.
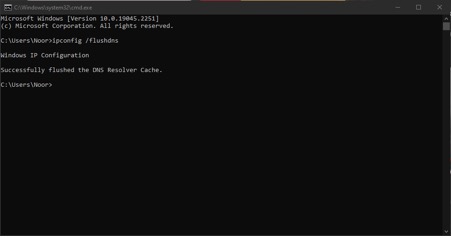

Now, you will see a screen with the message, successfully flushed the DNS cache.
However, to renew the DNS, you again have to follow the same procedure from step 1 for the following commands.
Ipconfig /flushdns.
ipconfig /registerdns
ipconfig /release
ipconfig /renew
If you want to reset the DNS cache, then type the following command: netsh winstock reset and hit Enter.
After this, reboot your computer and follow up by surfing the web if the error is fixed now.
Google Chrome
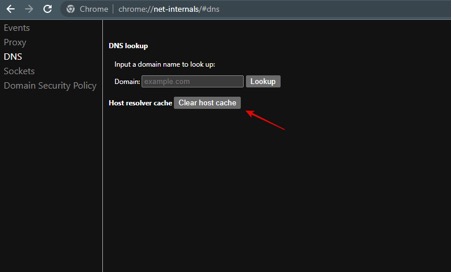
Here is the procedure to clear the DNS cache on Google chrome with these steps.
- Open Chrome and type this URL: chrome://net-internals/#dns in the address bar of Chrome.
- A screen will appear, now click DNS.
- Enter the domain address and then click the Clear host cache.
macOS
The method to flush DNS on macOS is different than on Windows. However, this resembles the Linux UNIX system.
- First, search Terminal in the Spotlight Search box.
- Then, open the terminal and type the following command there: sudo dscacheutil -flushcache; sudo killall -HUP mDNSResponder
- Hit Enter to execute the command.
- Now, type the password of our device in the password prompt, and again hit Enter.
Linux
Most Linux versions do not support default service to clear the DNS cache as in Windows. You can do so by using commands in the terminal.
To start the DNS flushing process, you have to use the shortcut keys (Ctrl + Alt + T) to open a Terminal. Now, follow the given below procedure.
1. Flush DNS Cache Using nscd
● Type the first command in Terminal: sudo
/etc/init.d/nscd restart.
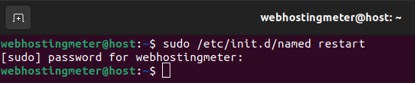
2. Flush DNS Cache Using BIND
- Type the following command: sudo
/etc/init.d/named restart

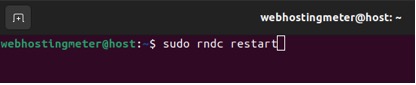
- Next,
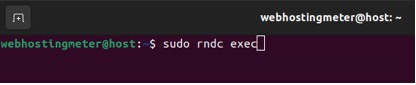
restart the service with this command: sudo rndc restart
- Finally, execute the service using this command: sudo
rndc exec
Type the following command to flush
cache memory: sudo rndc flushname domain.com
● Type this command to flush the DNS cache for WAN network: sudo rndc flush wan
● Type this command to flush the DNS cache for local network: sudo rndc flush lan
3. Flush DNS Cache Using dnsmasq
Type the following command after restarting the dnsmasq service: sudo /etc/init.d/dnsmasq restart.
Now, go to your browser, enter the web address and try to load the site. If you still can not, then opt for the next process.
8. Modify DNS Settings
Even after flushing the DNS cache, you cannot fix the DNS server couldn’t be found error, then you have to modify the DNS settings. You can change the already assigned DNS servers to Google, Cloudflare, or open DNS addresses.
Here is the DNS address for various servers.
● Google DNS: (8.8.8.8 and 8.8.4.4)
● Cloudflare DNS: (1.1.1.1 and 1.0.0.1)
● Quad9: (9.9.9.9 or 149.112.112.112)
● AdGuard DNS: (94.140.14.14 or 94.140.15.15)
● OpenDNS Home: (208.67.222.222 or 208.67.220.220)
Windows
You can change the DNS servers on Windows with these steps.
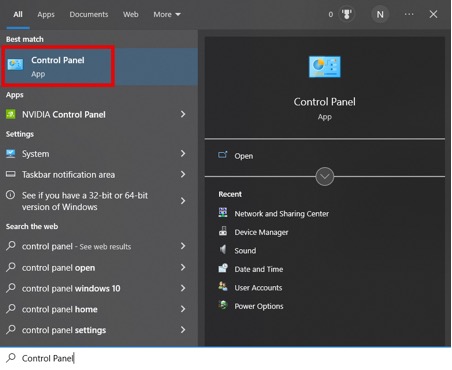
- Type Control
Panel in the search bar and click to open it.

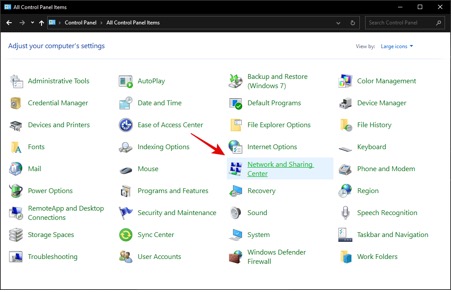
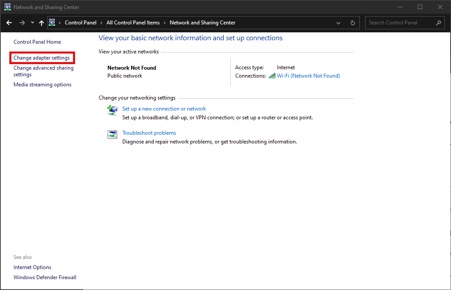
- Now, click on Network and Sharing
Center > Change Adapter Settings.

- After that, choose your Network
Adapter and right-click on it to open a panel.
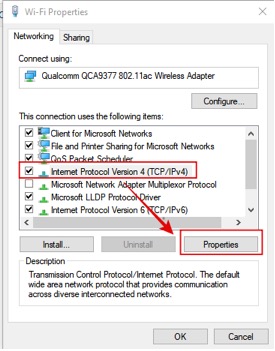
- Click on the Properties option.
- Now, choose "Internet Protocol
Version 4 (TCP/IPv4)" and click on Properties.

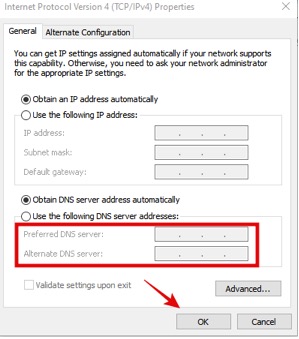
- After that,
enable "Use the following DNS server addresses," type the
following DNS (8.8.8.8 and 8.8.4.4) and click Ok.


Another way to modify DNS settings is the following.
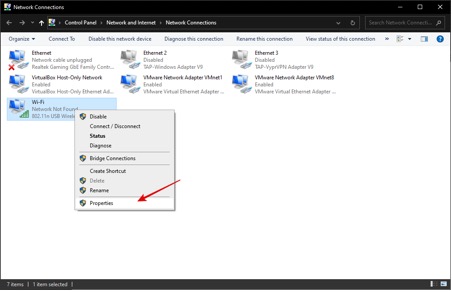
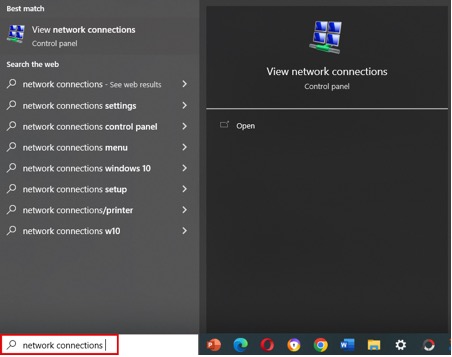
- Type Network Connections in the
search bar of Windows and click to open it.

- Now right click on the wireless
network you are currently using. It will open a menu.


- Click on Properties.
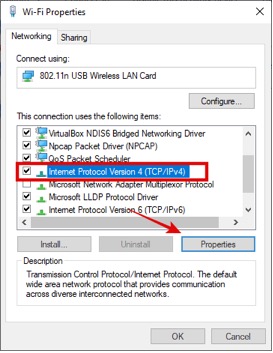
- Now, select Internet Protocol Version 4 (TCP/IPv4).
- Again click on Properties at the
bottom.

- Now,
manually assign the DNS addresses. For example, for Google servers,
use 8.8.8.8 in the Preferred DNS Server and 8.8.4.4 in
the Alternative DNS Server.

Google Chrome
You can also alter the DNS servers directly on Google Chrome if you are using that for browsing a particular website. Go through the following process
You can customize the DNS setting on Chrome.
- First open Chrome and type the following URL in the search bar of Chrome: chrome://settings/security.
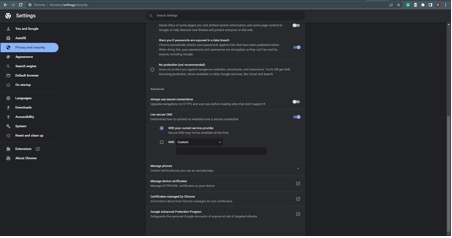
- You will get a new tab directly from settings. This will open a security tab from settings directly.
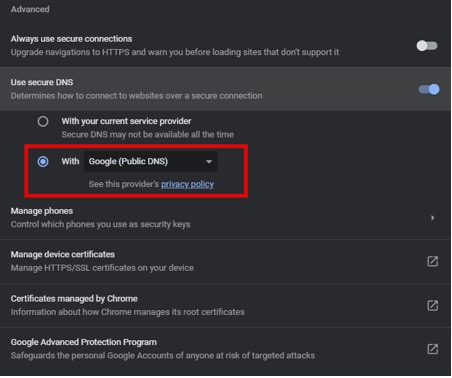
- Now, navigate to the Advanced section and click on the Use Secure DNS option.
- Alter the
custom settings and assign new servers: Google (Public DNS) or Cloudflare DNS option.

Firefox
If you are using Mozilla Firefox, you can alter the DNS settings in the following way.
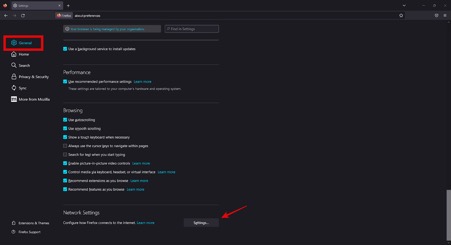
- Go to the Settings of Firefox and then navigate to General.
- Click on Network Settings.

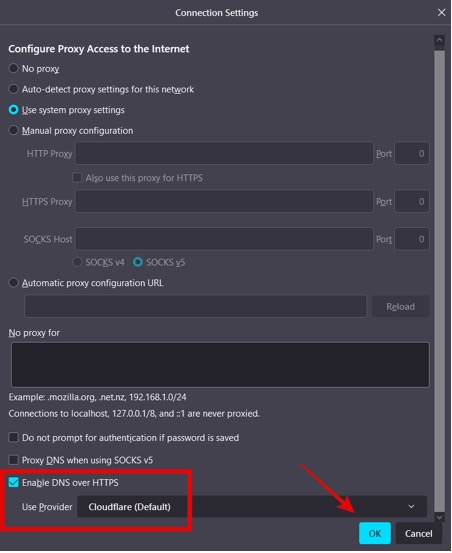
- Under "Enable
DNS over HTTPS, you can select Cloudflare or Google DNS to change servers manually.

macOS
Follow the given below procedure to change the DNS servers if you are a macOS user.
- Click on Apple Logo to open the settings tab.
- Navigate to System Preferences followed by Network.
- Then, select the network you are using and right-click on it to open the Advanced tab.
- Switch to the DNS tab
- Remove the already assigned DNS addresses and add new ones by clicking on the + button.
- When you are done, click Ok.
Linux
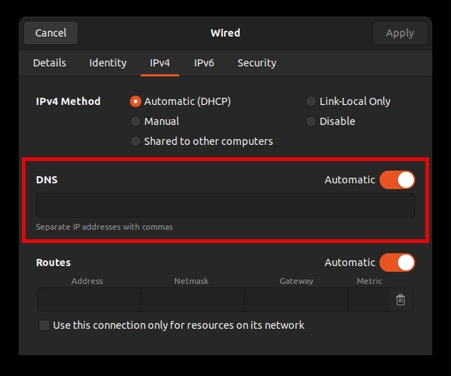
Here is the procedure to modify the DNS server IP Address from the system settings of Linux.
- Firstly go to Settings and then navigate to Network.
- Select the Network Adapter you are using currently and then open its settings from the right side icon.
- Choose IPv4 from the top menu. This will Turn DNS on and then you can
change your DNS server settings manually.
9. Disable Antivirus/Firewall
Firewall or Antivirus software prevent your system from viruses and any malware attacks. However, the demerit is that they can sometimes interfere with your DNS settings and hence you face issues while surfing the website.
Disabling Antivirus
Windows
Follow the given below process to disable Antivirus on Windows.
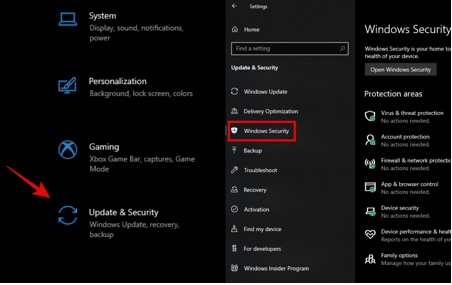
- Open the Settings app and then click on Update & Security.
- Then, go to Windows Security and
click on Virus & threat protection.

- If you see the Antivirus option, then
Click on the open app windows and disable the third-party app.
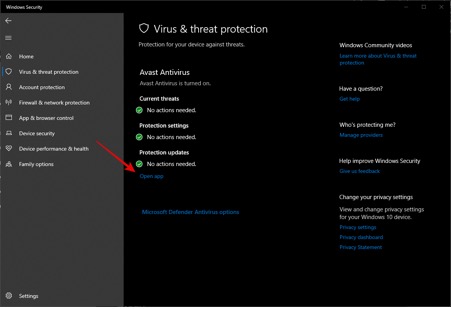

- Then, click Manage Settings and turn the Real-time protection Off to disable Antivirus.
macOS
If you have an antivirus installed on your macOS, such as Avast Antivirus, you can turn it off by navigating to Preferences on the Avast app and choosing the disable option.
Disabling Firewall
It’s also suggested to try disabling Firewall to check if the DNS server not responding error is caused by the interruption of the firewall.
Windows
- Type Control Panel in the search bar and click to open it.
- Now go to System and Security.
- Now, navigate to Windows Defender Firewall.
- On the left sidebar, click on turn Windows Defender Firewall on or off.
- Now, click on Turn off for both public and private network settings.
macOS
- Go to Settings > System Preferences.
- Then navigate to Security and Privacy > Firewall.
- Under the firewall tab, click the lock icon and type details such as username and password.
- After unlocking, Turn off the Firewall and then lock it again.
After disabling both Antivirus and Firewall, now you can try exploring the website. If not, then hop on to the next fix.
10. Deactivate VPN
VPN helps to mask your identity while surfing private web pages, but it also interferes with the DNS of the public web pages which can trigger the DNS error. To fix the error, it is suggested to temporarily deactivate the VPN or disable it permanently.
Windows
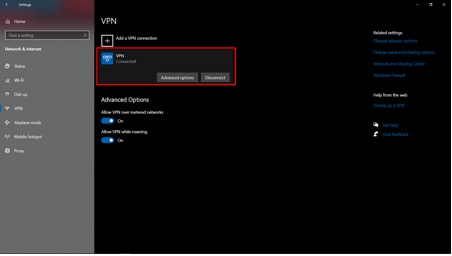
You can deactivate the VPN on windows with these steps.
- Open Settings and navigate to Network & Internet > VPN.
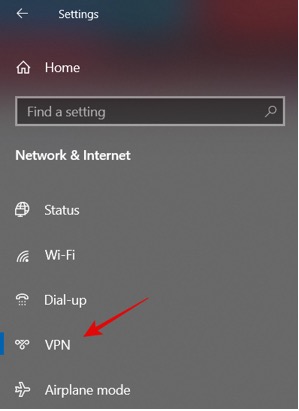

- If you see
the VPN switch is on, then VPN click on “Disconnect.”

macOS
The procedure to disable VPN for mac users is also very easy.
- Click on the Apple logo and then navigate to System Preferences.
- Click on Network, and then select the VPN connection you want to disconnect.
- Click on Disconnect.
- Click Apply the settings.
Another way is to directly disable the VPN through the Software. Then, reboot your PC to ensure that the error is fixed and you can now browse the website.
11. Disable IPv6
Internet Protocol version 6 is the enhanced feature that identifies the traffic between the local networks and over the Internet. Thus, it is possible that it might be causing misconfigurations in the DNS that results in DNS not responding to errors.
To fix the error, you have disabled this feature, as this won't have any negative impact on your network router.
Windows
Follow this procedure to disable IPv6 on Windows.
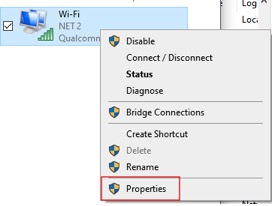
- Type Network Connections in the
search bar of windows and click to open it.
- Now select the network WiFi.
- Right-click on the WiFi to go to its Properties.

- Now navigate to Internet Protocol
Version 6 under the Networking menu and unselect this box.
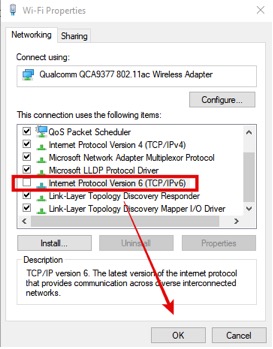

- Click Ok to save changes.
macOS
With the steps below, you can disable IPv6 on Mac.
- Click on the Apple logo and go to Apple Menu.
- Now click on System Preferences and go to Network.
- Now choose the Network connection.
- click on the Advanced tab to open a settings menu.
- Click on TCP/IP.
- Click on Configure IPv6 and turn it off.
- Click Ok to save changes.
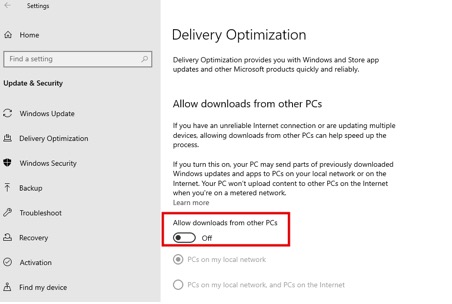
12. Disable Windows P2P Feature
The peer-to-peer feature is an innovative feature on Windows that can help update Windows using other PCs or users. You can download the updates from other PCS on your local network or both locally and on the Internet. However, this sometimes causes trouble with the DNS settings, so you have to disable it to allow a smooth DNS working process.
Here is the procedure to disable the P2P feature.
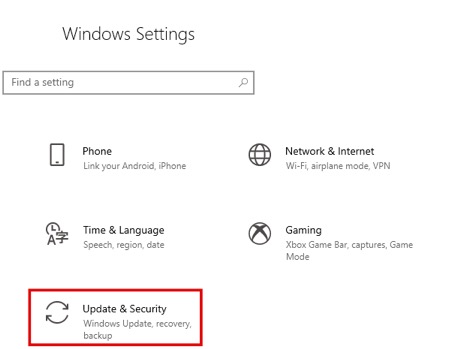
- Open the Settings app on Windows
and navigate to Updates & Security.

- Now select Advanced Options in the
Windows Update menu.
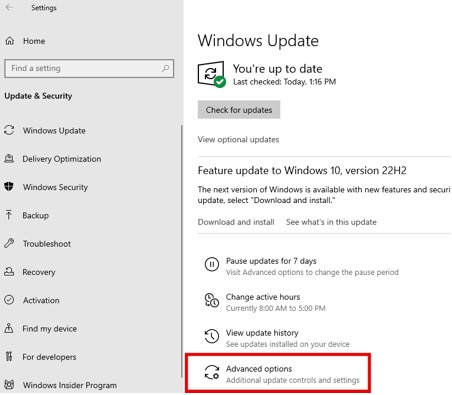

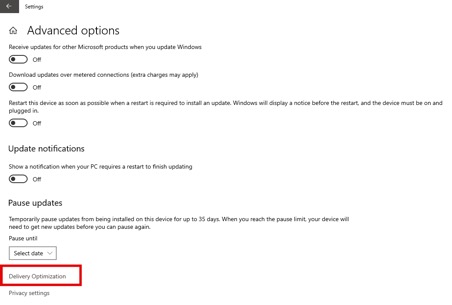
- Click on Delivery Optimization.

- Now, disable the button for “Allow
downloads from other PCs.

Turn to the browser and try reloading the site.
13. Disable Other Network Connections
If you have multiple connections turned on at the moment and you are not using them, then turn them off to fix the DNS not responding error.
Here is how you can disable unnecessary network connections on your PC.
- Type Control panel in the search
bar of the Windows and click to open it.
- Navigate to Network and Internet >
Network and Sharing Center.
- On the left side, you will see a menu,
from that click on Change Network adapter settings.
- This will open the connections page, now click on the additional network and click Disable. Do this for all other connections.
Another simple is to type Network connections in the search bar and open it. Then, right-click on the network you want to disconnect and click on disable.
macOS
The procedure for disabling unnecessary connections on Mac is quite simple.
- Click on the Apple logo and go to Apple Menu.
- Now click on System Preferences and navigate to Network.
- Now click on the - for each connection that you are not using.
The other way to disable IPv6 on macOS is by using Commands.
- Open the terminal and detect the network interface by executing this command: networksetup -listallnetworkservices
- Then, follow up the next command to disable IPv6 for the WiFi connection: networksetup - setv6off Wi-Fi.
- Follow up this command to disable IPv6 for the ethernet connection: networksetup - setv6off Ethernet.
Refresh the site if you can see the error is fixed.
14. Boot PC in Safe Mode
Using a computer in Safe Mode can help you detect the cause of the error, as your device usually works in a stripped-down mode with limited drivers, files, and resources.
Windows
With the following steps, you can activate safe mode on your Windows machine.
- Open Settings by pressing the Windows
key + I and navigate to Updates & Security.
- Then, click on Recovery.
- Choose Restart Now from the
Advanced Startup Menu.

- Once the startup begins, you will get a screen with Choose an option.
- Now, choose Troubleshoot.
- Navigate to Advanced > Startup settings > Restart.
- After it restarts, press F5 or 5 to get your PC into Safe mode.
macOS
Follow the steps to enable Safe mode on macOS.
- Click on the Apple logo and open the Apple Menu.
- Now click on Shut down and wait for a few seconds.
- Press the power button again, and hold the shift key to enable safe mode.
Open the browser, and search the website if the DNS error is gone.
15. Use a Different Device
If none of the above methods for the same device doesn't work, then you have to opt for this last method of changing the device. Try accessing the website on a different device. If you can load the site, then the primary issue was with your previous device.
Conclusion
The "DNS server not responding" error is one of the common web surfing errors caused by client-side misconfigurations, possibly in the DNS settings. But fortunately, it is usually an easy-to-fix error.
We have listed above the tried and tested methods that can help you fix the error yourself. Whether you are facing this error on your Windows or macOS, you can apply the relevant fixes in the above guide.
FREQUENTLY ASKED QUESTIONS
How Do I Find My DNS Server?
To find the DNS server, you have to open the command line. For this first open the Run dialogue box on Windows by pressing the Windows key + R. Type cmd and click Ok. Then, type the following command: ipconfig/all and hit Enter. Search for the DNS servers from the list.
How can I Fix DNS Server Not Responding Error?
You can fix the DNS server not responding error by fixing the misconfigurations in the DNS settings. For this, flush the DNS cache or manually modify DNS. You can also disable third-party apps such as Antivirus or VPNs, Internet protocols or other connections that interfere with the DNS.
What Causes DNS Server Not Responding Error?
DNS server not responding error can be mainly caused by incorrect DNS records. However, there can be many other reasons such as Internet connection issues, misconfigured or outdated adapters, DNS cache, Antivirus or VPN interference, or other network interruptions.

PROMO
FREE Web Hosting
for Your Website