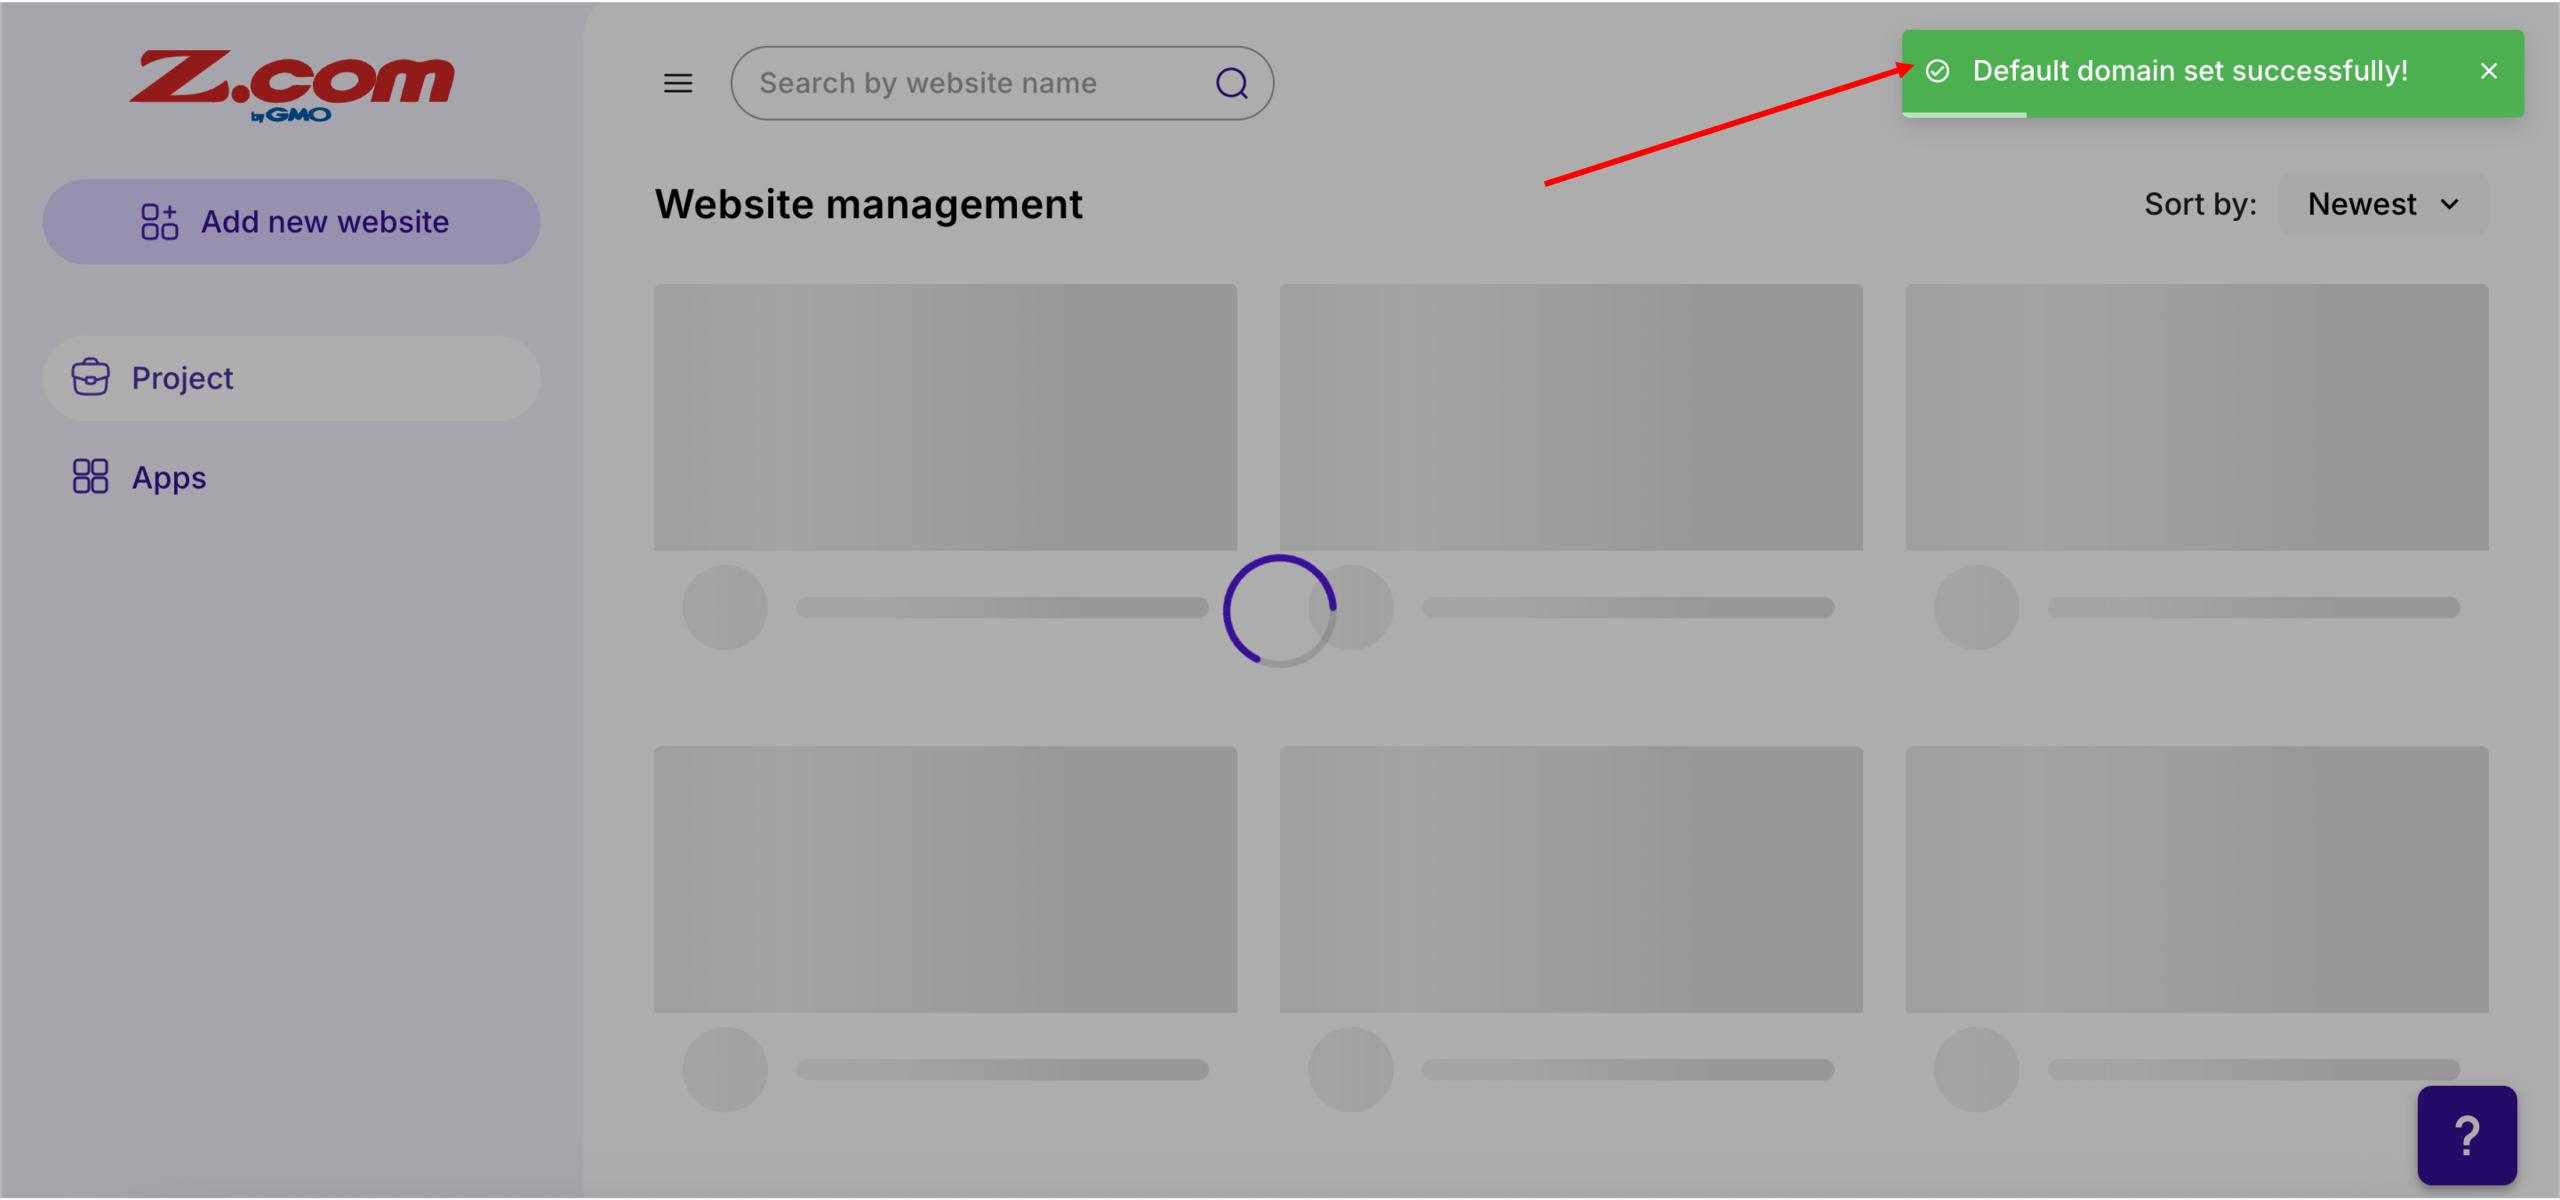
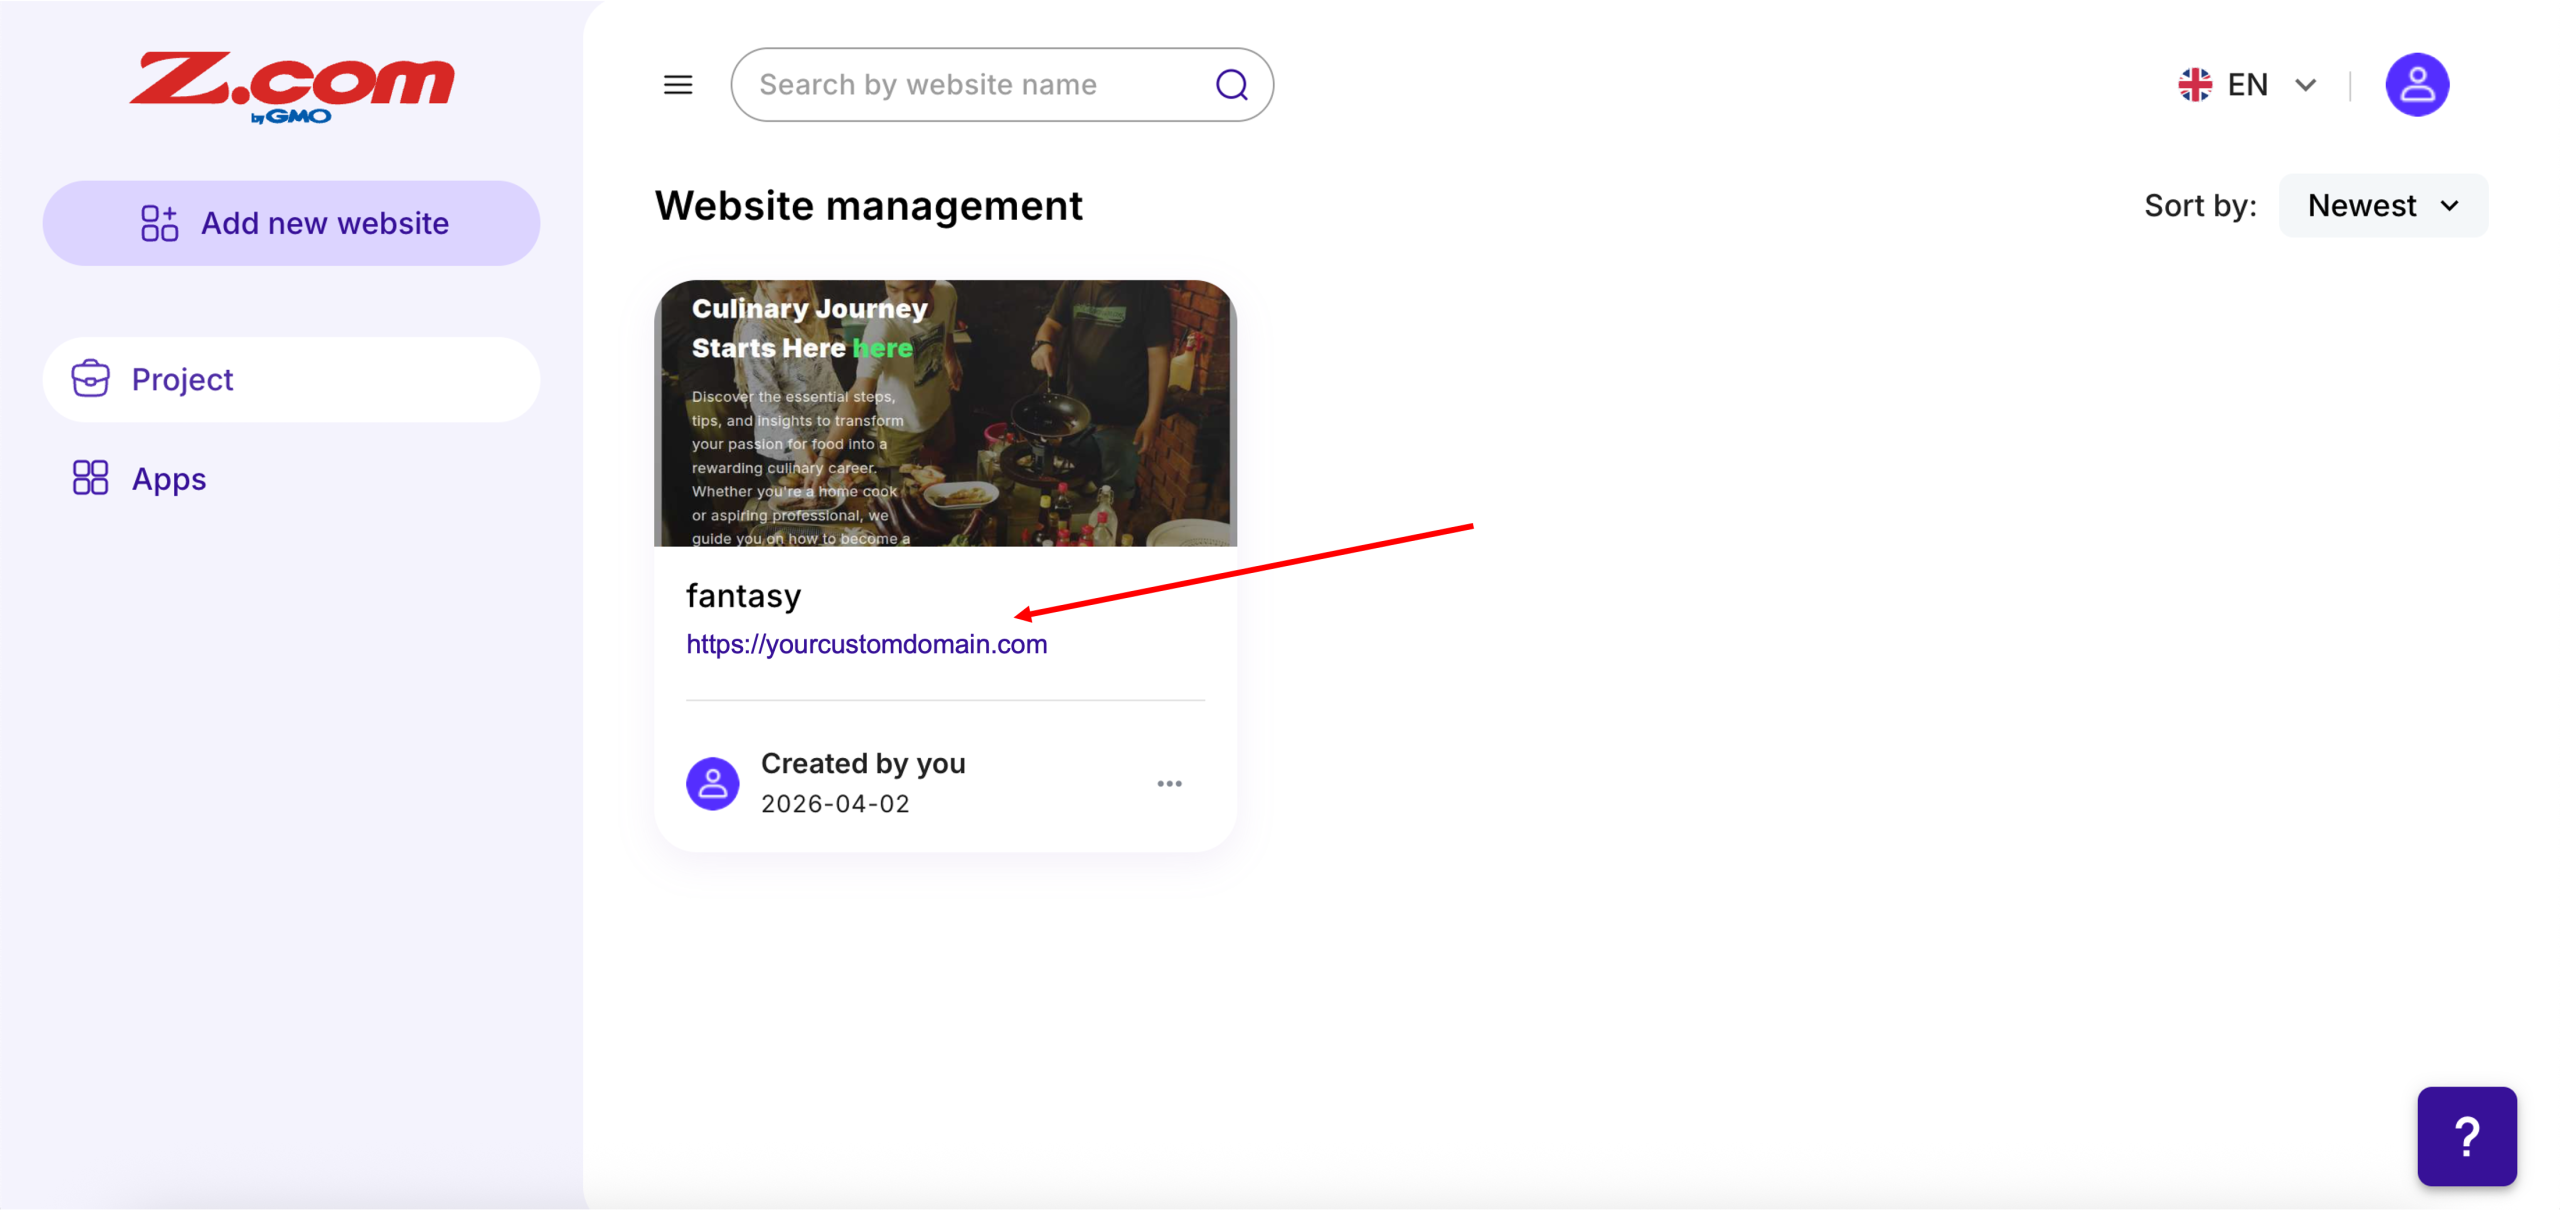
Example :
How to set up an email or change my account settings.
- Help Center
- AI Powered Website Builder
- AI Powered Website Builder
- How to change your website domain from a shared domain to your own domain?
How to change your website domain from a shared domain to your own domain?
When creating a website with the AI Powered Website builder, your website may initially be published on a temporary Z.com shared domain if a custom domain is not yet available. While this allows you to get started quickly, using your own domain provides a more professional web address and strengthens your online presence.
Once you have registered a domain name, you can easily update your website to use your own custom domain in the website builder settings.
This guide explains how to change your website domain from a shared domain to your own domain.
Note:
• Ensure that you have a registered domain name before attempting to update your website domain.
• If you do not yet have a domain name, you can browse available domain name options on our website here.
• Changes to your domain settings may take some time to propagate due to DNS updates.
1. Go to our Sign-in page.
2. Enter your Email Address and Password, and proceed to log in.
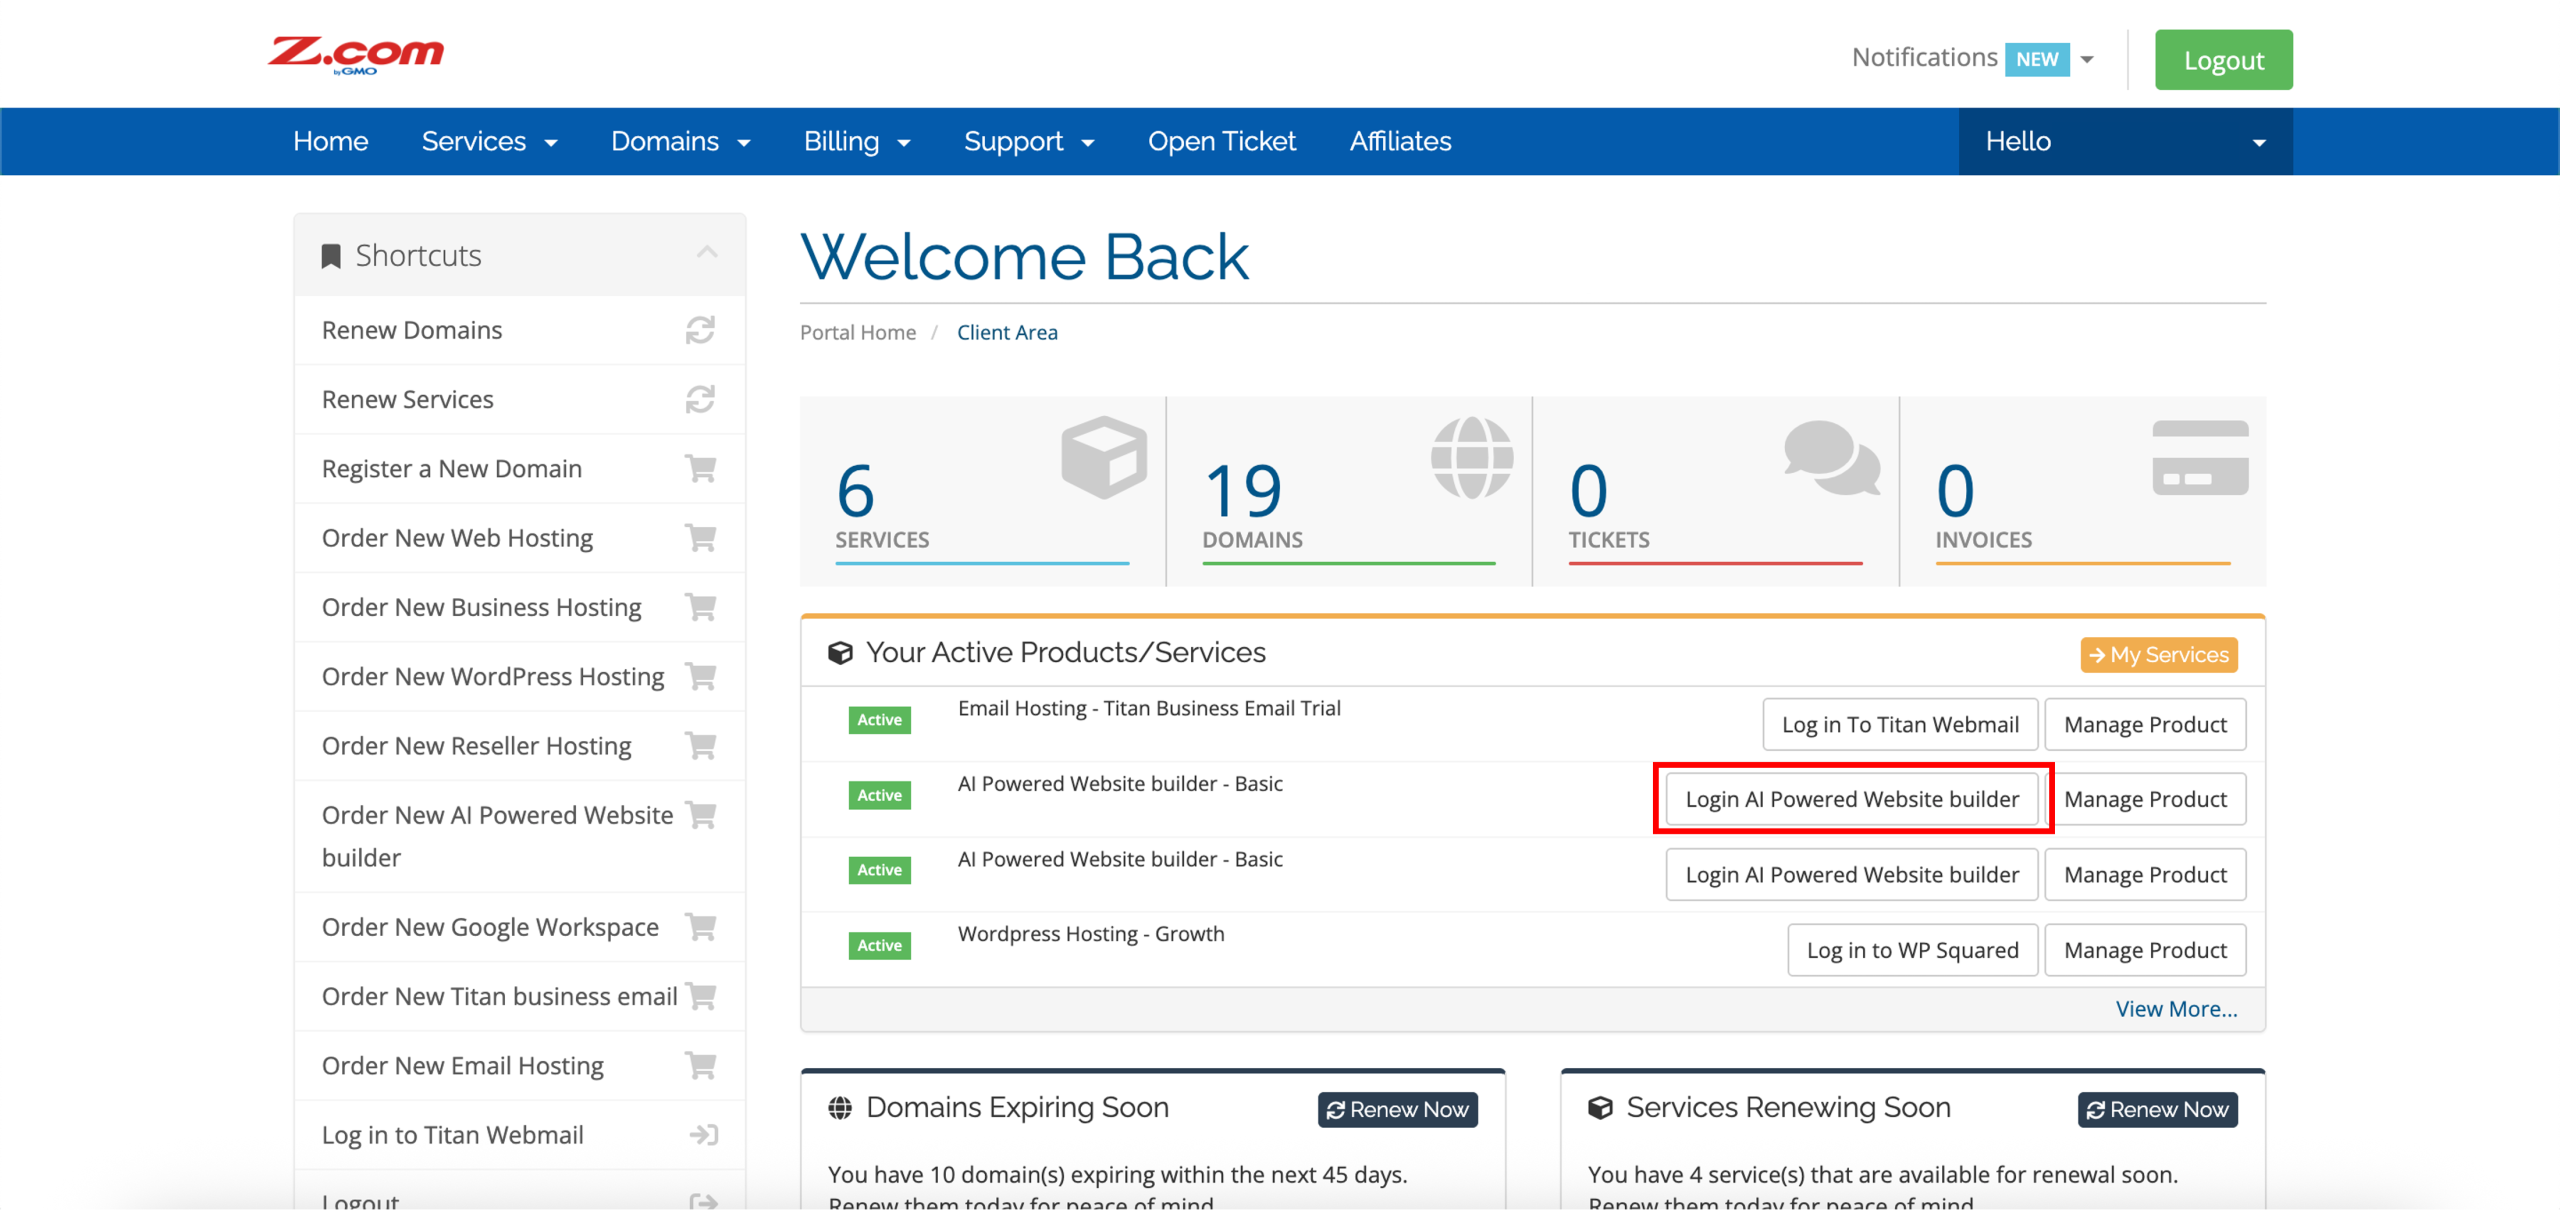
3. Aligned with your new AI-Powered website builder service, click Login AI Powered Website builder.
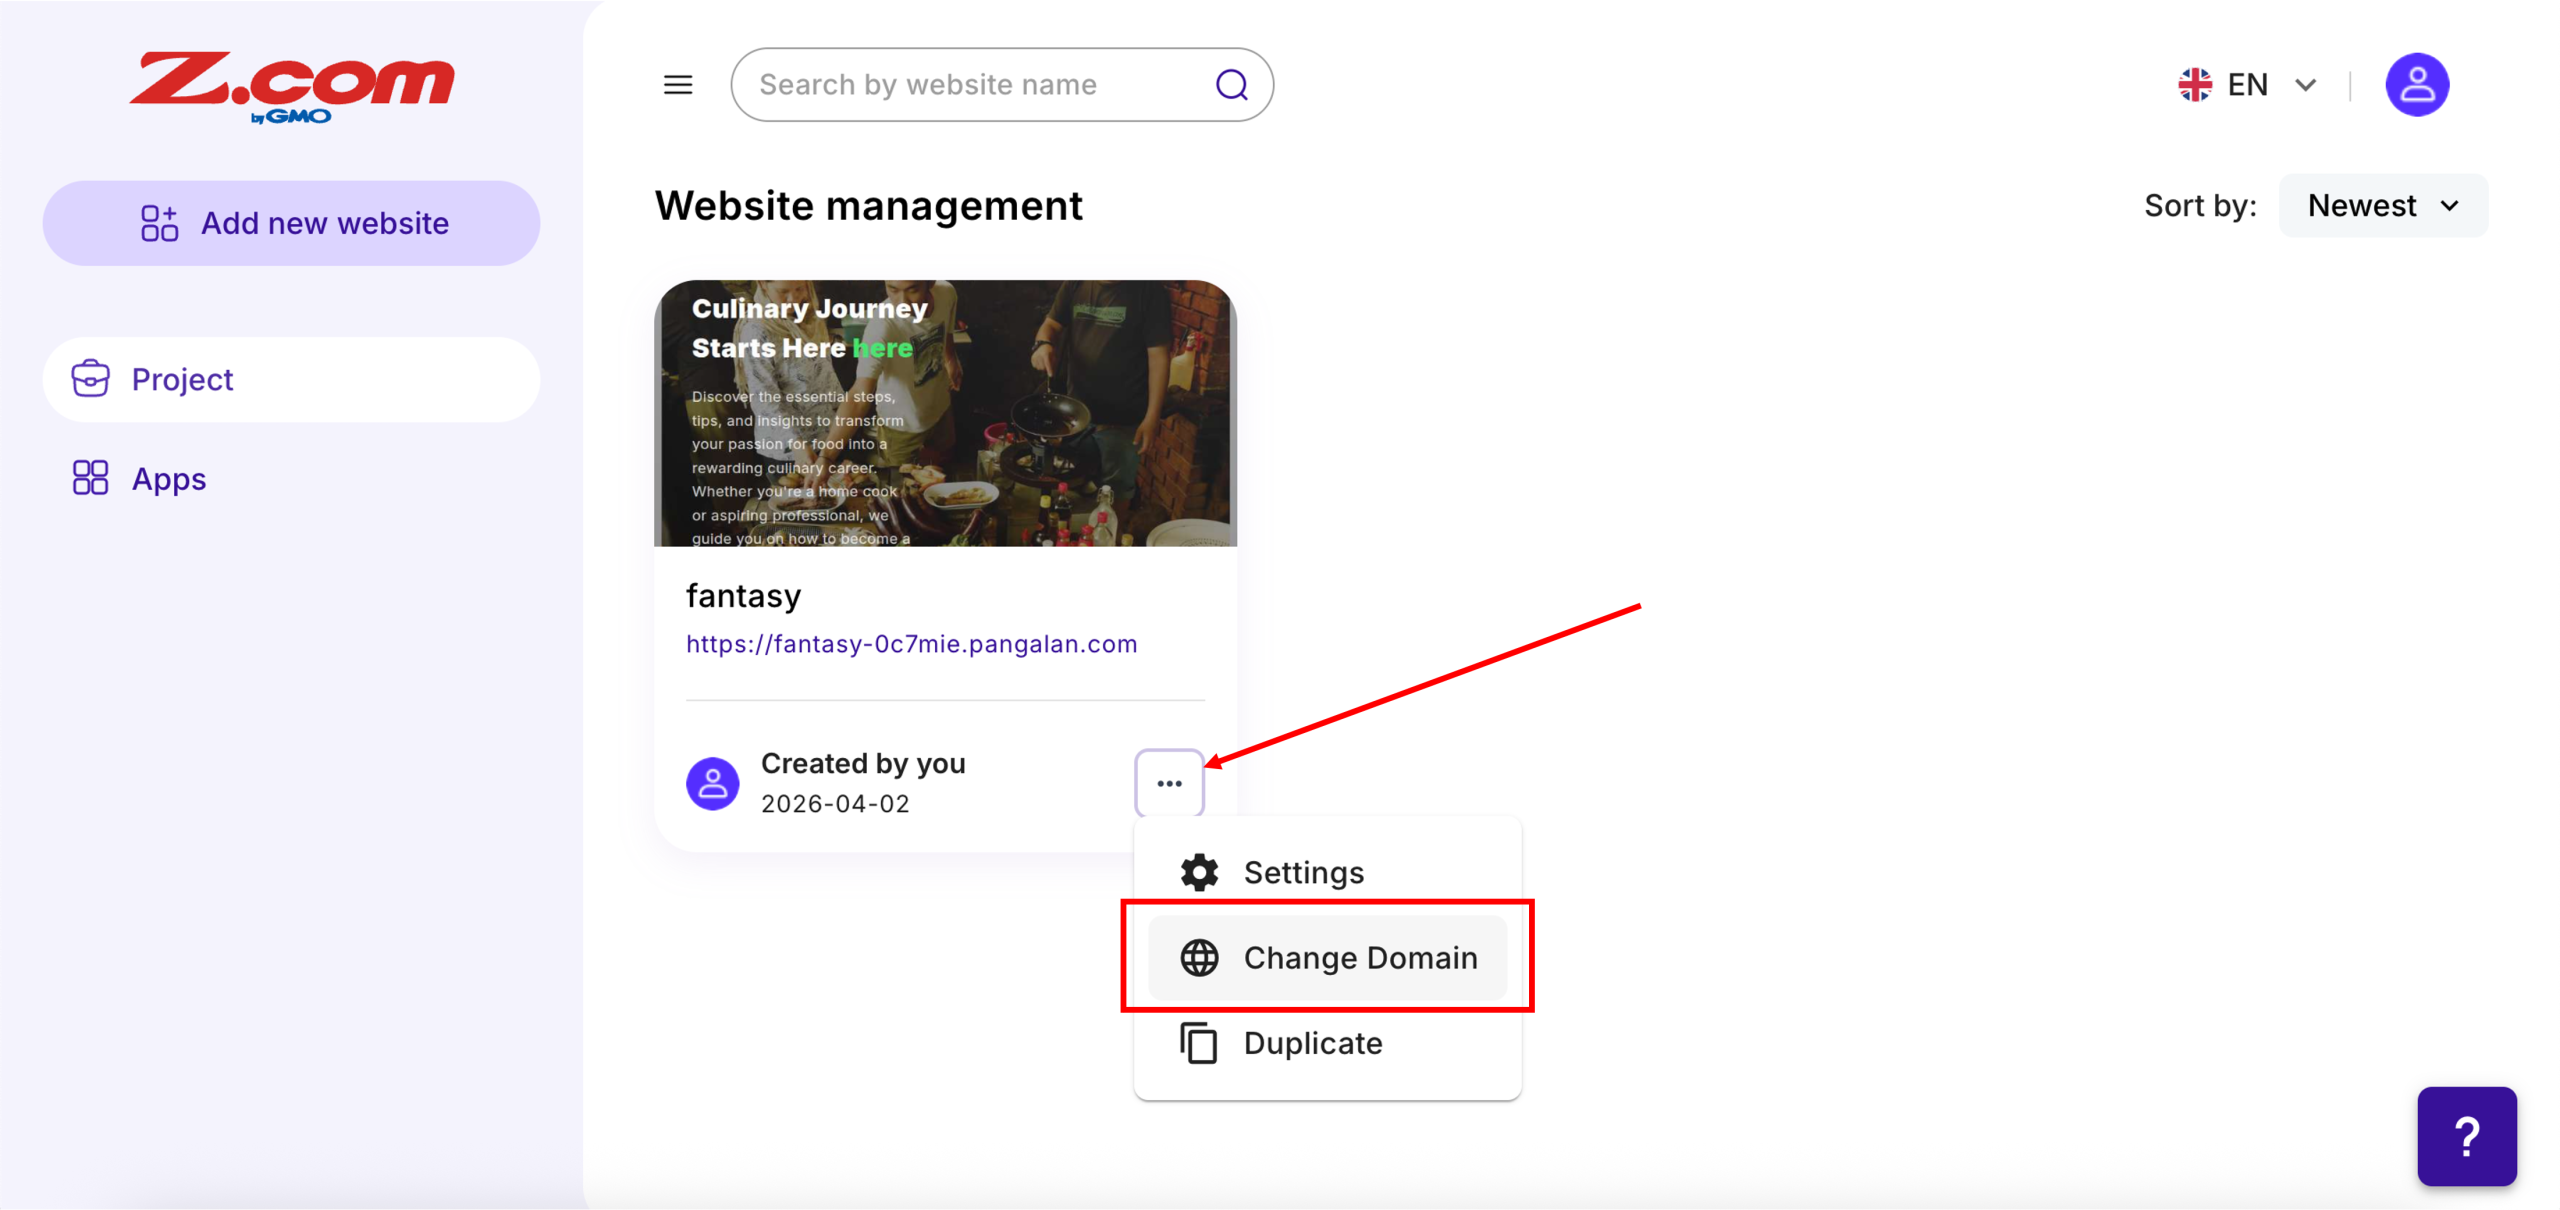
4. A new tab will open, directing you to the AI Powered Website builder Website List (Website management) page. Click the horizontal ellipsis (⋯) option for the website project you wish to change the domain name for, then click Change Domain.
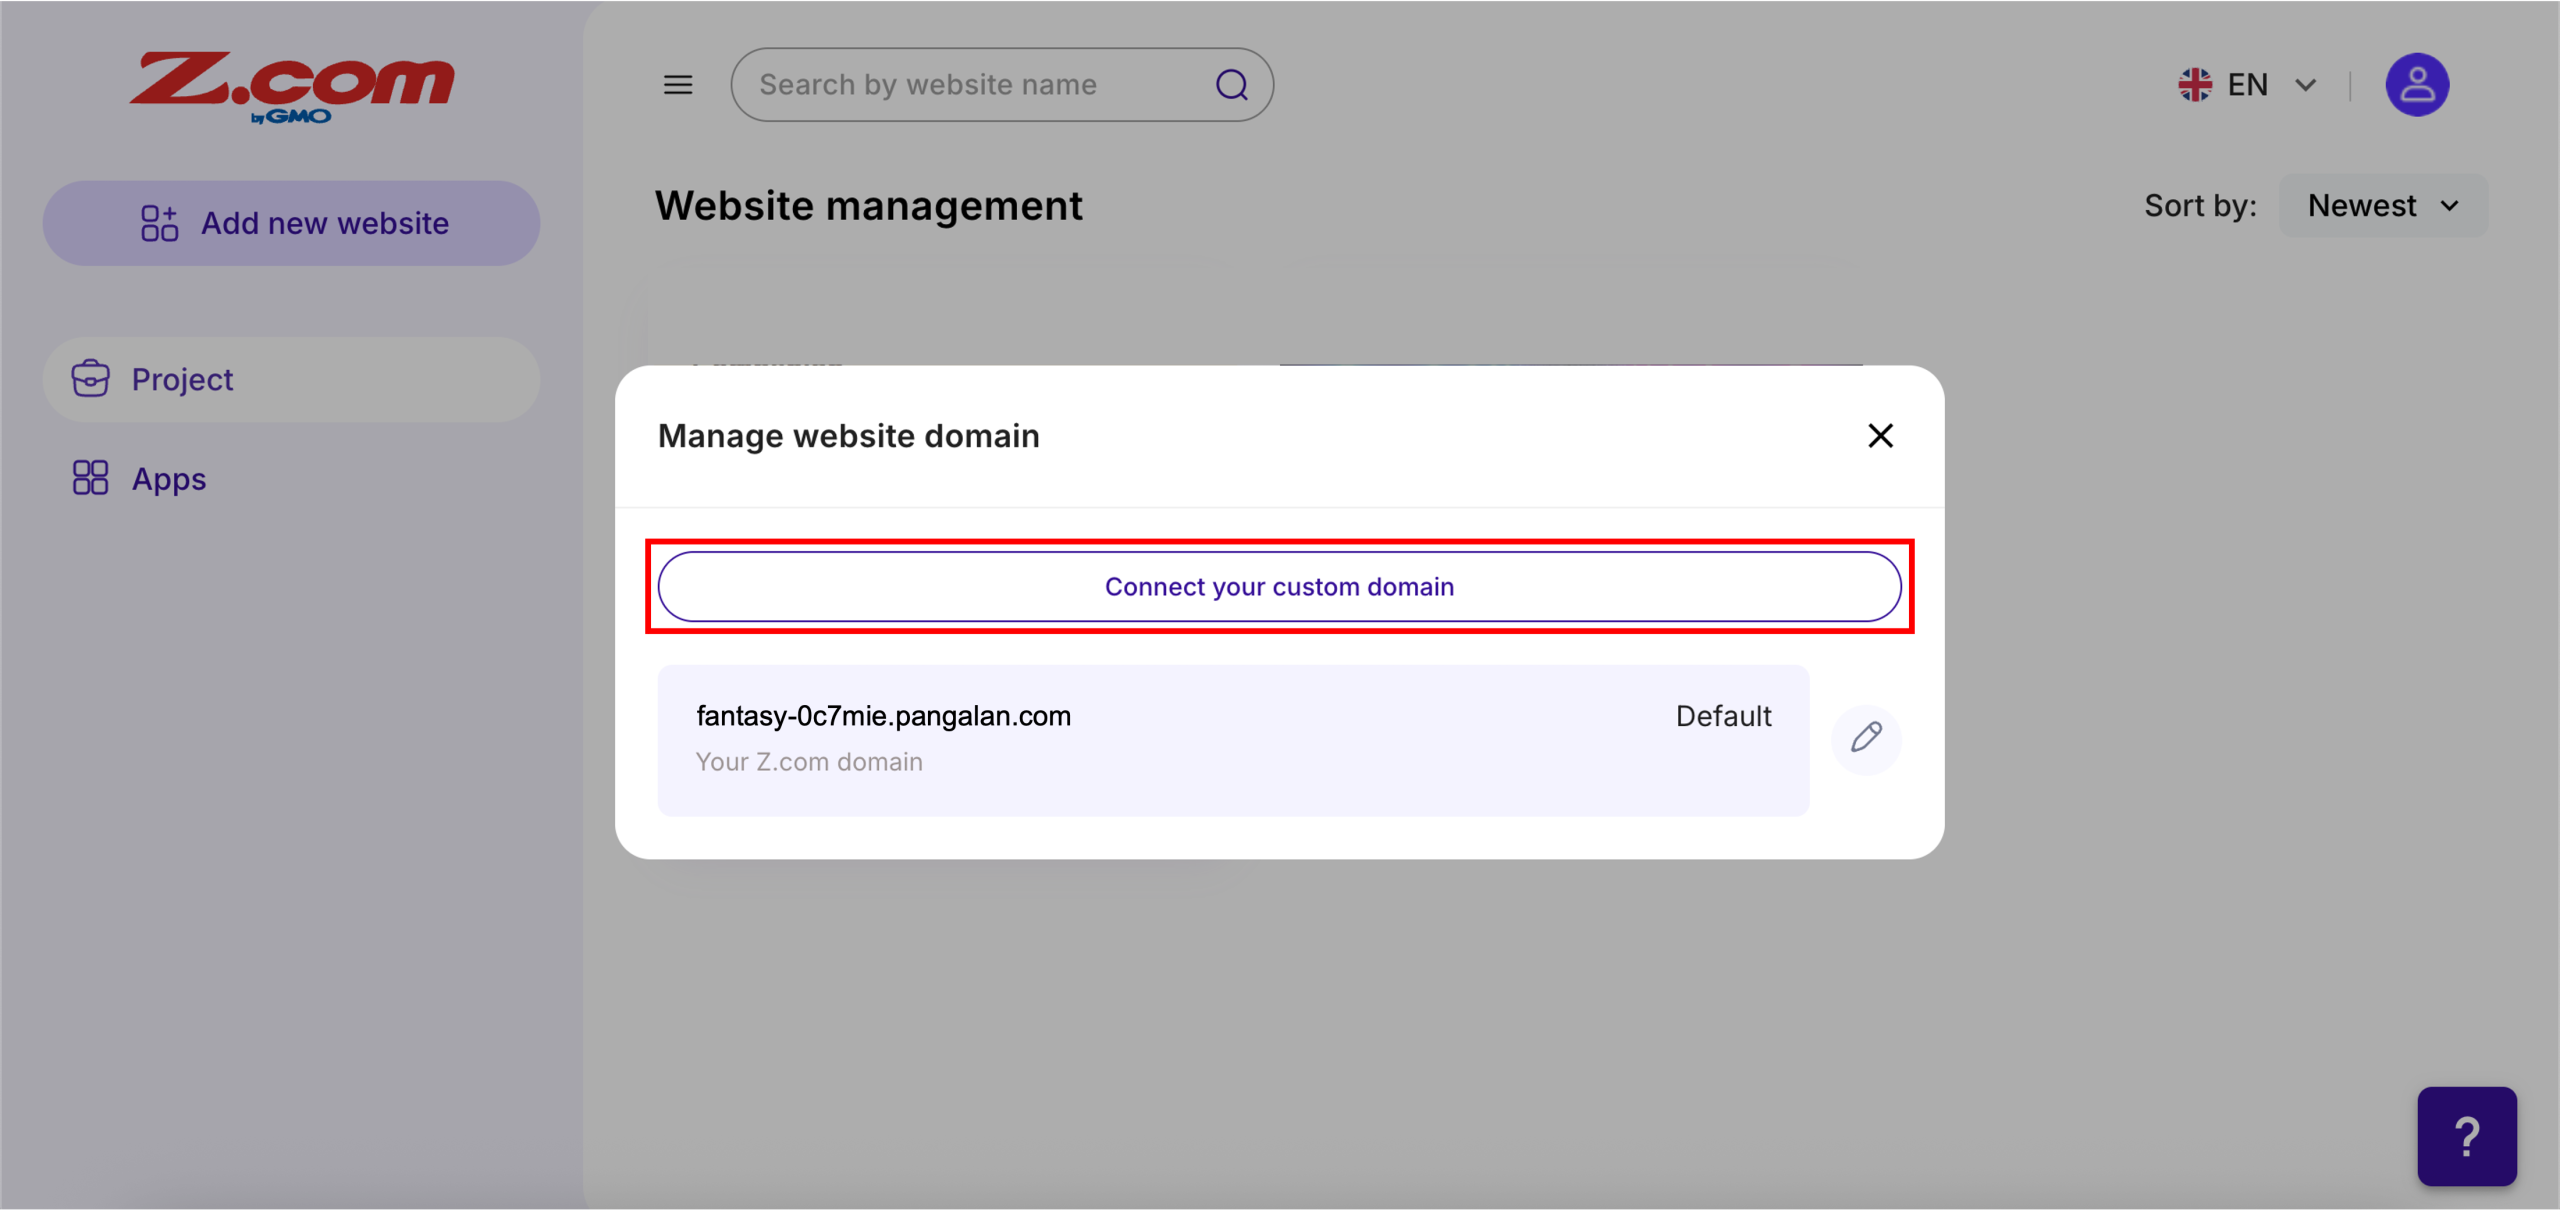
5. Click Connect your custom domain.
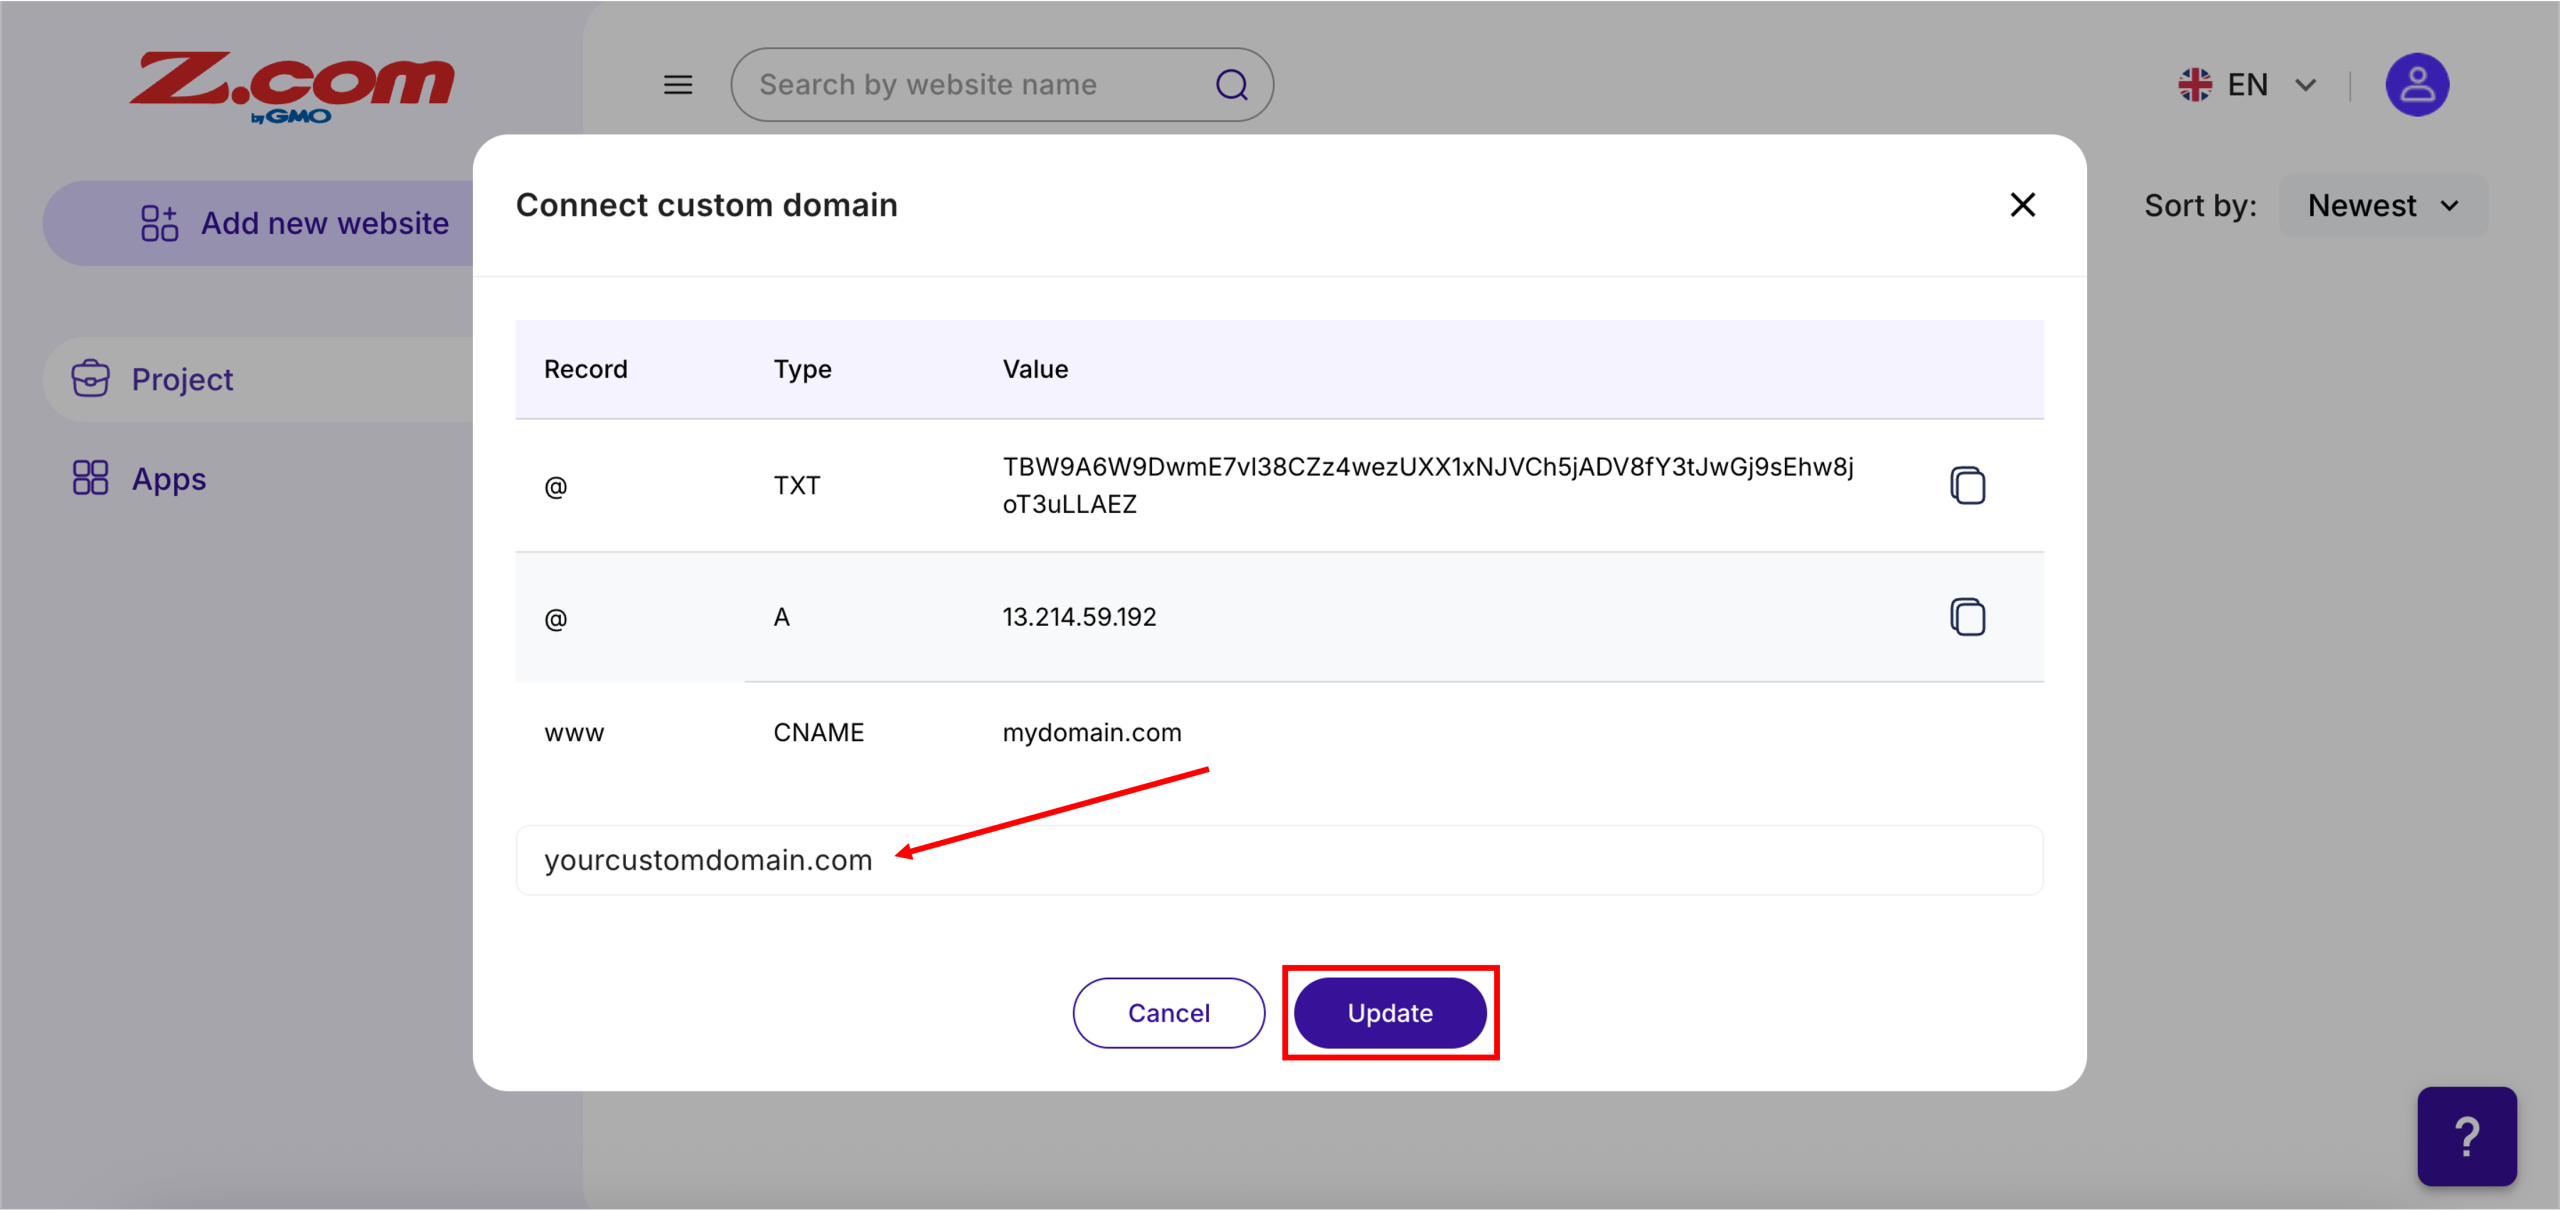
6. You can proceed directly by entering your domain in the field. Once done, click Update.
Note: Ensure the required DNS records (TXT, A, and CNAME) are configured before entering your domain name.
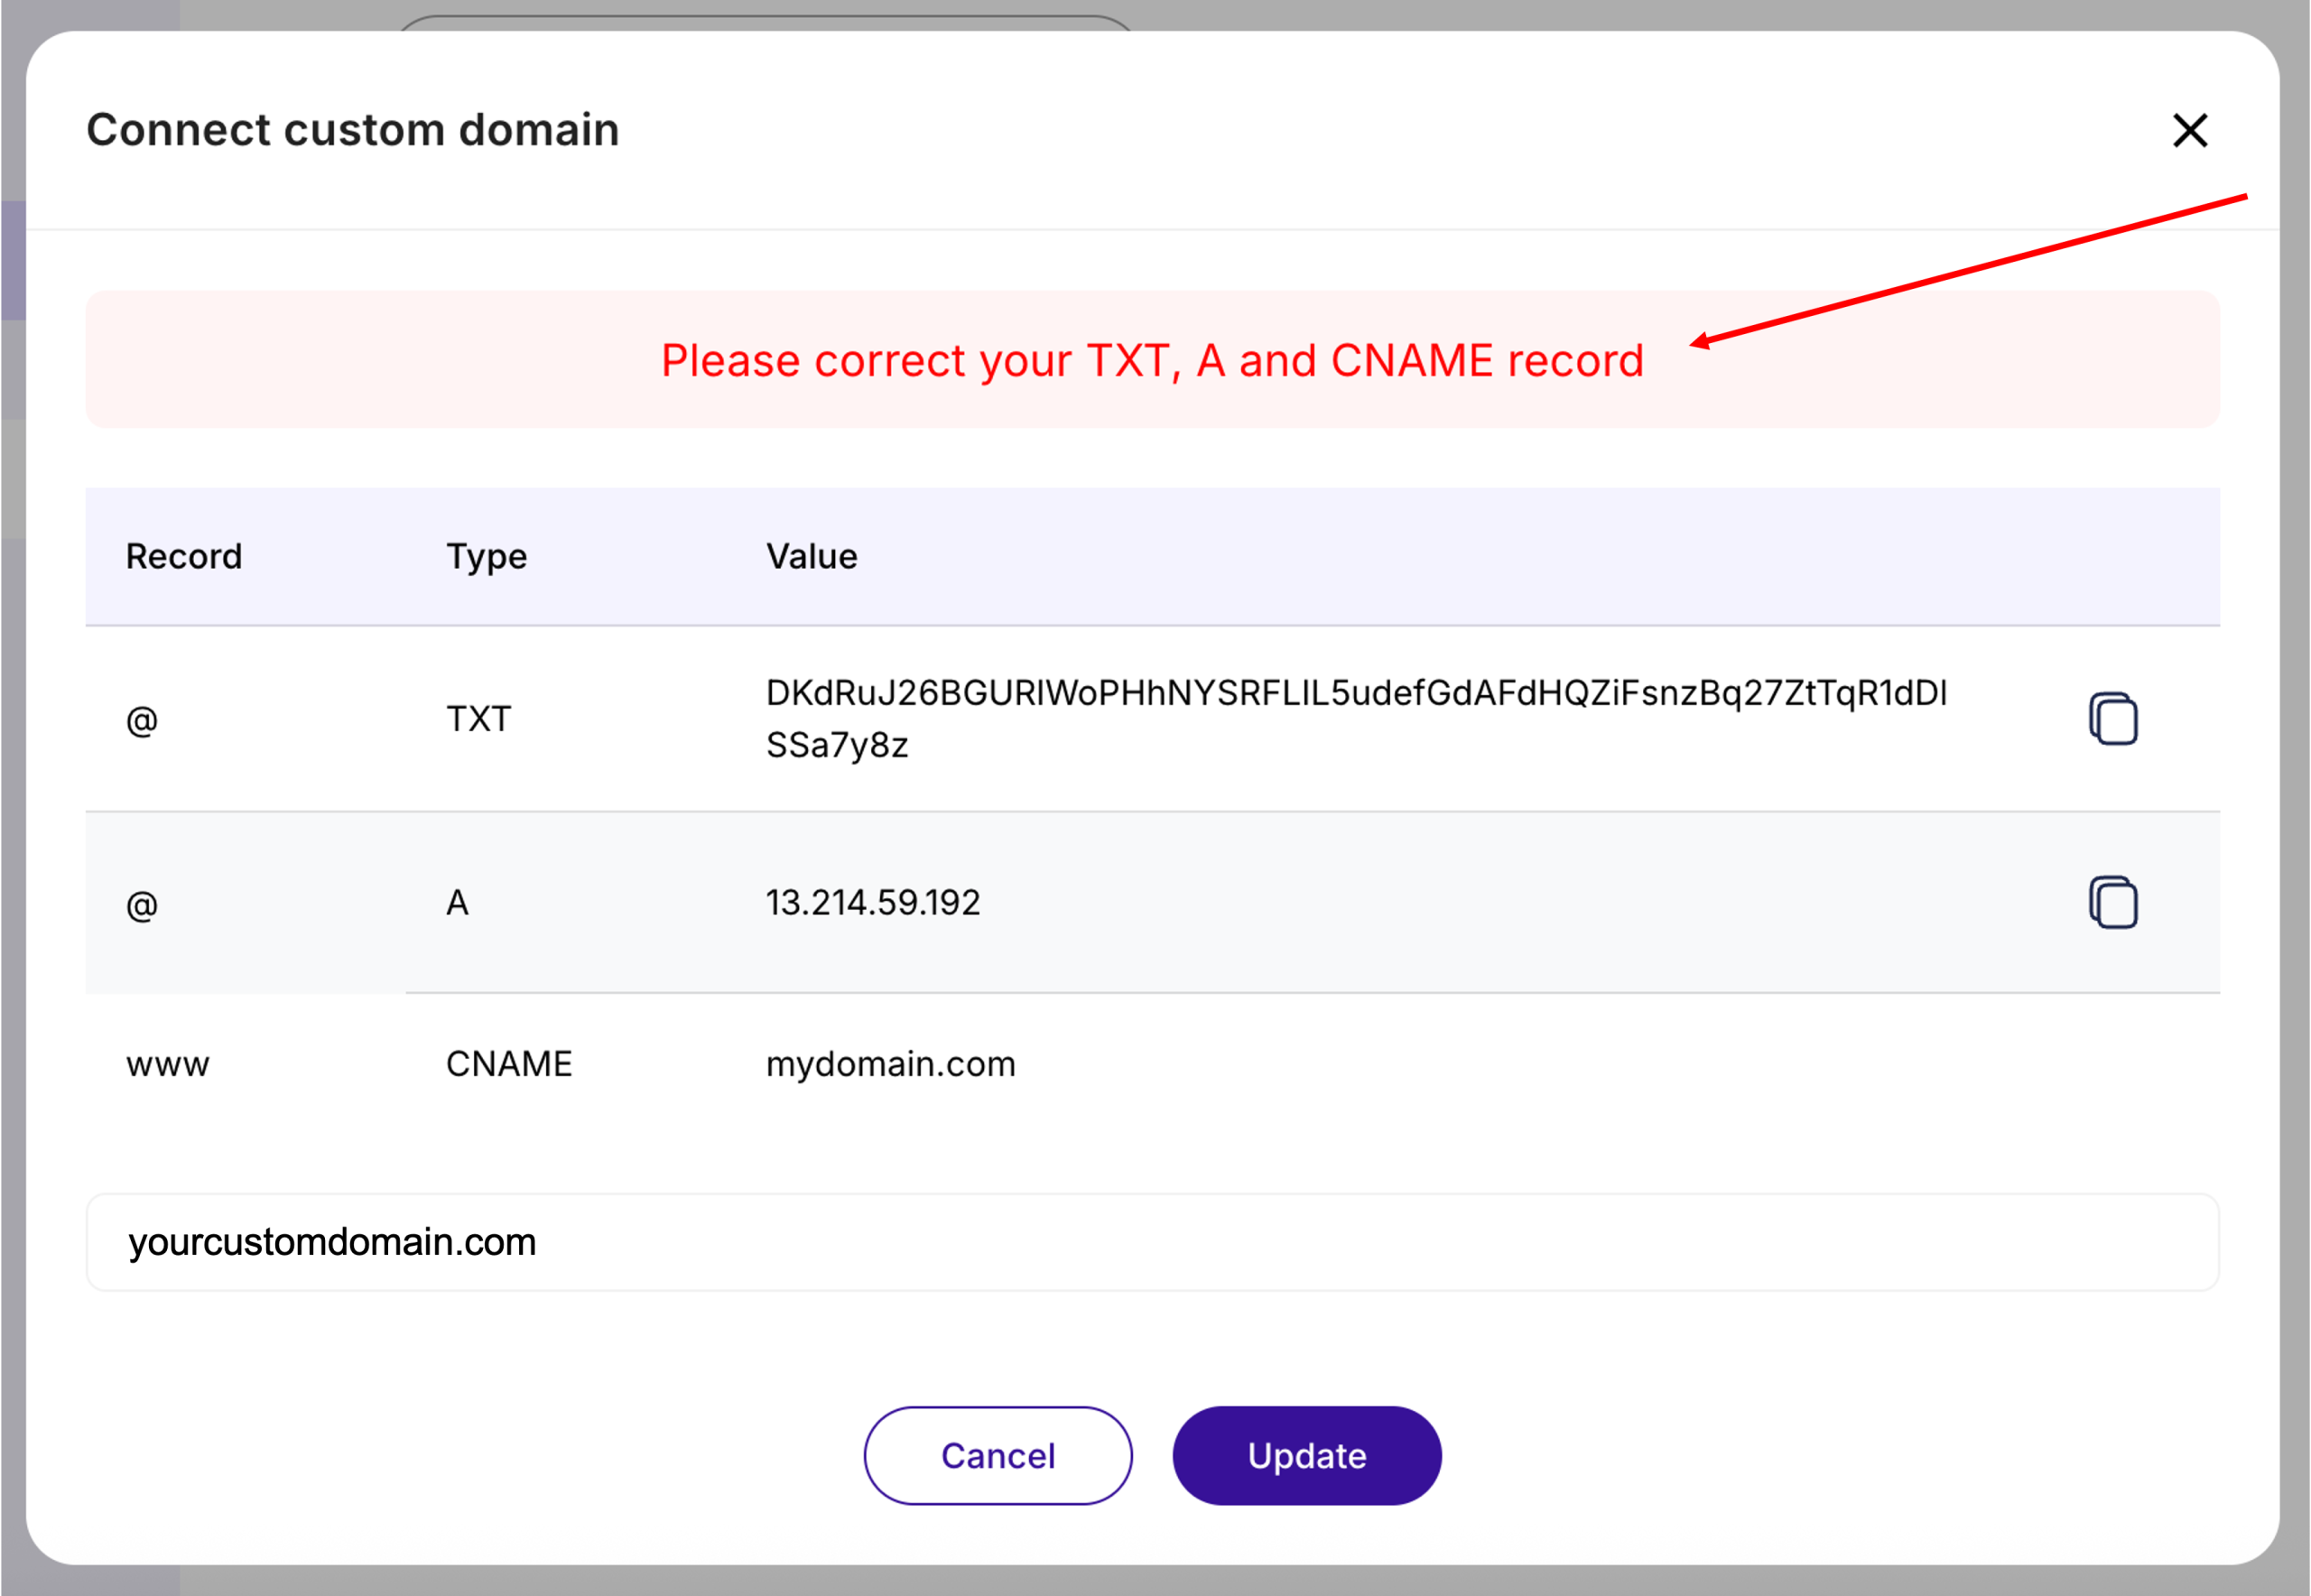
Note: If you encounter an error at this stage (example screenshot below), it may be due to DNS changes that are still propagating. Please allow some time for the updates to take effect and try again later.
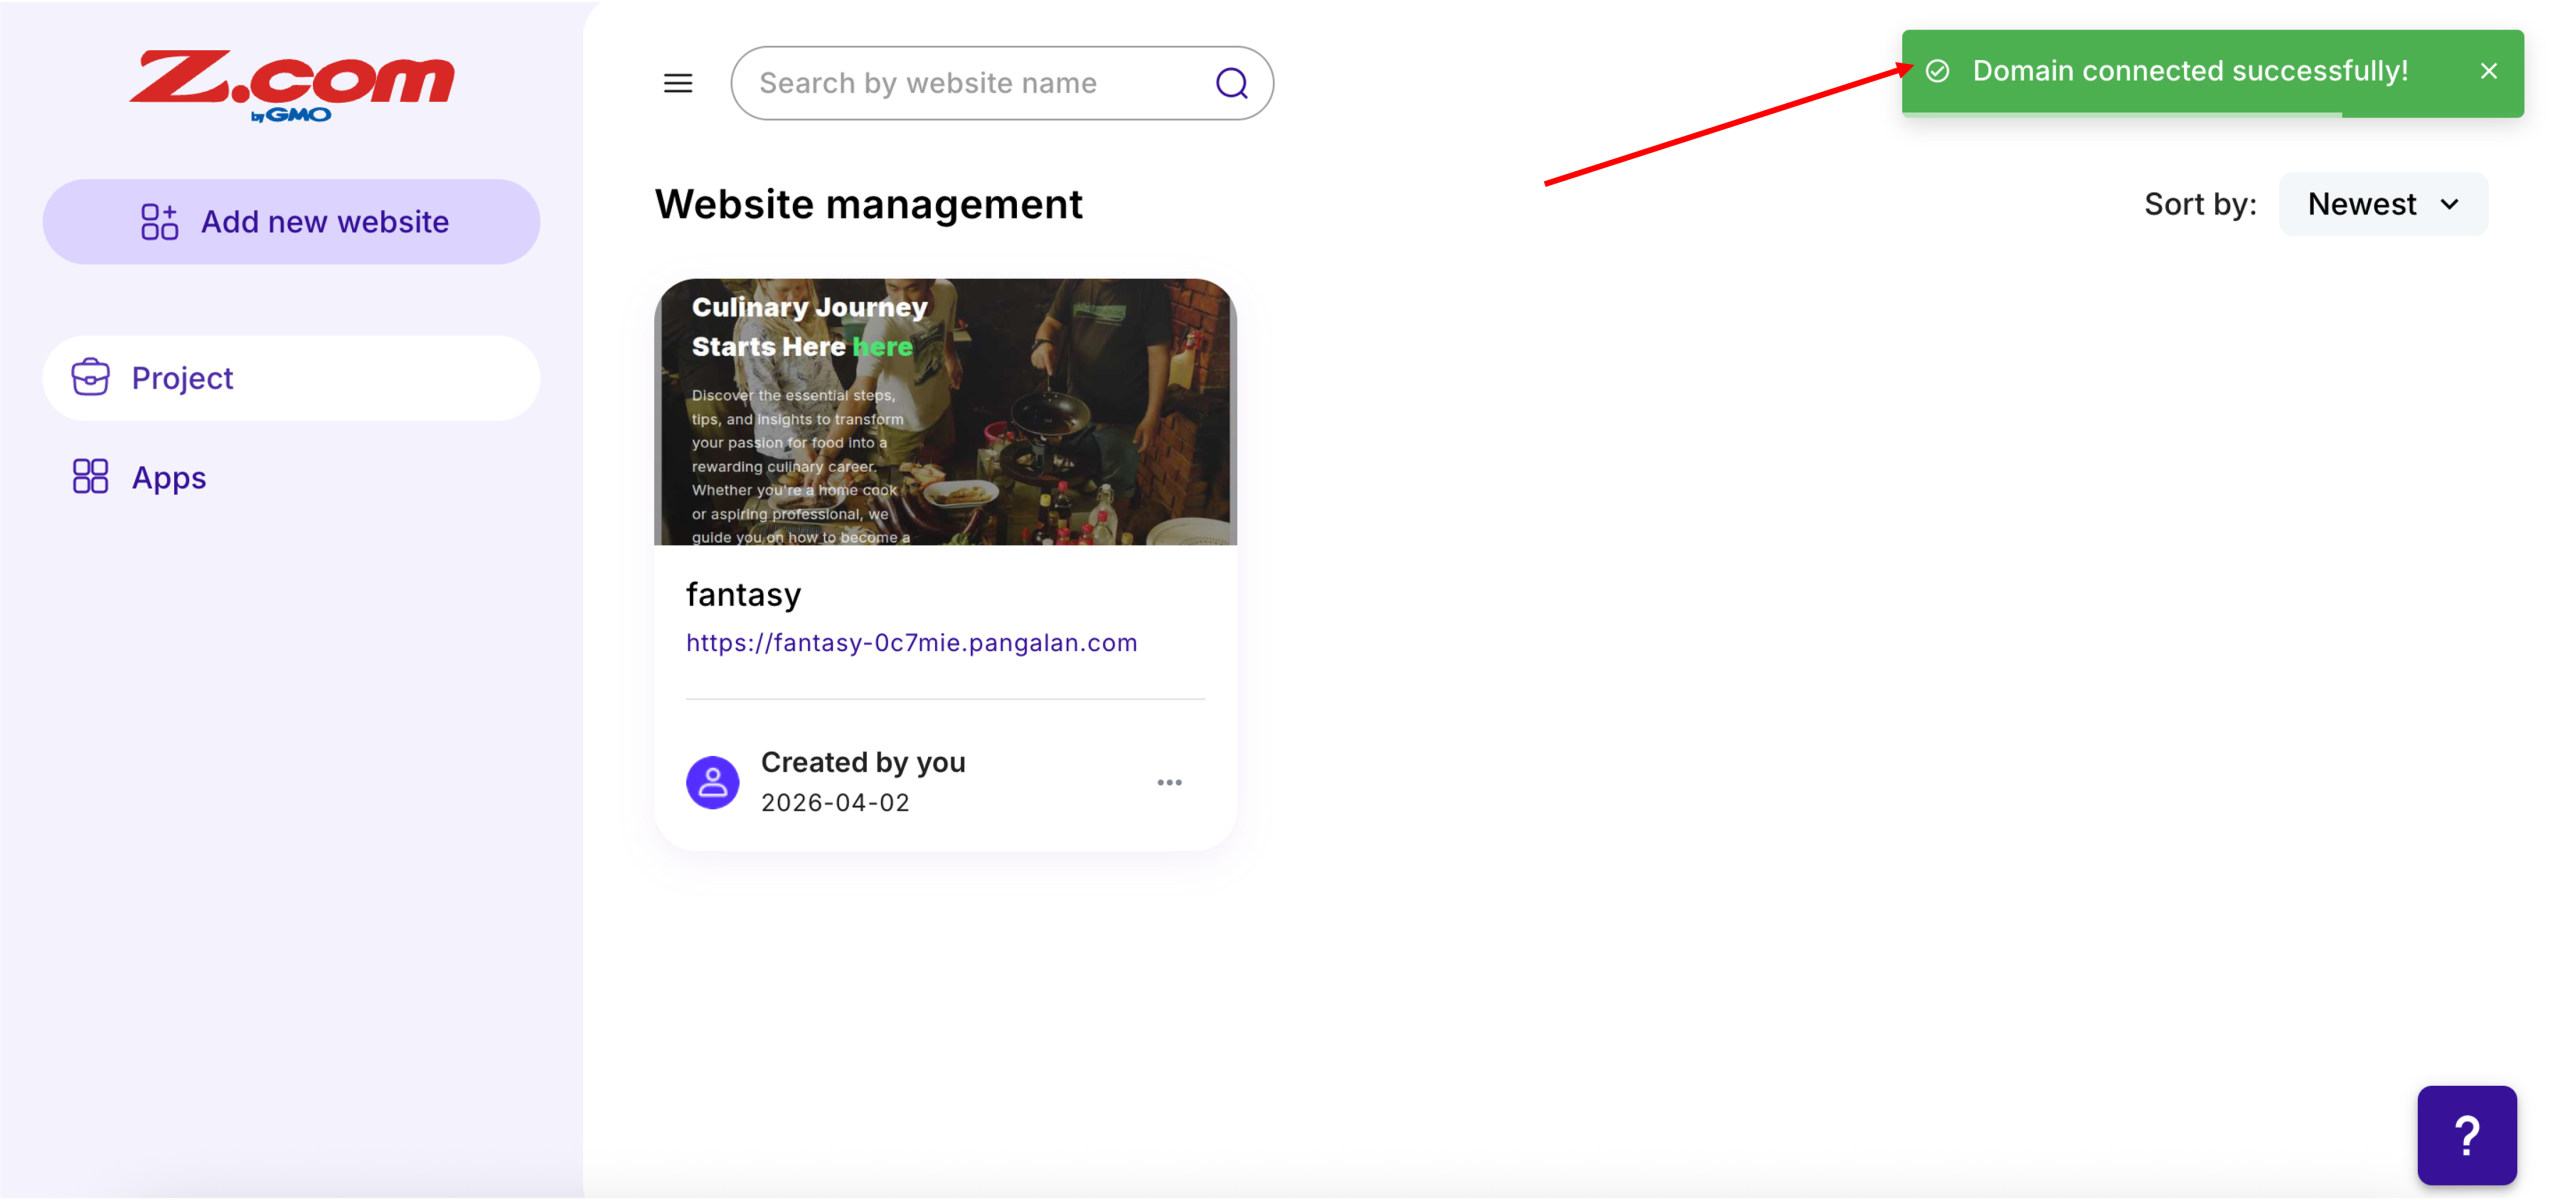
7. Successfully changing the website domain from a shared domain to your own domain will look like the following, with the Domain connected successfully prompt.
8. Lastly, to change the current default shared domain to the successfully added custom domain, repeat step 4 above. Aligned with the successfully added custom domain, click Set as default.
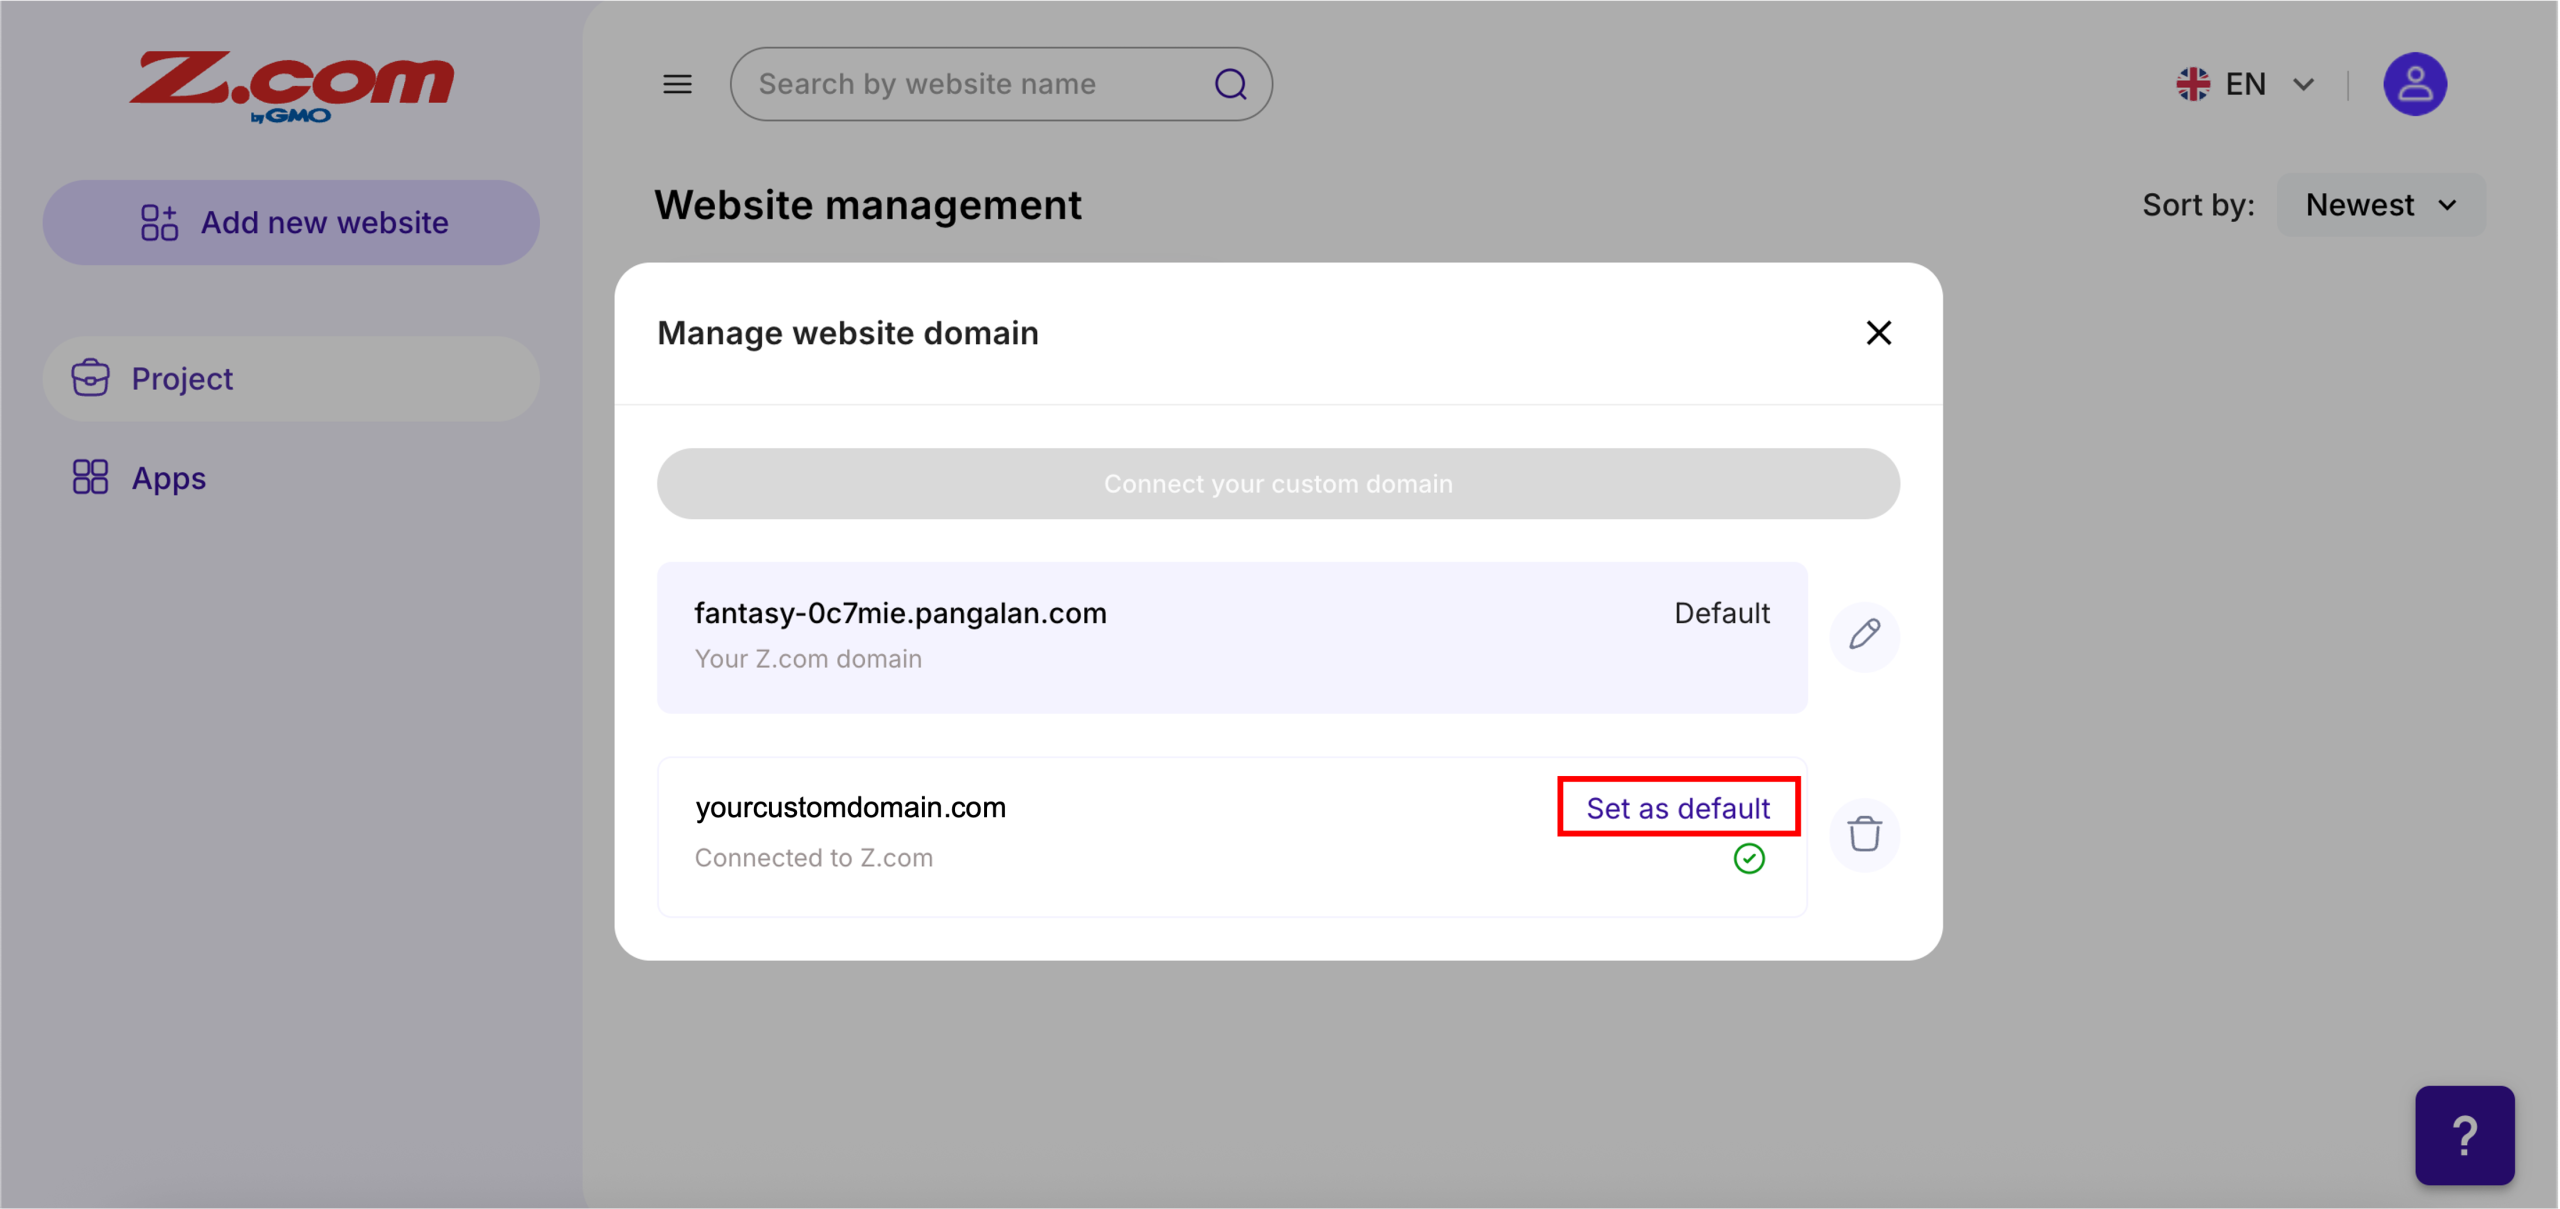
9. Done! A Default domain set successfully prompt should appear in the top right, with the default domain of your website project changed from the shared domain to your own domain.