
Example :
How to set up an email or change my account settings.
- Help Center
- Web Hosting
- PHP
- How to configure PHP settings using the MultiPHP INI Editor in cPanel
How to configure PHP settings using the MultiPHP INI Editor in cPanel
The guide video is available for your reference:
The MultiPHP INI Editor in cPanel allows you to configure PHP settings for your website without manually editing server configuration files. It provides a convenient way to adjust common PHP values that may affect your website’s performance, functionality, and resource limits.
*The MultiPHP INI Editor provides two configuration modes:
• Basic Mode – Allows you to update commonly used PHP settings through a user-friendly interface with descriptions for each option.
• Editor Mode – Allows you to edit PHP configuration values for greater flexibility and control directly.
This guide shows you how to configure PHP settings using both the Basic Mode and Editor Mode in the MultiPHP INI Editor.
Note:
• Ensure that you have an active web hosting plan with access to cPanel. If you do not yet have one, you can compare the available plans that we currently offer on our Web Hosting page and choose the one that best suits your needs.
• The available PHP settings may vary depending on the selected PHP version.
• Changes made through the MultiPHP INI Editor may affect your website functionality and performance.
• It is recommended to modify PHP settings only if you are familiar with their purpose or have received specific requirements from your website application or developer.
Table of contents
1. Basic Mode
1. Access cPanel directly through your Z.com account.
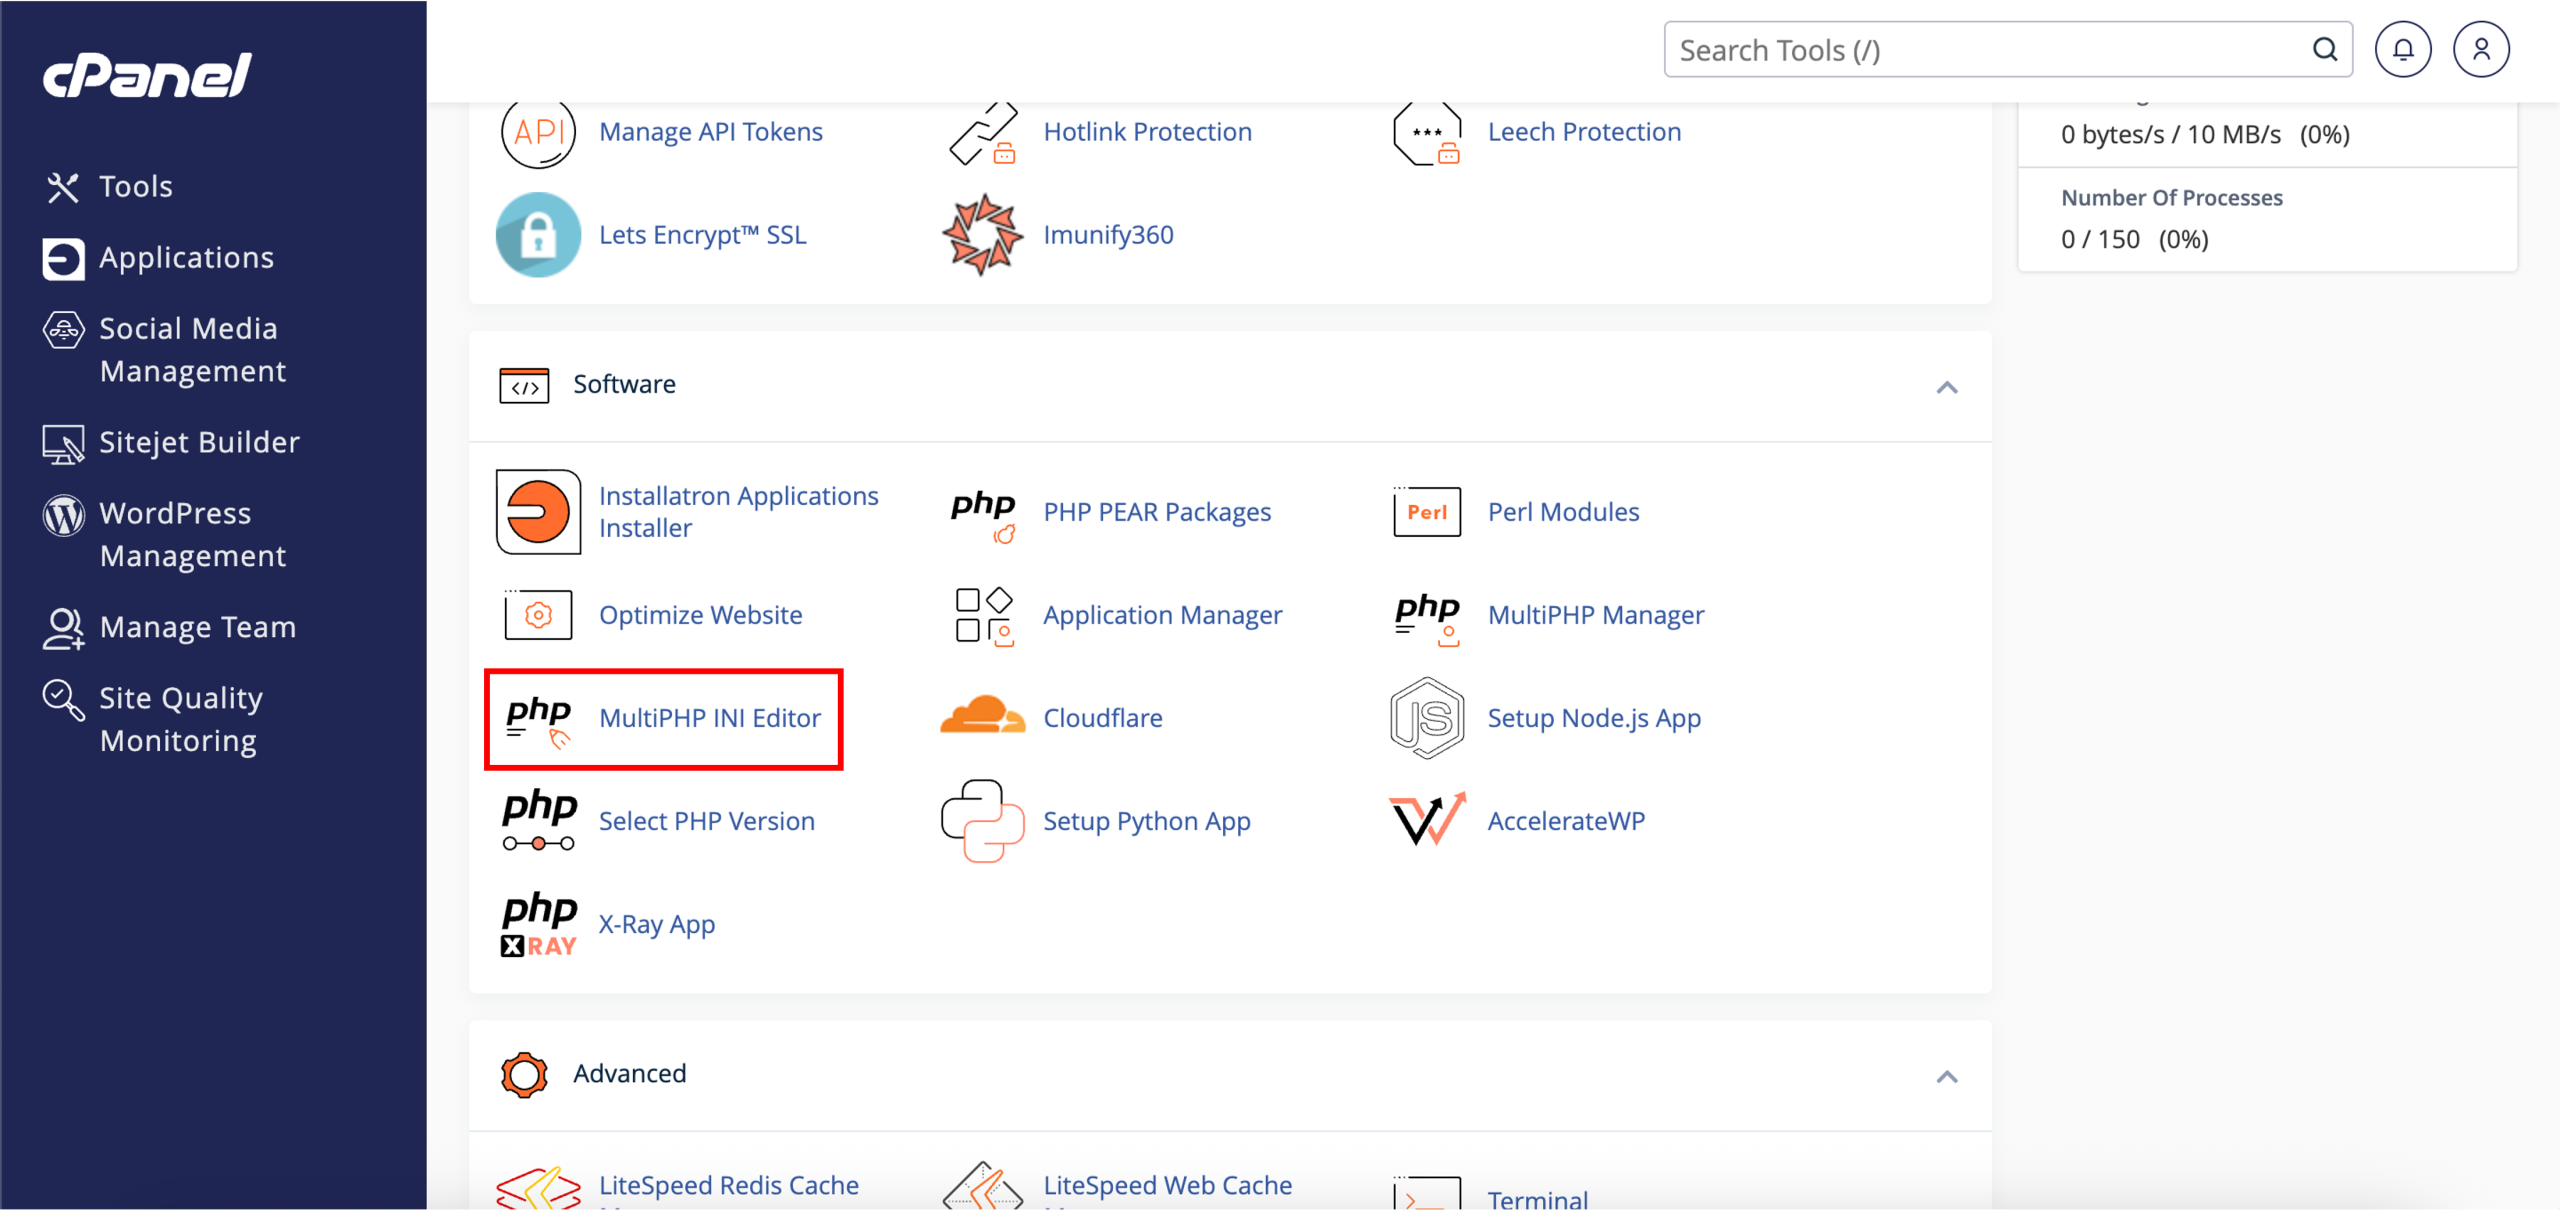
2. Once you have reached the cPanel dashboard, locate MultiPHP INI Editor under Software.
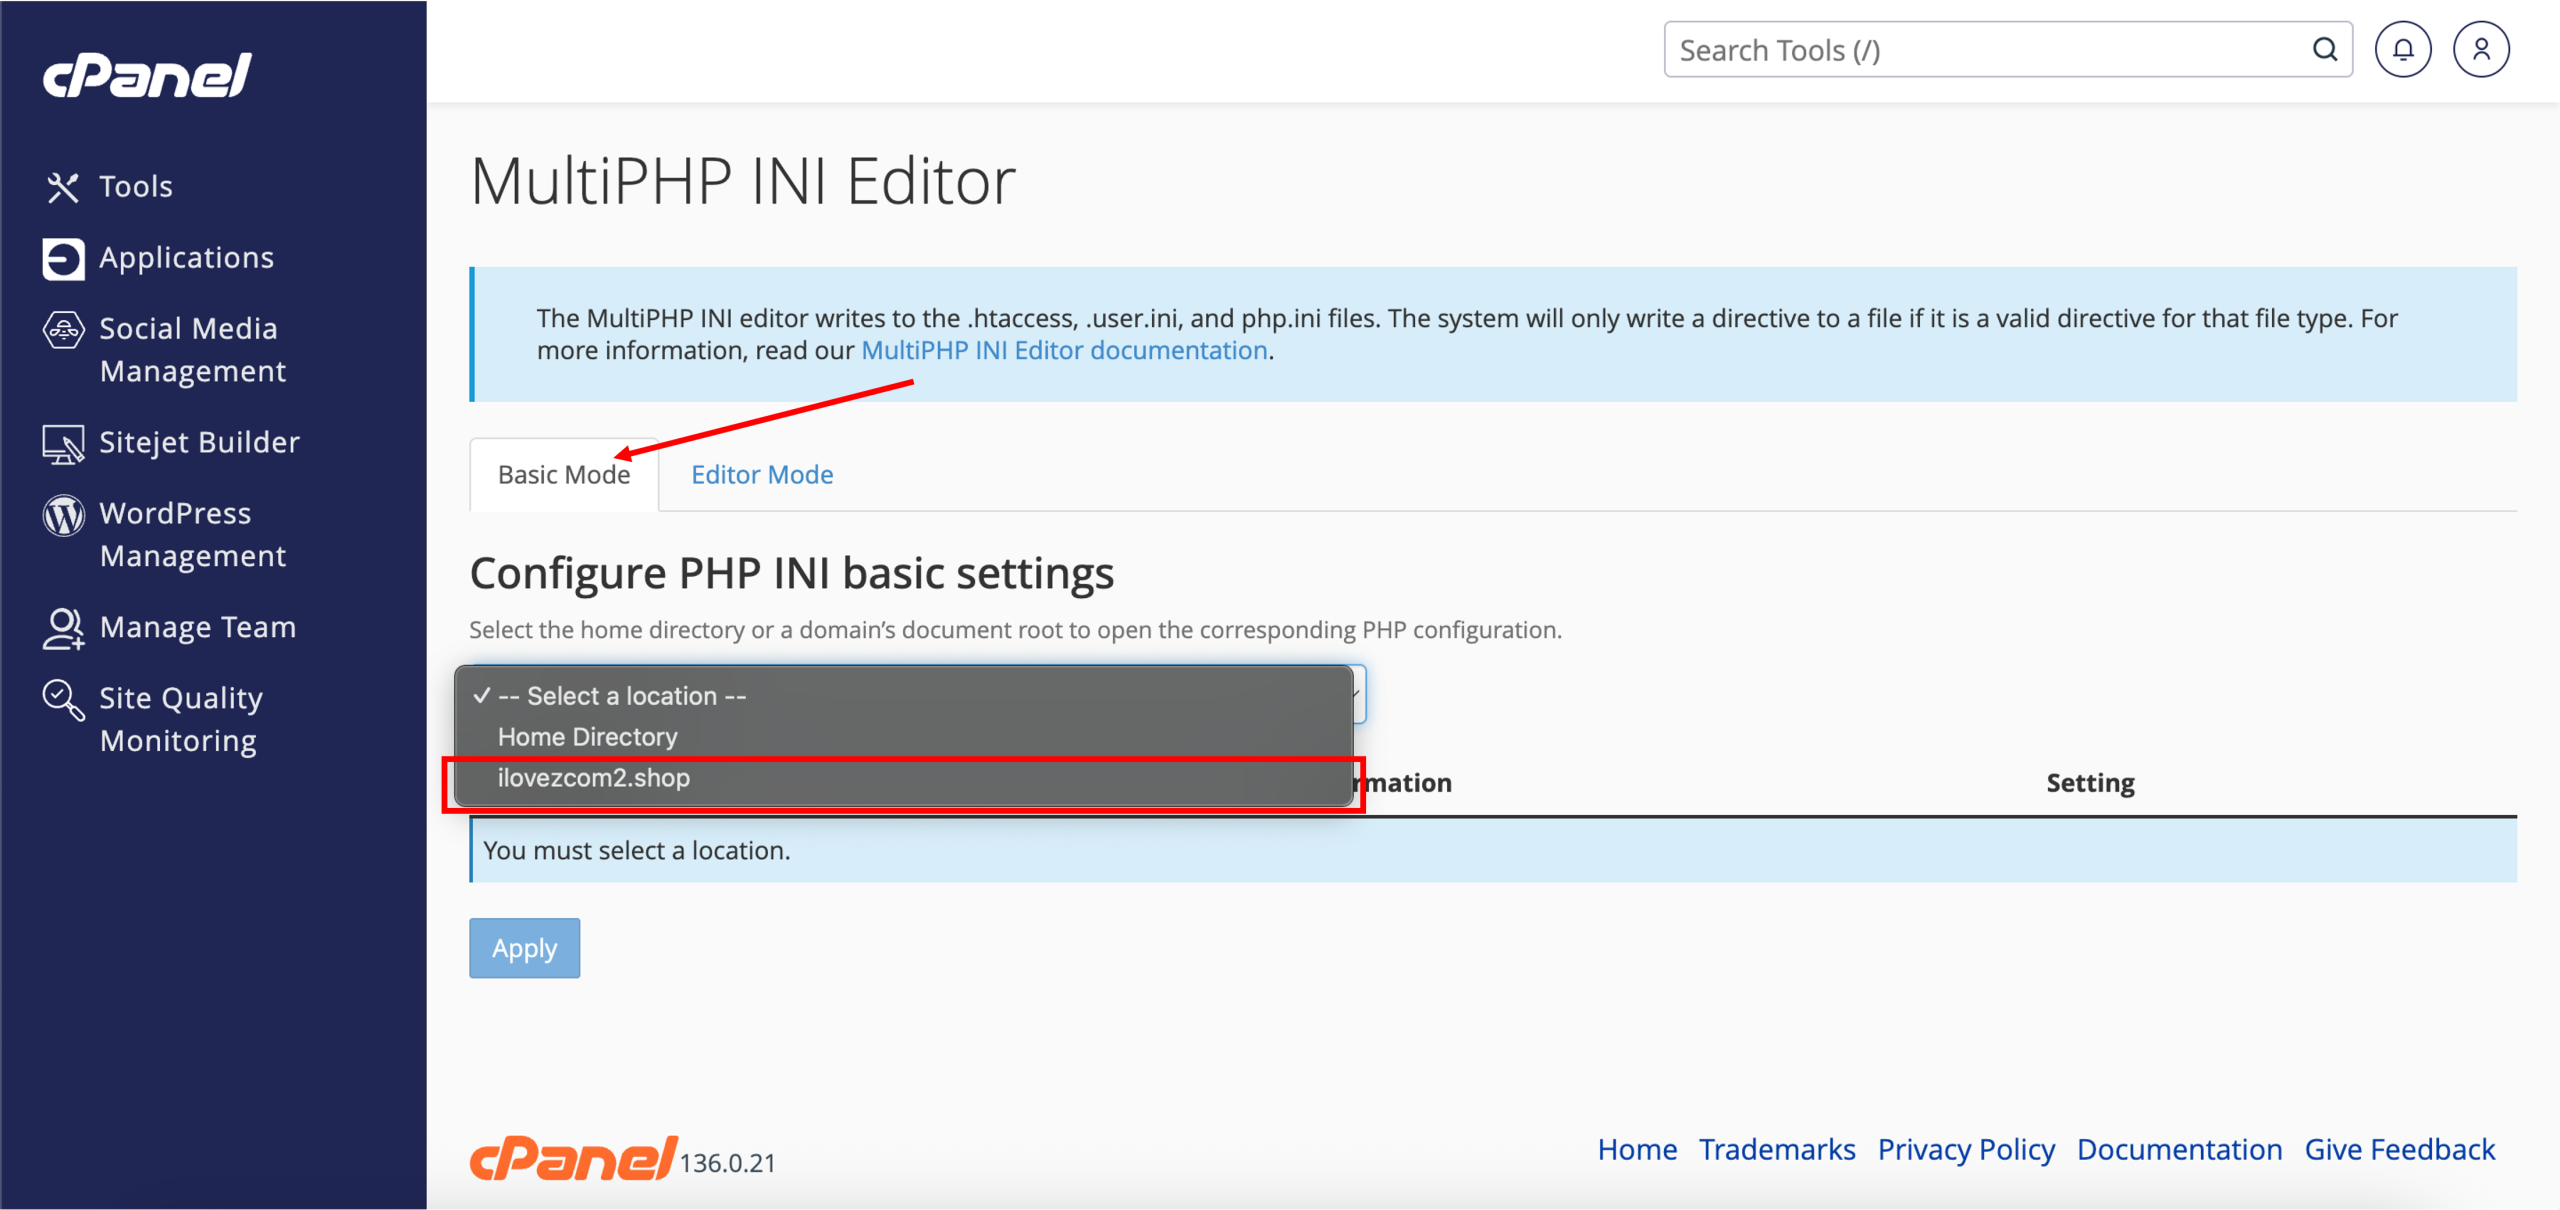
3. On the MultiPHP INI Editor page, the Basic Mode tab will be displayed by default, while the Editor Mode tab can be accessed beside it. Click the drop-down menu and select the domain for which you would like to configure PHP settings.
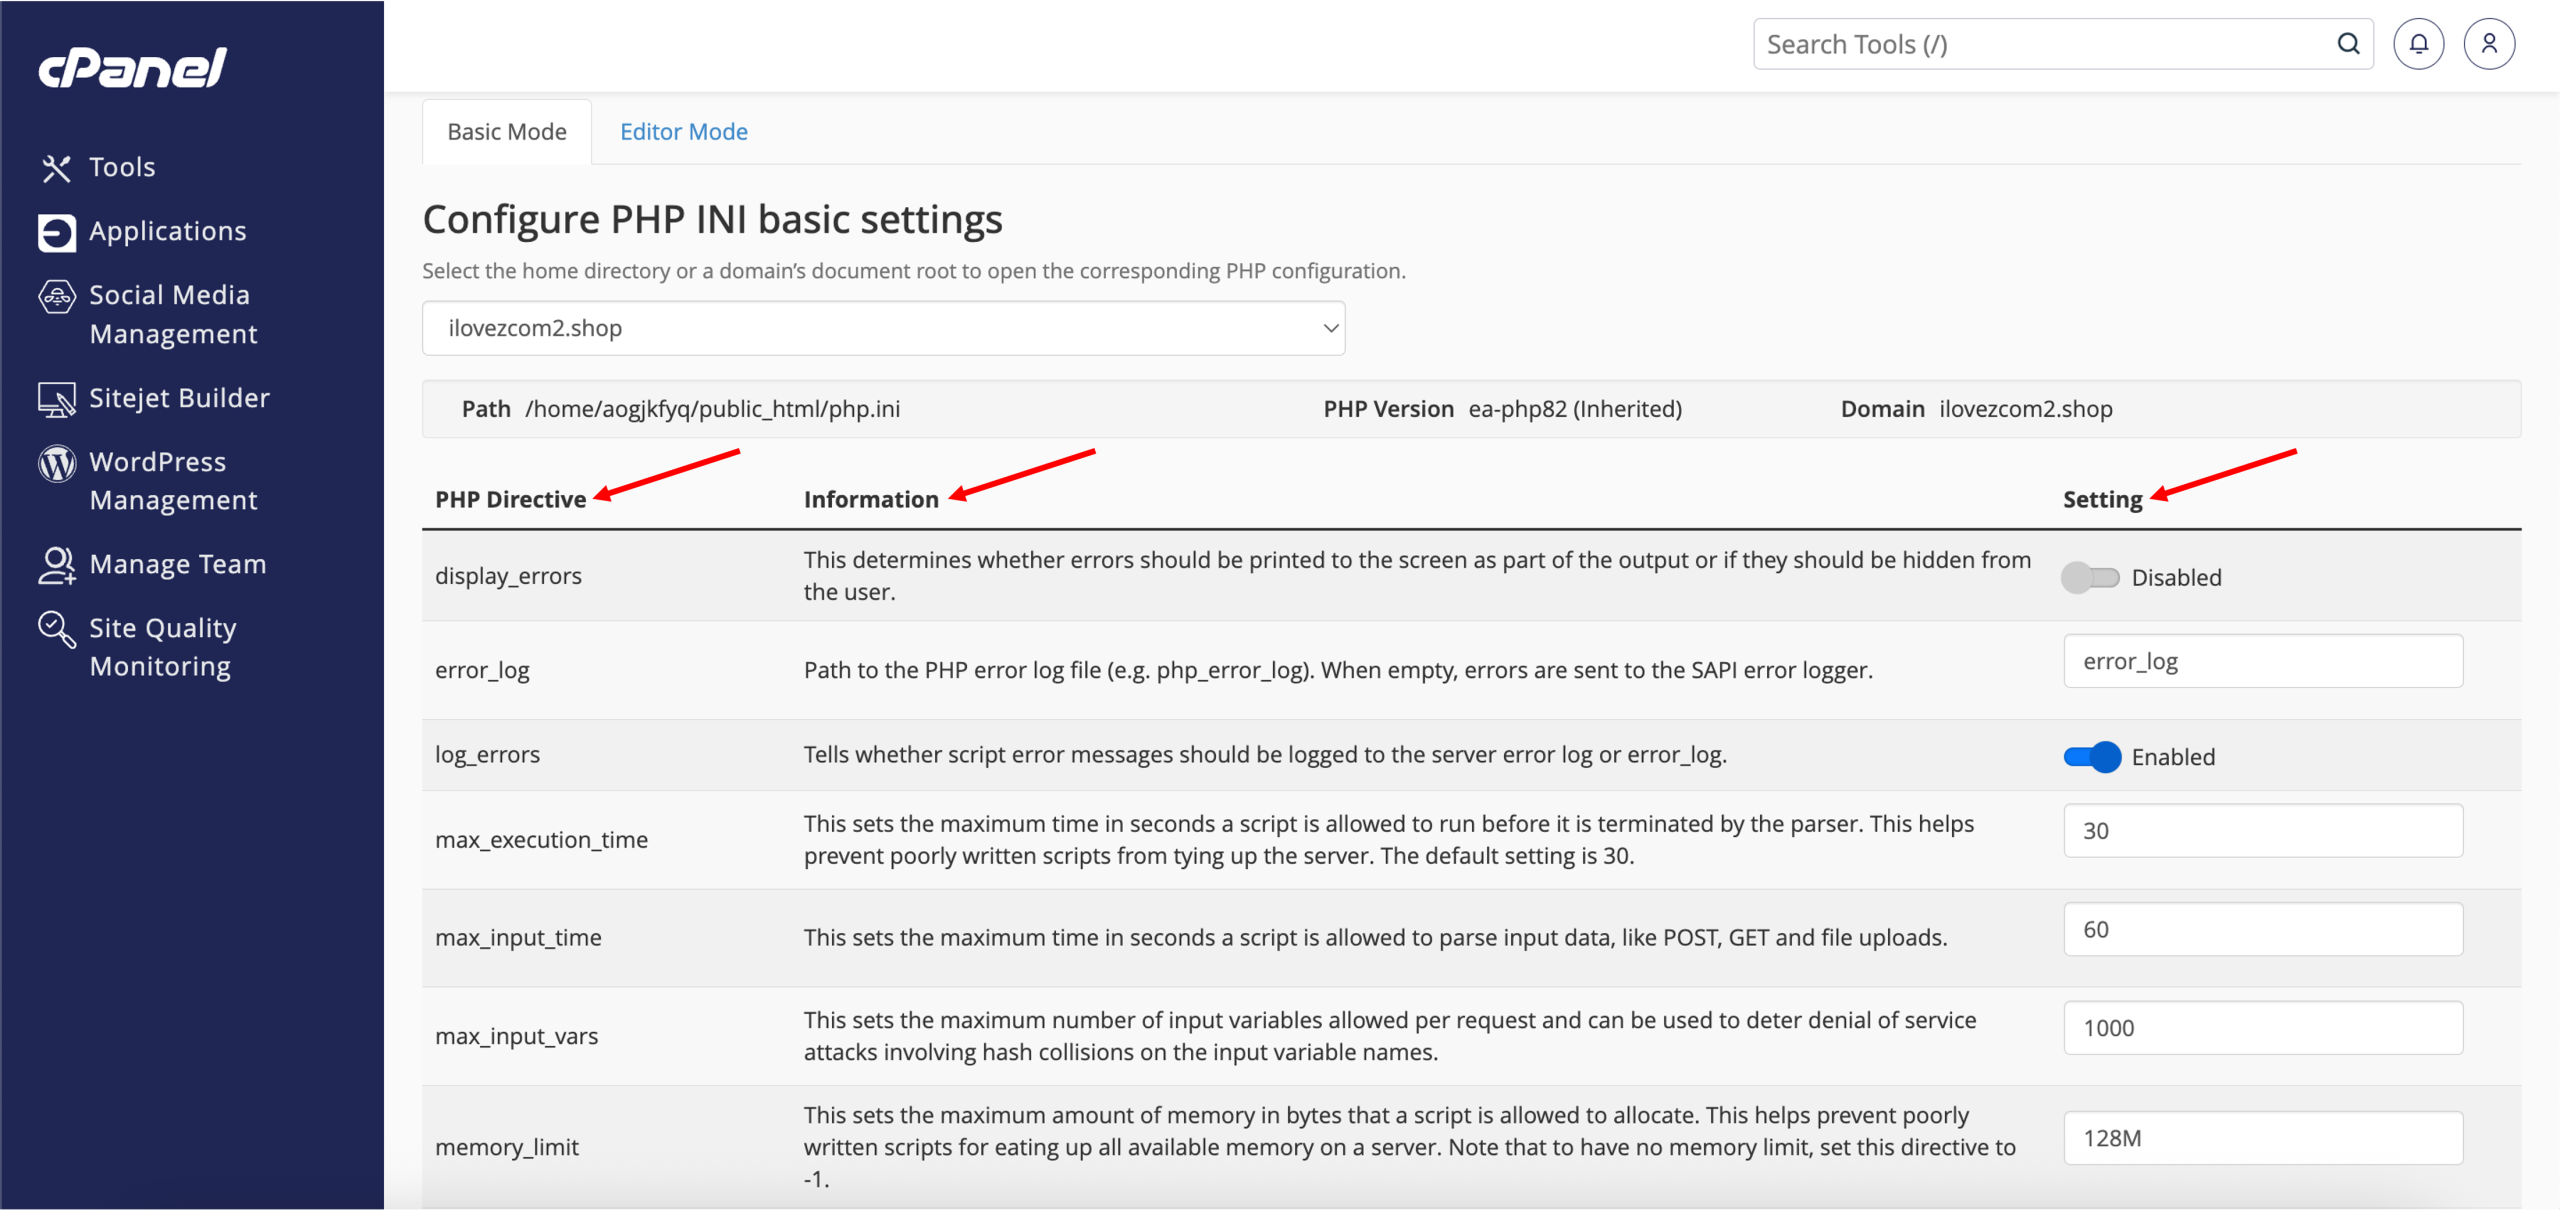
4. Once the domain has been selected, the corresponding PHP configuration settings will be displayed. You may then update the desired PHP directives by adjusting the available values and toggle switches as needed.
*Some commonly configured PHP settings include:
• memory_limit – Controls the maximum amount of memory a PHP script can use.
• upload_max_filesize – Controls the maximum file size that can be uploaded.
• post_max_size – Controls the maximum size of data submitted through forms.
• max_execution_time – Controls how long a PHP script can run before timing out.
• max_input_vars – Controls the maximum number of input variables accepted by PHP.
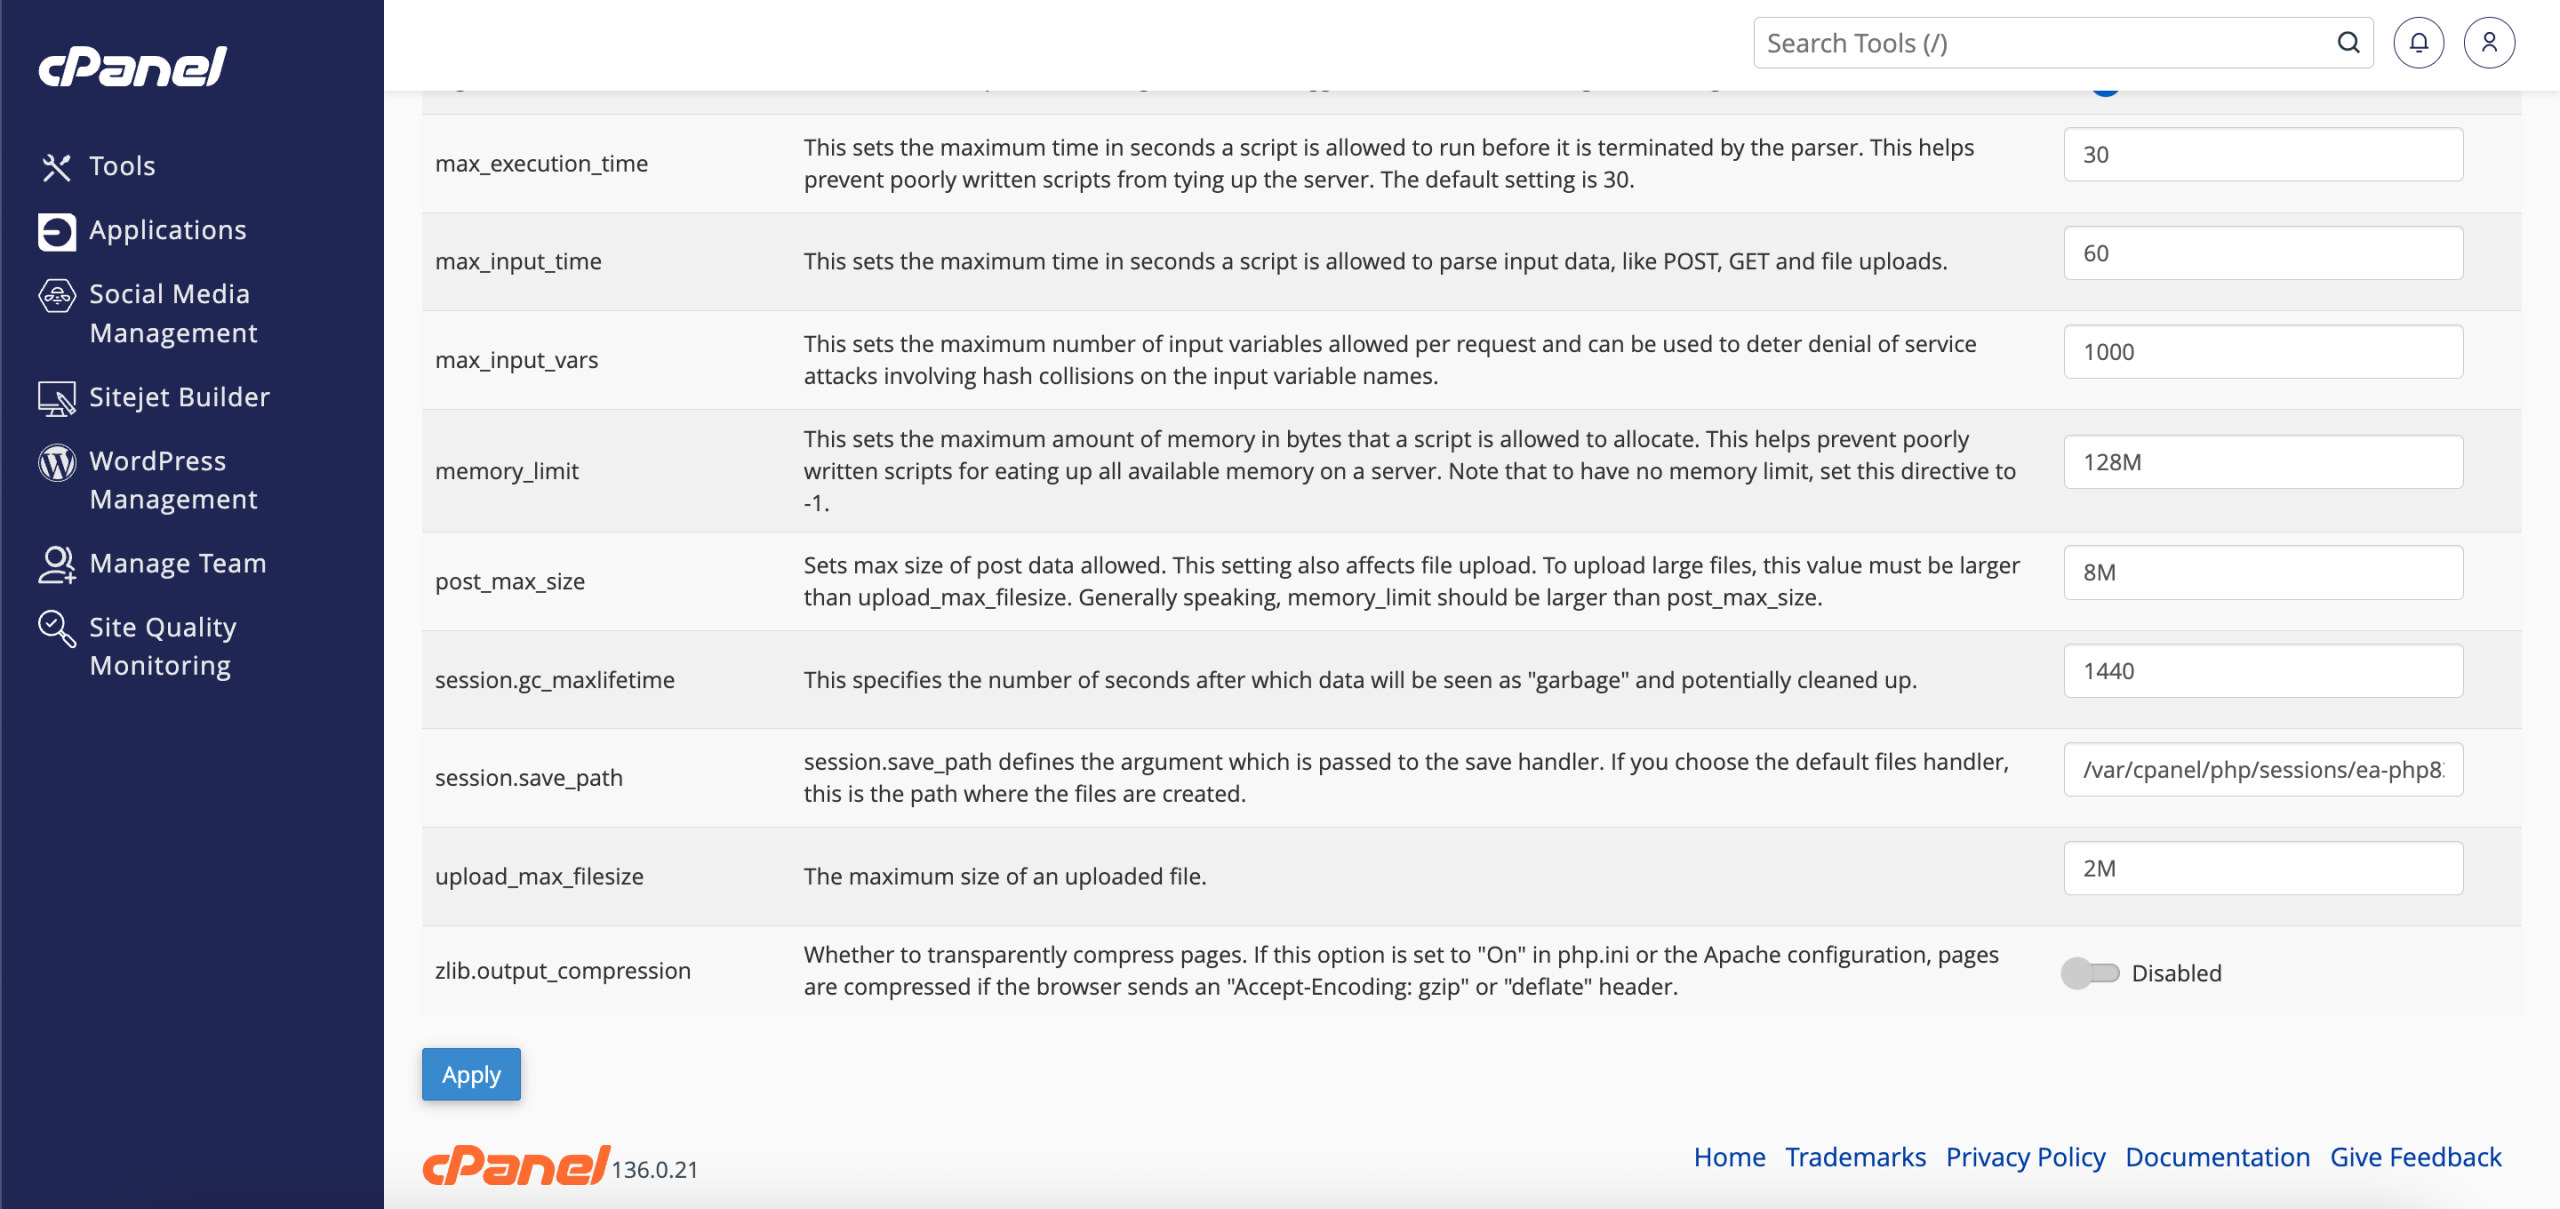
5. For example, increasing the memory_limit to 512. After making the necessary changes, click Apply to save the updated PHP settings.
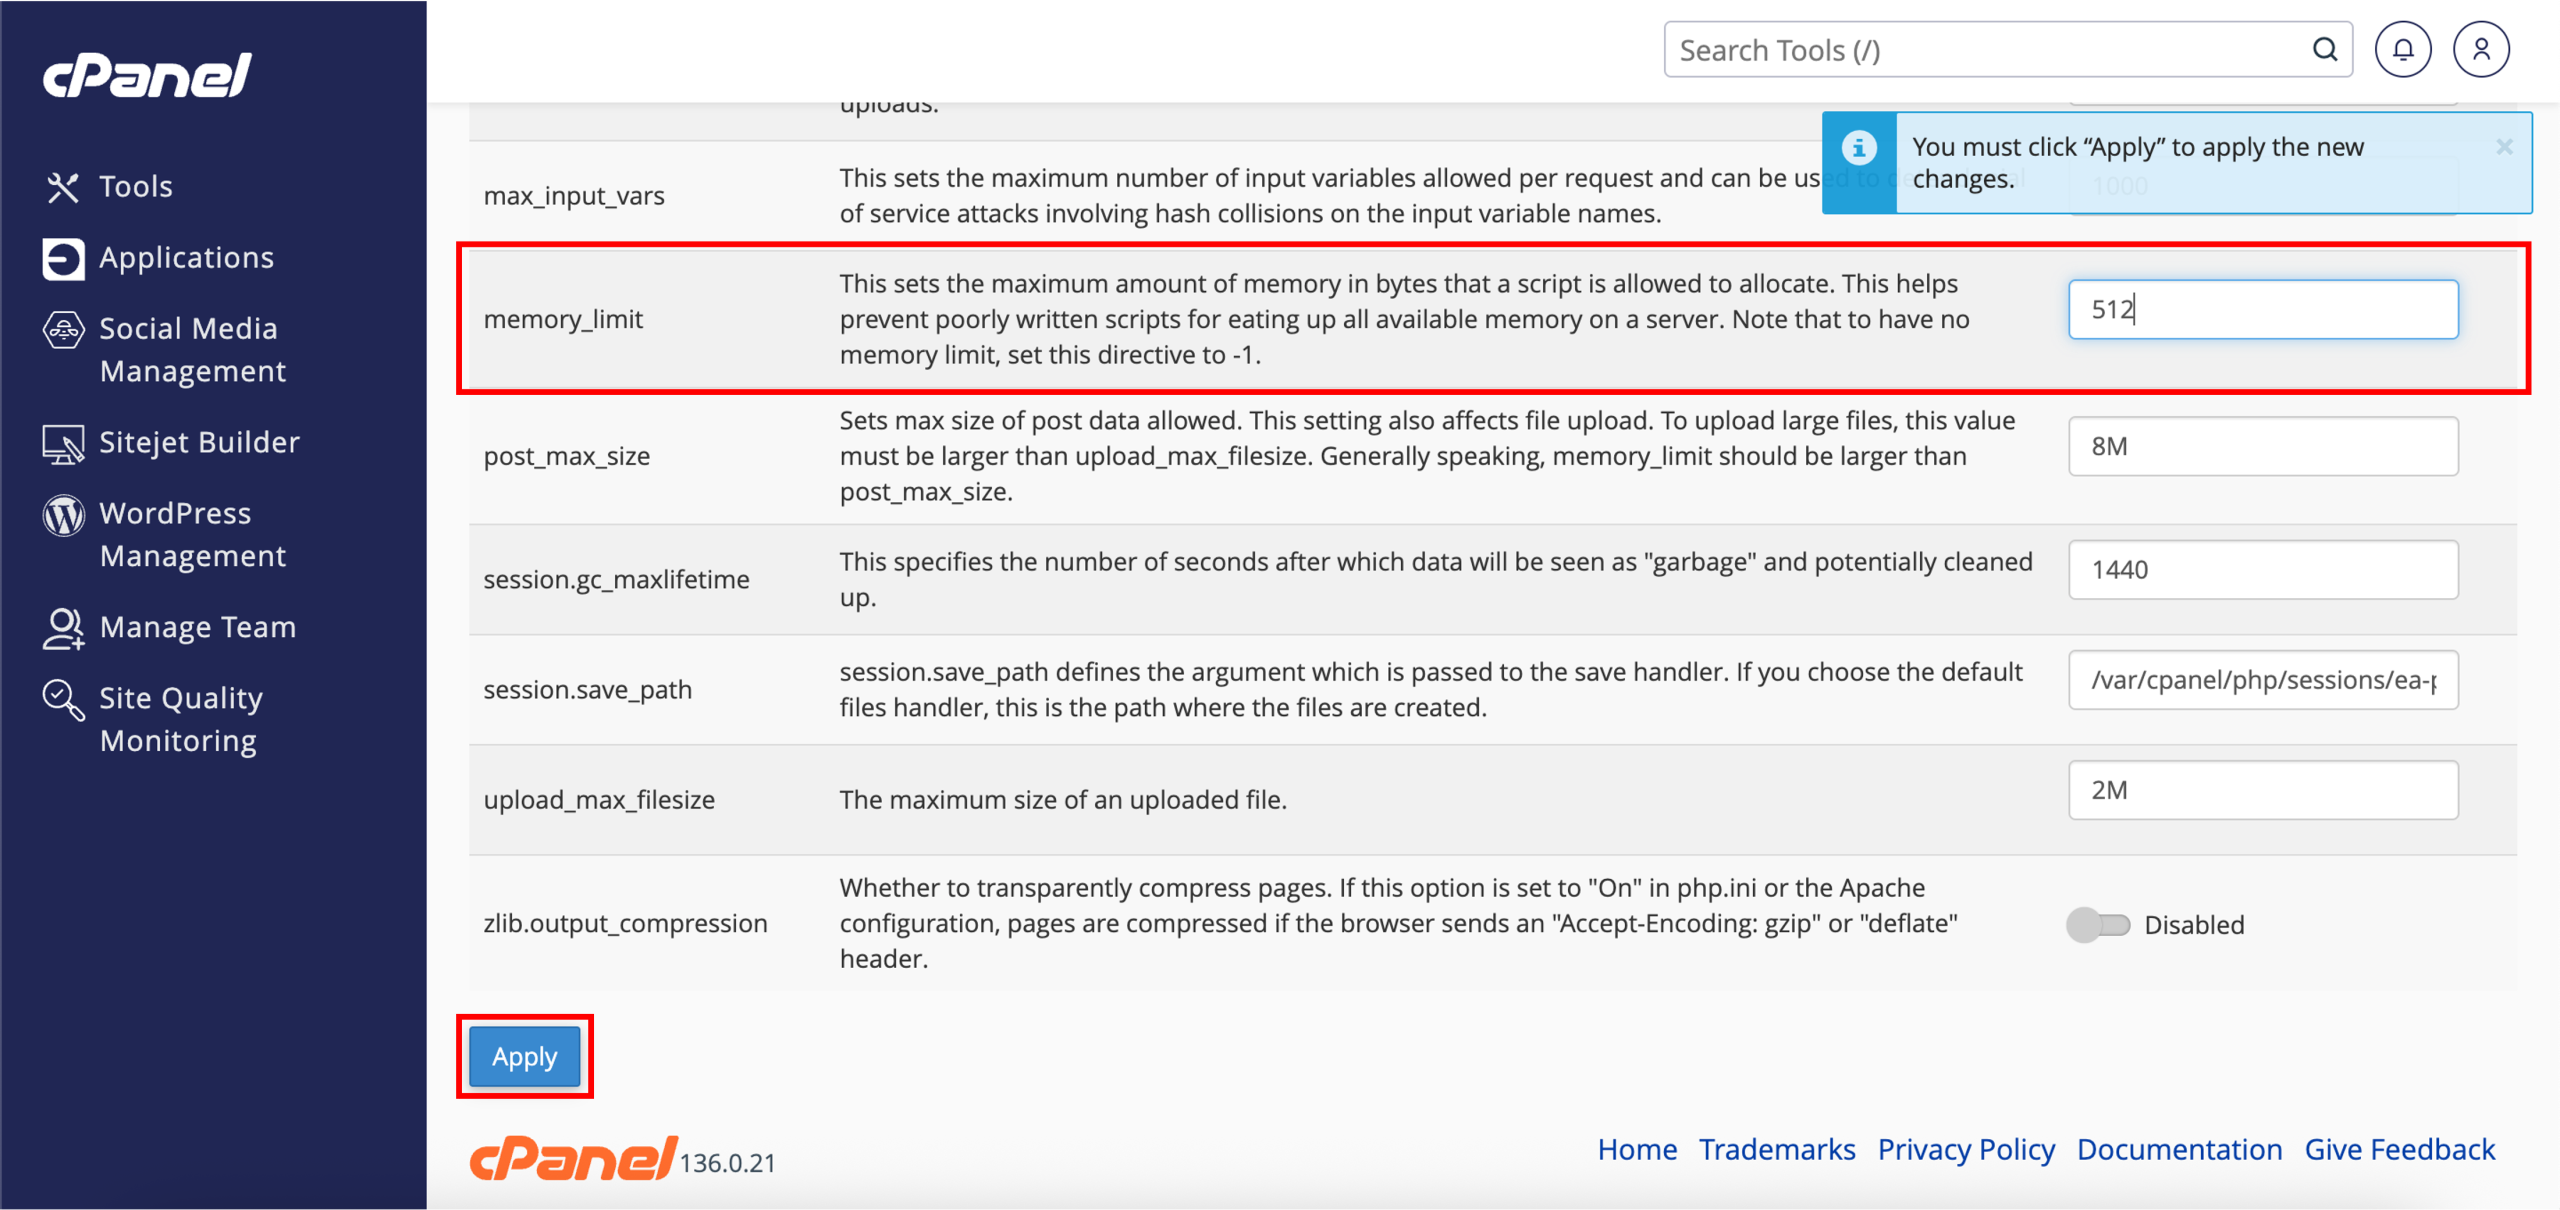
6. Done! Successfully updating the PHP settings should look like the following, with the success prompt.
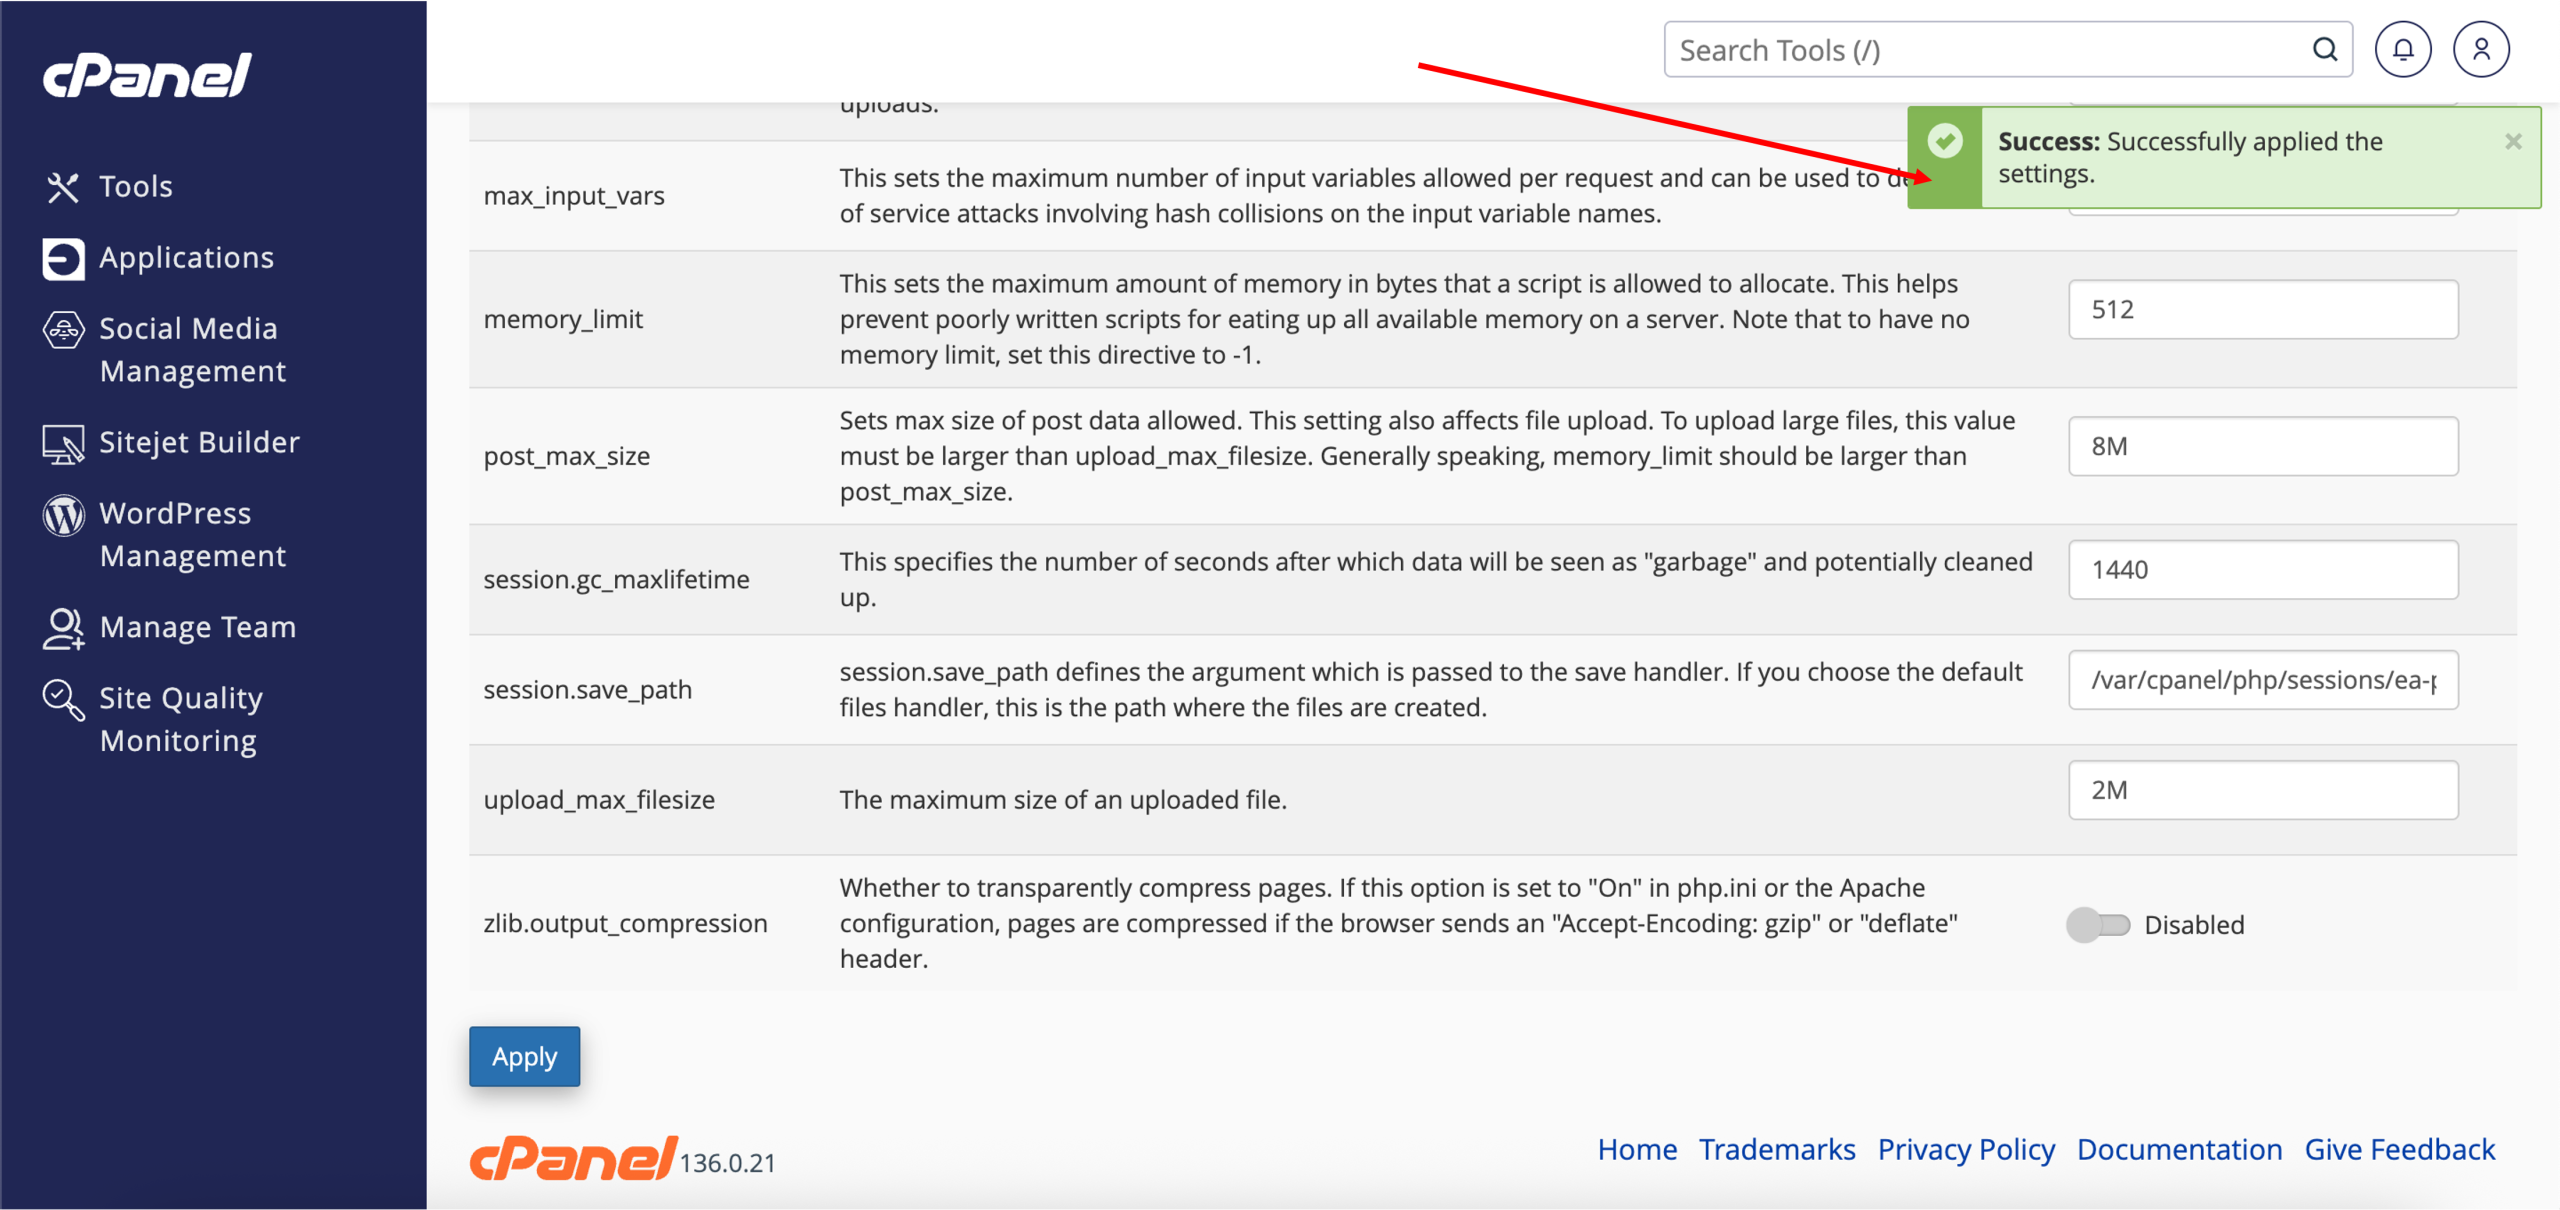
Note: Changes made here will automatically reflect in the Editor Mode as well.
2. Editor Mode
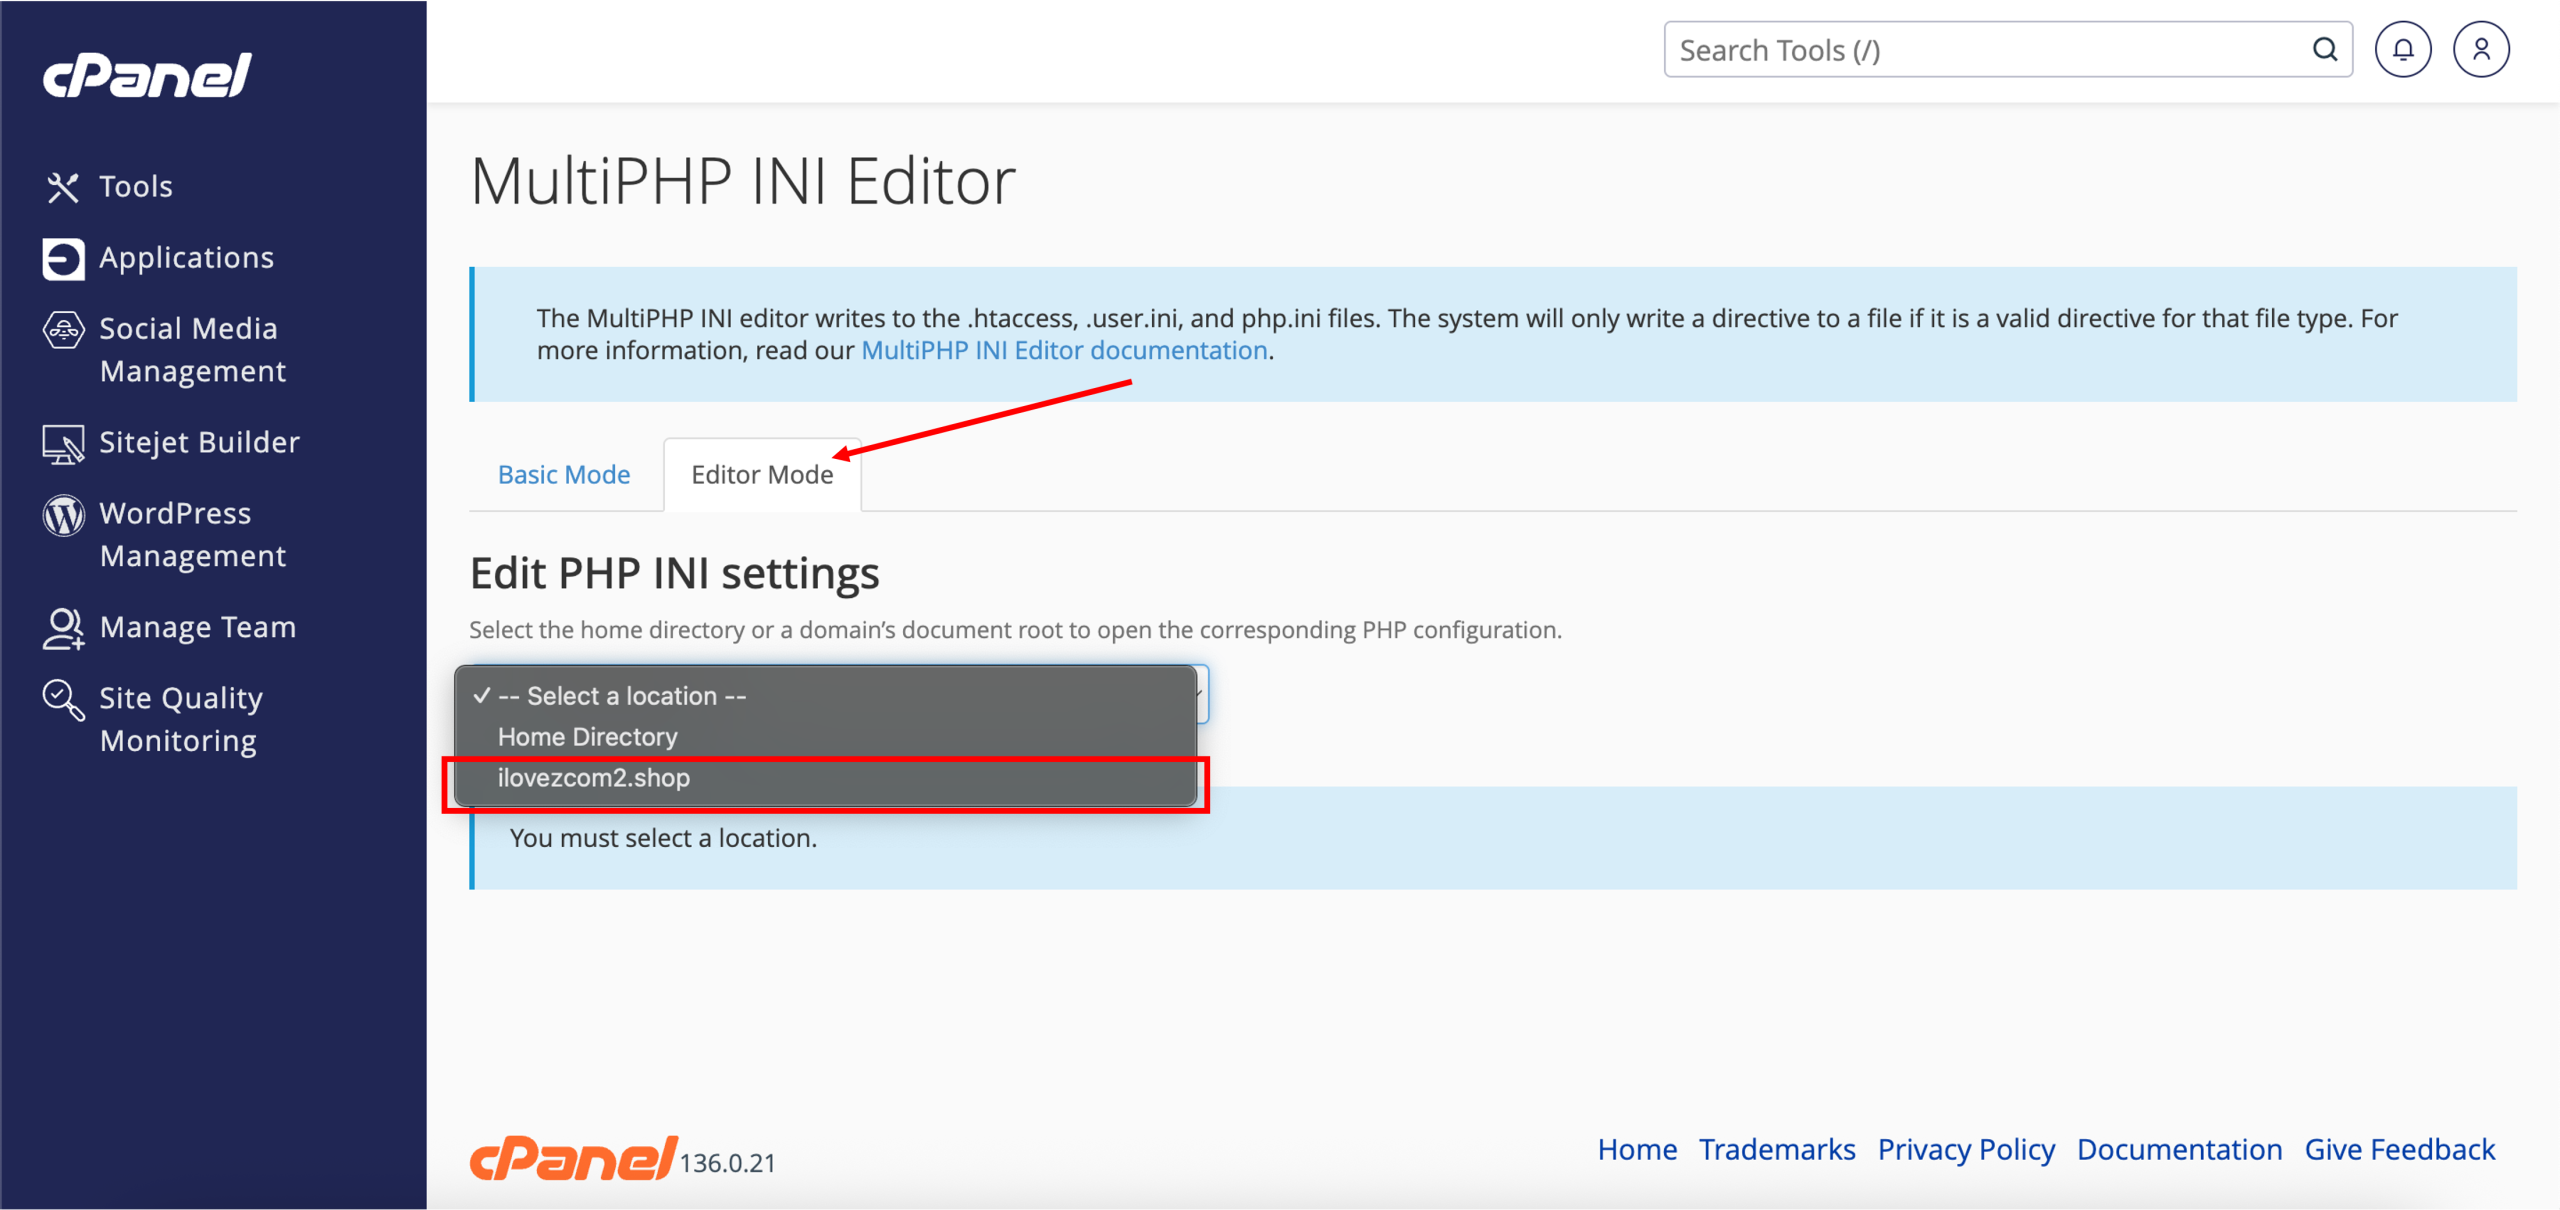
1. Referring back to step 3 from the first part, click the Editor Mode tab. Similarly, click the drop-down menu and select the domain for which you would like to configure PHP settings.
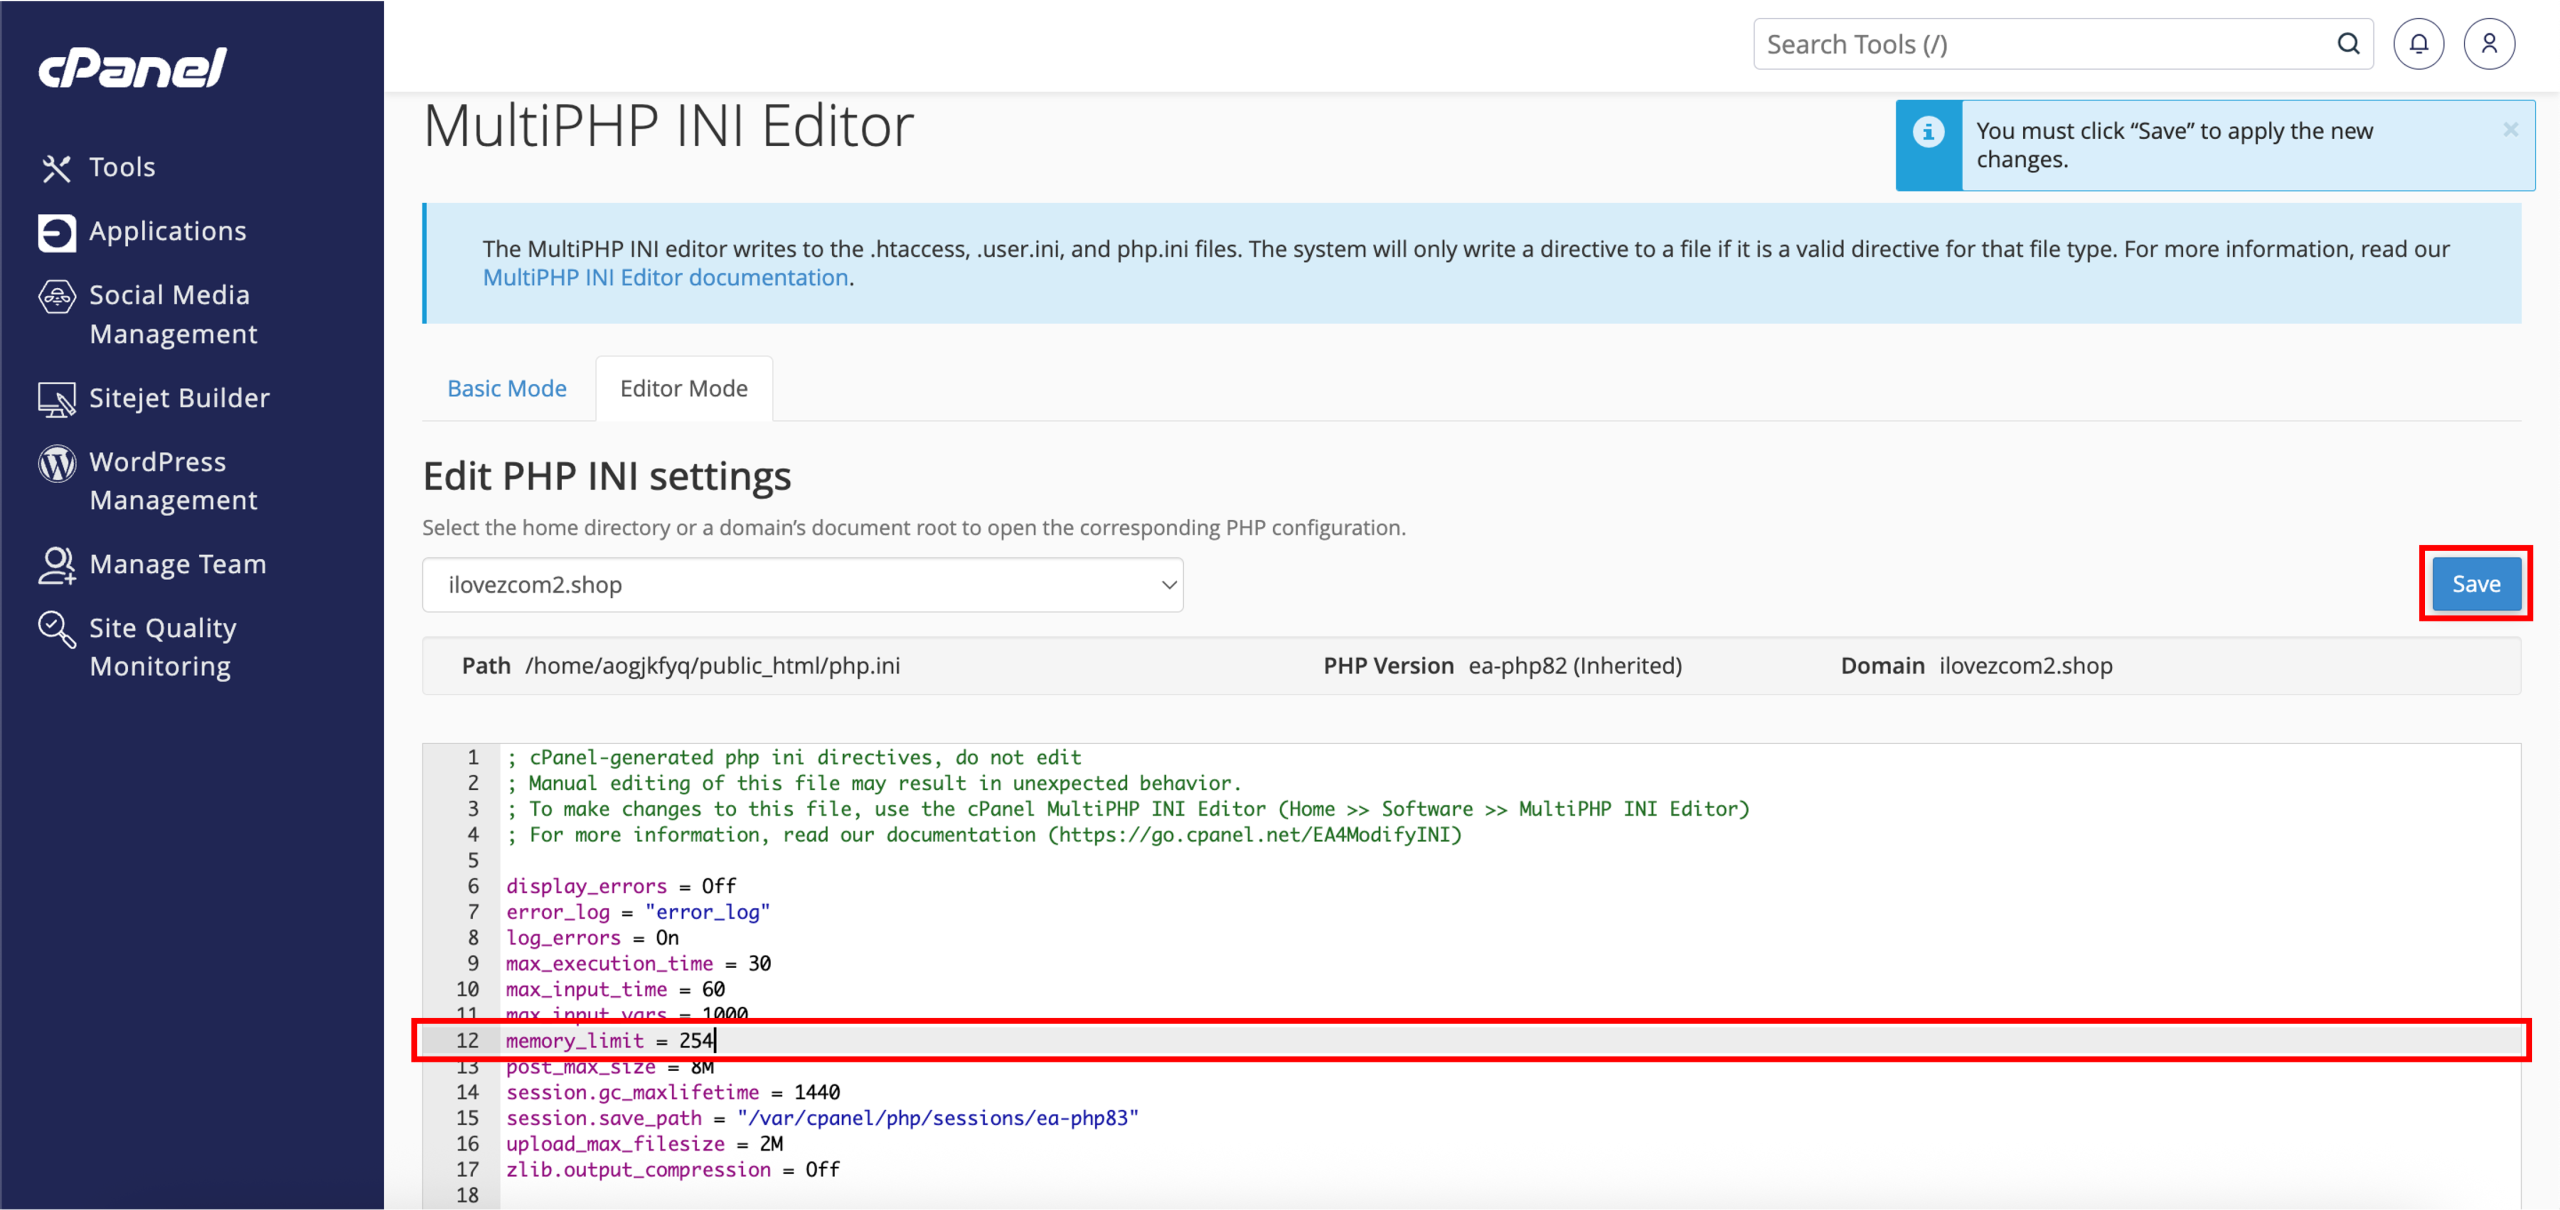
2. Once the domain has been selected, the configuration editor will be displayed, showing the PHP directives that you can view and modify as needed.
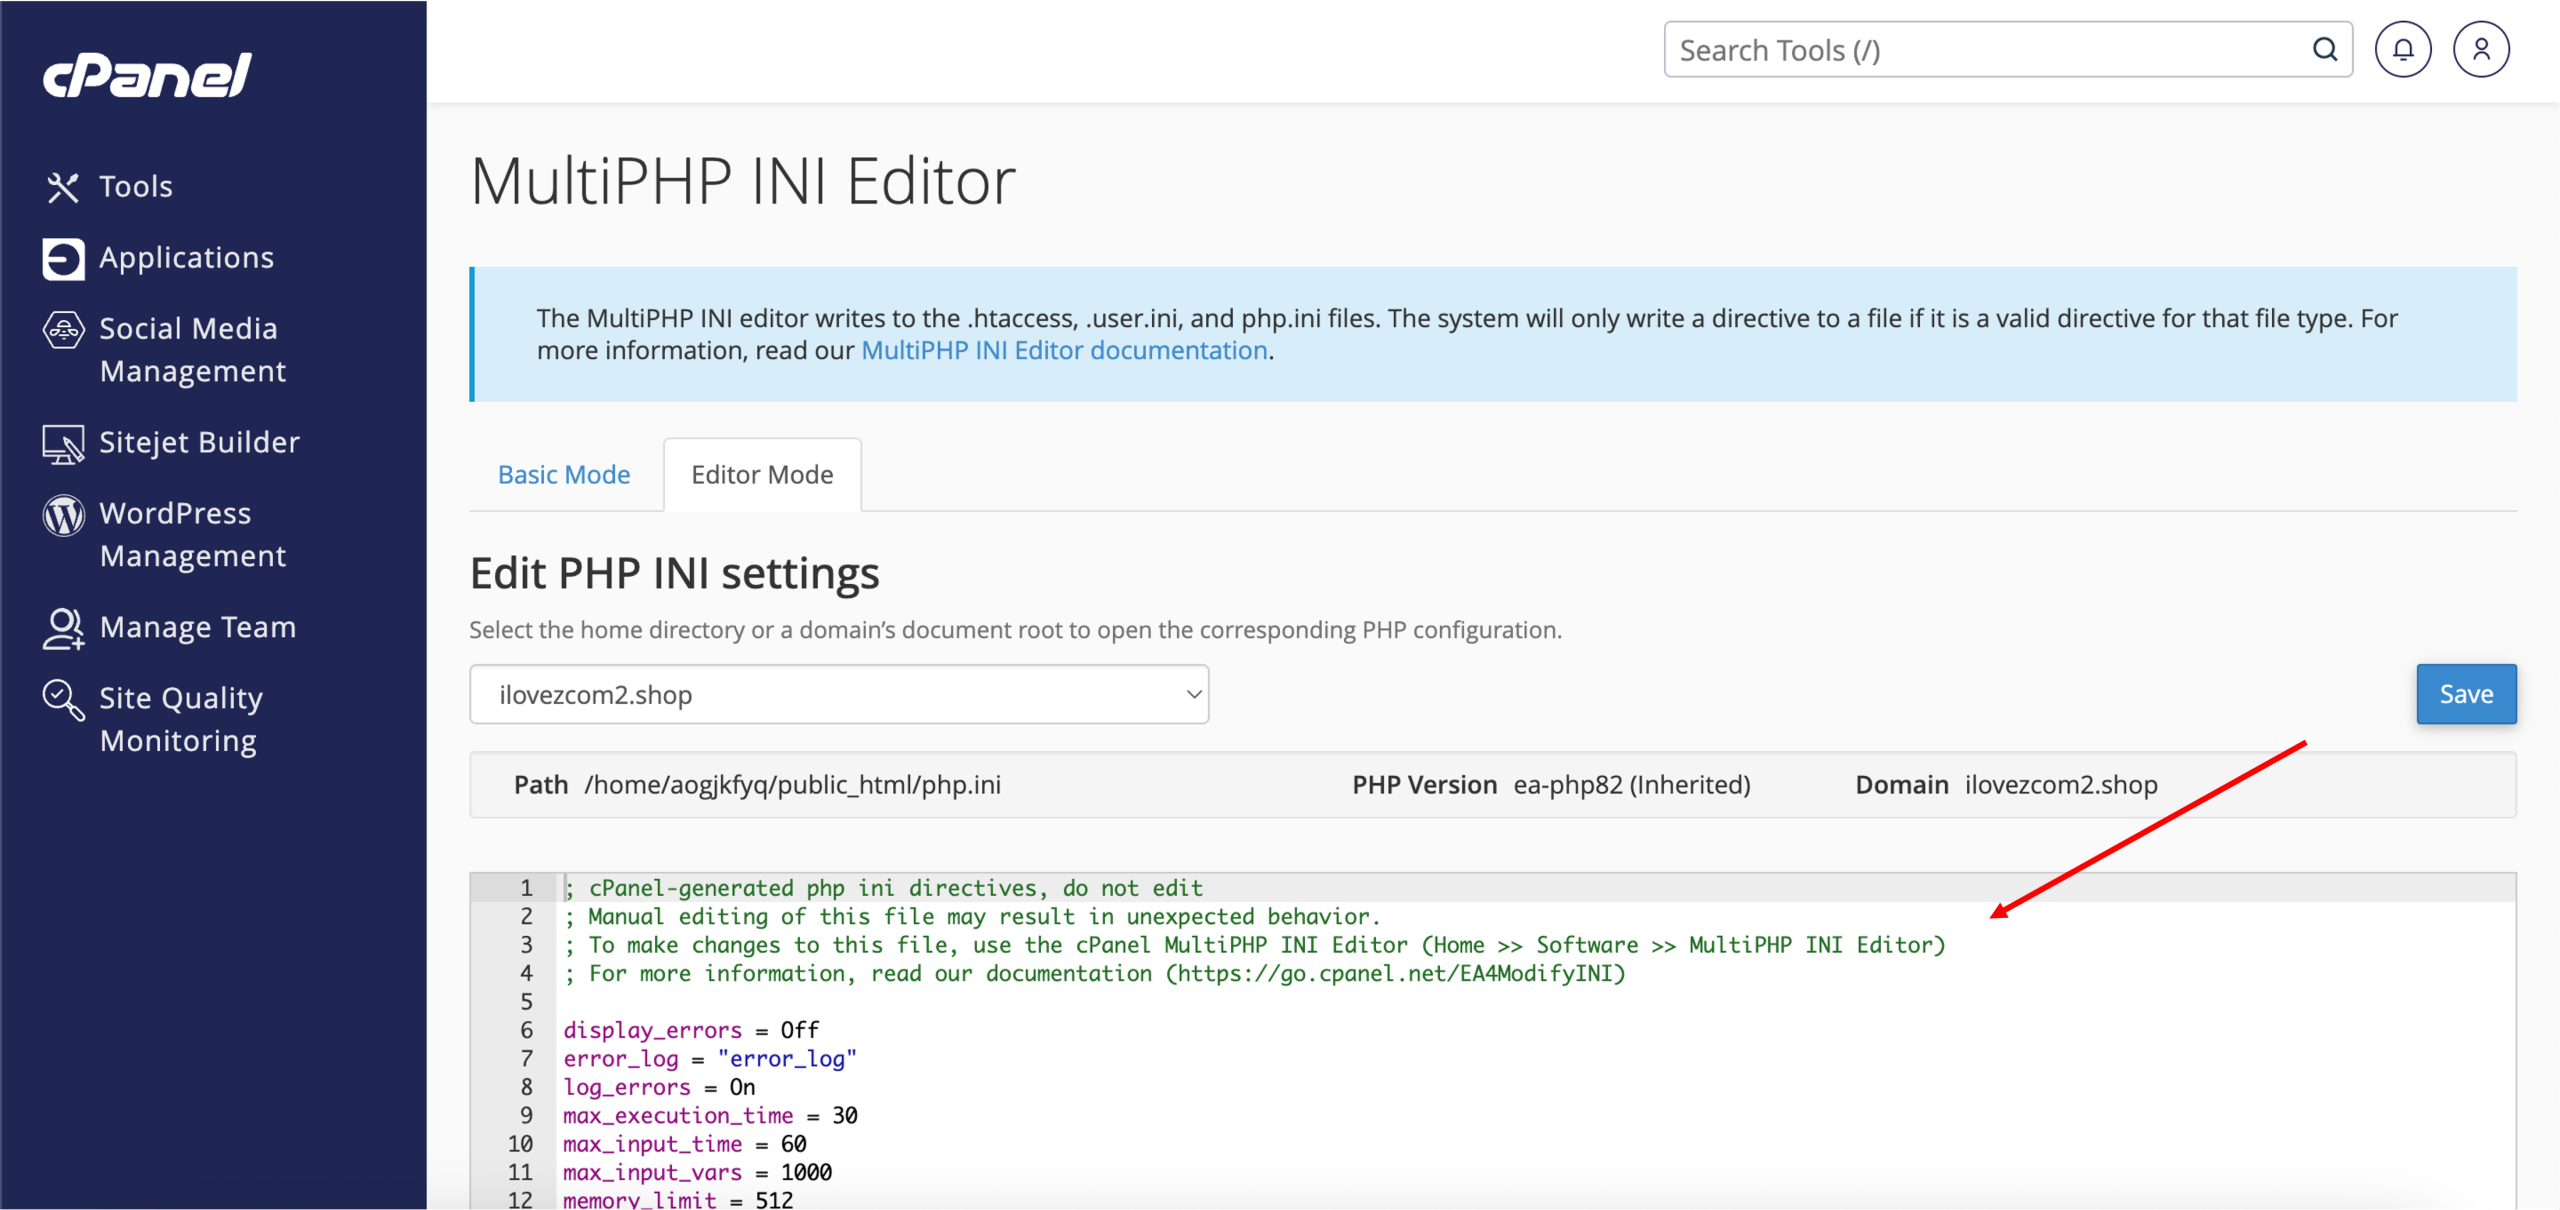
3. For example, decreasing the memory_limit to 254. After making the necessary changes, click Save to apply the updated PHP settings.
4. Done! Successfully updating the PHP settings should look like the following, with the success prompt.
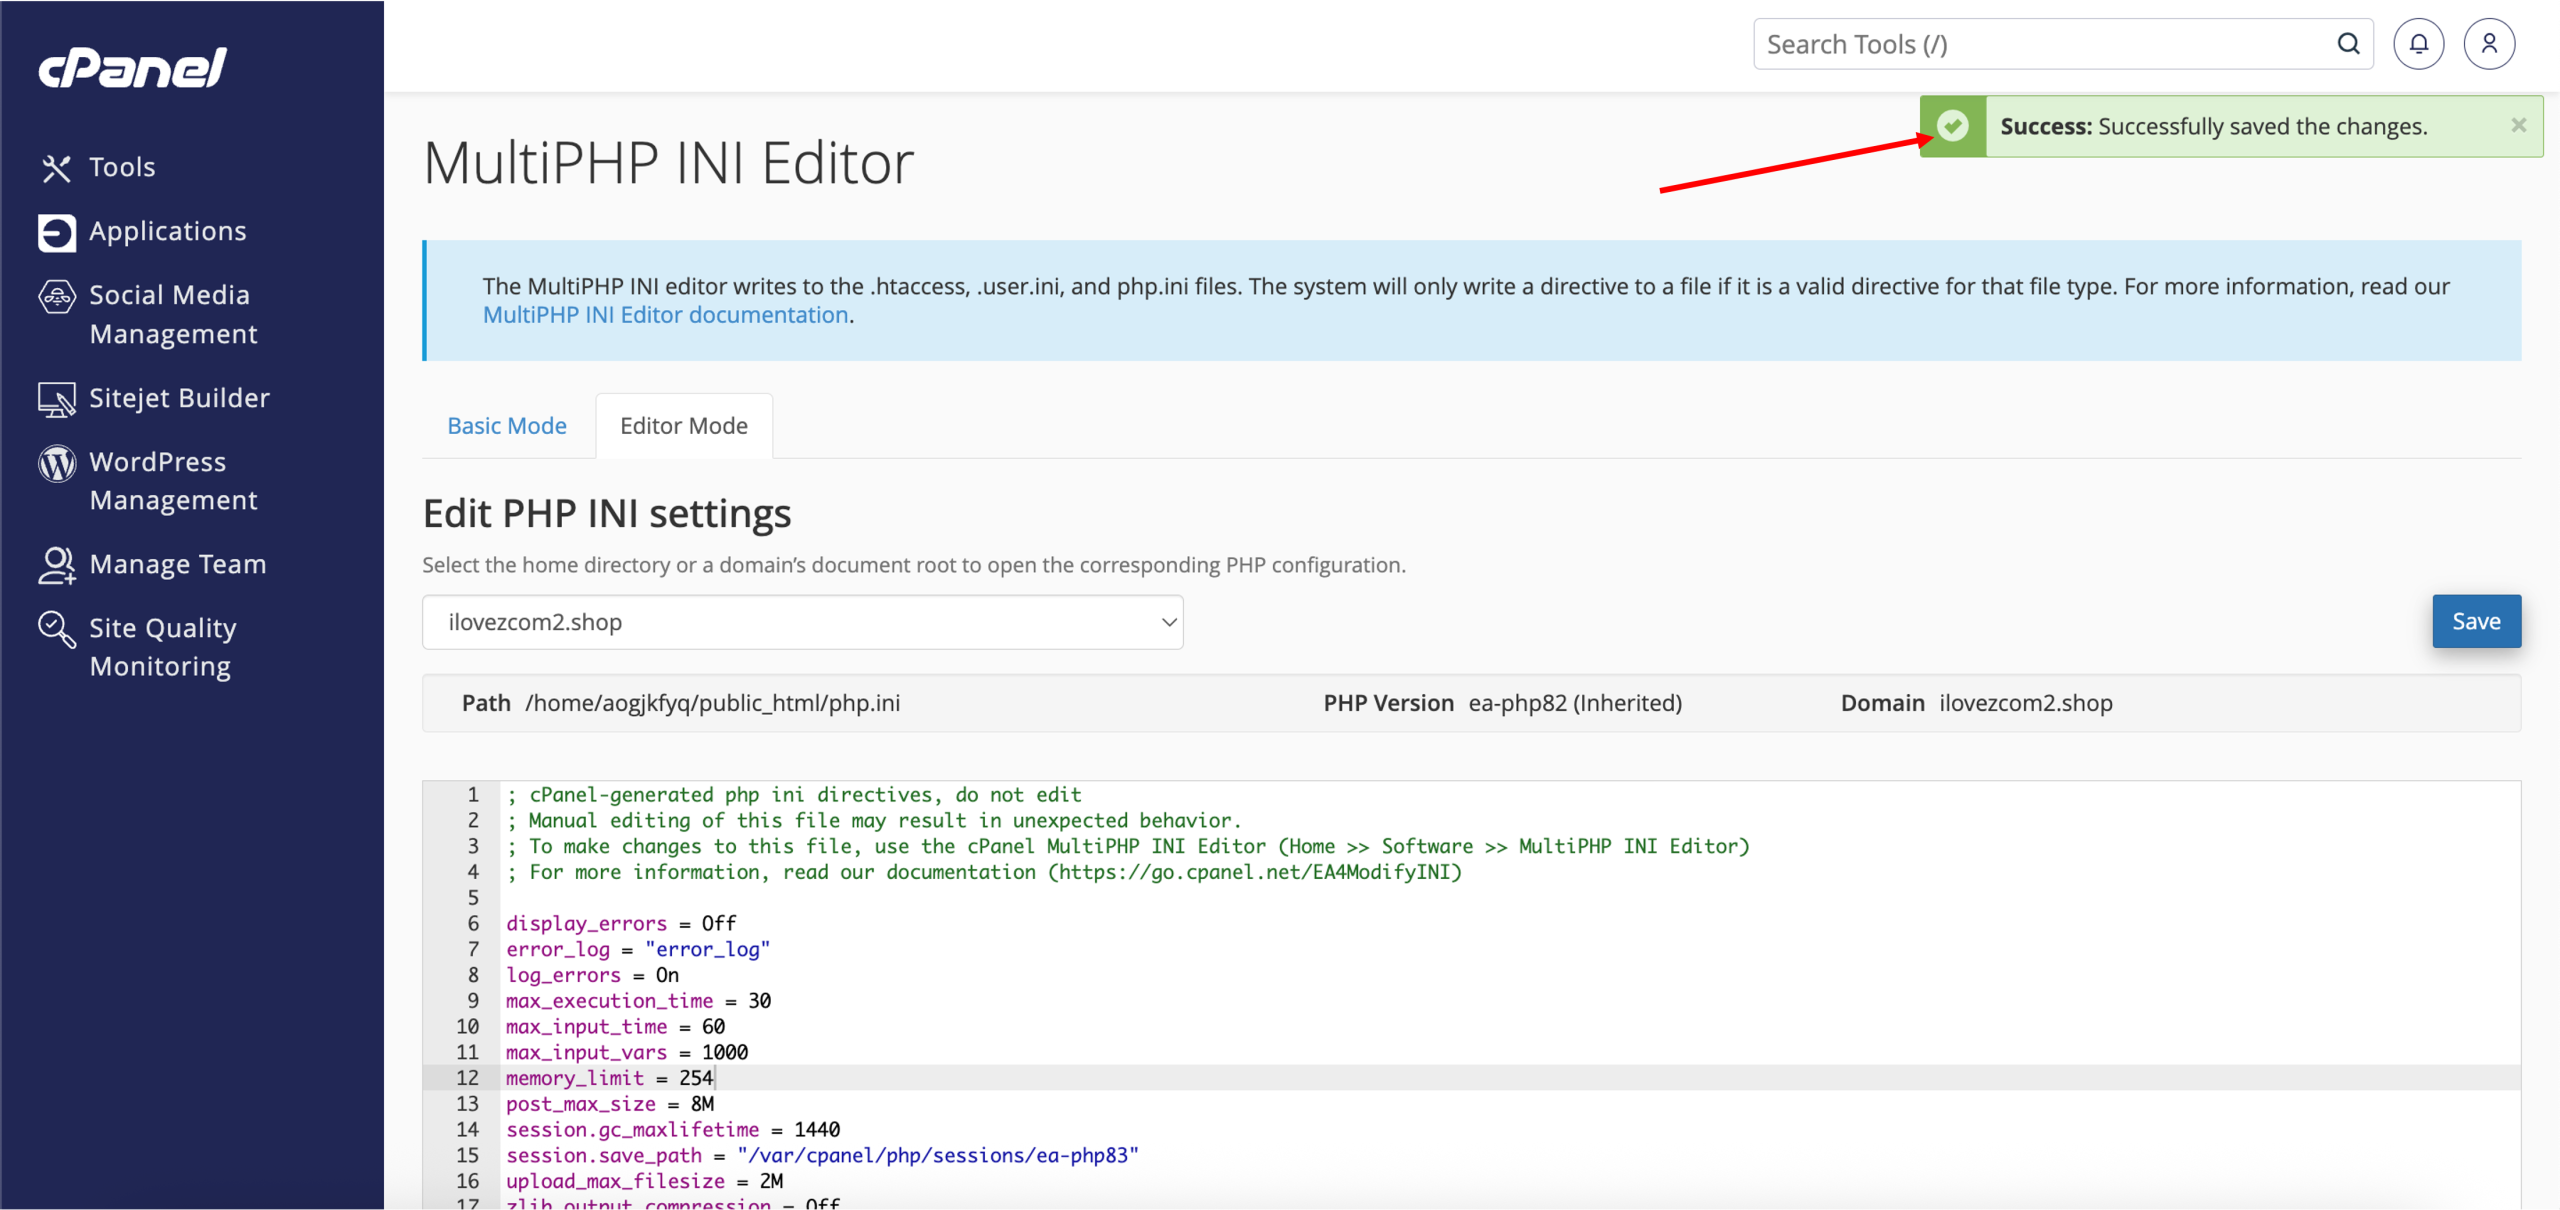
Note: Changes made here will automatically reflect in the Basic Mode as well.