
Example :
How to set up an email or change my account settings.
- Help Center
- Web Hosting
- Domains
- How to set up Domain Redirection in cPanel
How to set up Domain Redirection in cPanel
The guide video is available for your reference:
Domain redirection lets you automatically forward visitors from one domain or webpage to another destination URL. This is useful when redirecting traffic to a new website, maintaining multiple domains, or guiding visitors to updated content.
In cPanel, you can easily configure domain redirection through the Redirects feature without requiring advanced technical knowledge.
This guide will show you how to set up domain redirection in cPanel.
Note:
• Ensure that you have an active web hosting plan with access to cPanel. If you do not yet have one, you can compare the available plans that we currently offer on our Web Hosting page and choose the one that best suits your needs.
• Domain redirection may take some time to apply due to DNS propagation.
• Ensure that the domain is properly pointed to your hosting service before configuring the redirect.
• Redirect loops or incorrect destination URLs may cause the website to become inaccessible. It is recommended to verify the destination URL before saving the redirect settings.
• Redirecting a domain does not transfer website files or hosting content; it only forwards visitors to another URL.
• Existing redirects cannot be modified directly. To make changes to a redirect, you will need to delete the existing redirect and create a new one.
1. Access cPanel directly through your Z.com account.
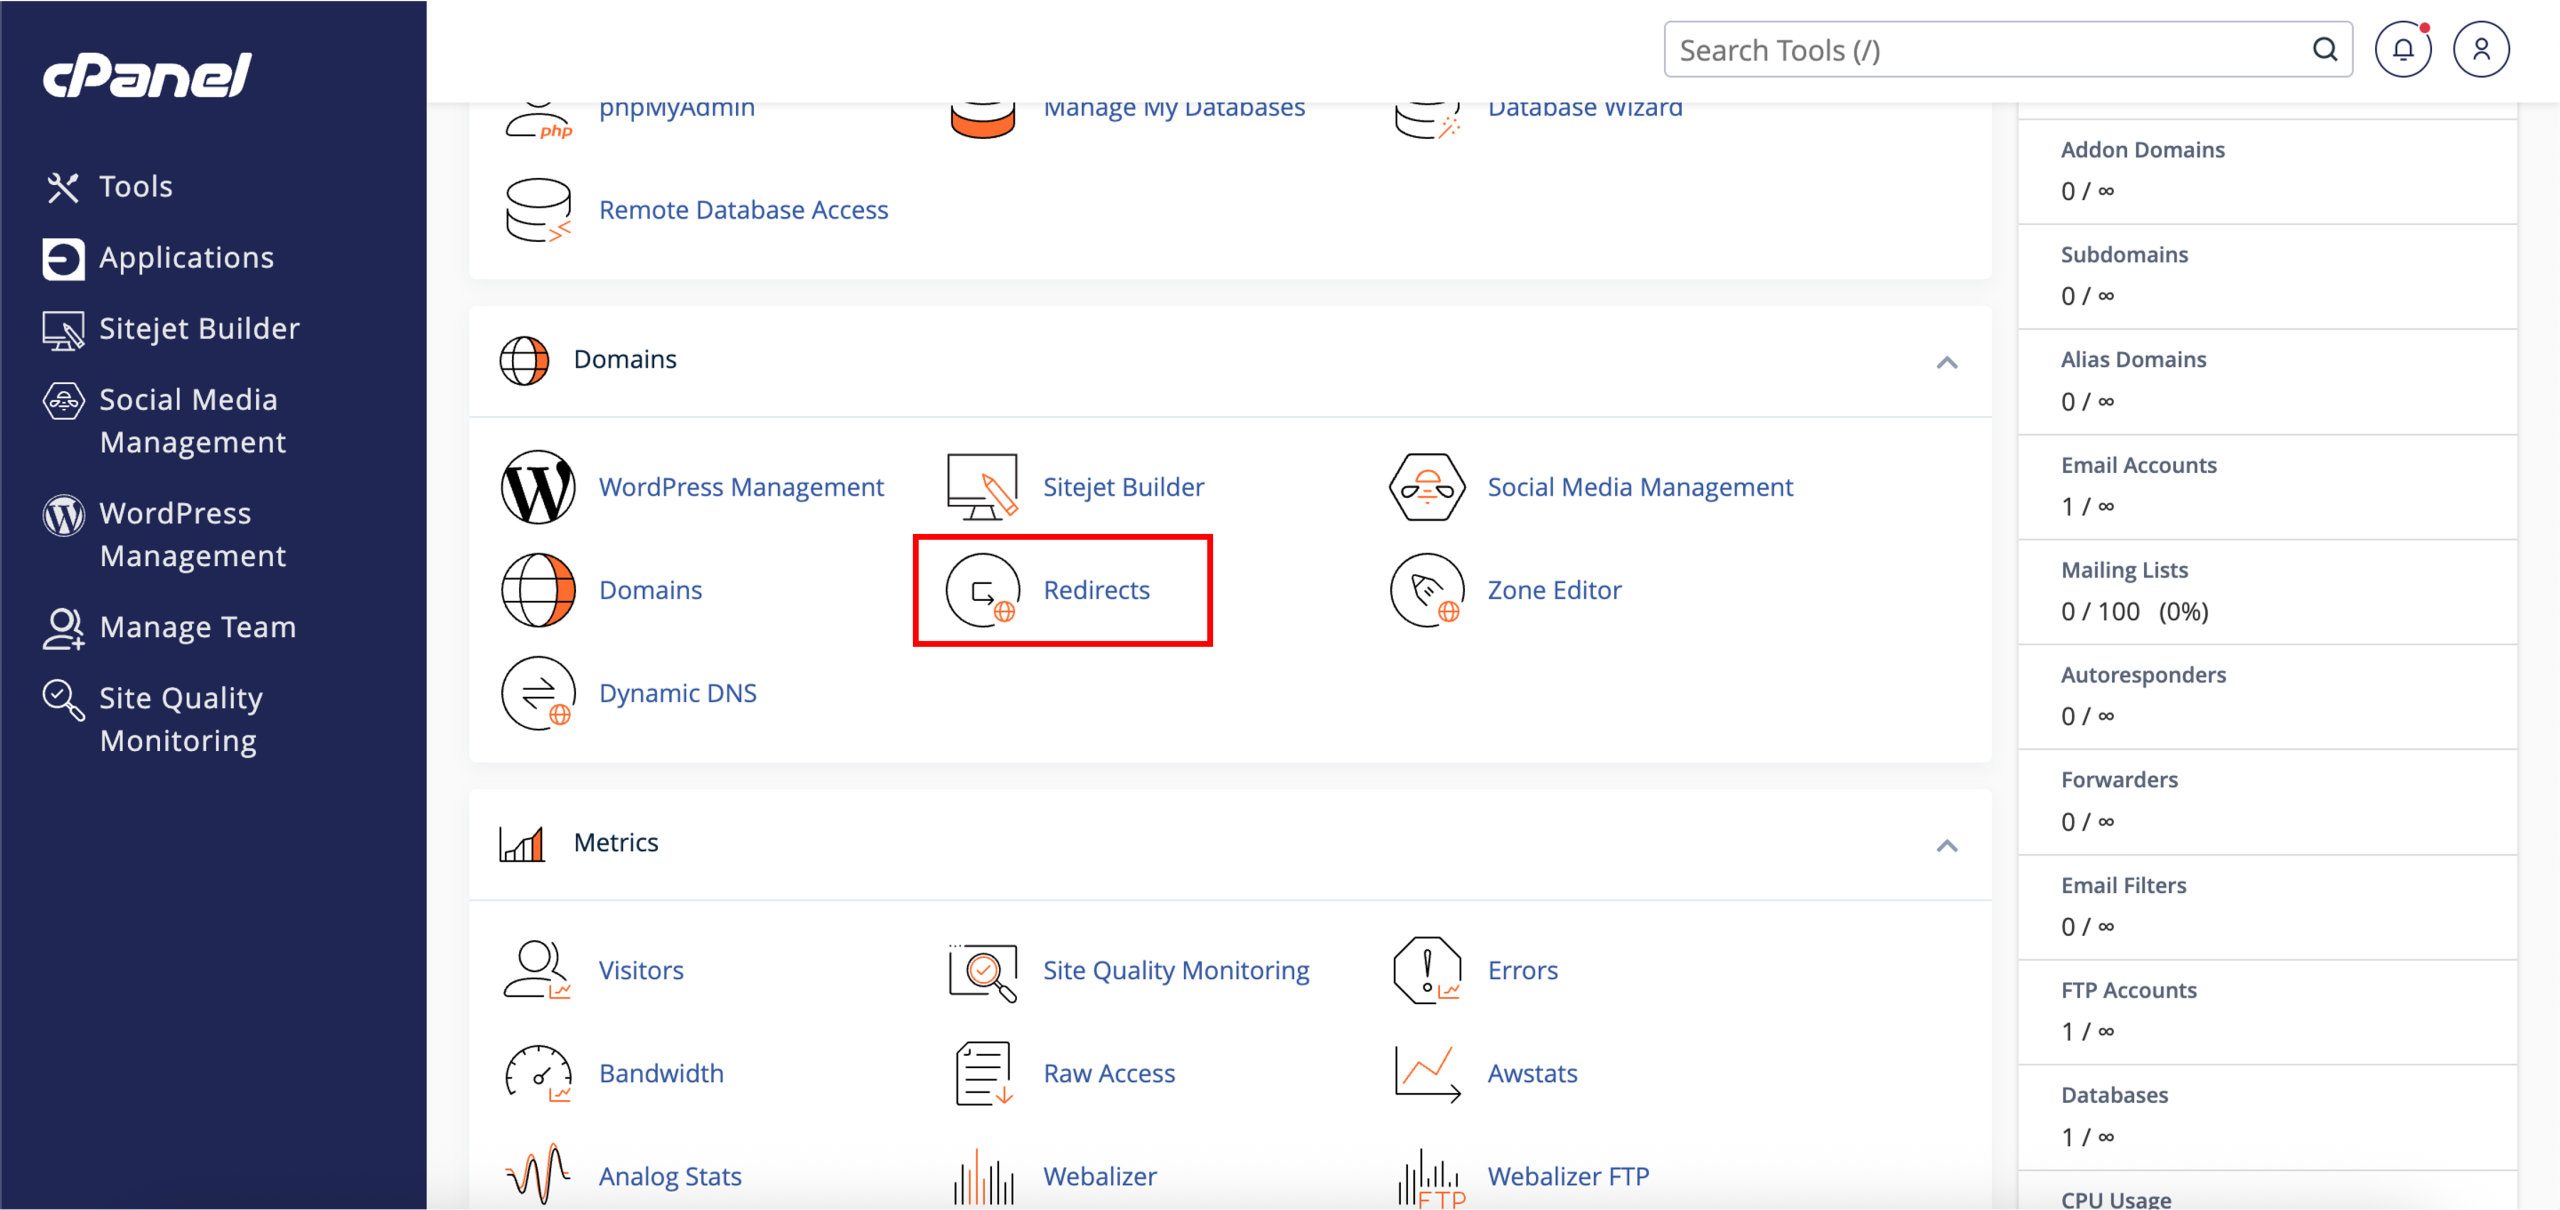
2. Once you have reached the cPanel dashboard, locate Redirects under Domains.
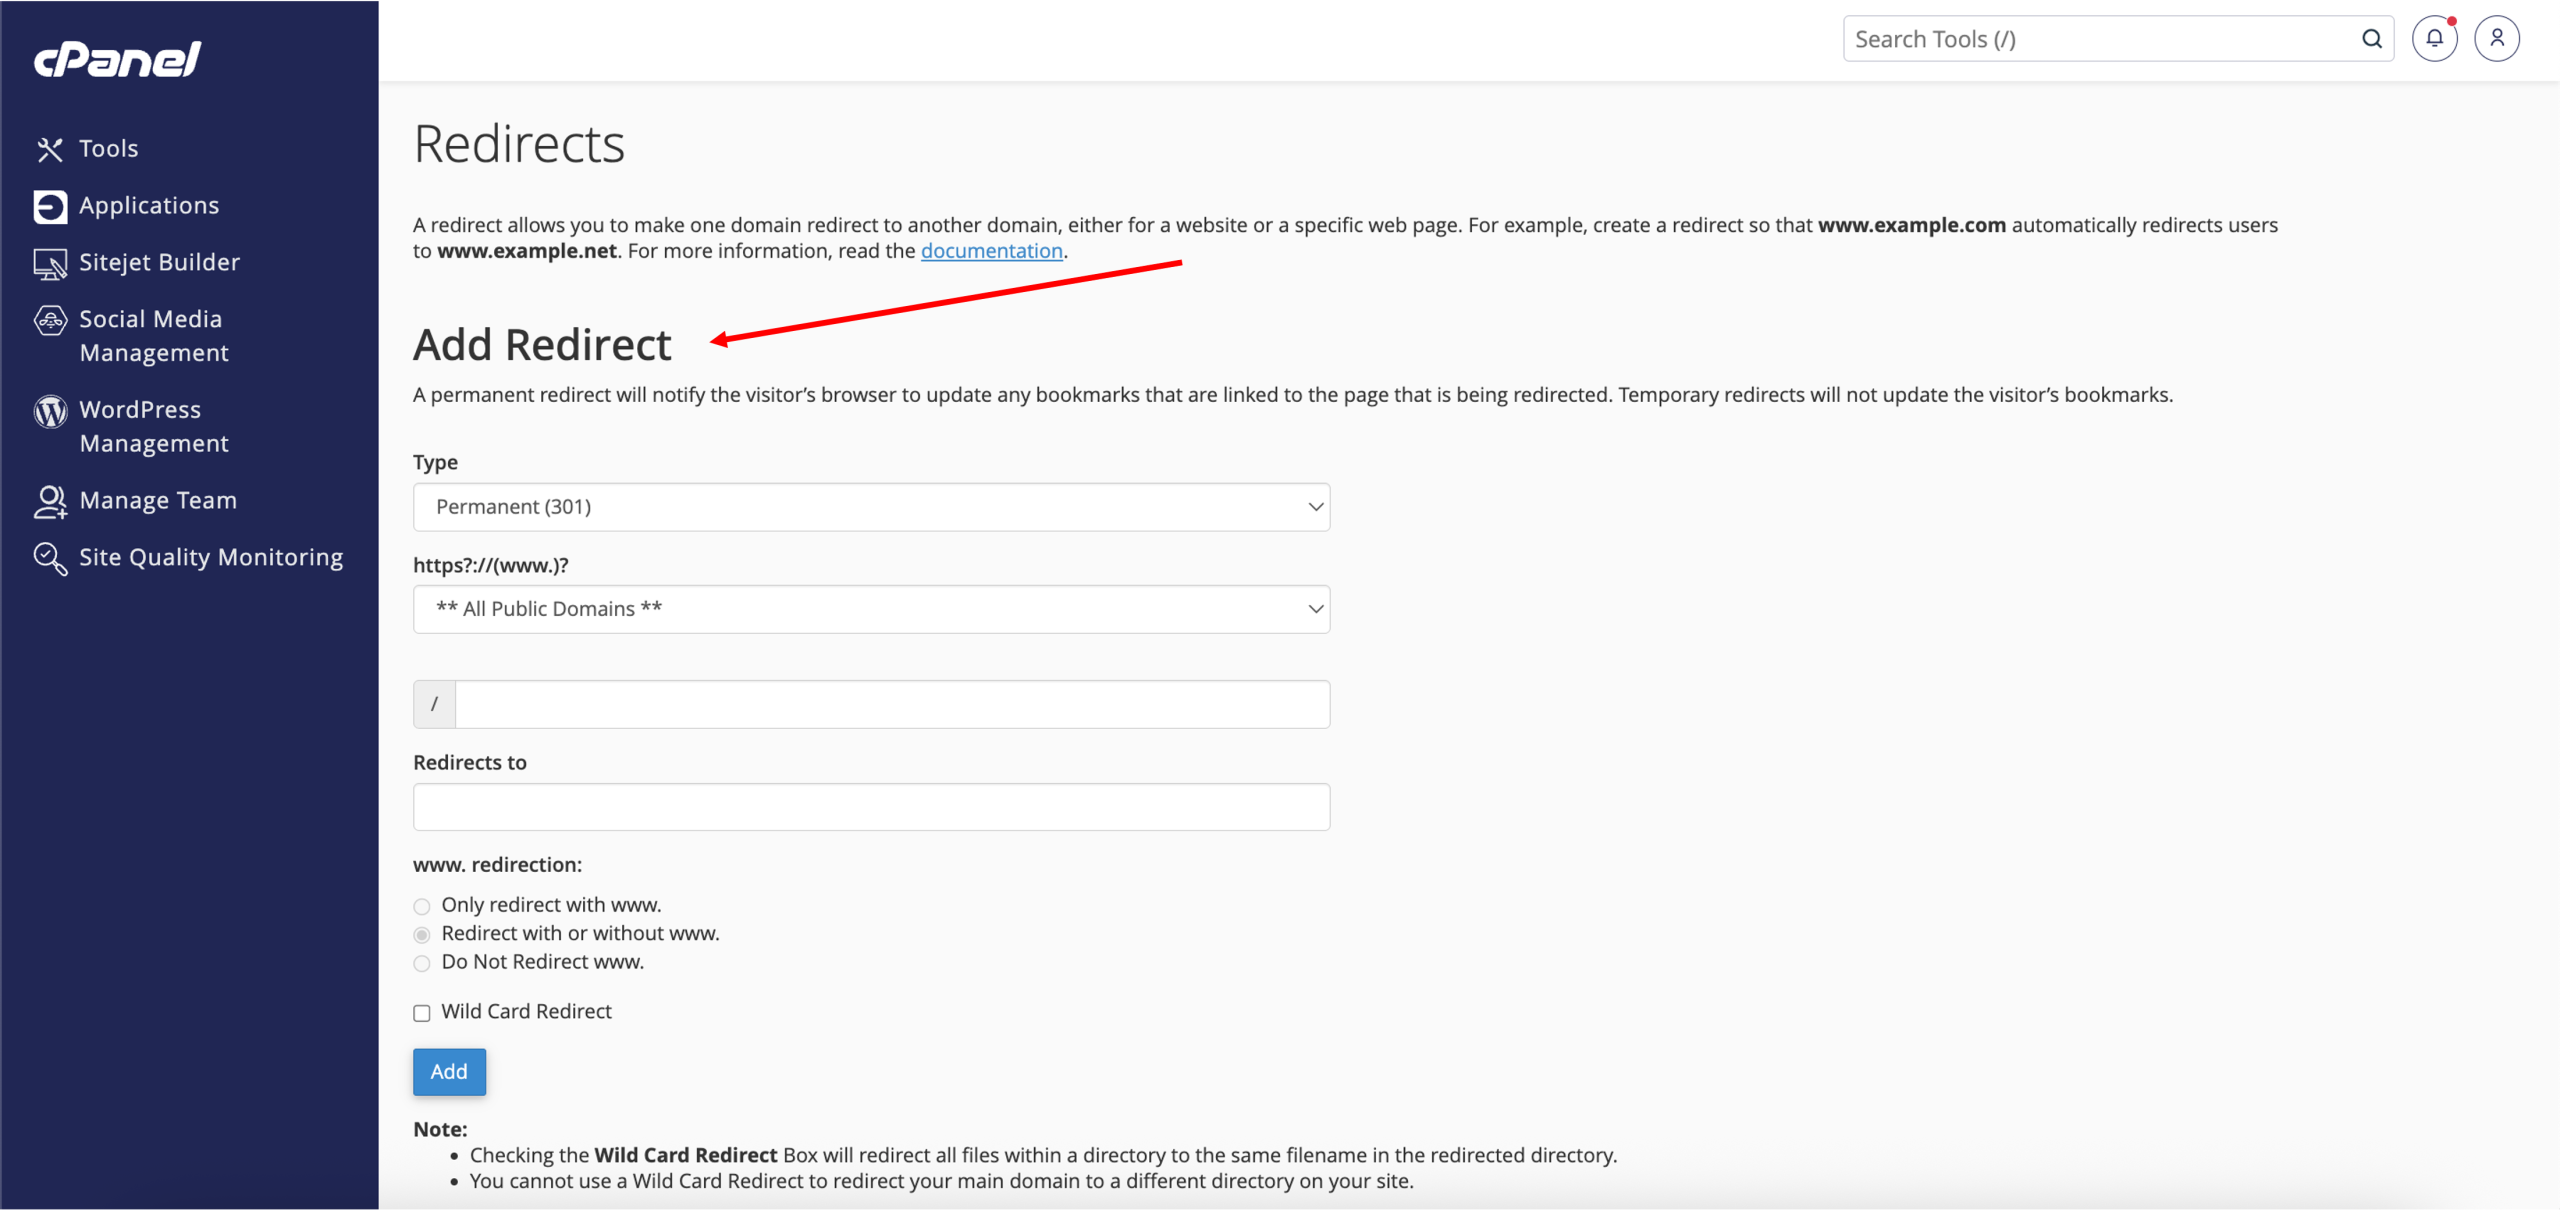
3. On the Redirects page, you should see two different sections.
Add Redirect:
※ Use this section to create a new domain redirect.
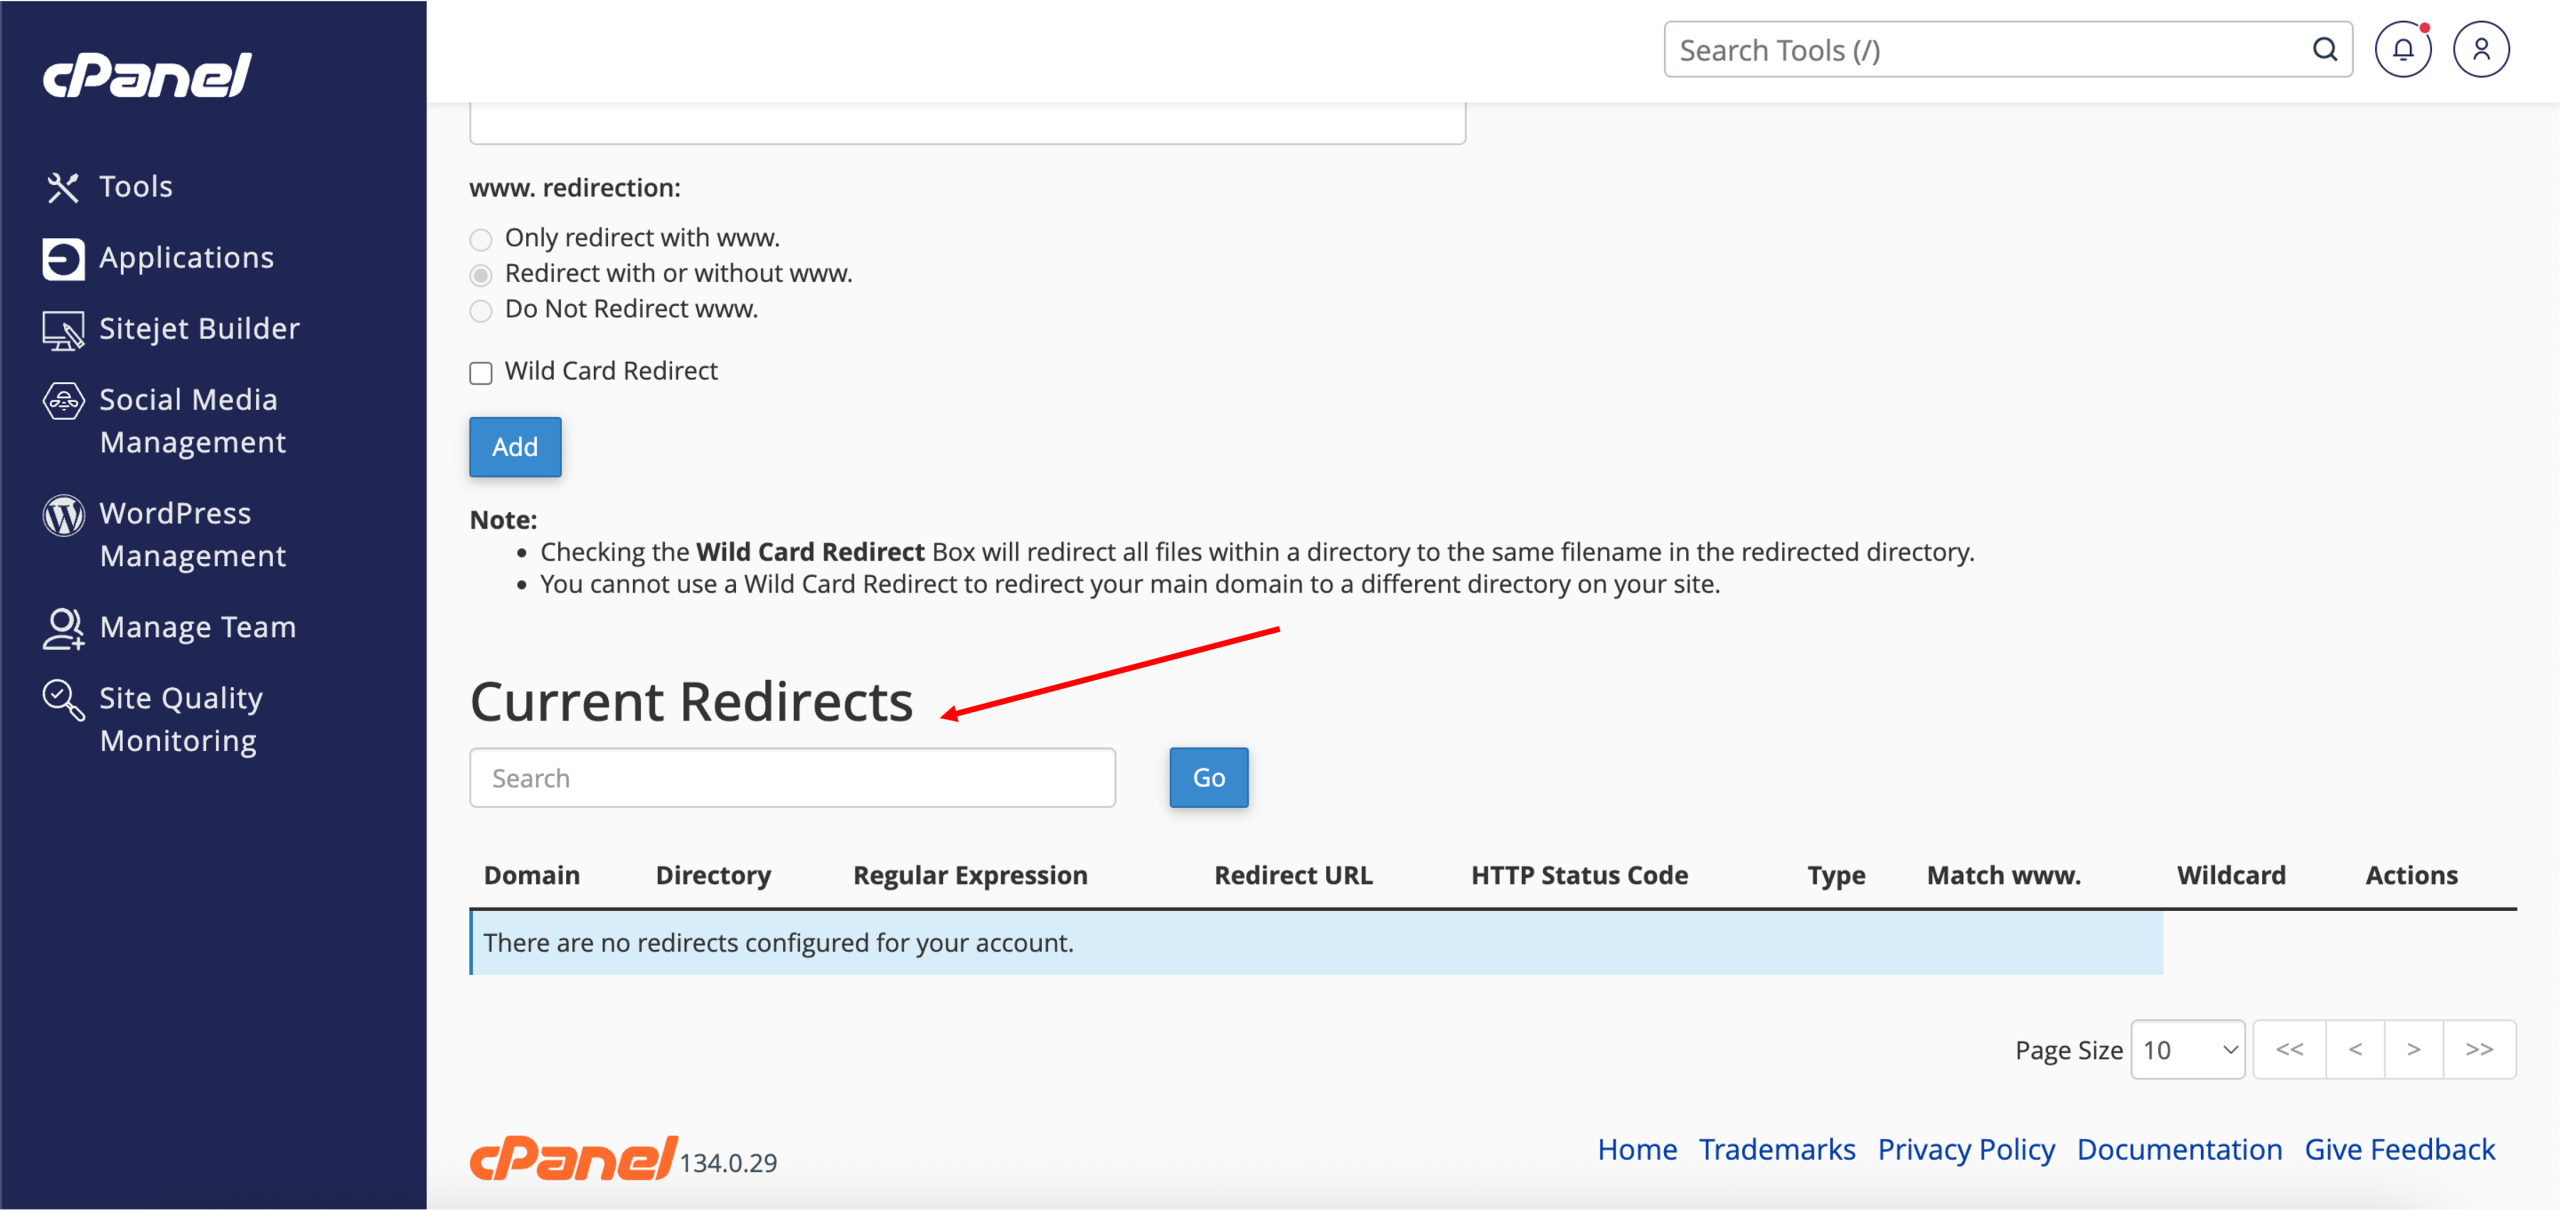
Current Redirects:
※ This section displays all existing redirects that have already been set up.
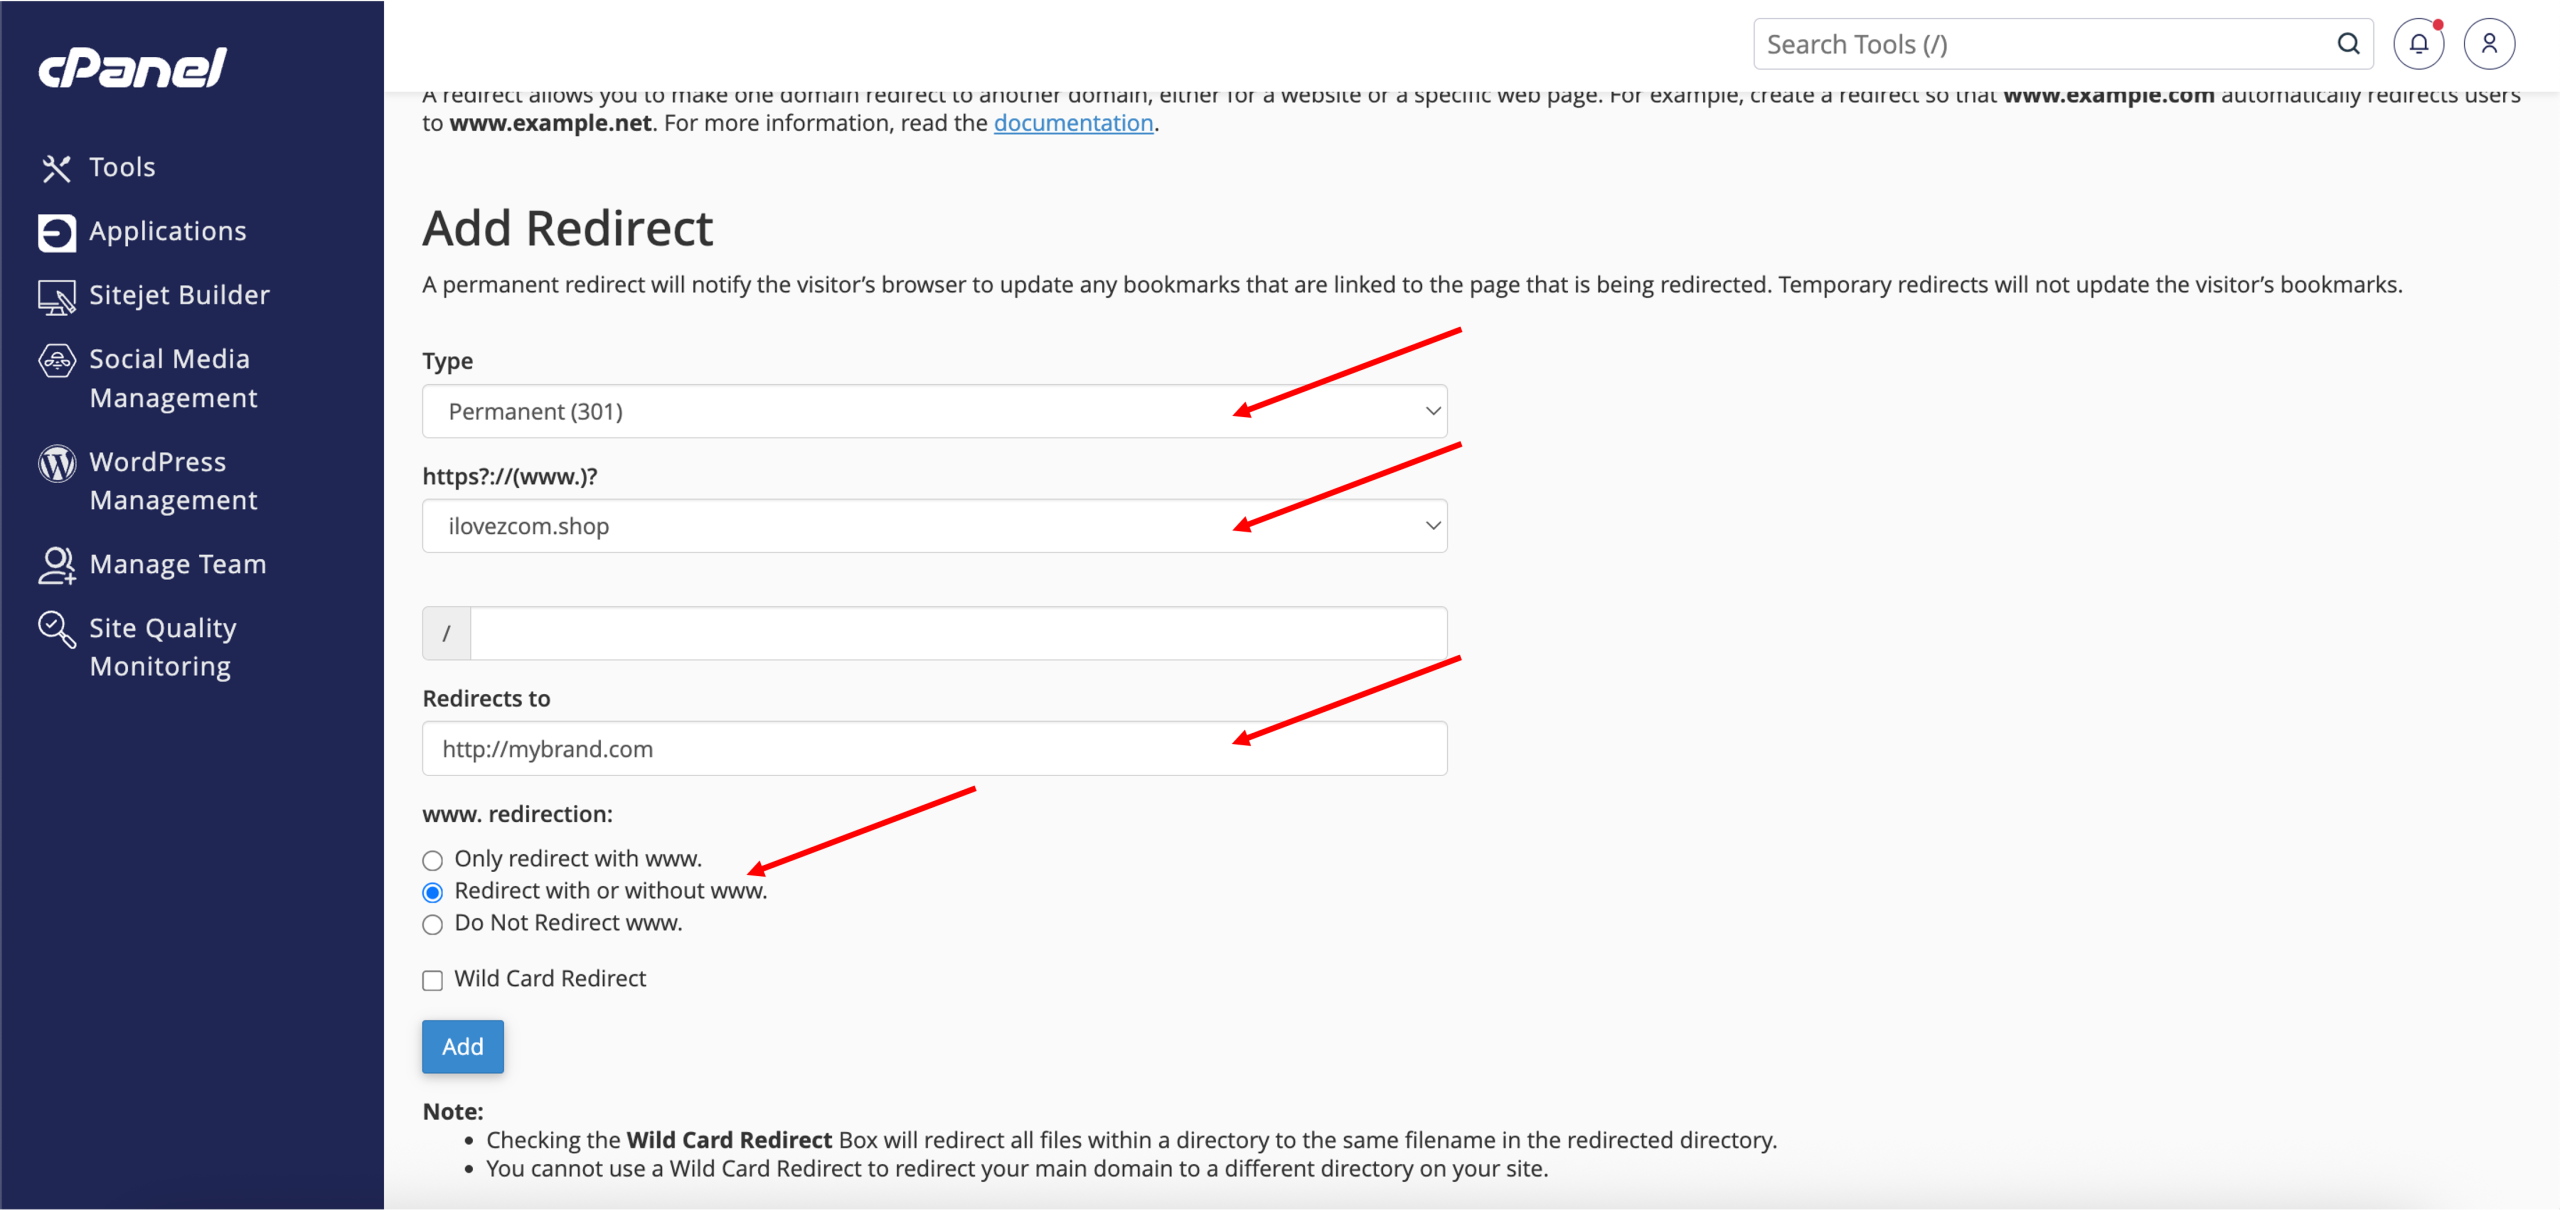
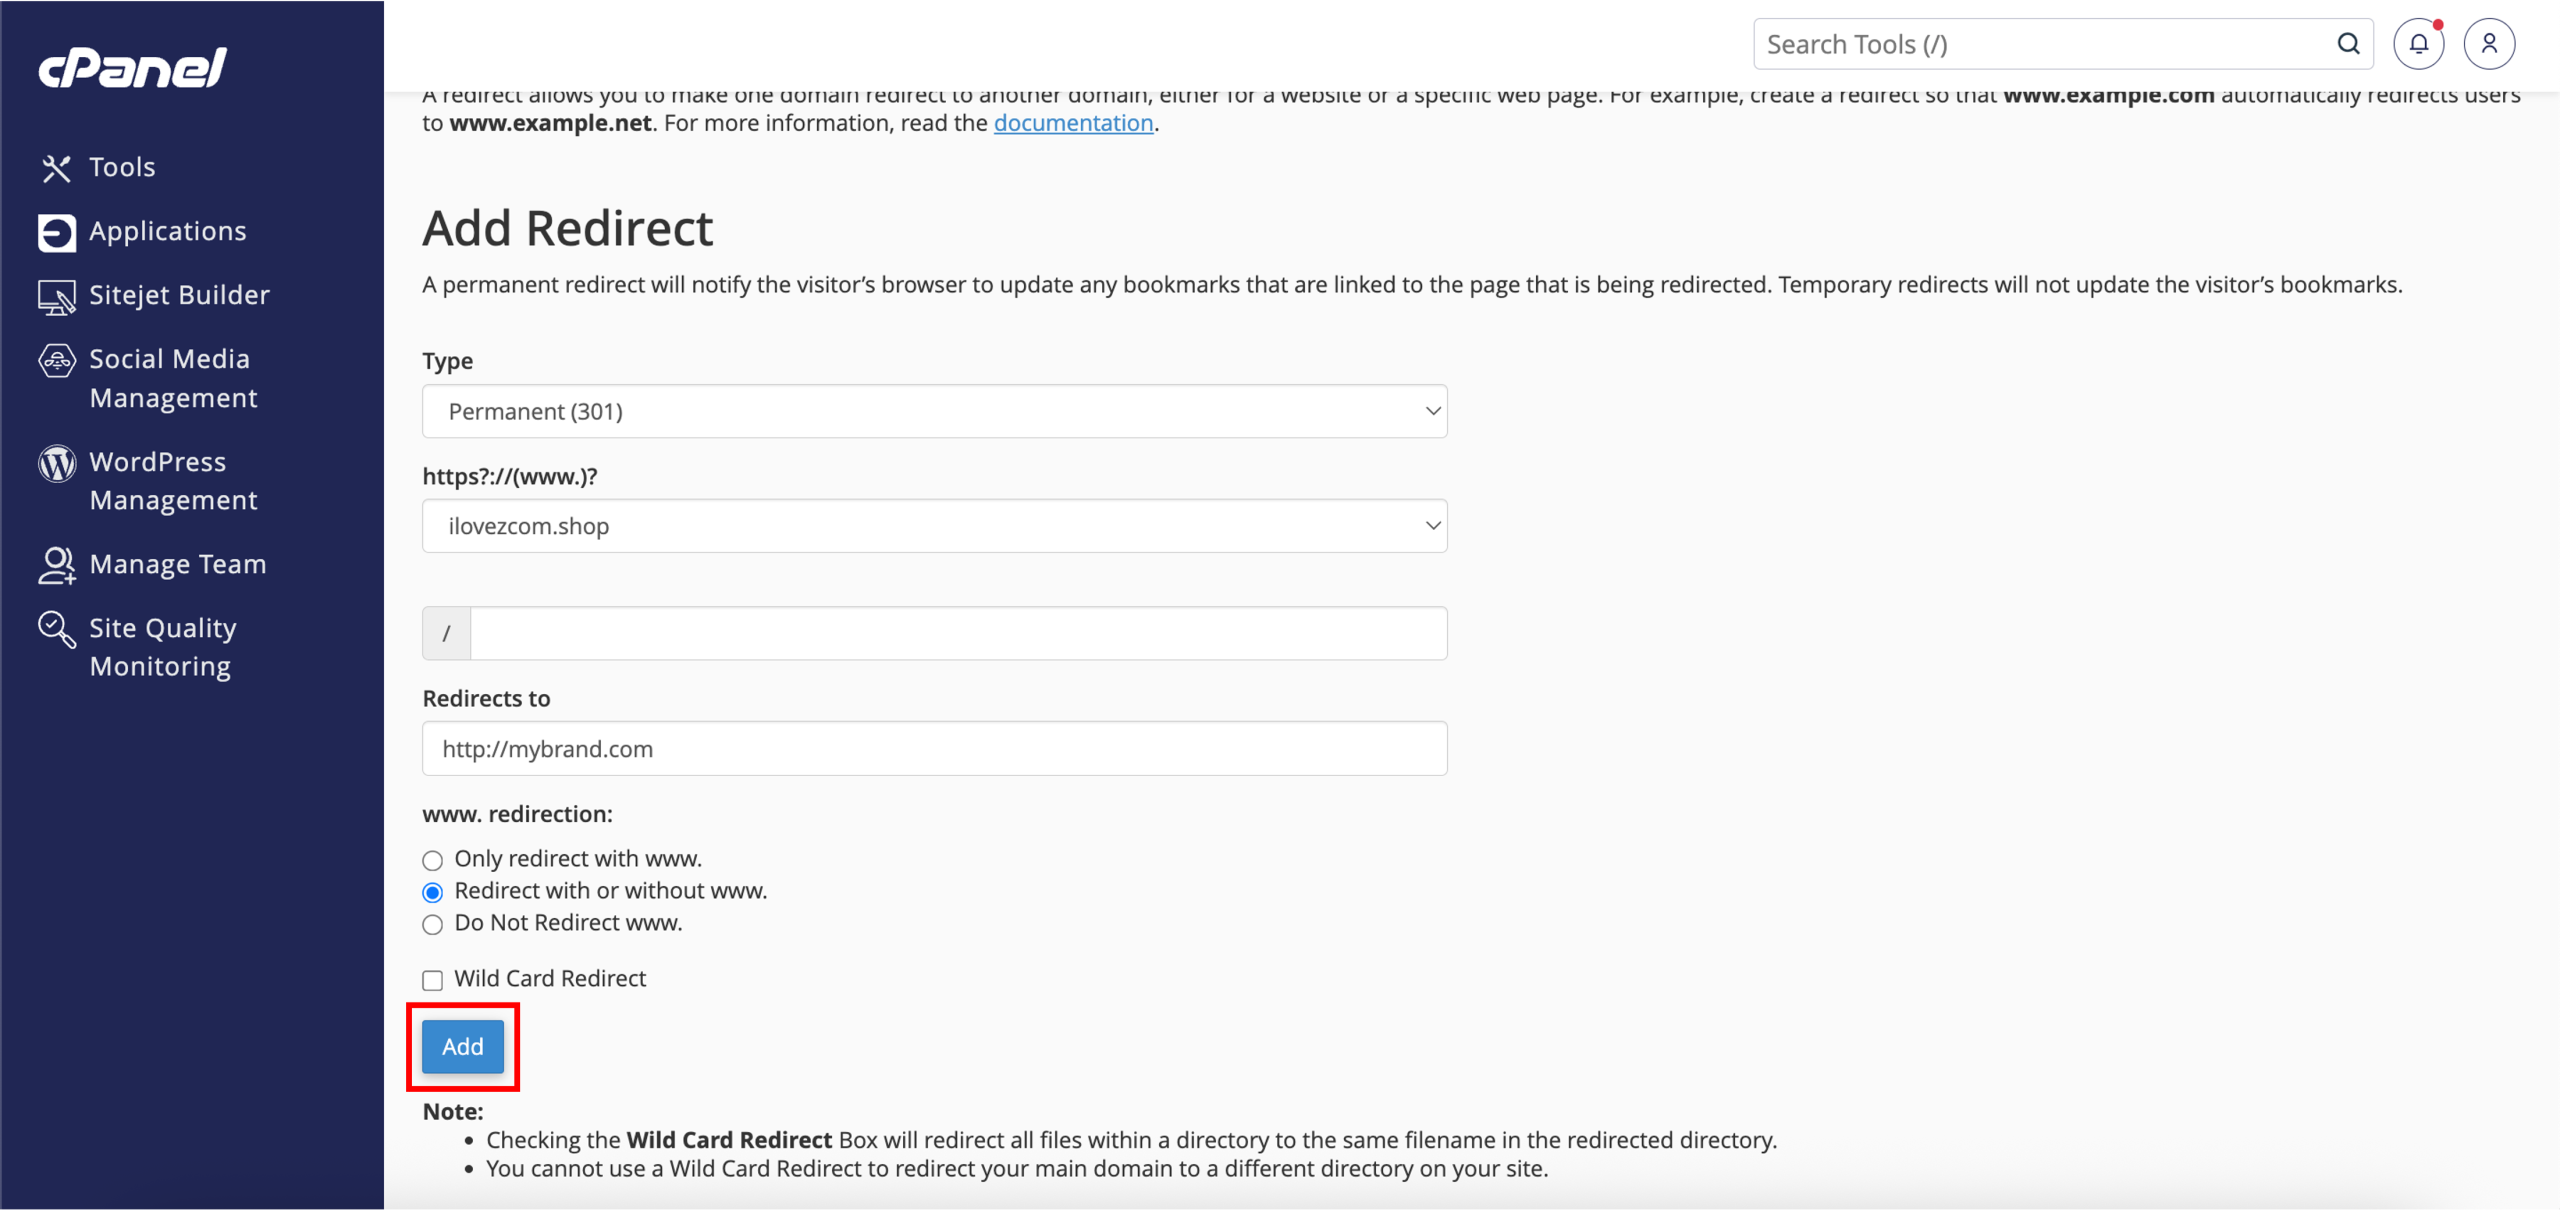
4. To set up domain redirection, scroll back up to the Add Redirect section. Configure the following settings:
• Type: From the drop-down menu, choose either a Permanent (301) redirect for a permanent URL change, or a Temporary (302) redirect for short-term purposes, such as website maintenance or temporary website migration.
• https?://(www.)?: Select the domain you want to apply the redirect to. Choose your domain (linked to the cPanel account) to apply the redirect only to your website, or select ** All Public Domains ** to apply it across all available domains on the server.
• / Directory: Also known as the folder path. This field specifies the folder to redirect to. You can safely leave it blank to apply the redirect to your entire website.
• Redirects to: This refers to the destination URL where visitors will be redirected to after accessing the source URL. Enter the full destination URL to which you would like visitors redirected (e.g., mybrand.com).
• www. redirection: Choose how your domain handles the www version.
– Only redirect with www.: Redirects only the www version of your domain.
– Redirect with or without www.: Redirects both www and non-www versions (recommended).
– Do Not Redirect www.: Keeps both versions separate with no redirection.
*Wild Card Redirect: This selection is optional. Leave this selection unchecked for standard domain redirection. Enable it only if you want all files within a directory to follow the same path on the destination website.
5. Once done, click Add.
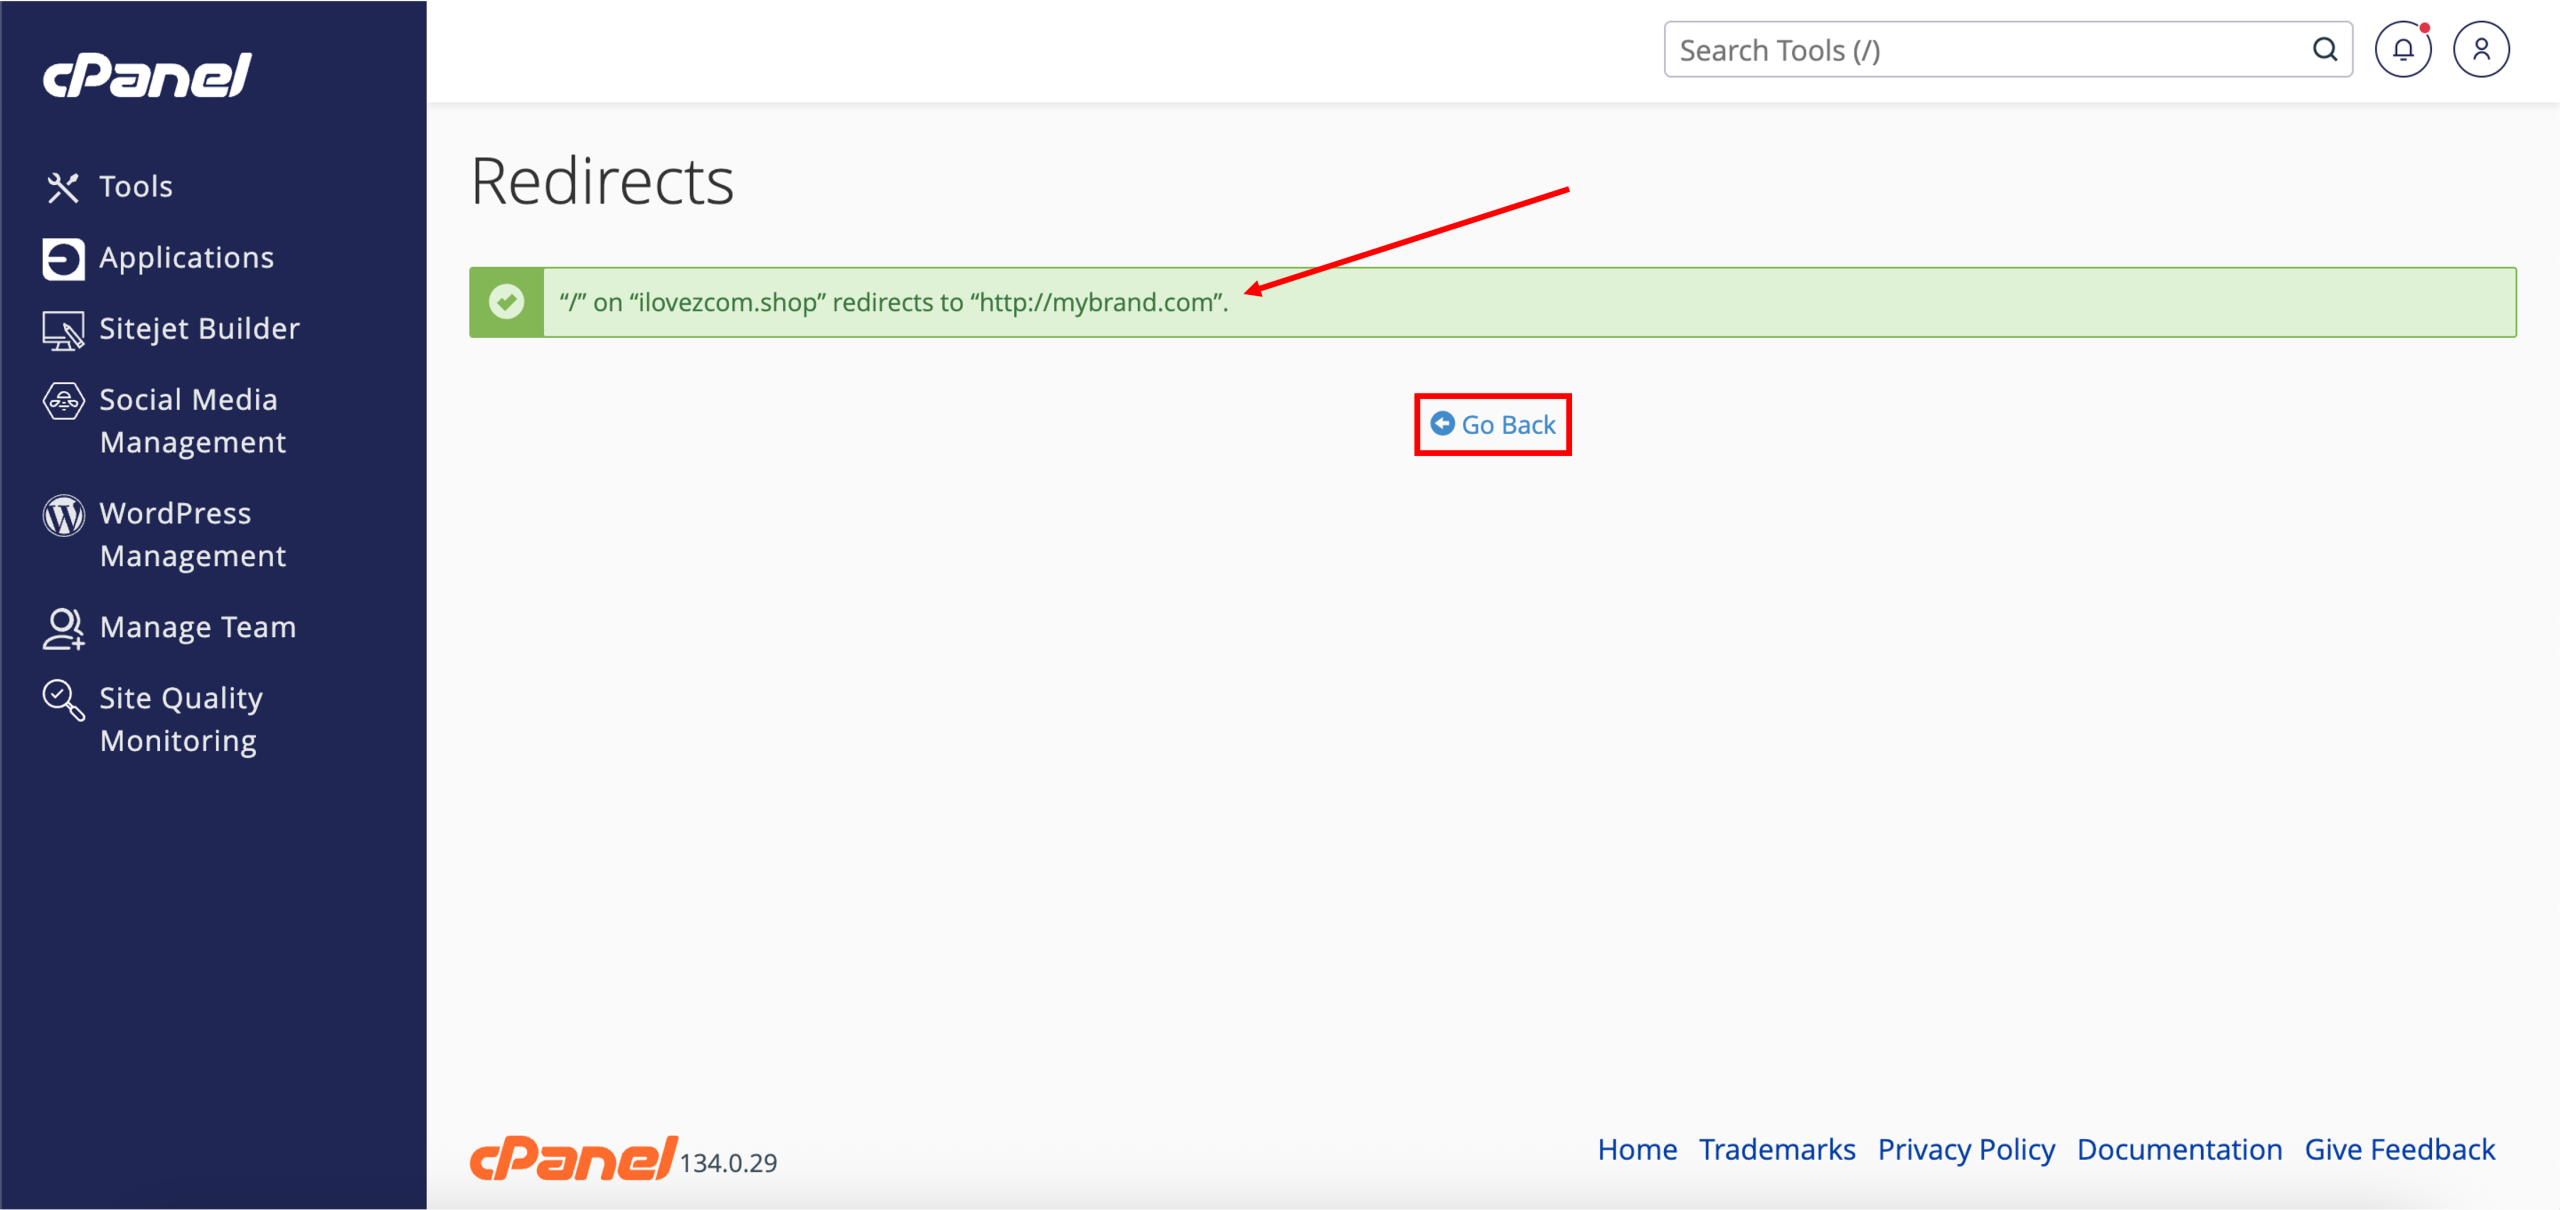
6. Done! Successfully setting up domain redirection should look like the following, with the redirects added successfully prompt. You may click Go Back to return to the Redirects page.
7. Scroll down to the Current Redirects section to view all existing redirects and their configuration settings. You can also Delete any redirect from this section if needed.
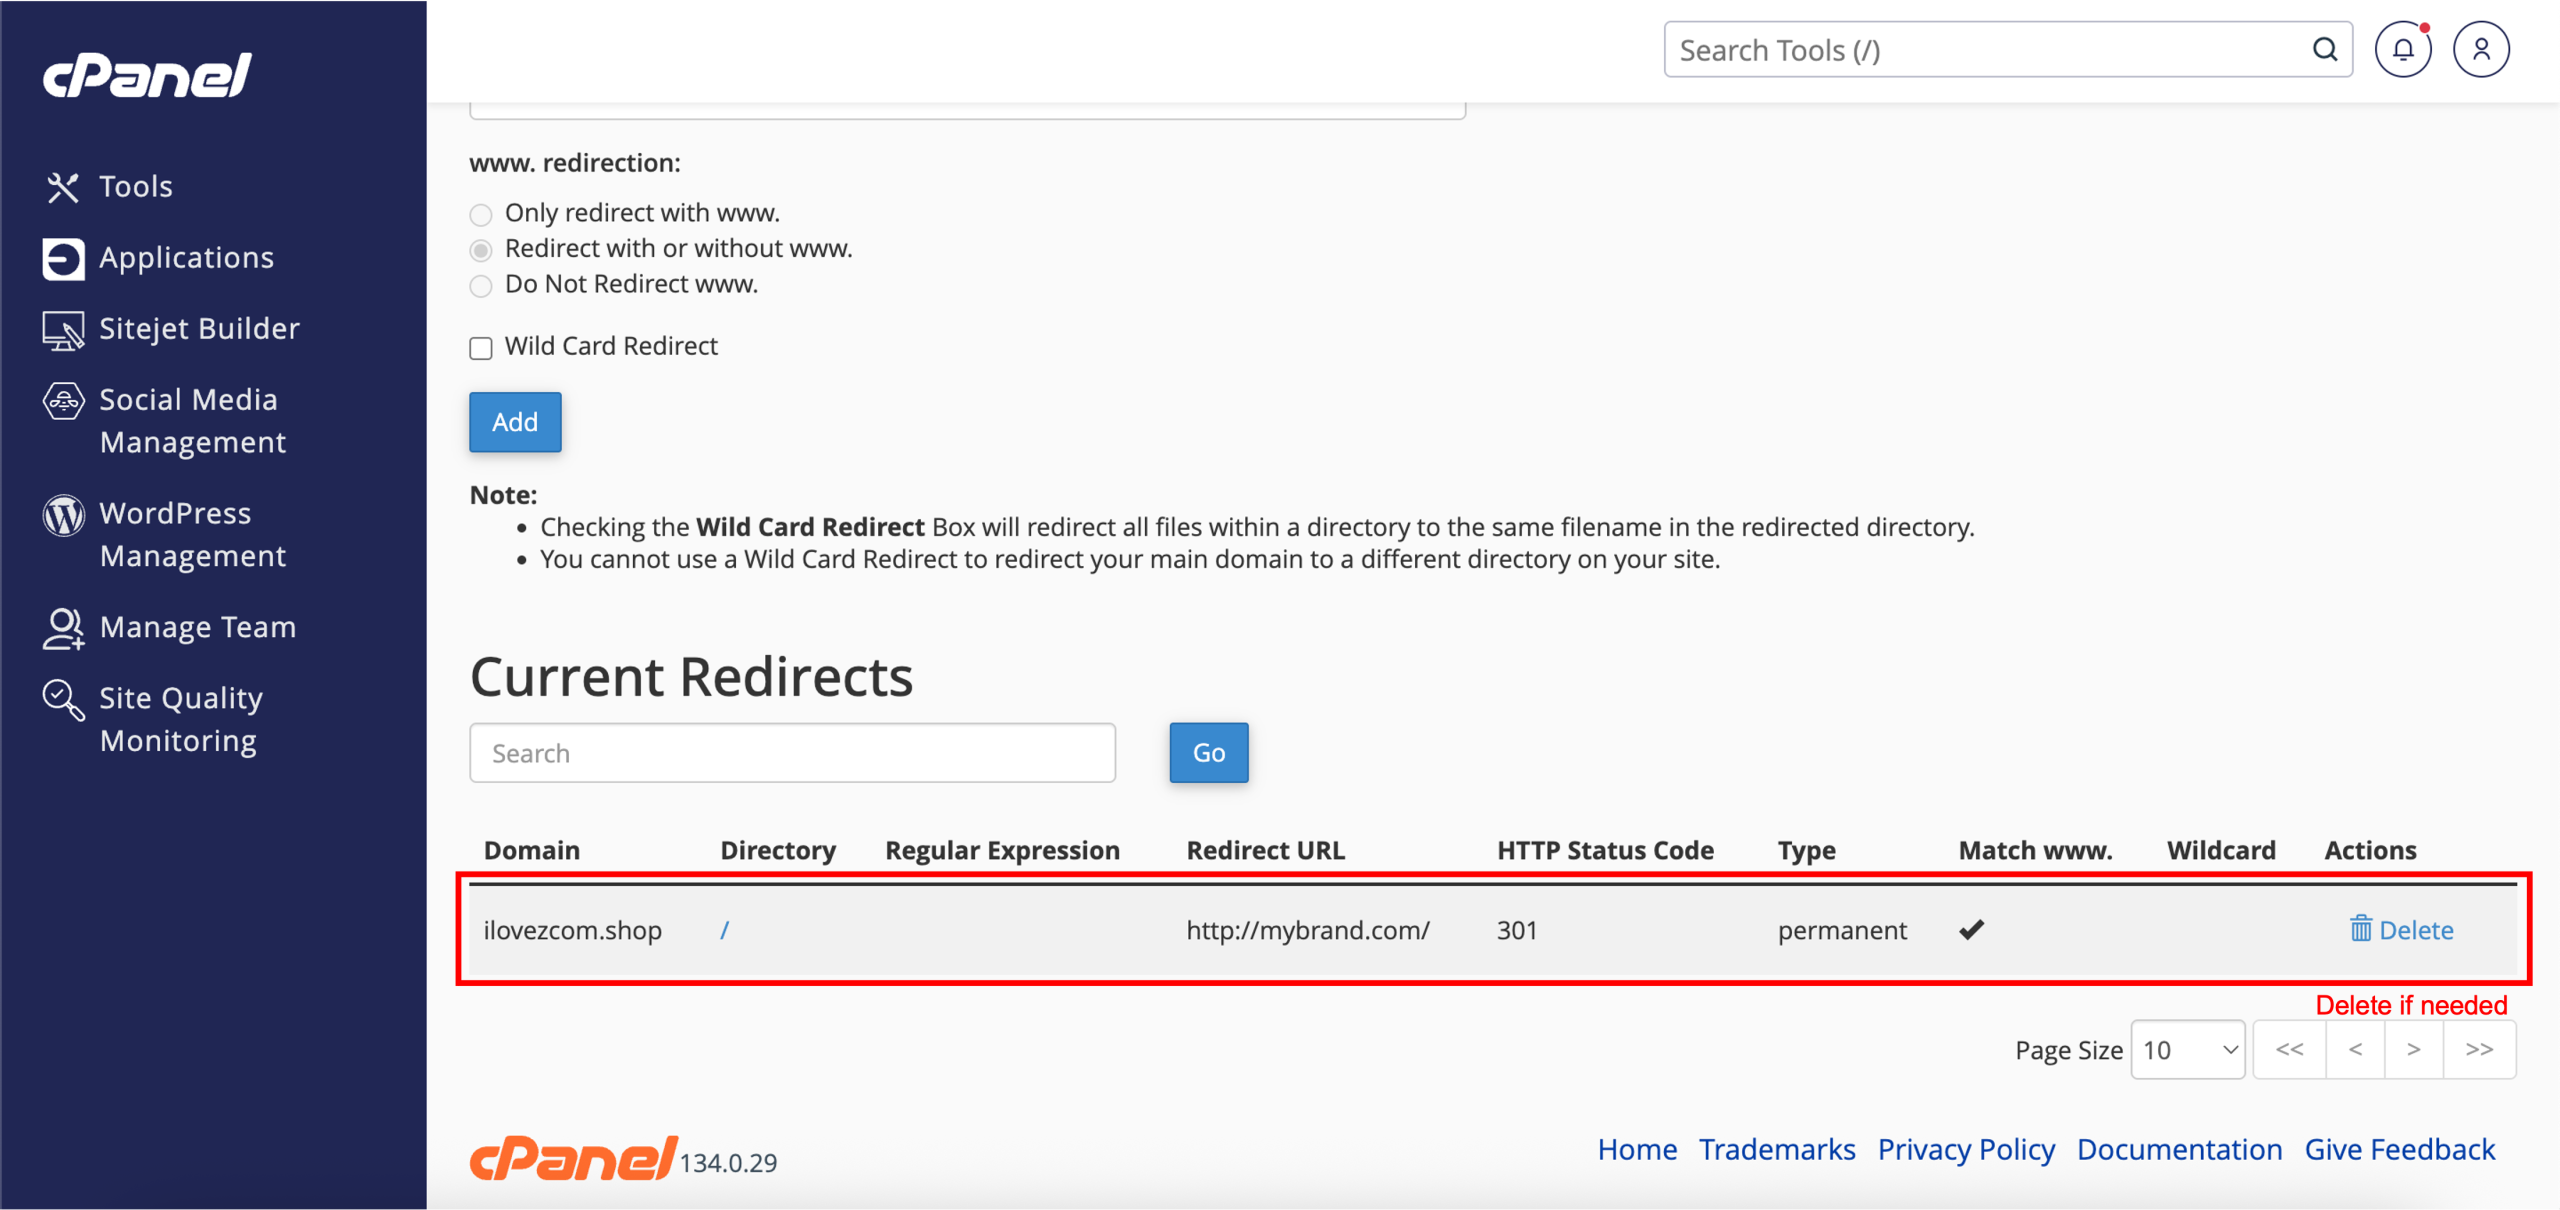
Note: Even after deleting a redirect, some visitors may still experience it due to cached browser data. In such cases, clearing the web browser cache may help remove the stored redirect.