
Example :
How to set up an email or change my account settings.
- Help Center
- WordPress Hosting
- Websites
- How to access and manage files using the File Manager in WordPress hosting
How to access and manage files using the File Manager in WordPress hosting
File Manager lets you view and manage your website files and folders directly in your WordPress hosting control panel, without the need for additional tools like FTP.
Through File Manager, you can perform basic actions such as uploading files, creating folders, editing files, and deleting unnecessary items. This makes it a convenient way to manage your website content in one place.
This guide shows you how to access the File Manager and use it to manage your website’s files and folders.
Note:
• If you do not yet have a WordPress hosting plan, you can compare the available plans that we currently offer on our WordPress hosting page and choose the one that best suits your needs.
• File Manager can be accessed via the Z.com Client Area under your WordPress hosting service.
• Changes made in File Manager may affect your website immediately.
• Avoid modifying or deleting core WordPress files unless necessary, as this may affect your website functionality. It is recommended to back up your website before making any file changes.
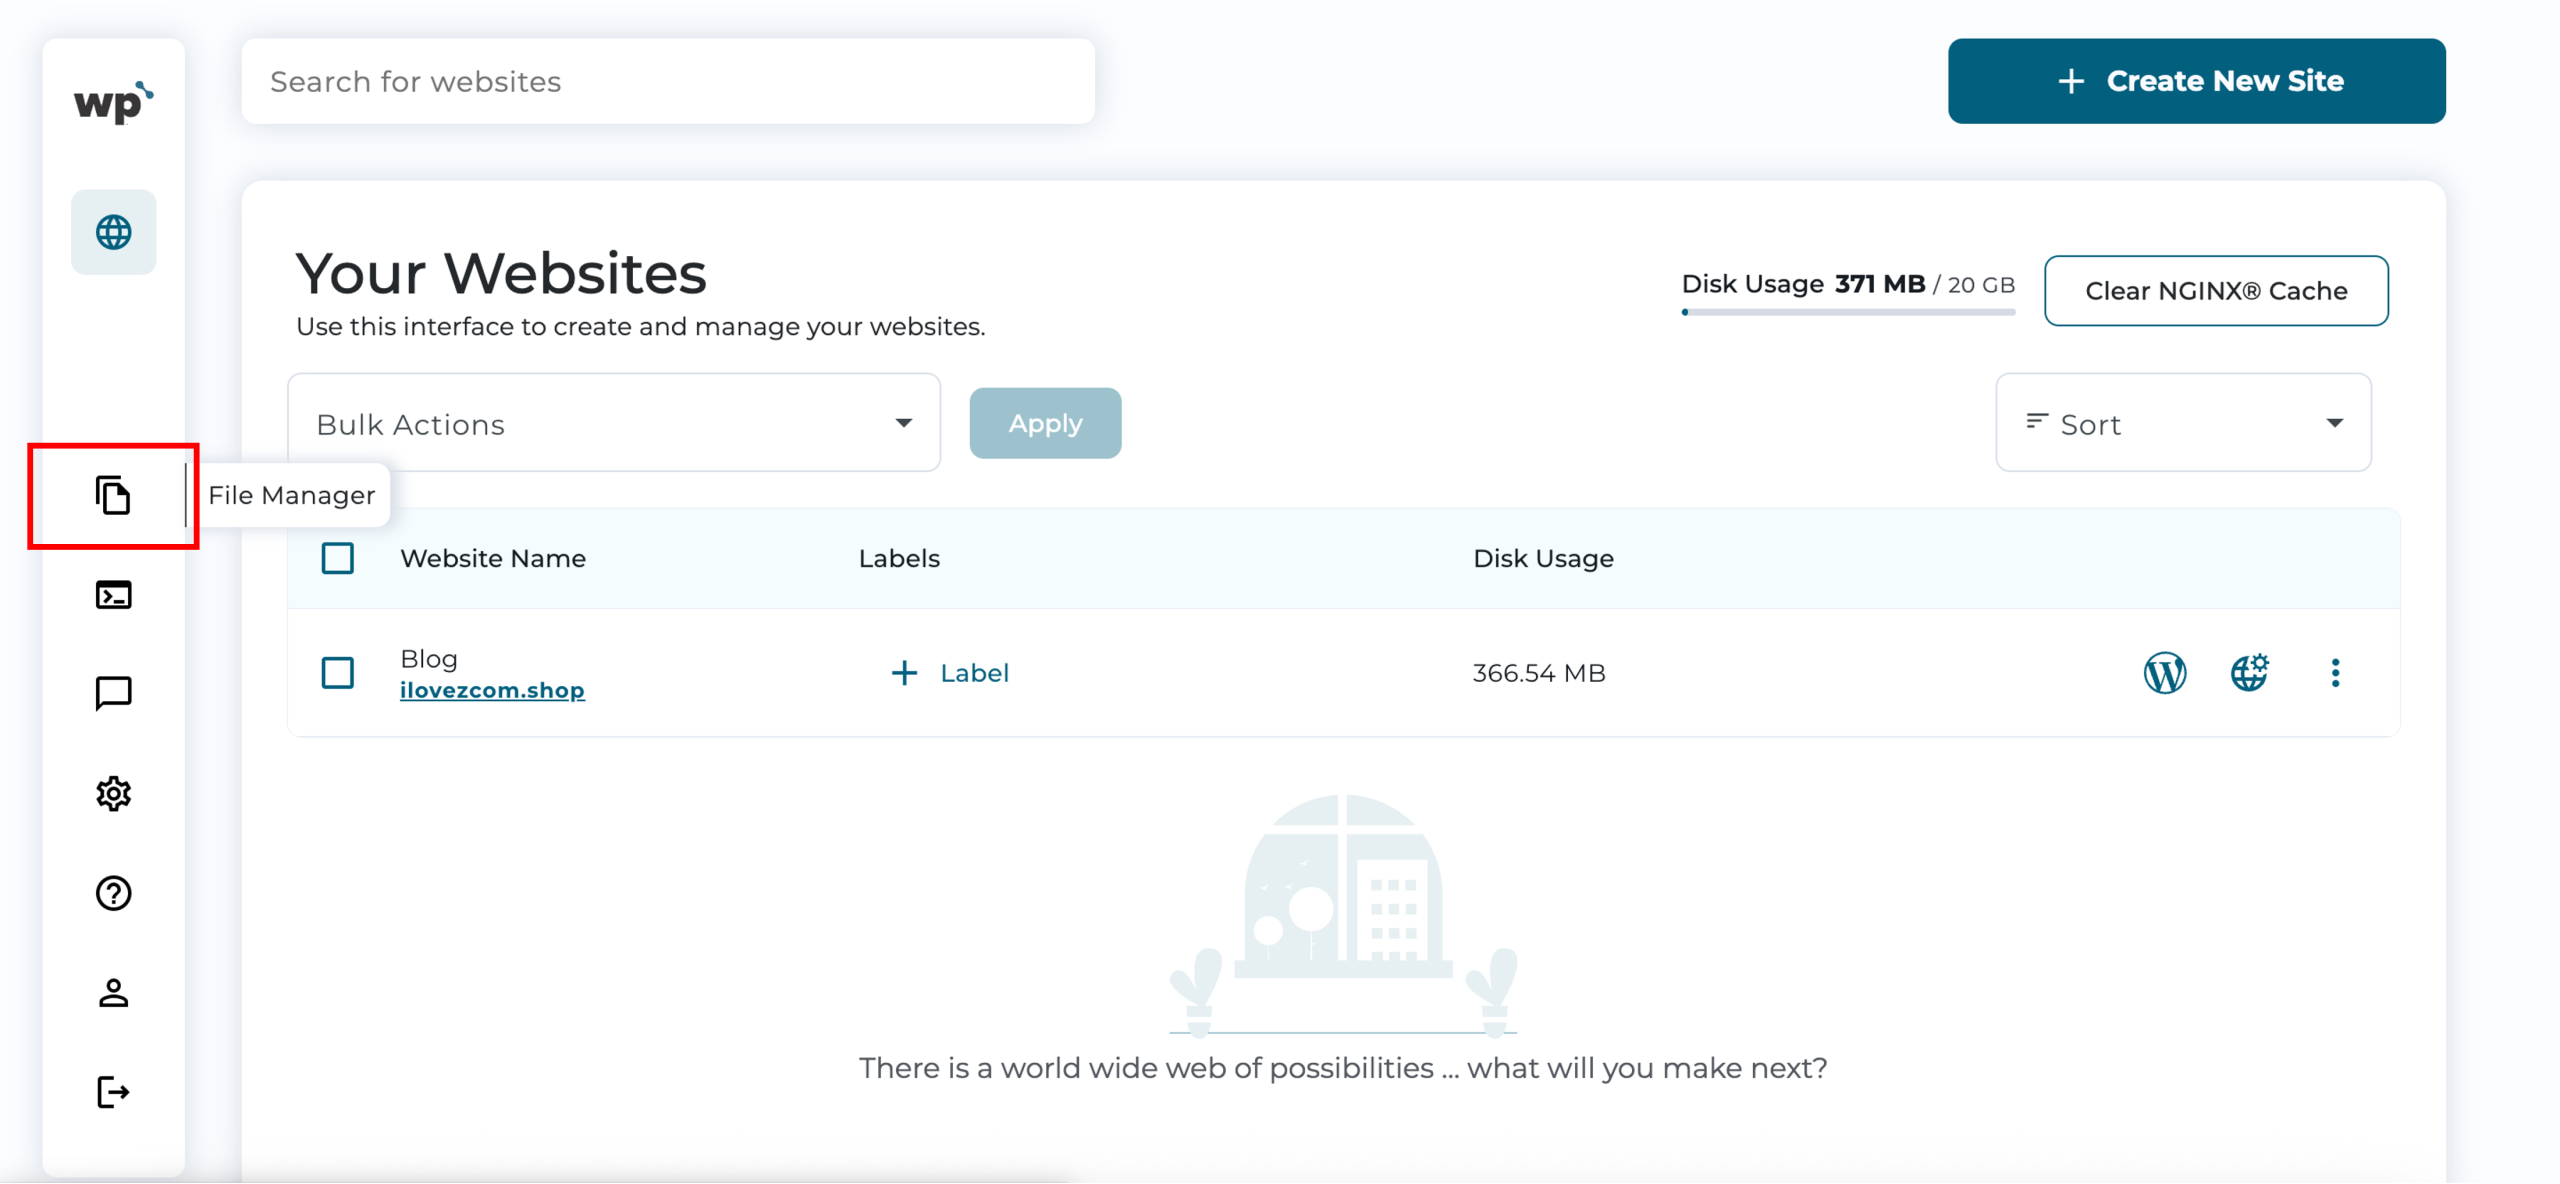
1. Upon reaching your WP Squared dashboard, click File Manager from the left sidebar.
2. A new tab will open, directing you to the WP Squared File Manager interface, where you can manage your website files.
Once inside, you will see several folders and files related to your WordPress website. To help you avoid modifying or deleting important website files accidentally, below are some commonly used WordPress directories and files you should be familiar with:
• public_html – The main directory where your WordPress website files are usually installed.
• wp-content – Contains your website themes, plugins, uploads, and media files.
• wp-admin – Contains files required for the WordPress admin dashboard.
• wp-includes – Contains core WordPress system files and functions.
• wp-config.php – The main WordPress configuration file containing your website settings and database connection details.
• .htaccess – A configuration file used to control website settings such as redirects and permalink structure.
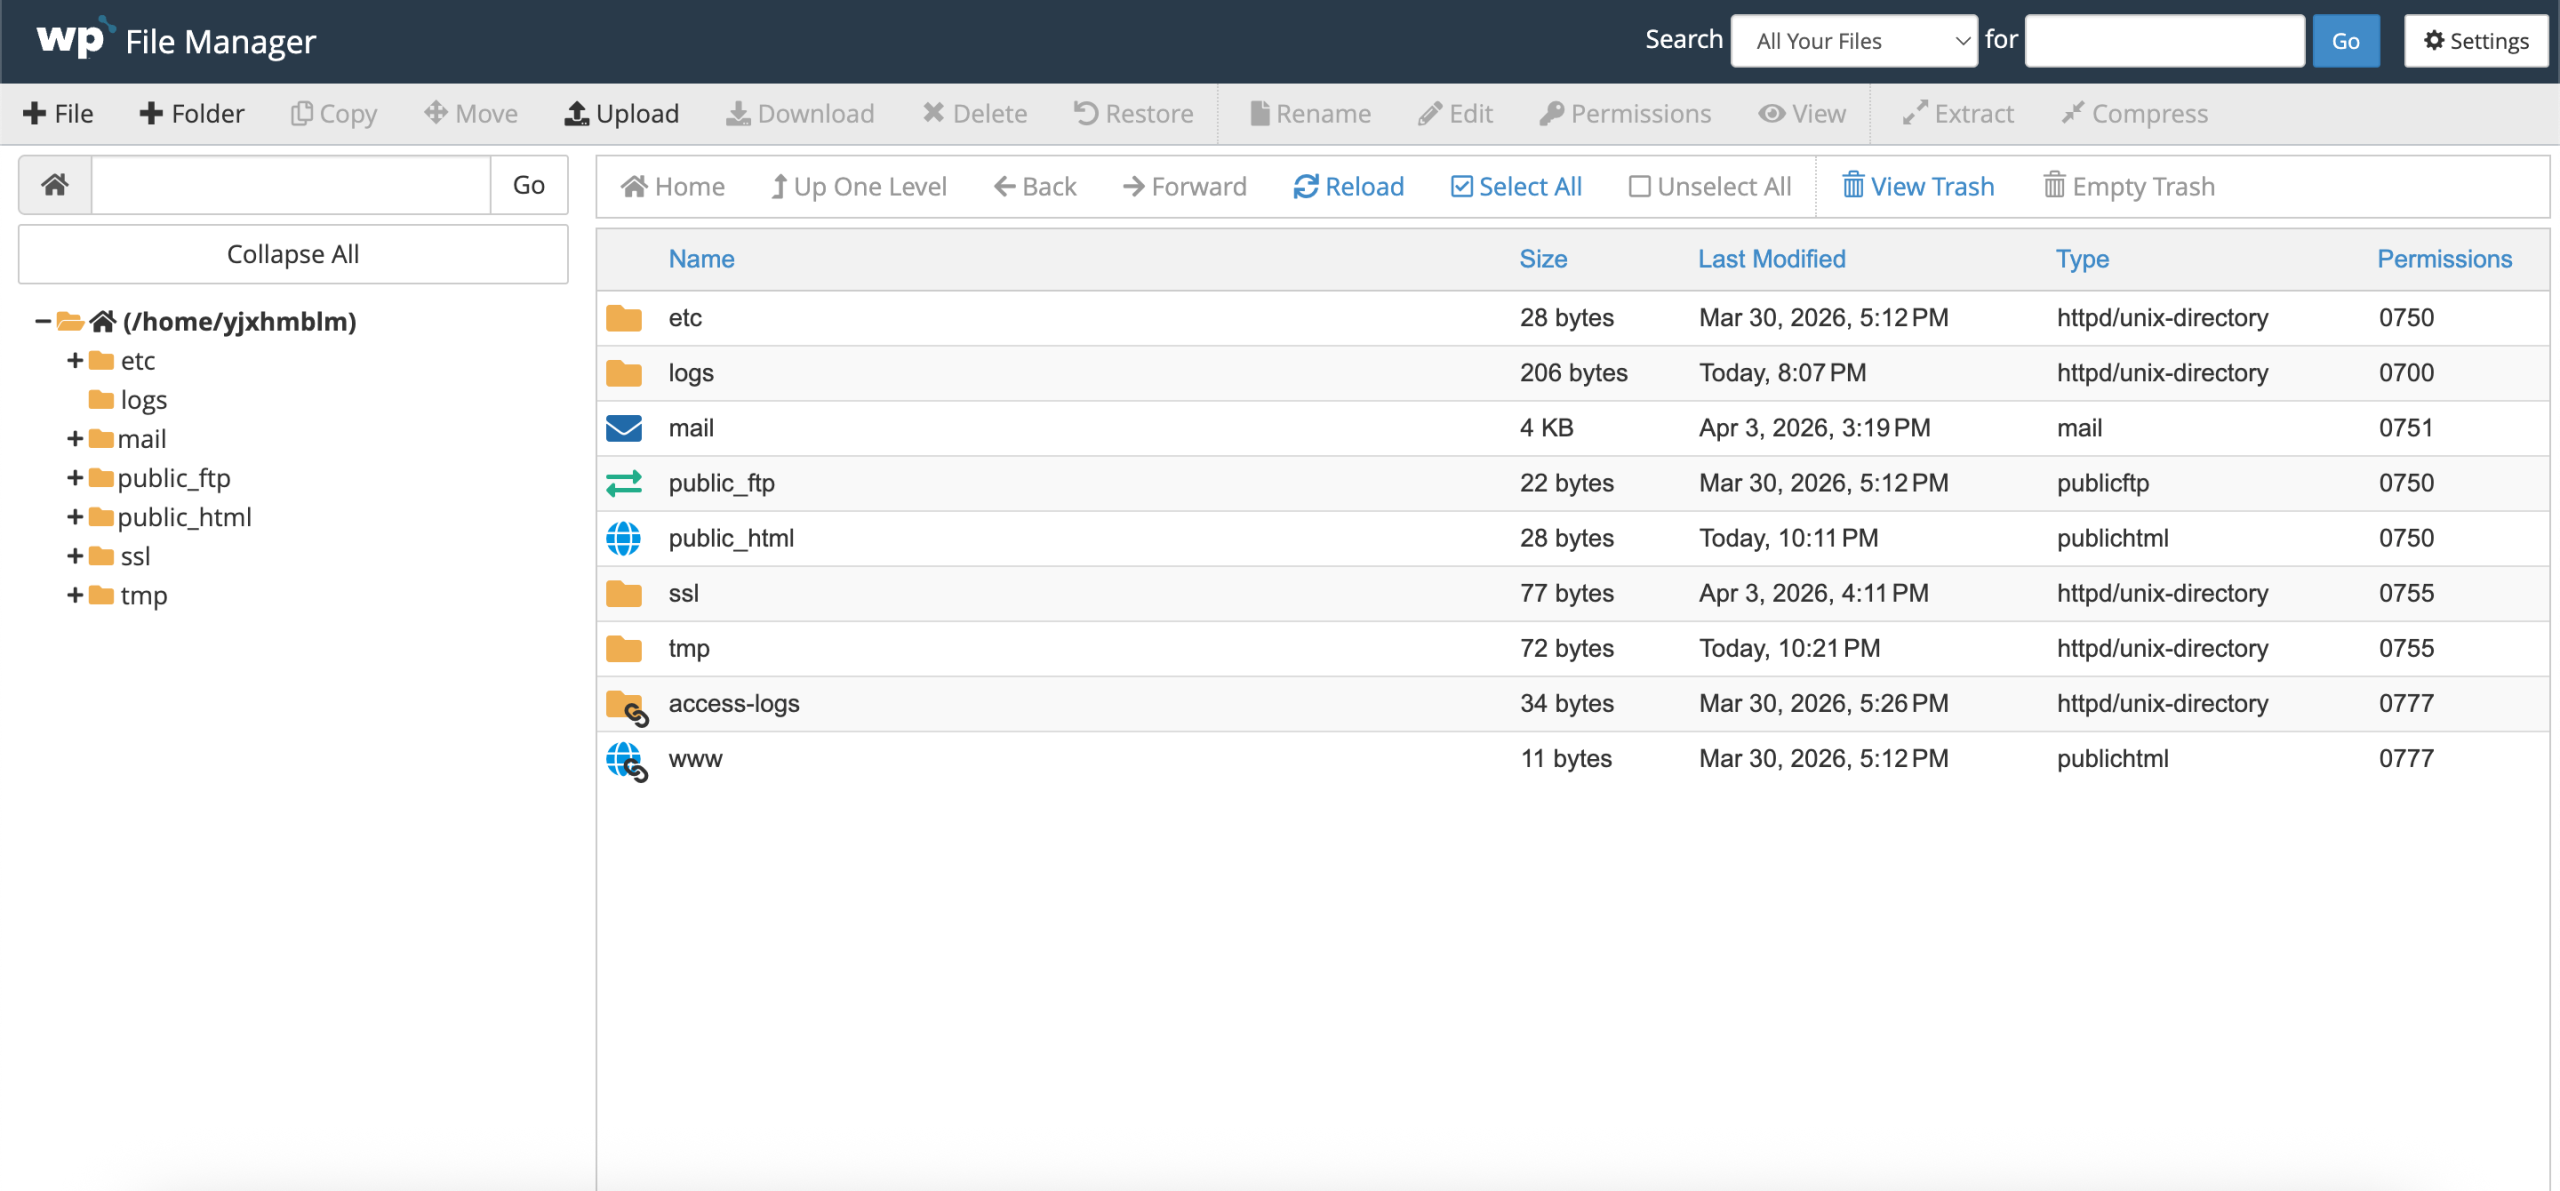
3. Once inside File Manager, you can perform the following actions:
– Upload files
– Create a new folder
– Edit a file
– Delete a file or folder
– Rename a file or folder
Upload files
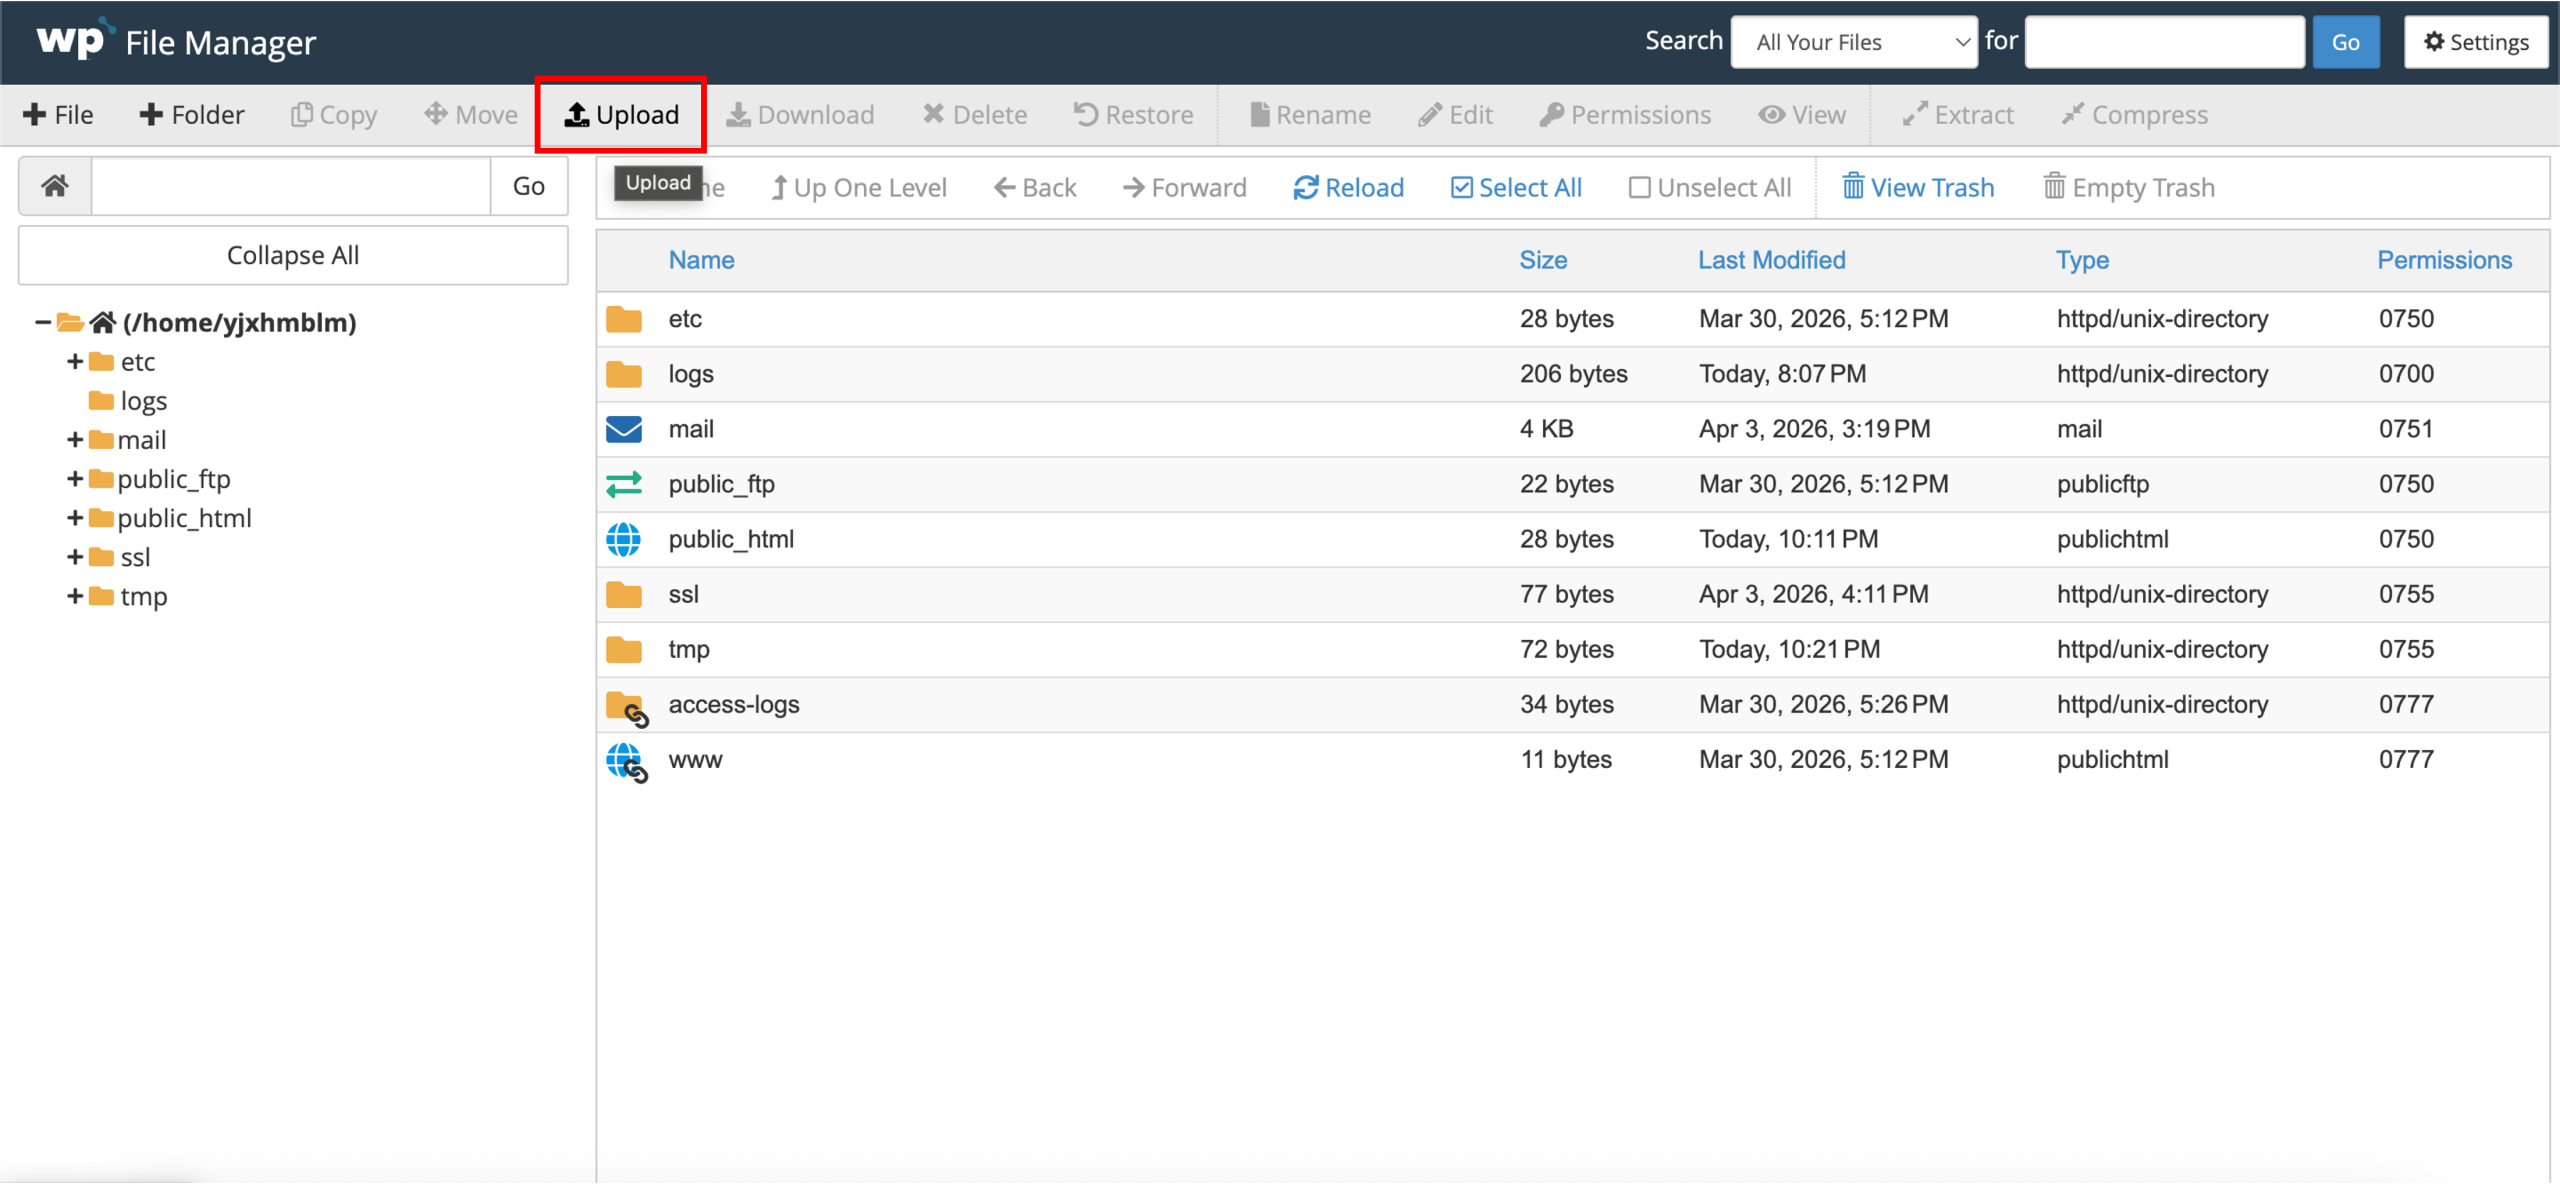
1. On the top navigation bar, click Upload.
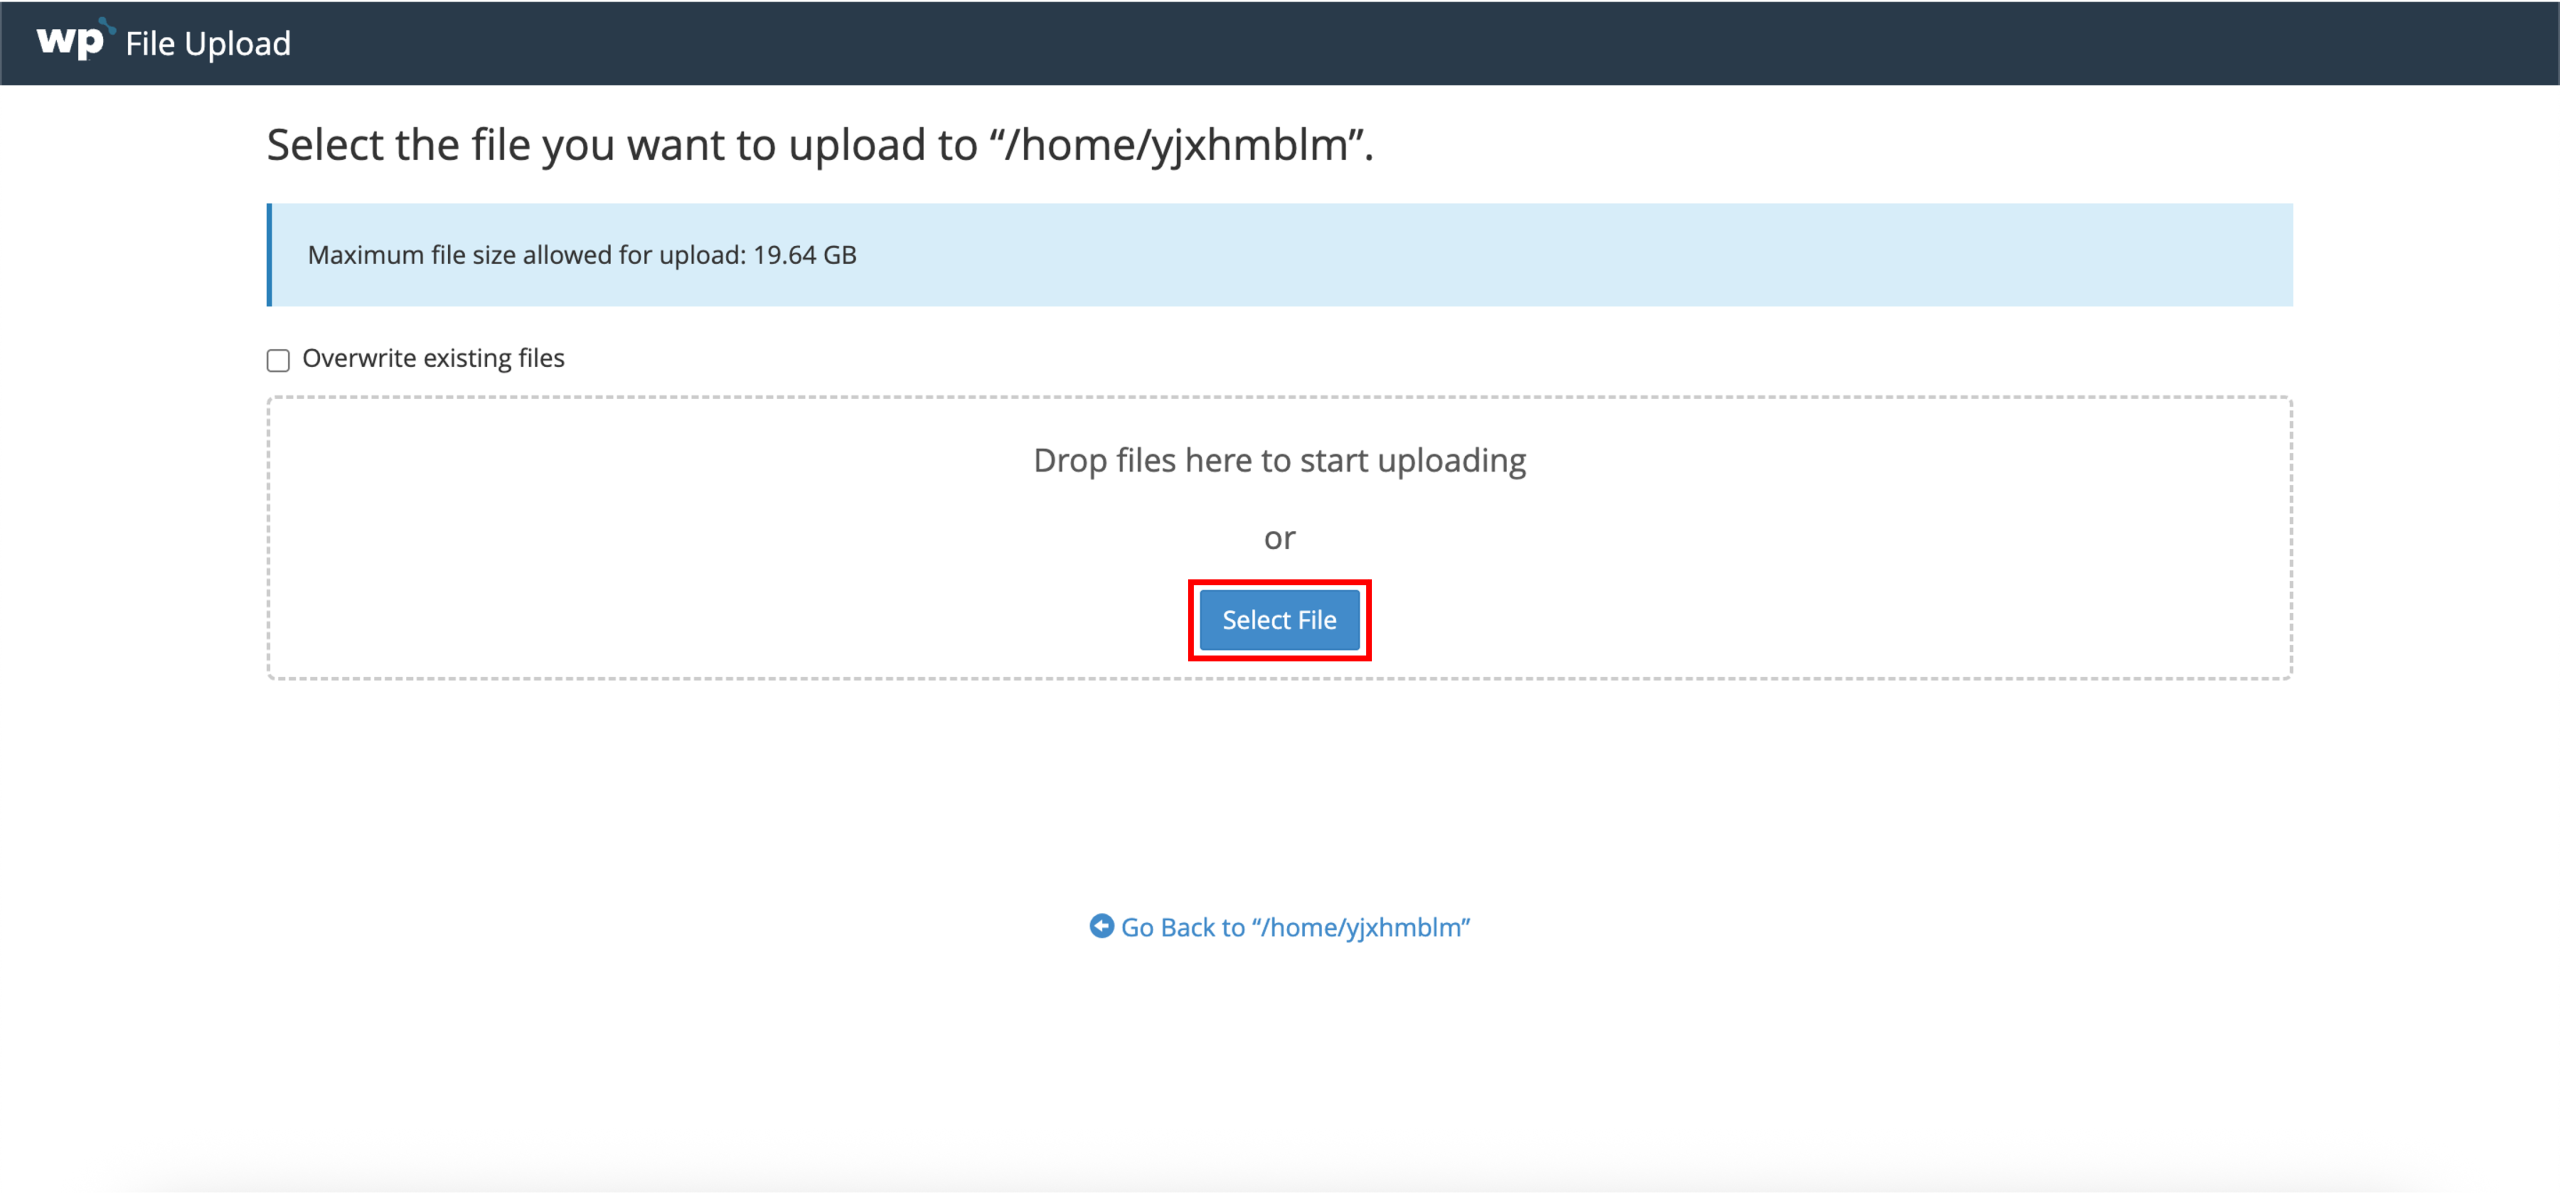
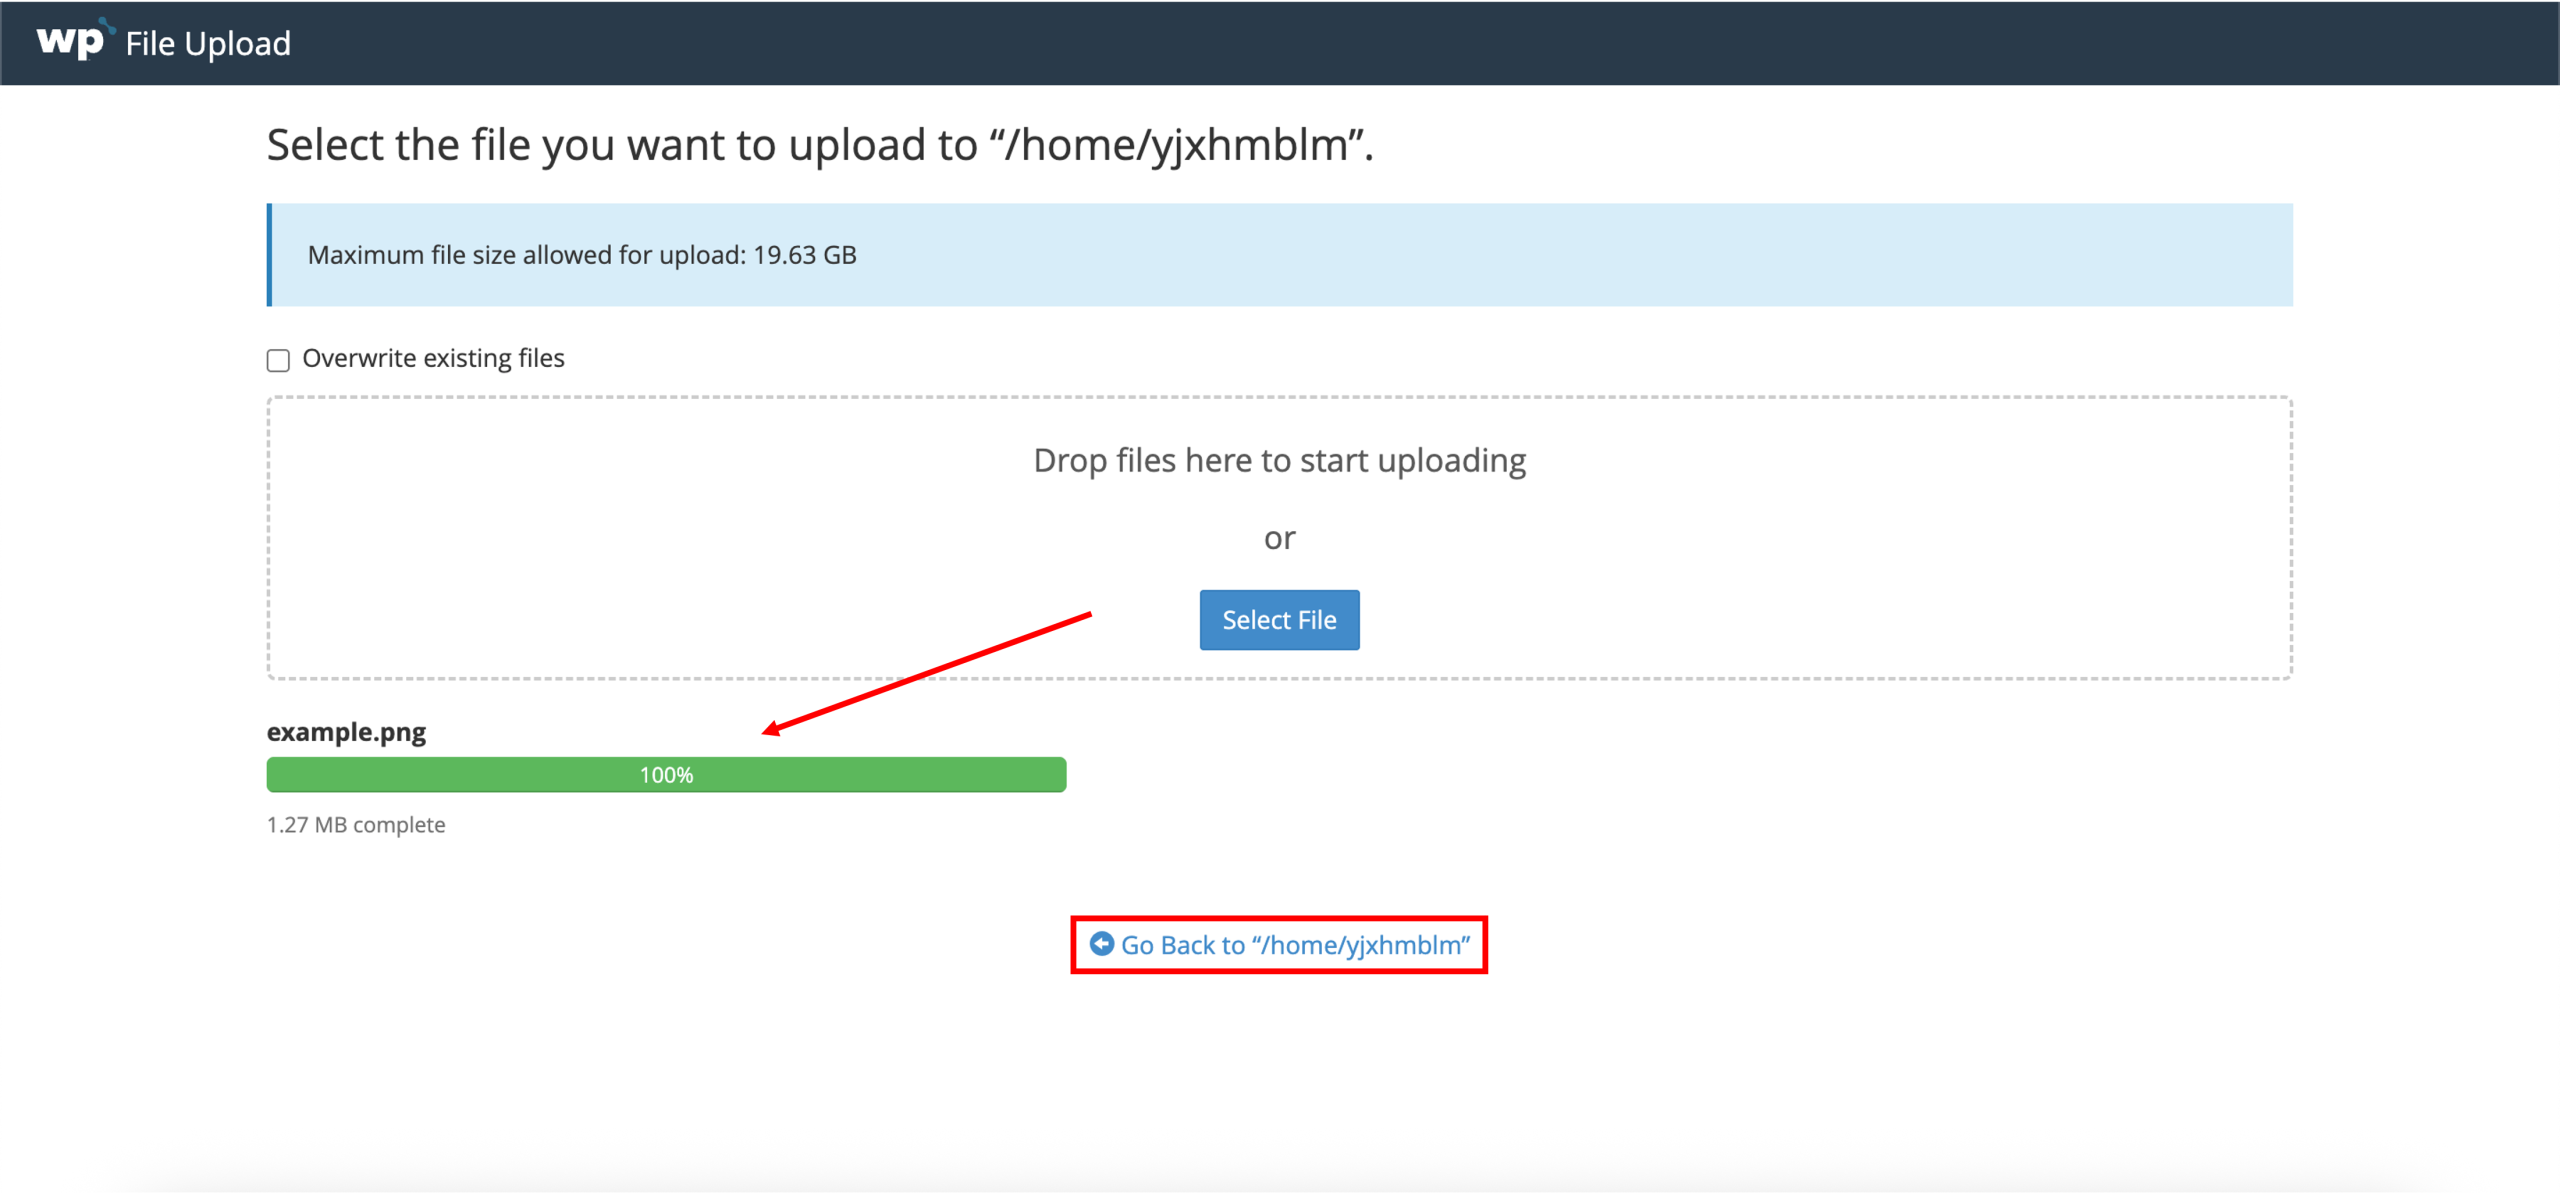
2. A new tab will open, directing you to the WP Squared File Manager File Upload interface. Click Select File to select files from your computer, or drag files into the box to start uploading.
3. Wait for the upload to complete. Successfully uploading files should look like the following, showing 100% completion. You may click Go Back to return to the File Manager interface directly.
Create a new folder
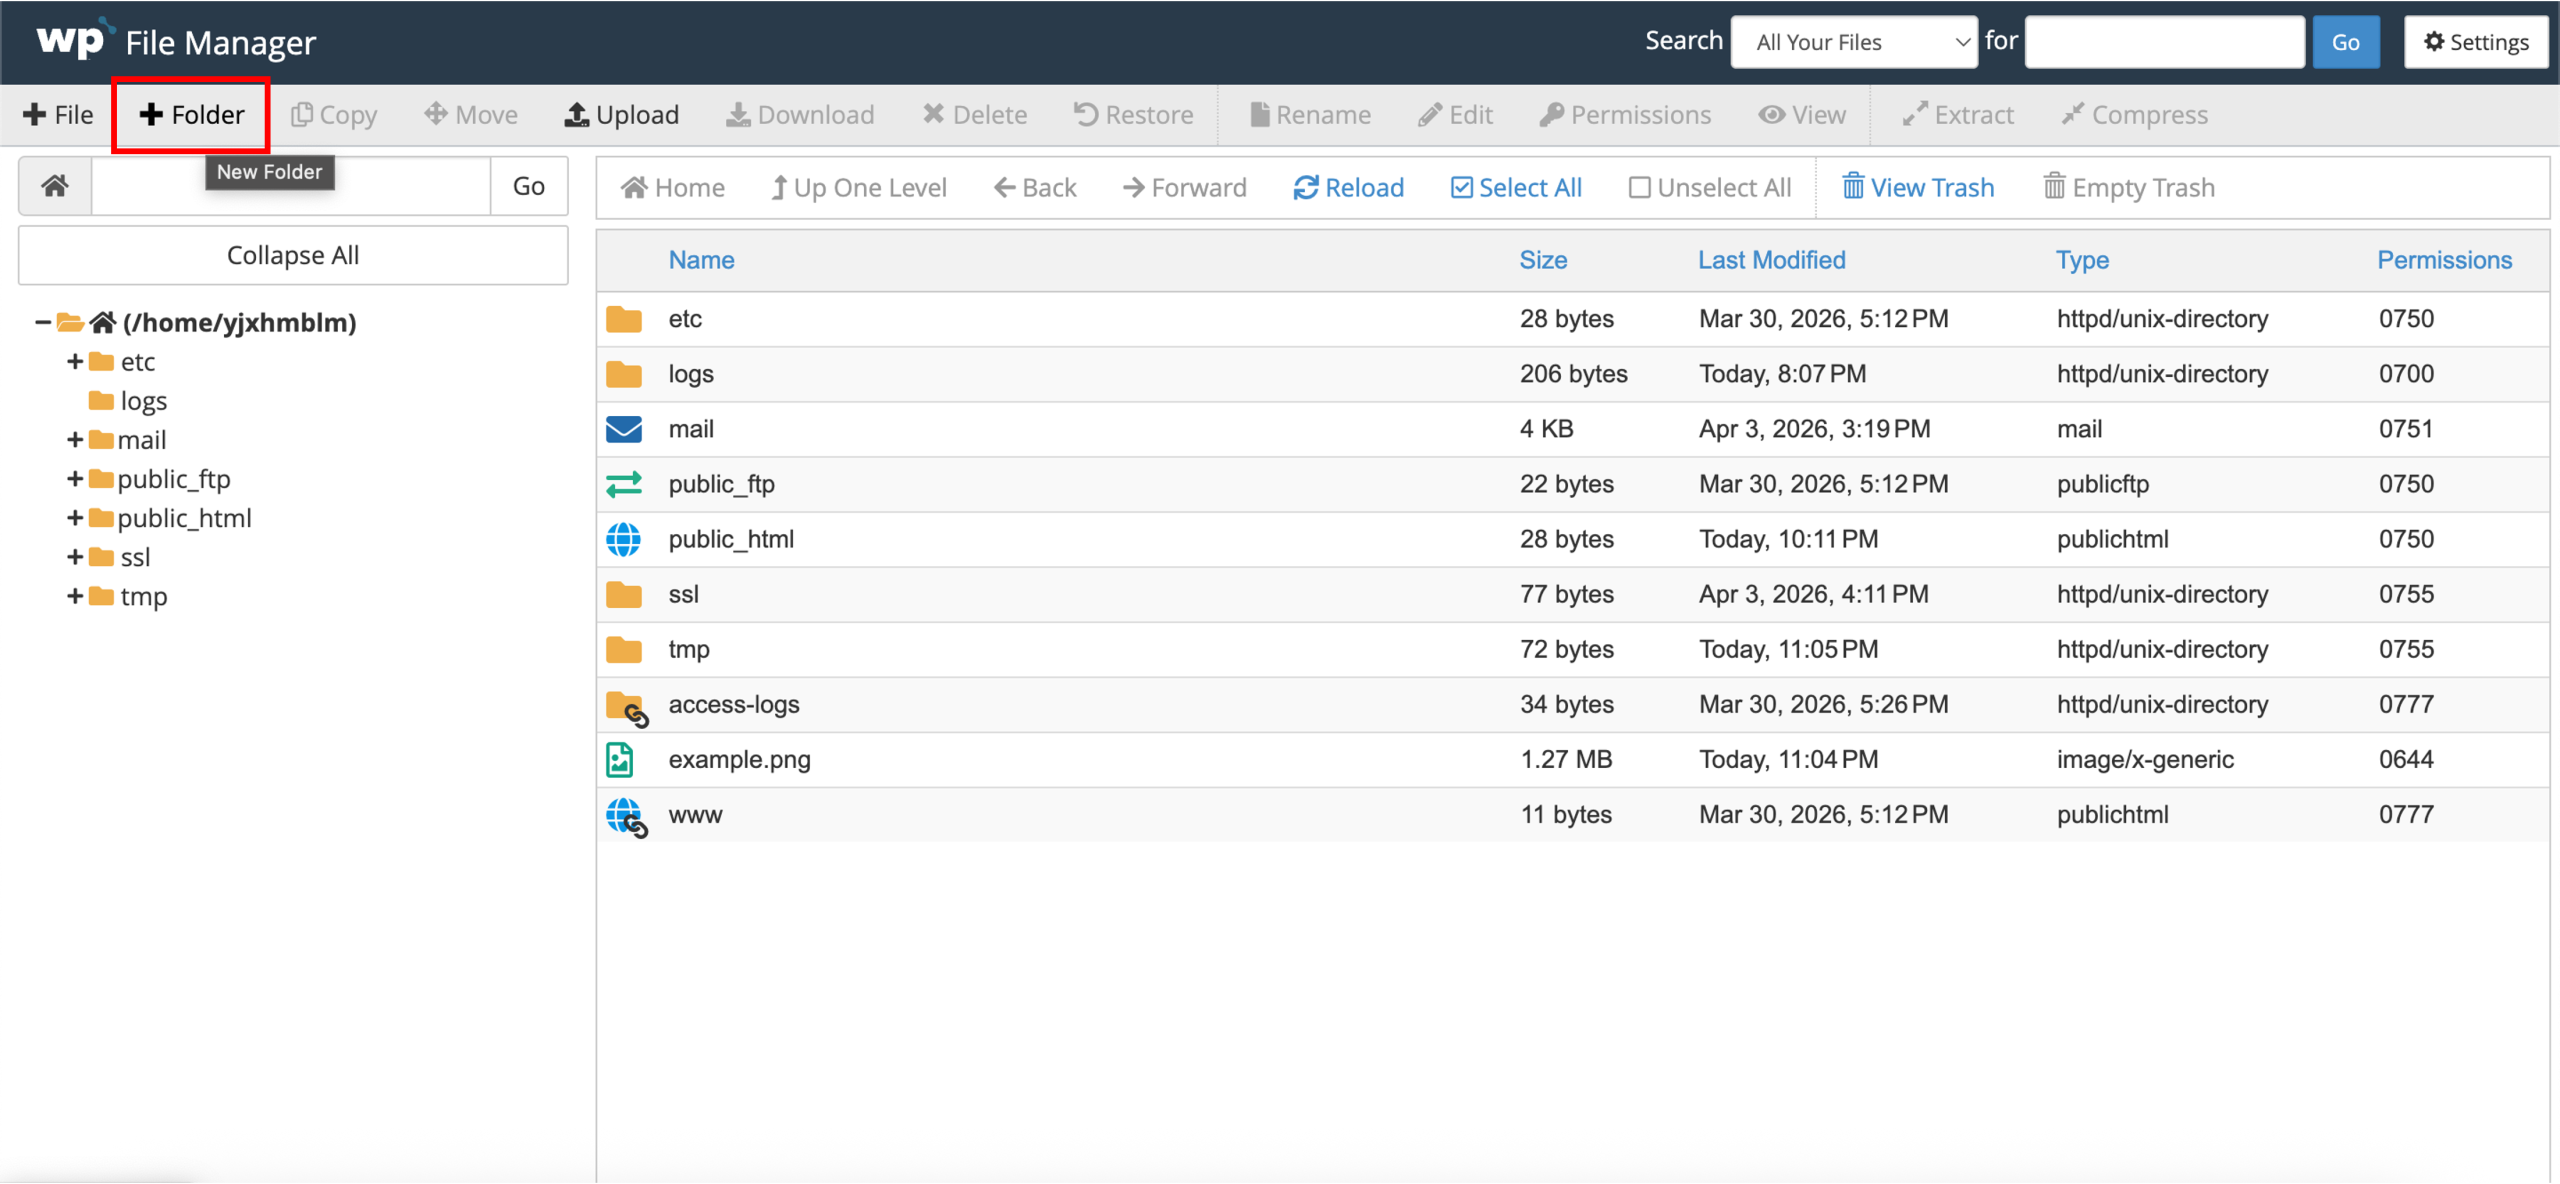
1. On the top navigation bar, click Folder.
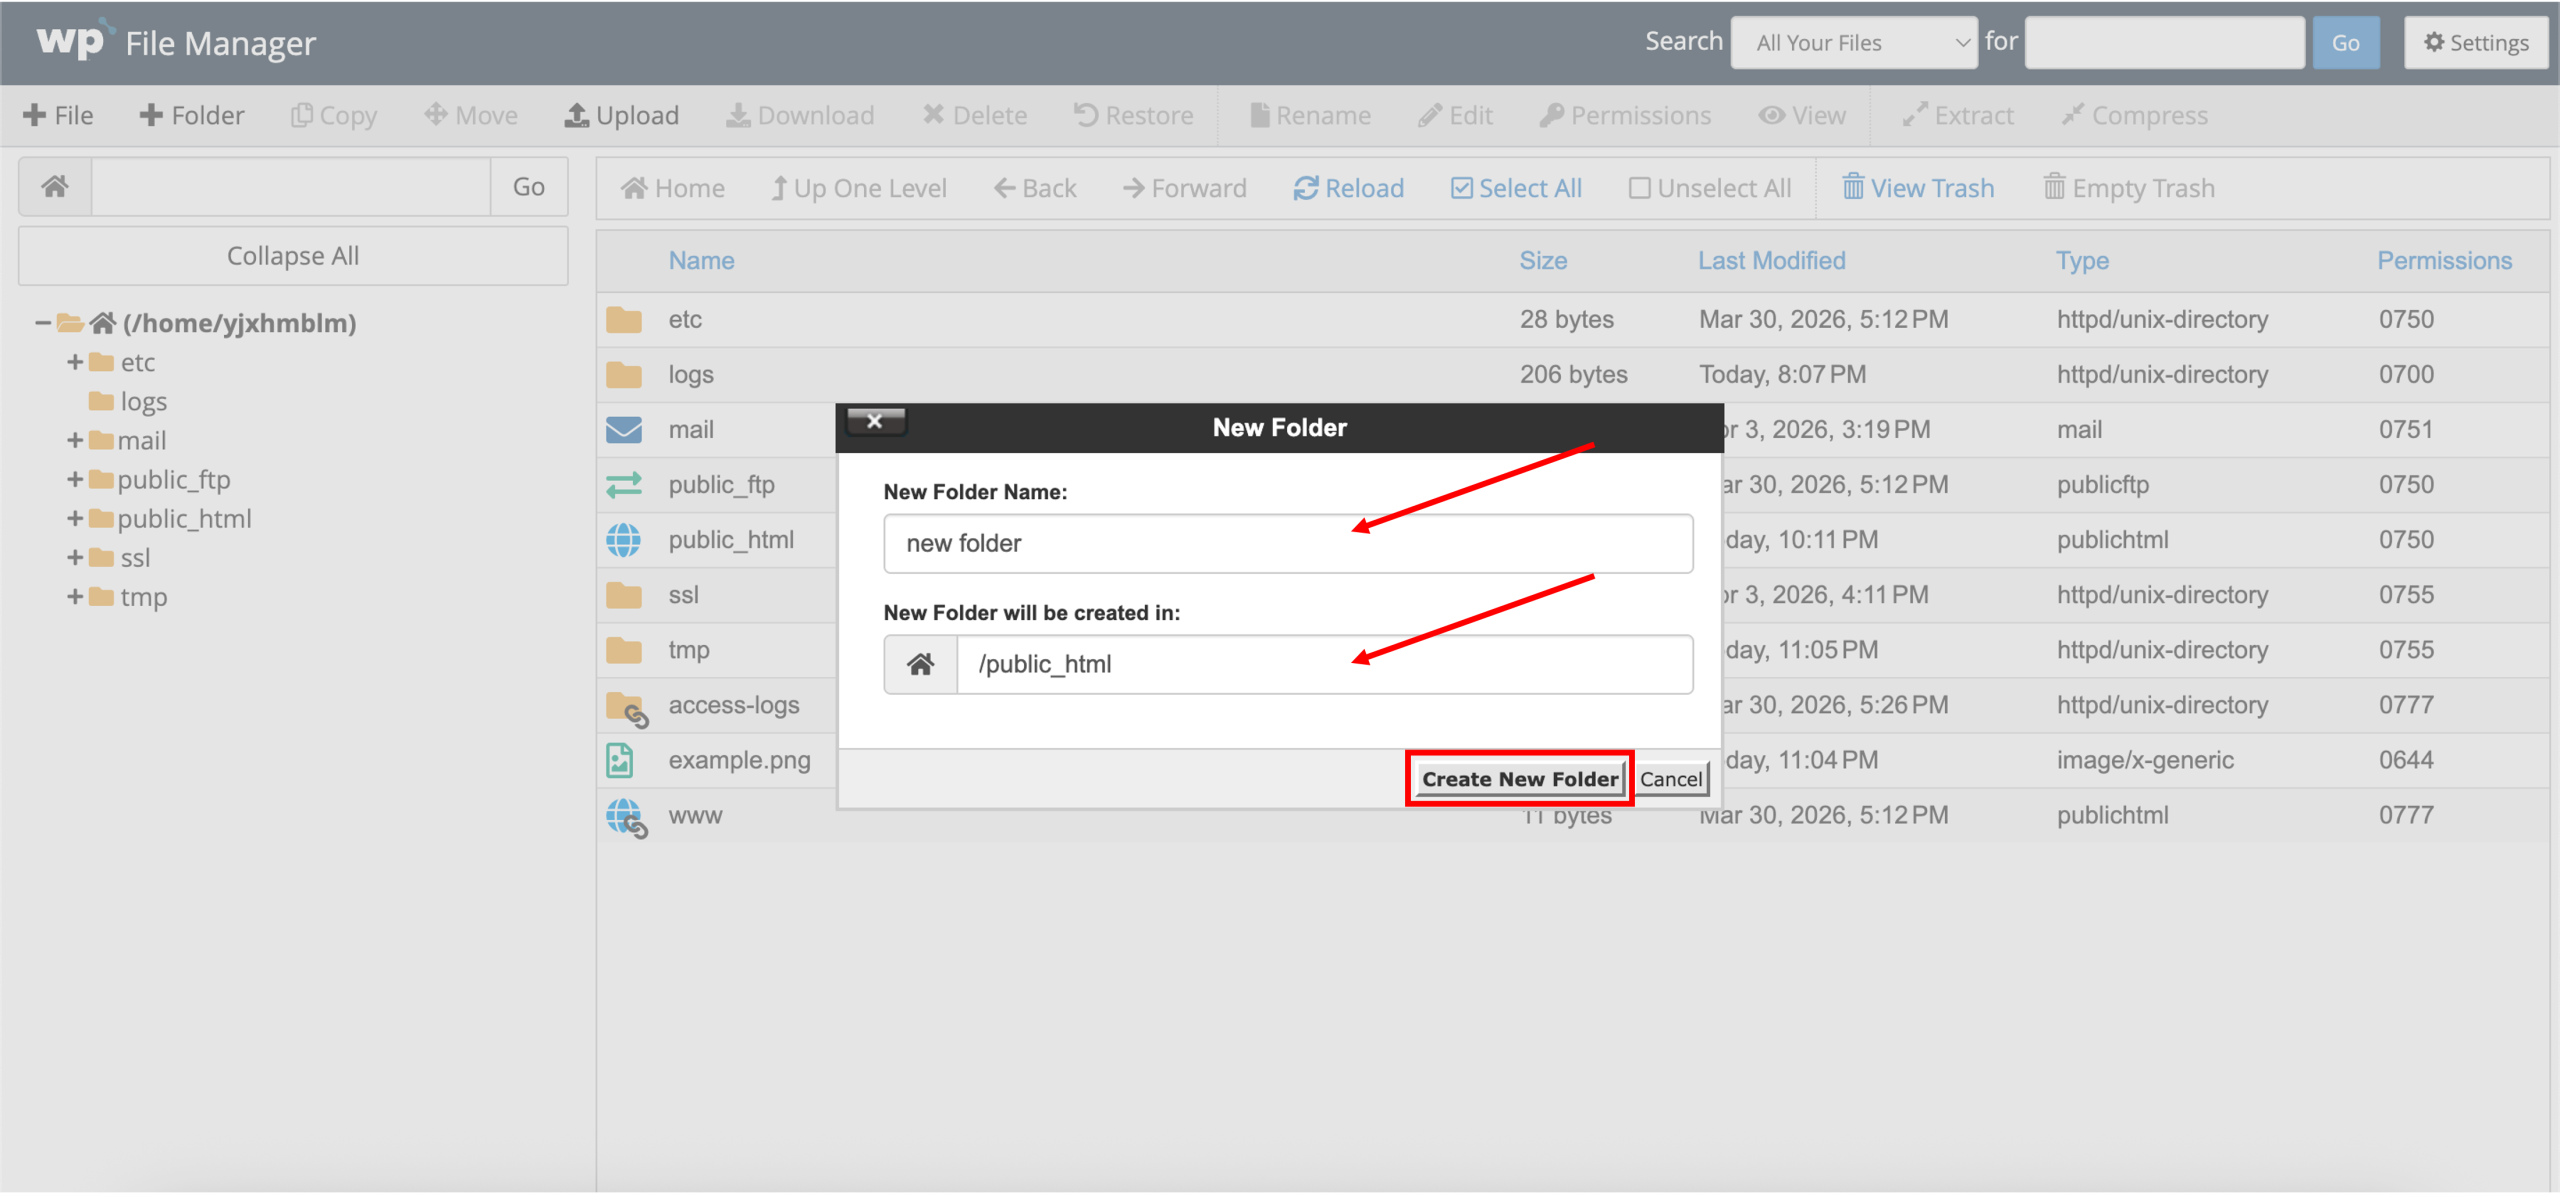
2. A New Folder prompt will appear. Enter your desired New Folder Name and where you would like it created. Once done, click Create New Folder.
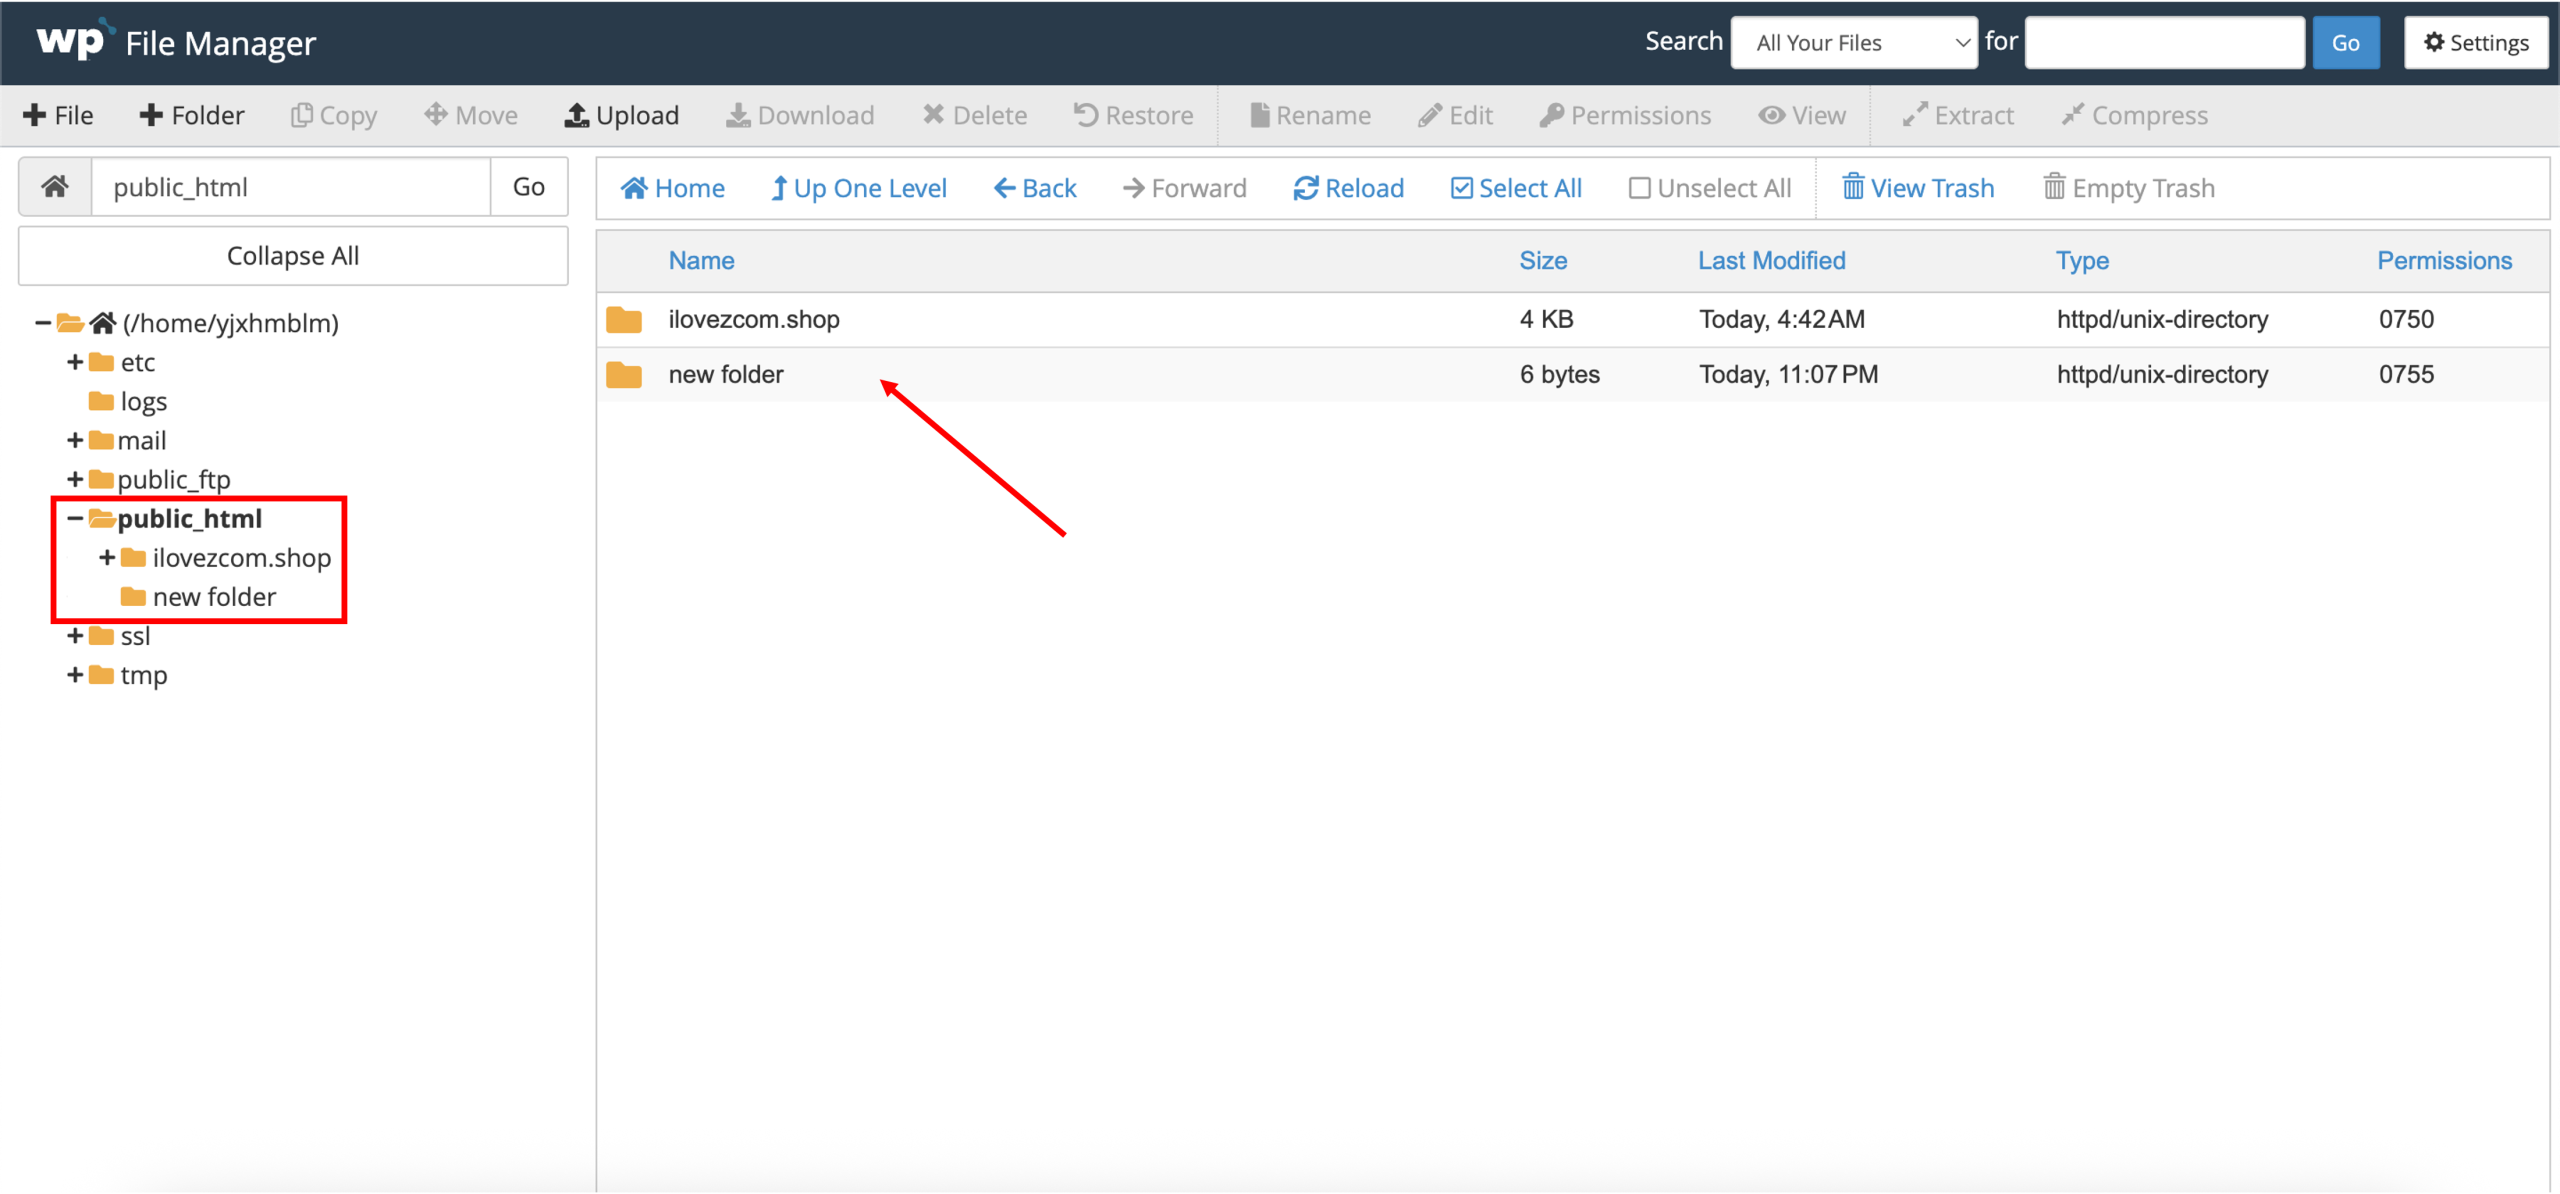
3. Done! The successfully created folder can be located where you have it created in. For example, a new folder in public_html.
Edit a file
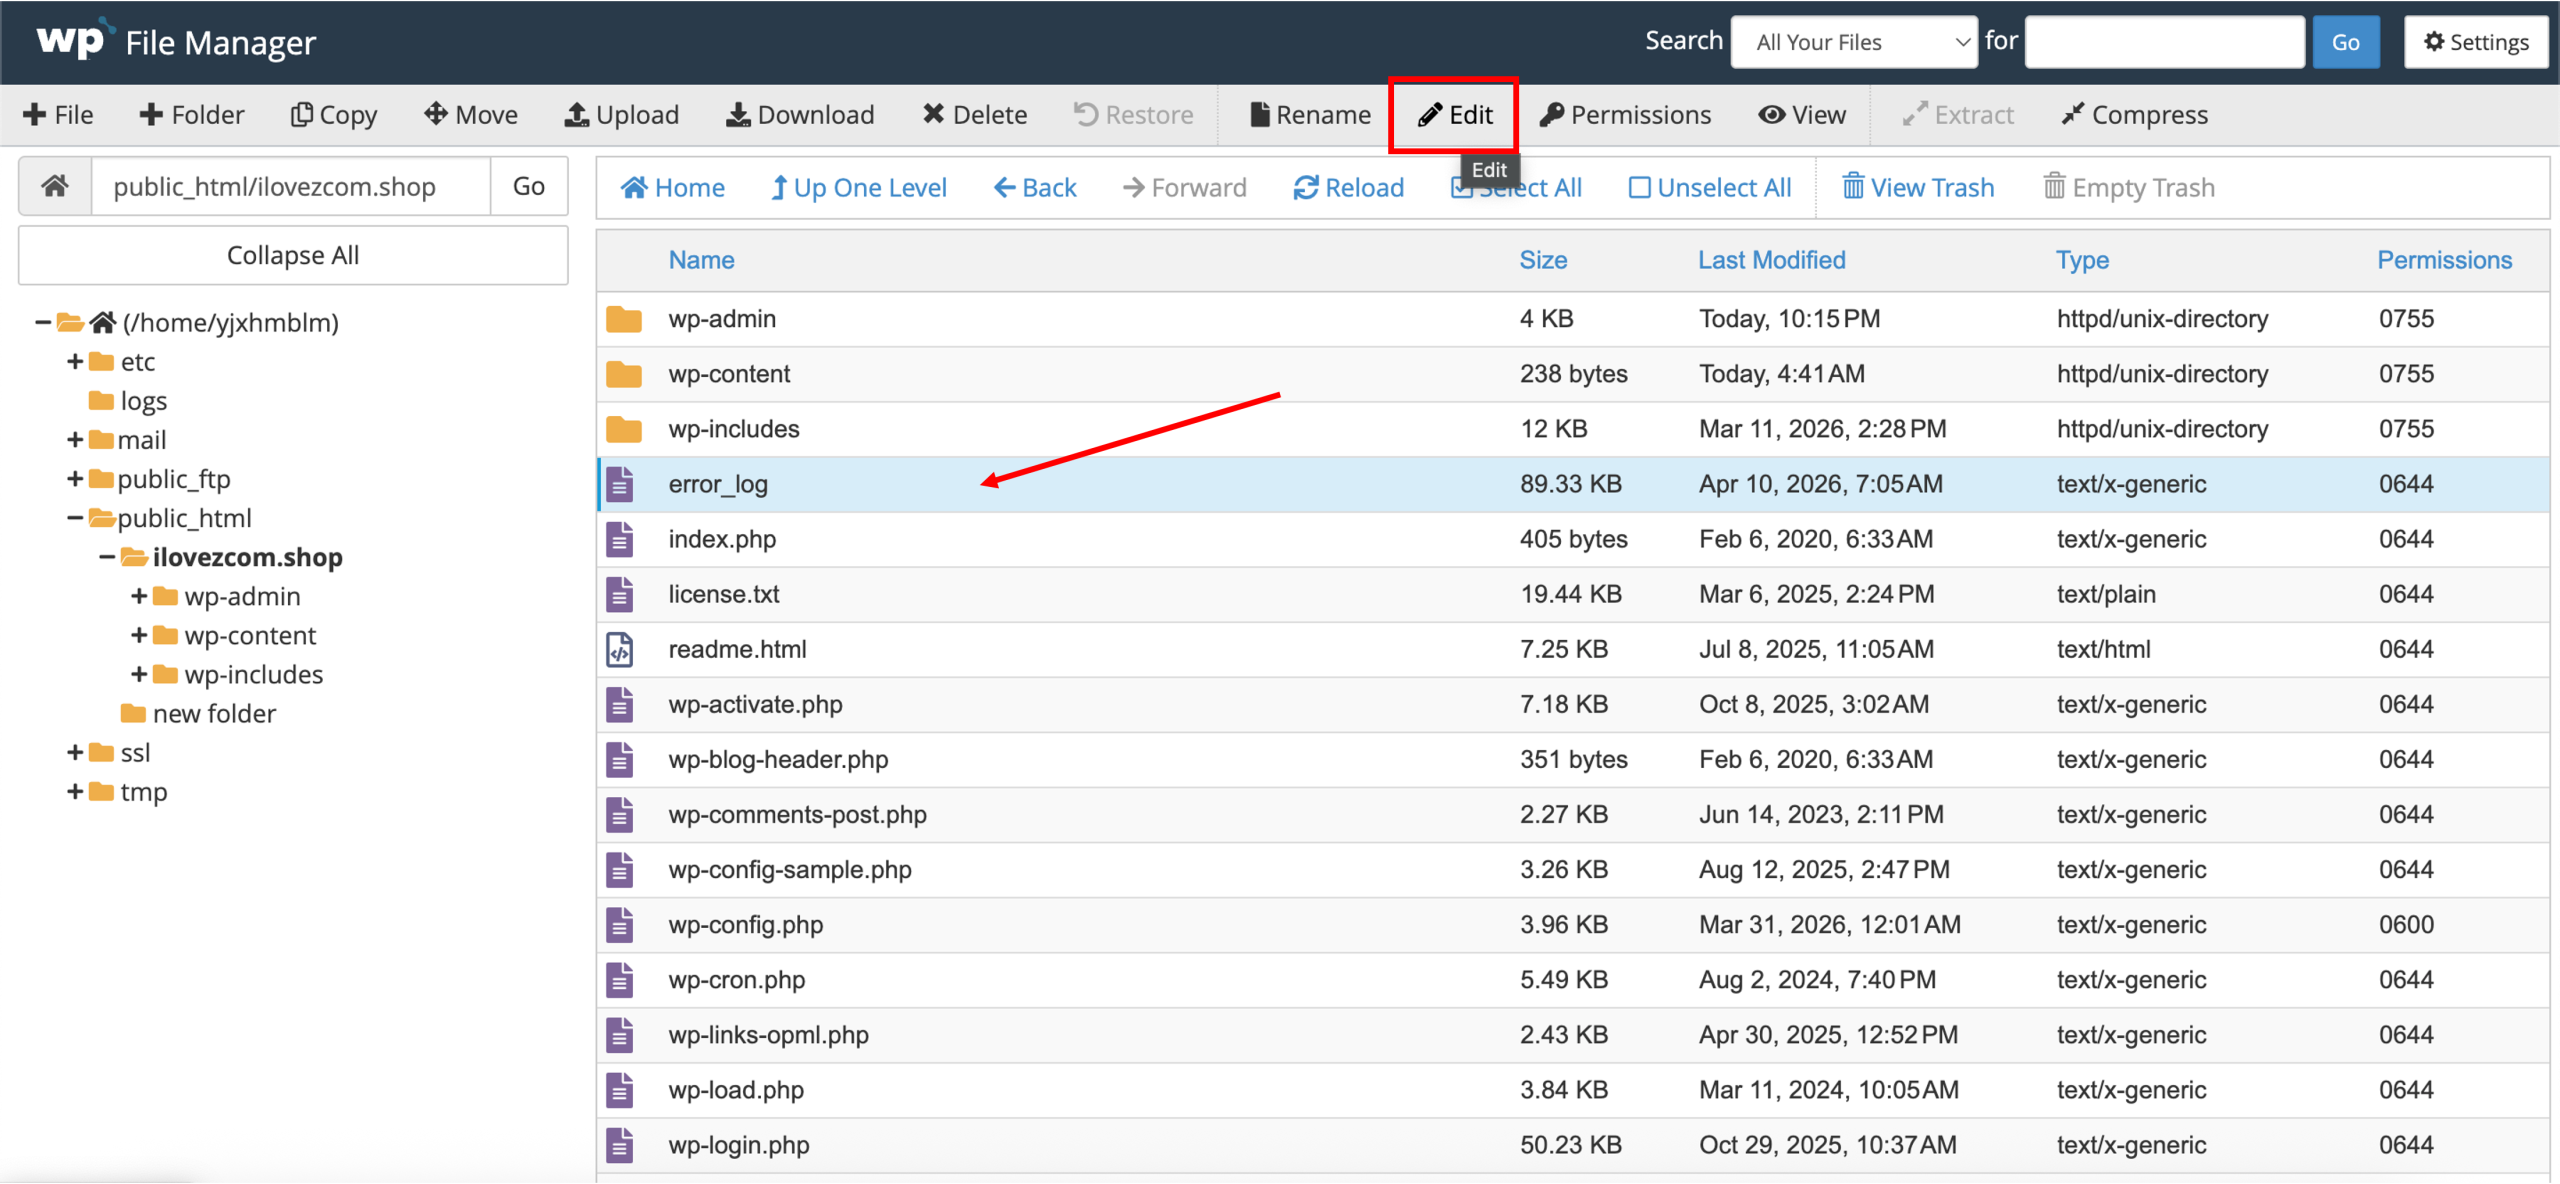
1. Select the file you want to edit, and click Edit on the top navigation bar.
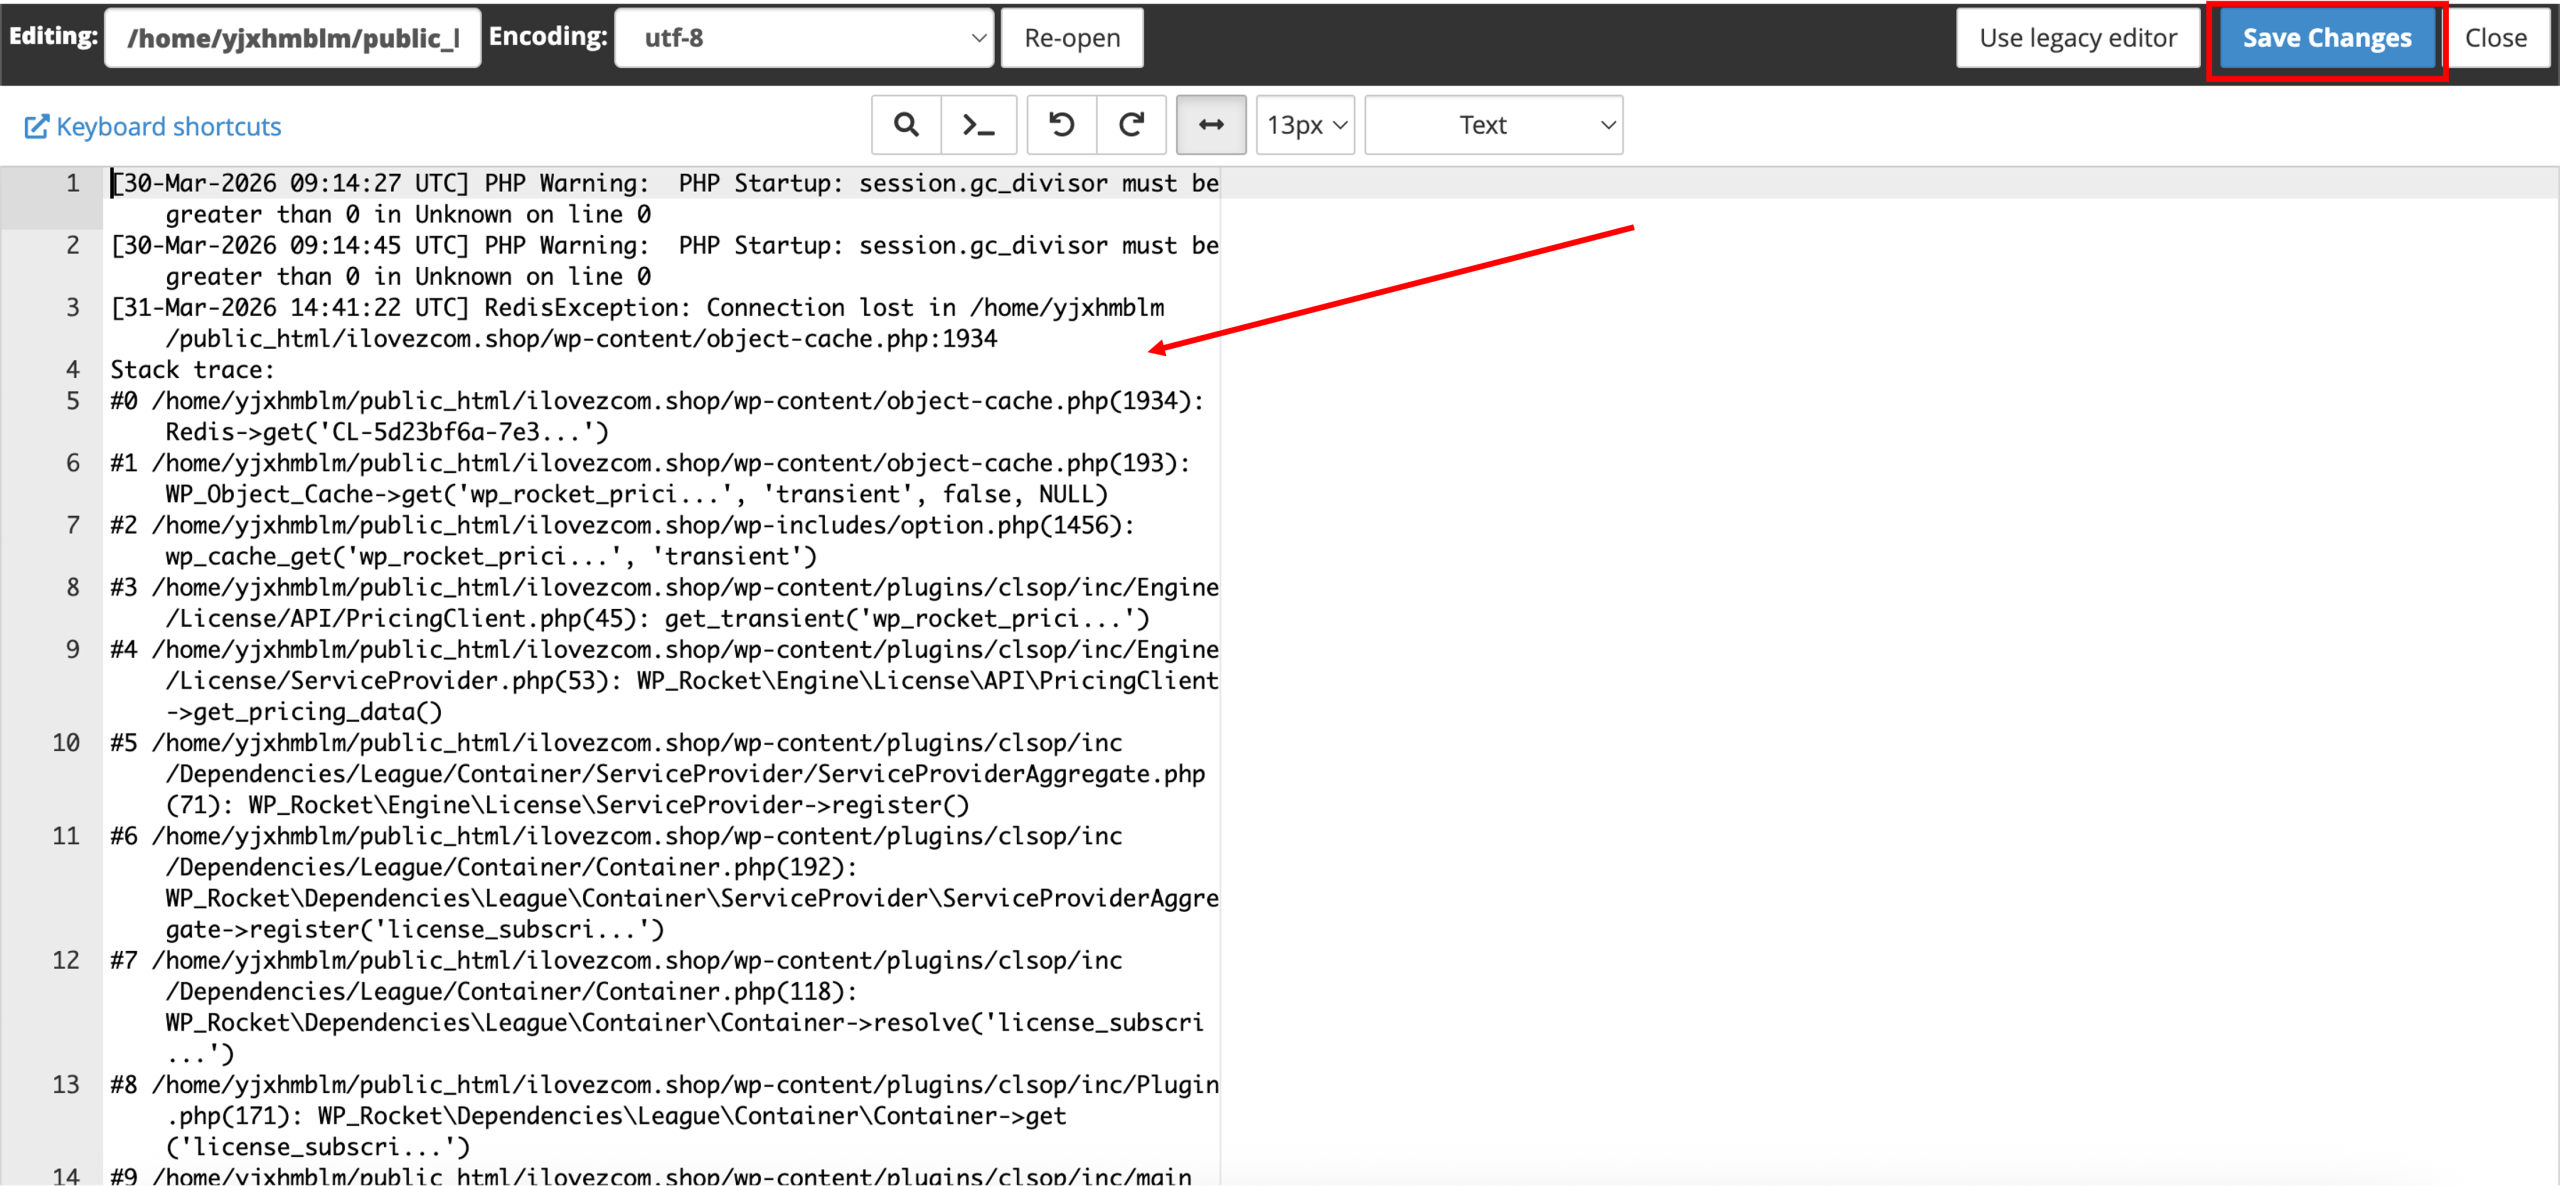
2. A new editing tab will open. Make the necessary changes, then click Save Changes.
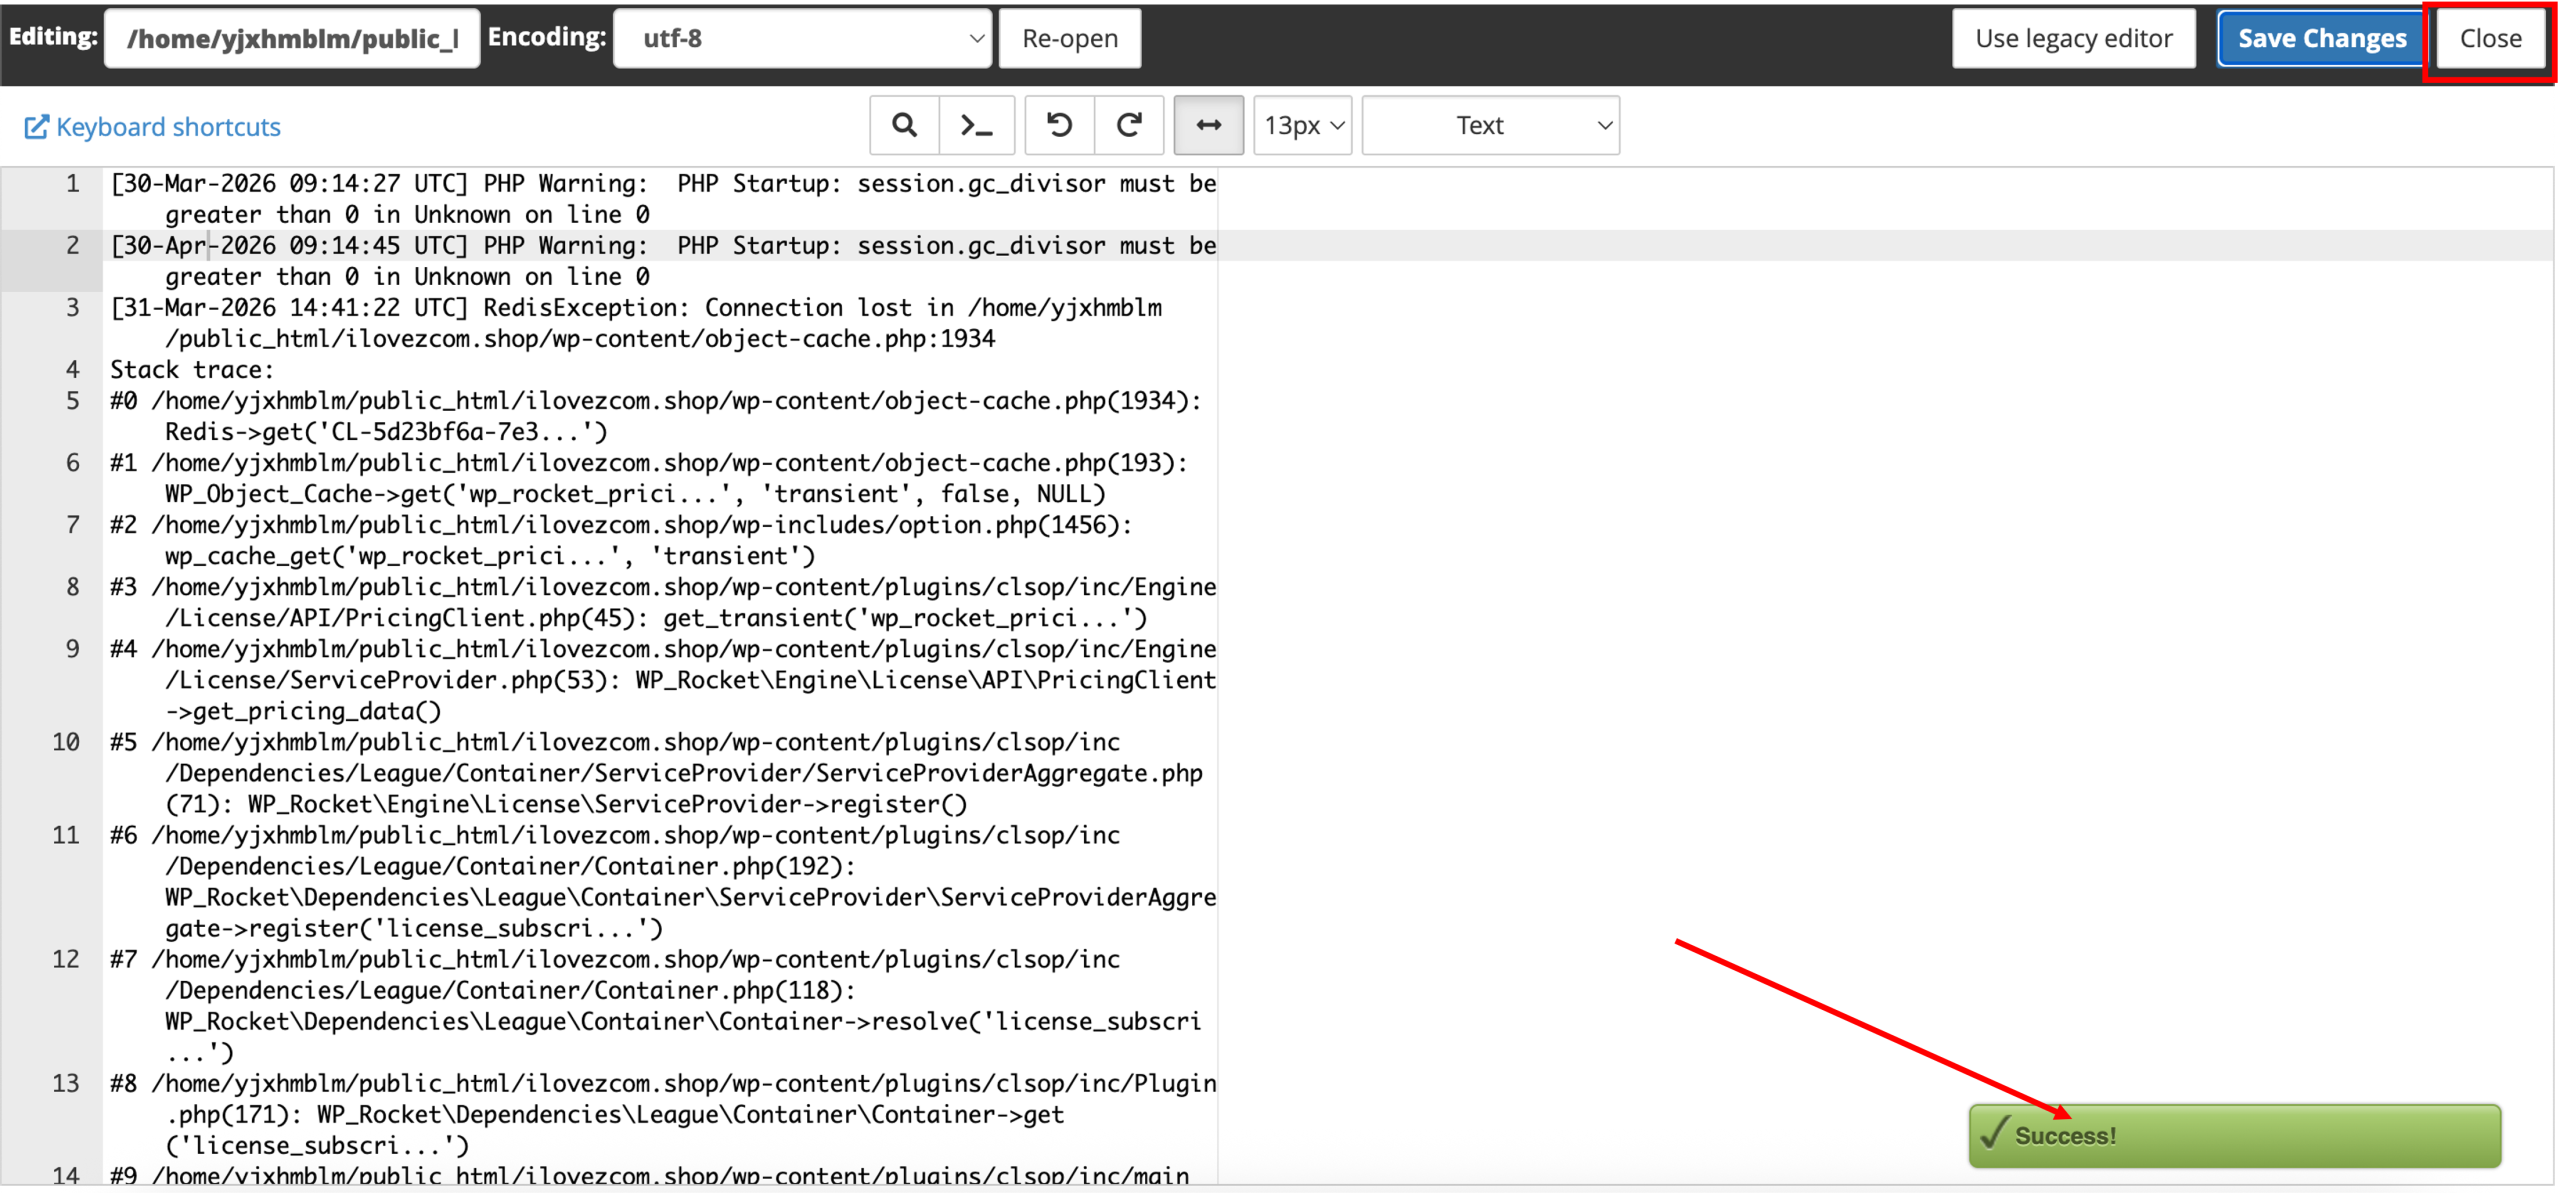
3. Done! A Success prompt will appear, indicating that you have successfully updated the file. You may click Close to exit the window and return to the File Manager interface.
Delete a file or folder
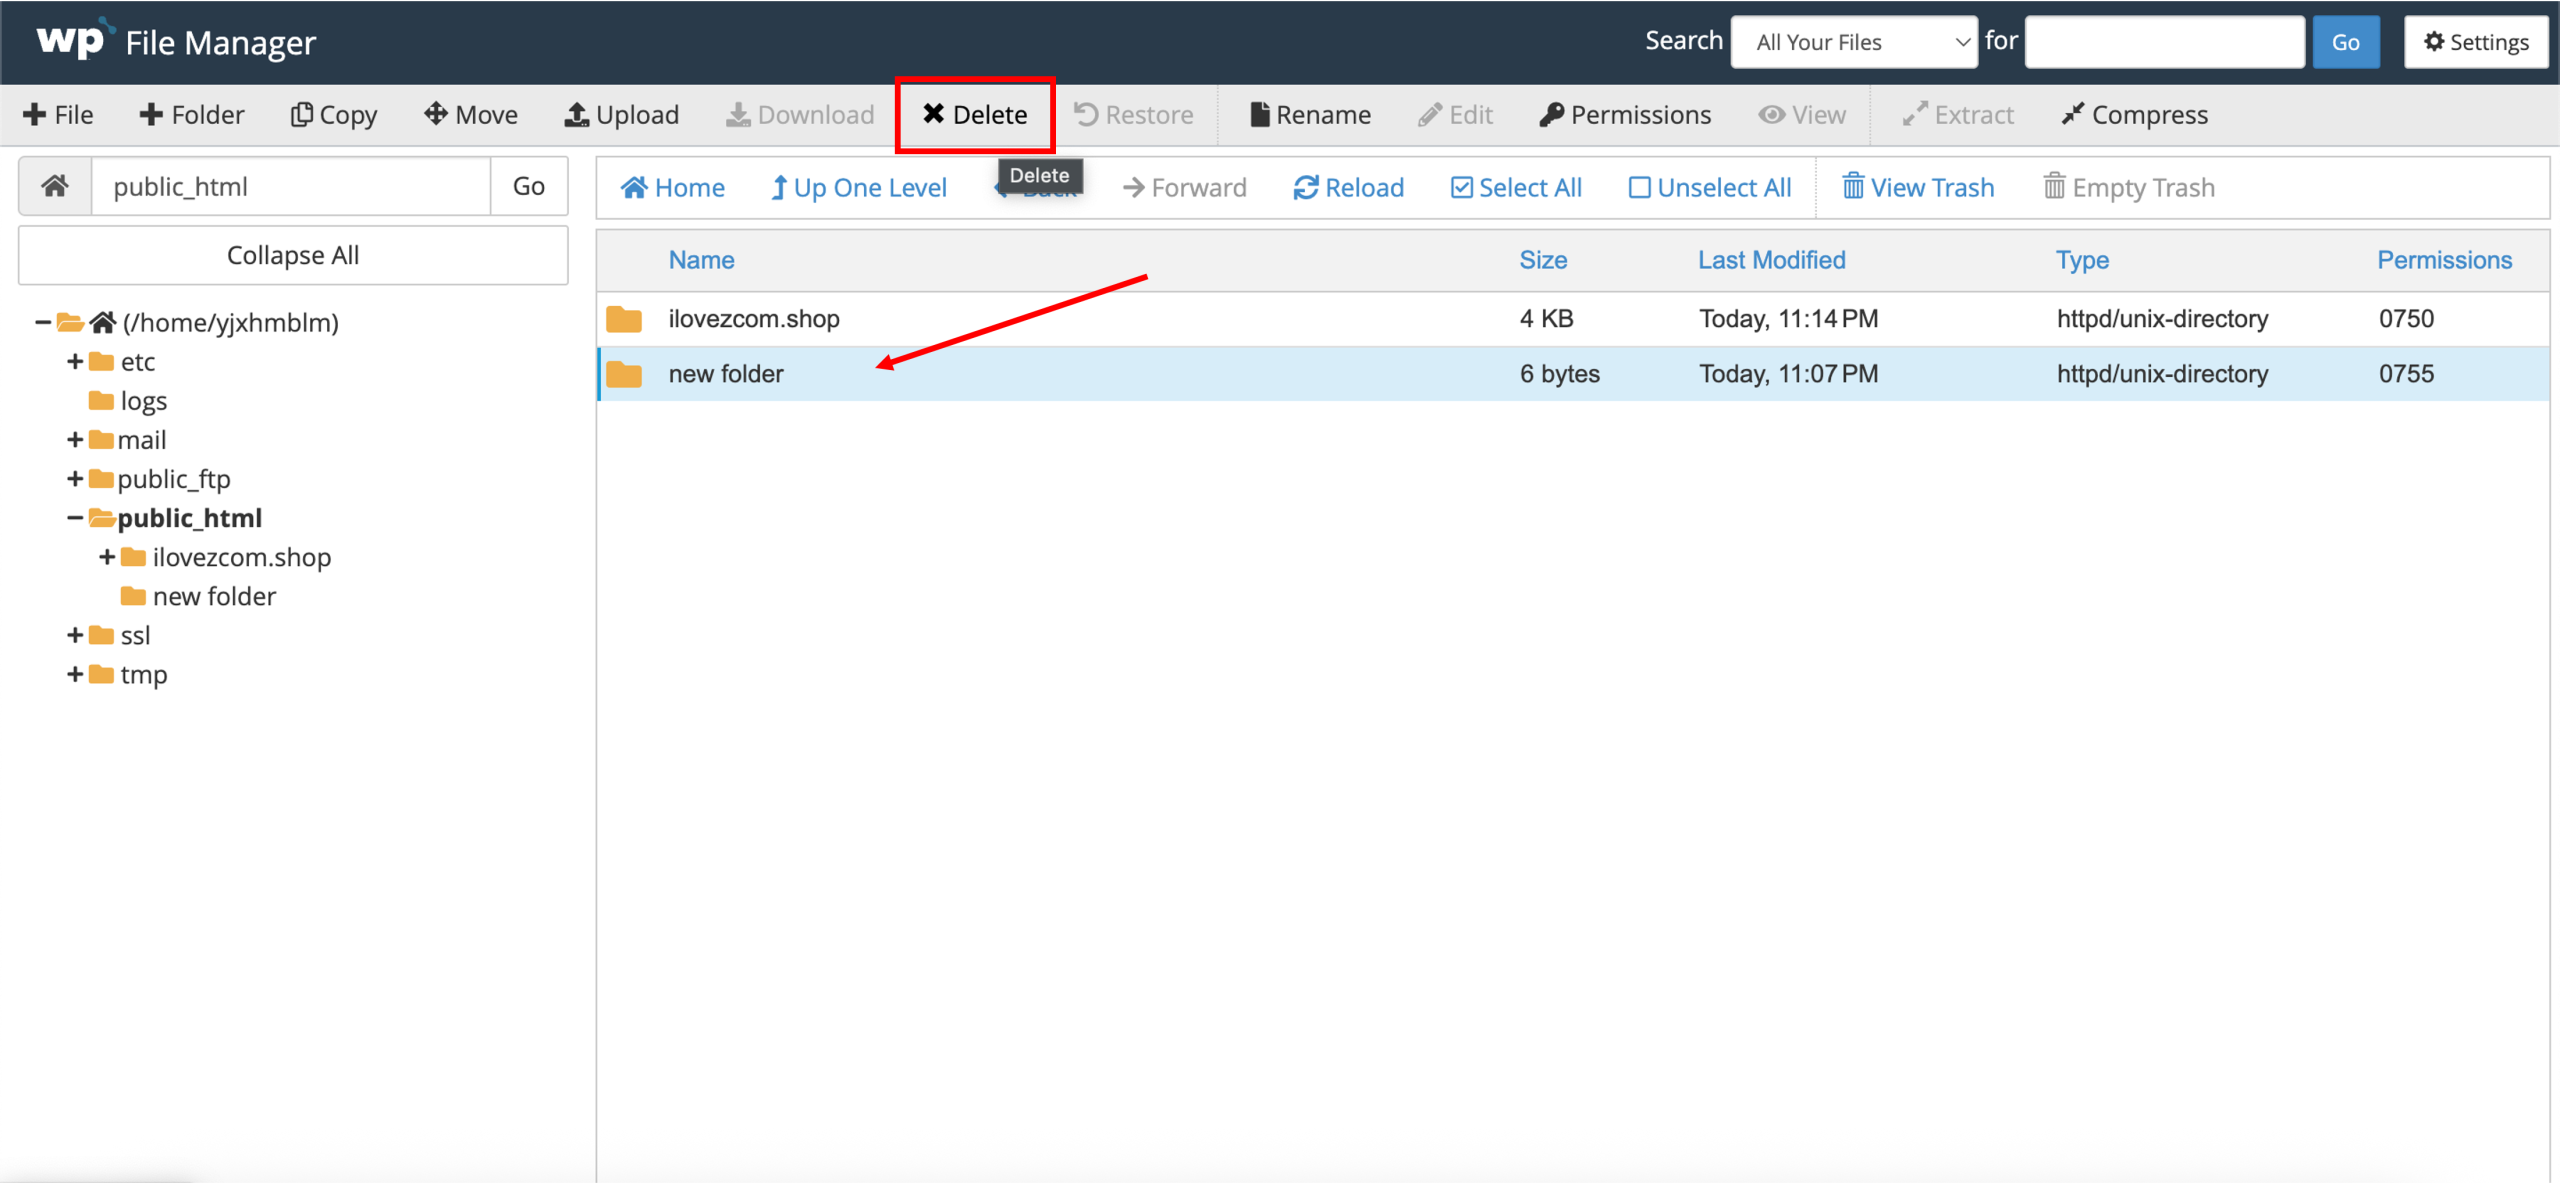
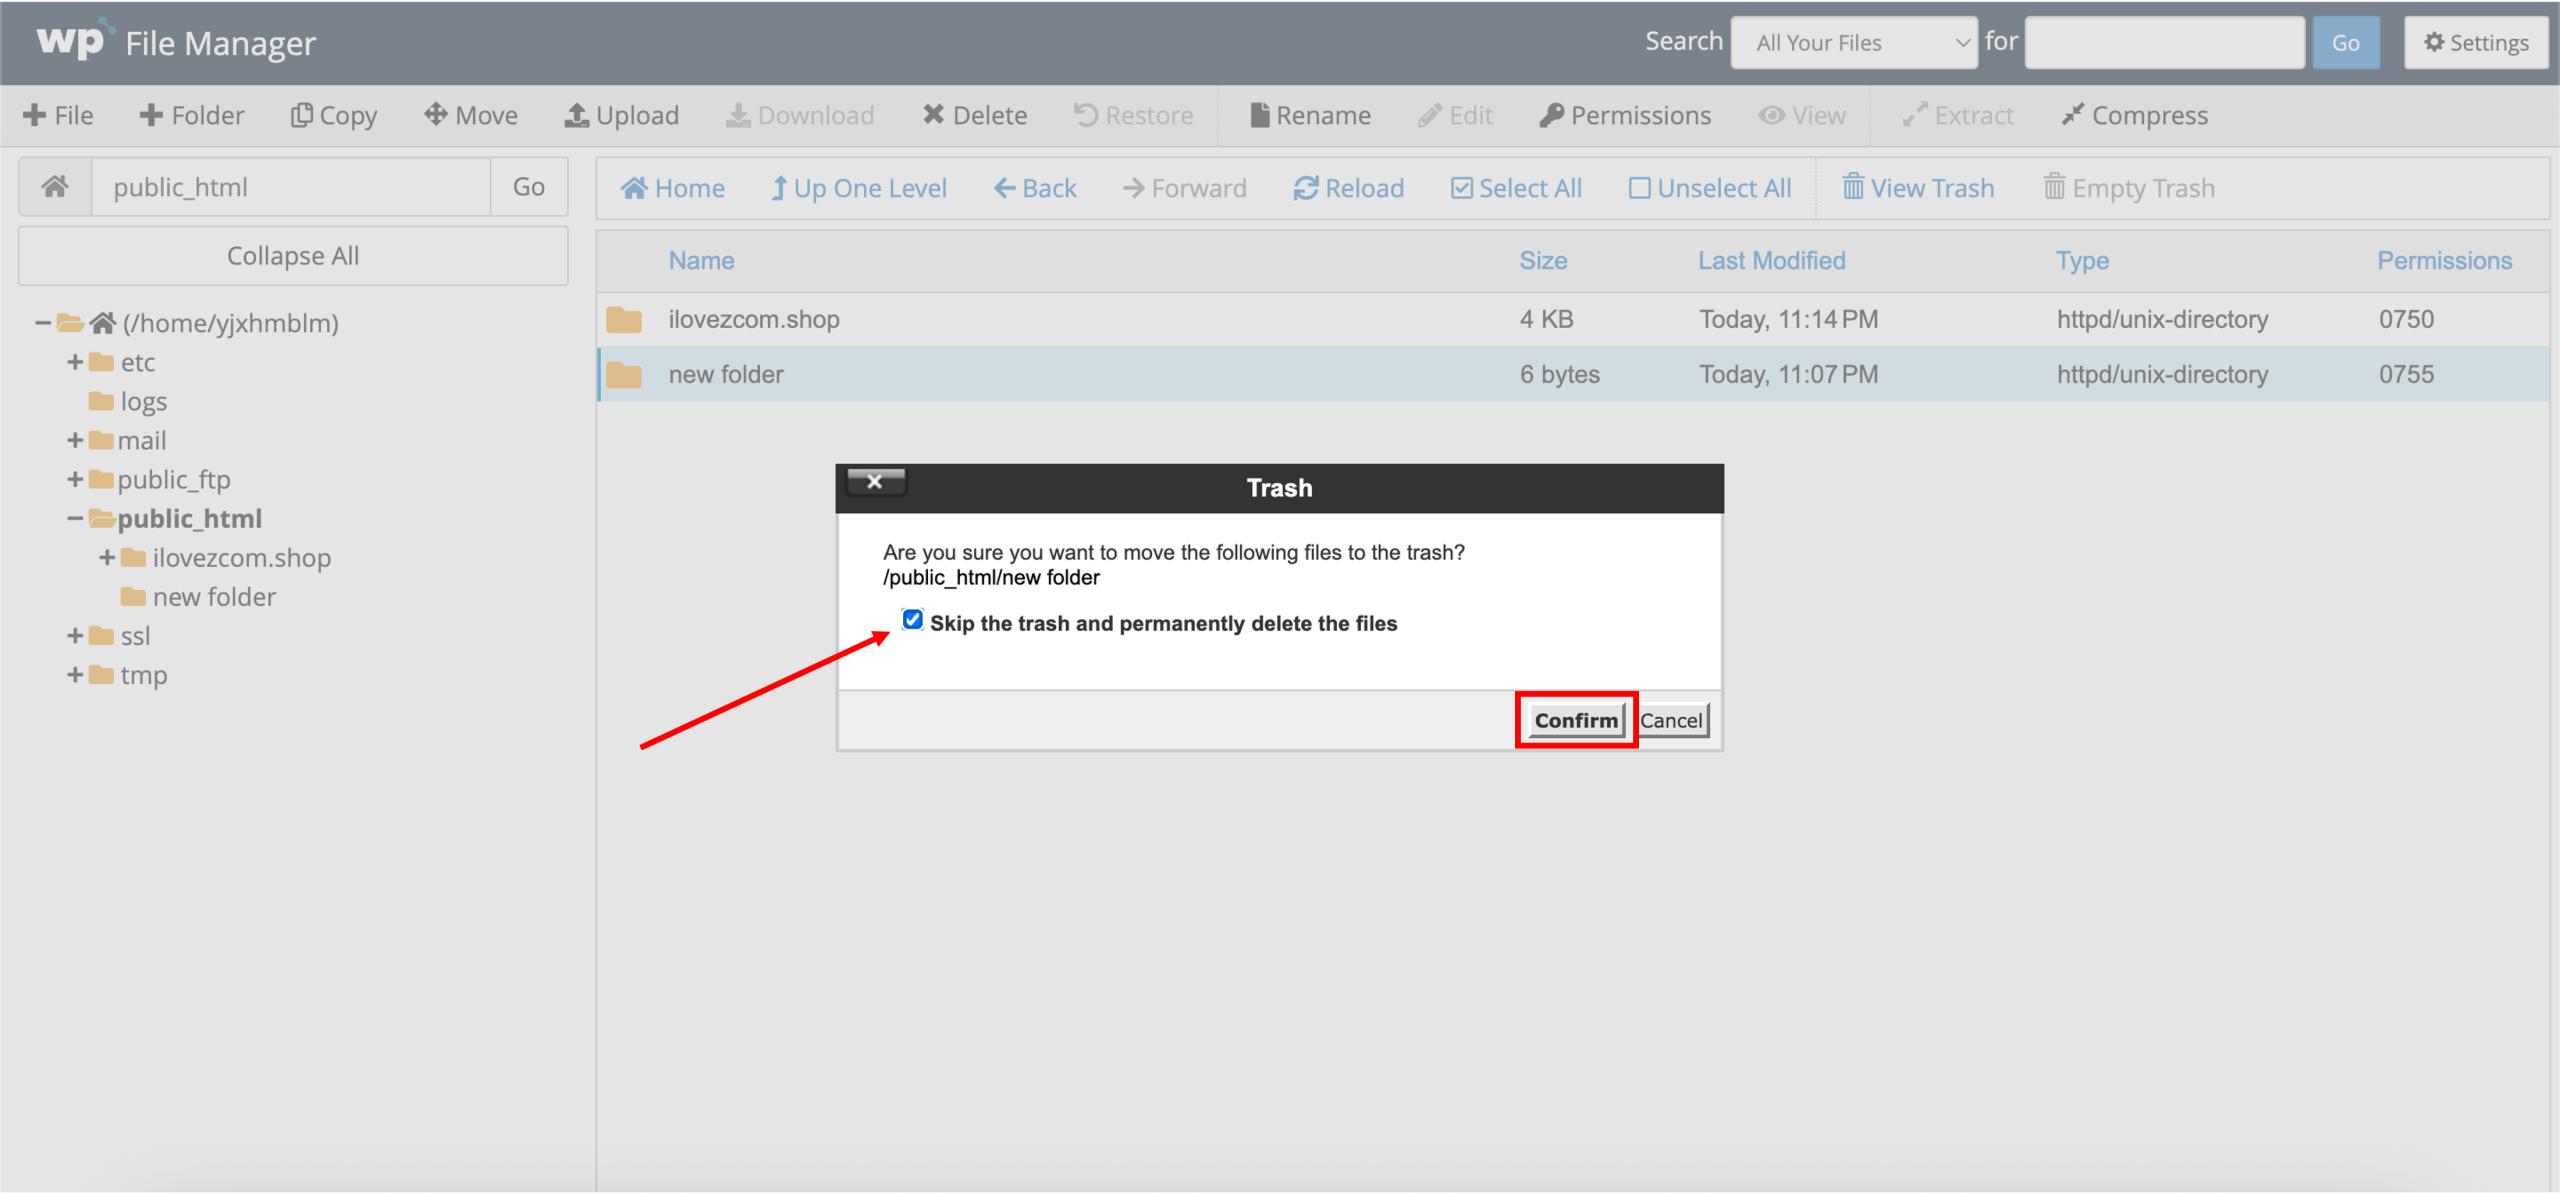
1. Select the file or folder, and click Delete on the top navigation bar.
2. A Trash prompt will appear. It is optional to check the Skip the trash and permanently delete the files option to delete the item immediately without moving it to the trash. Once done, click Confirm.
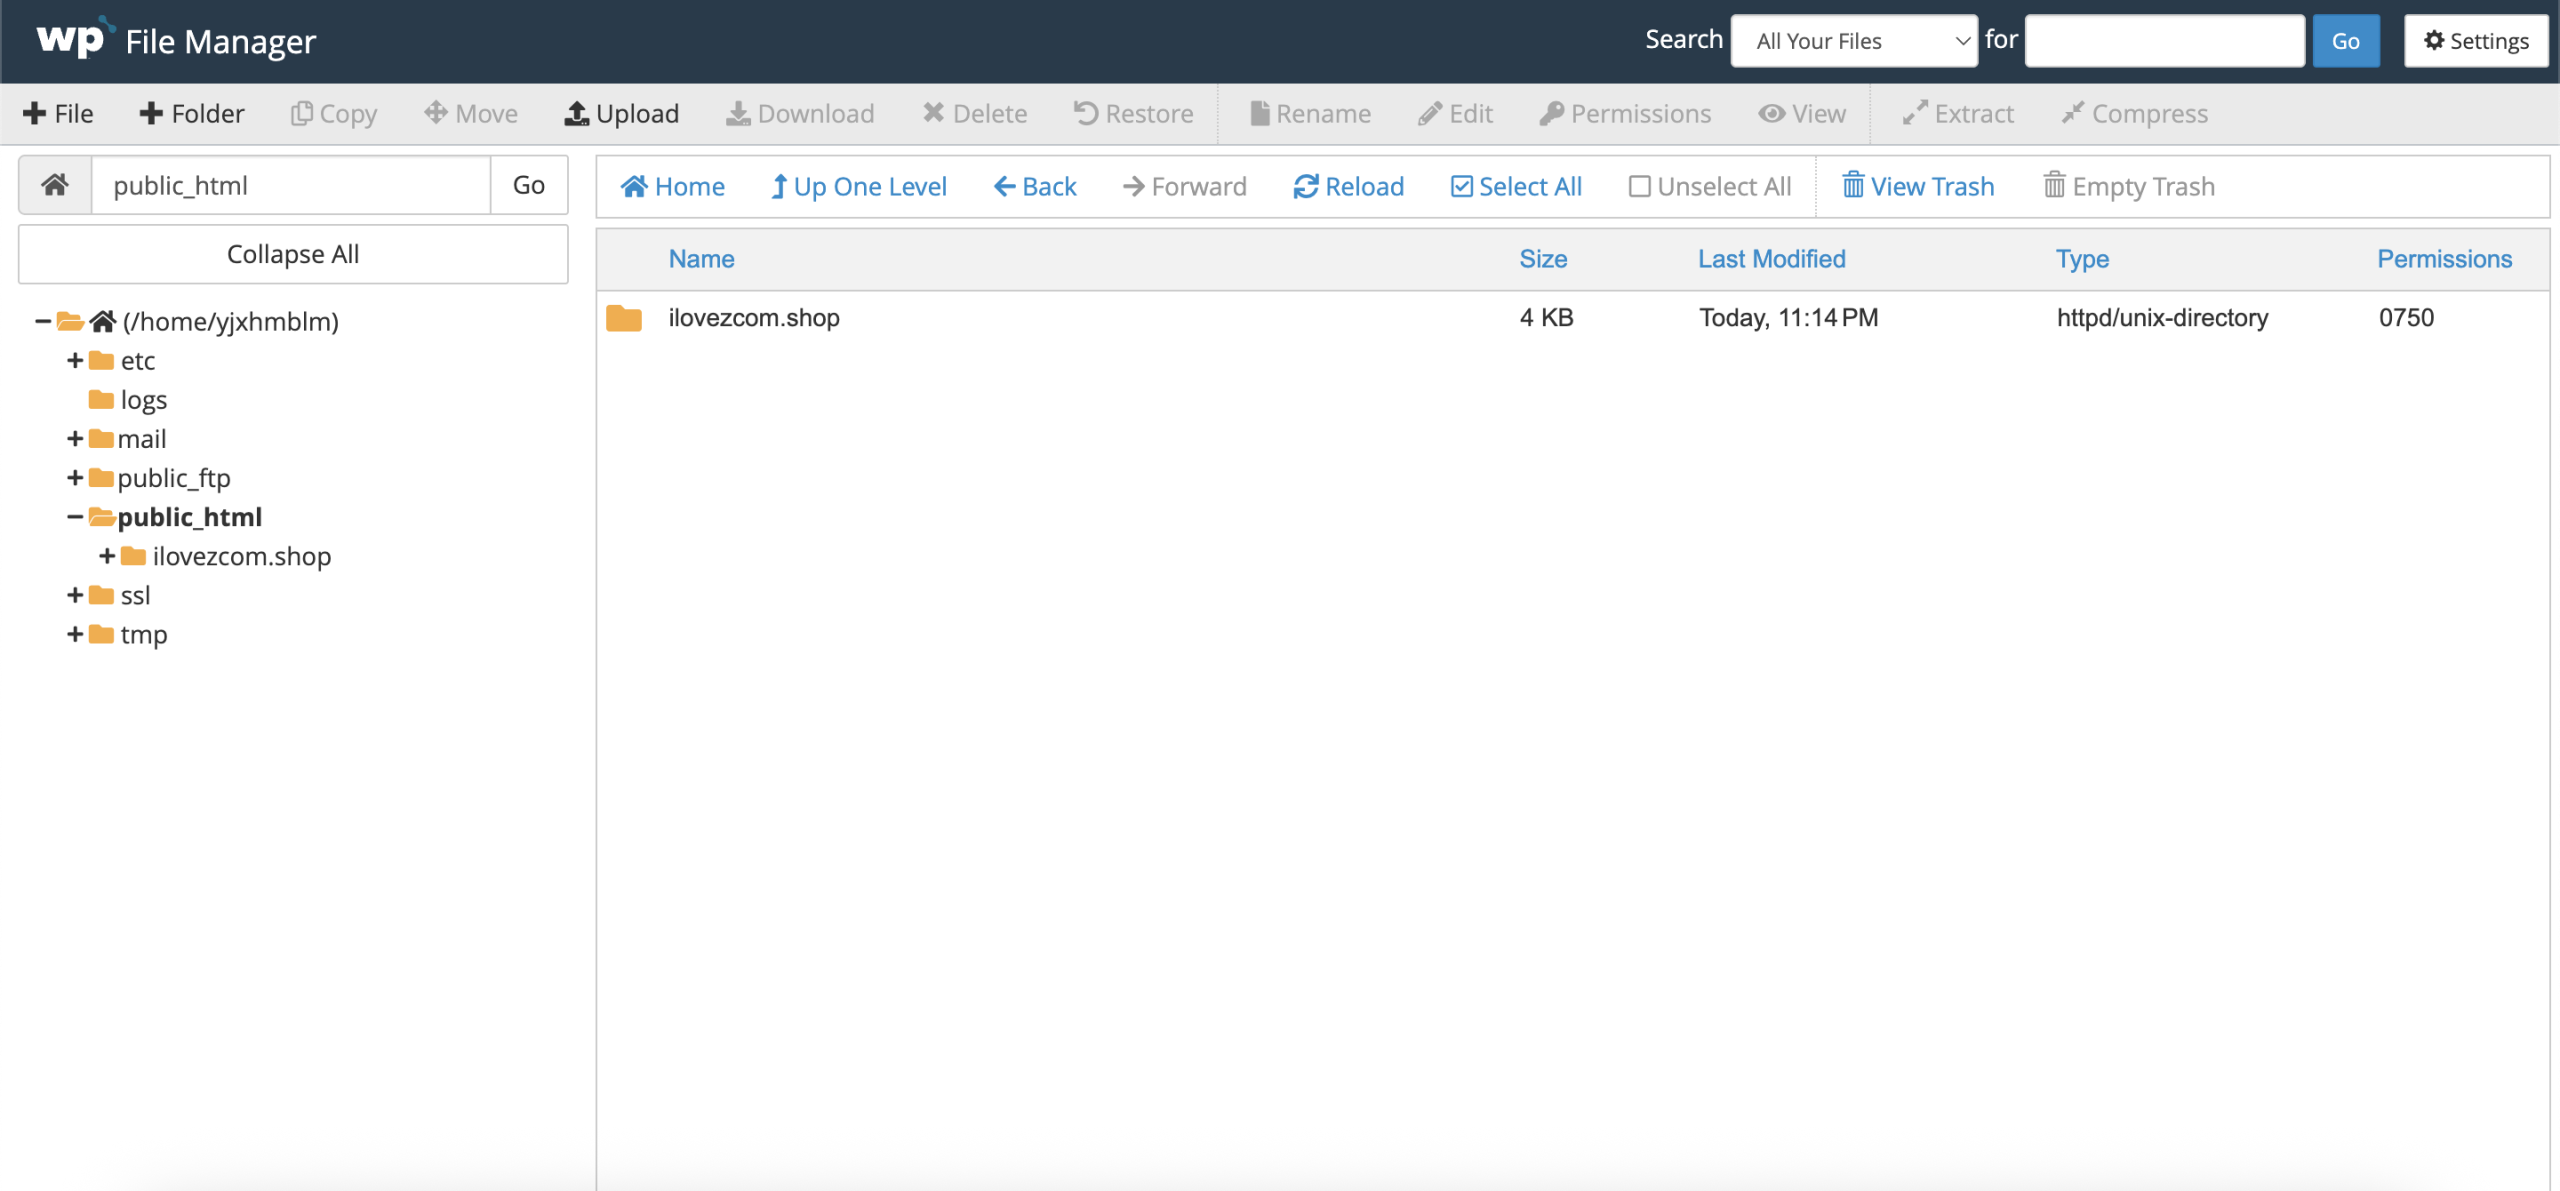
3. Done! The successfully deleted file or folder will no longer be visible in its original location.
Rename a file or folder
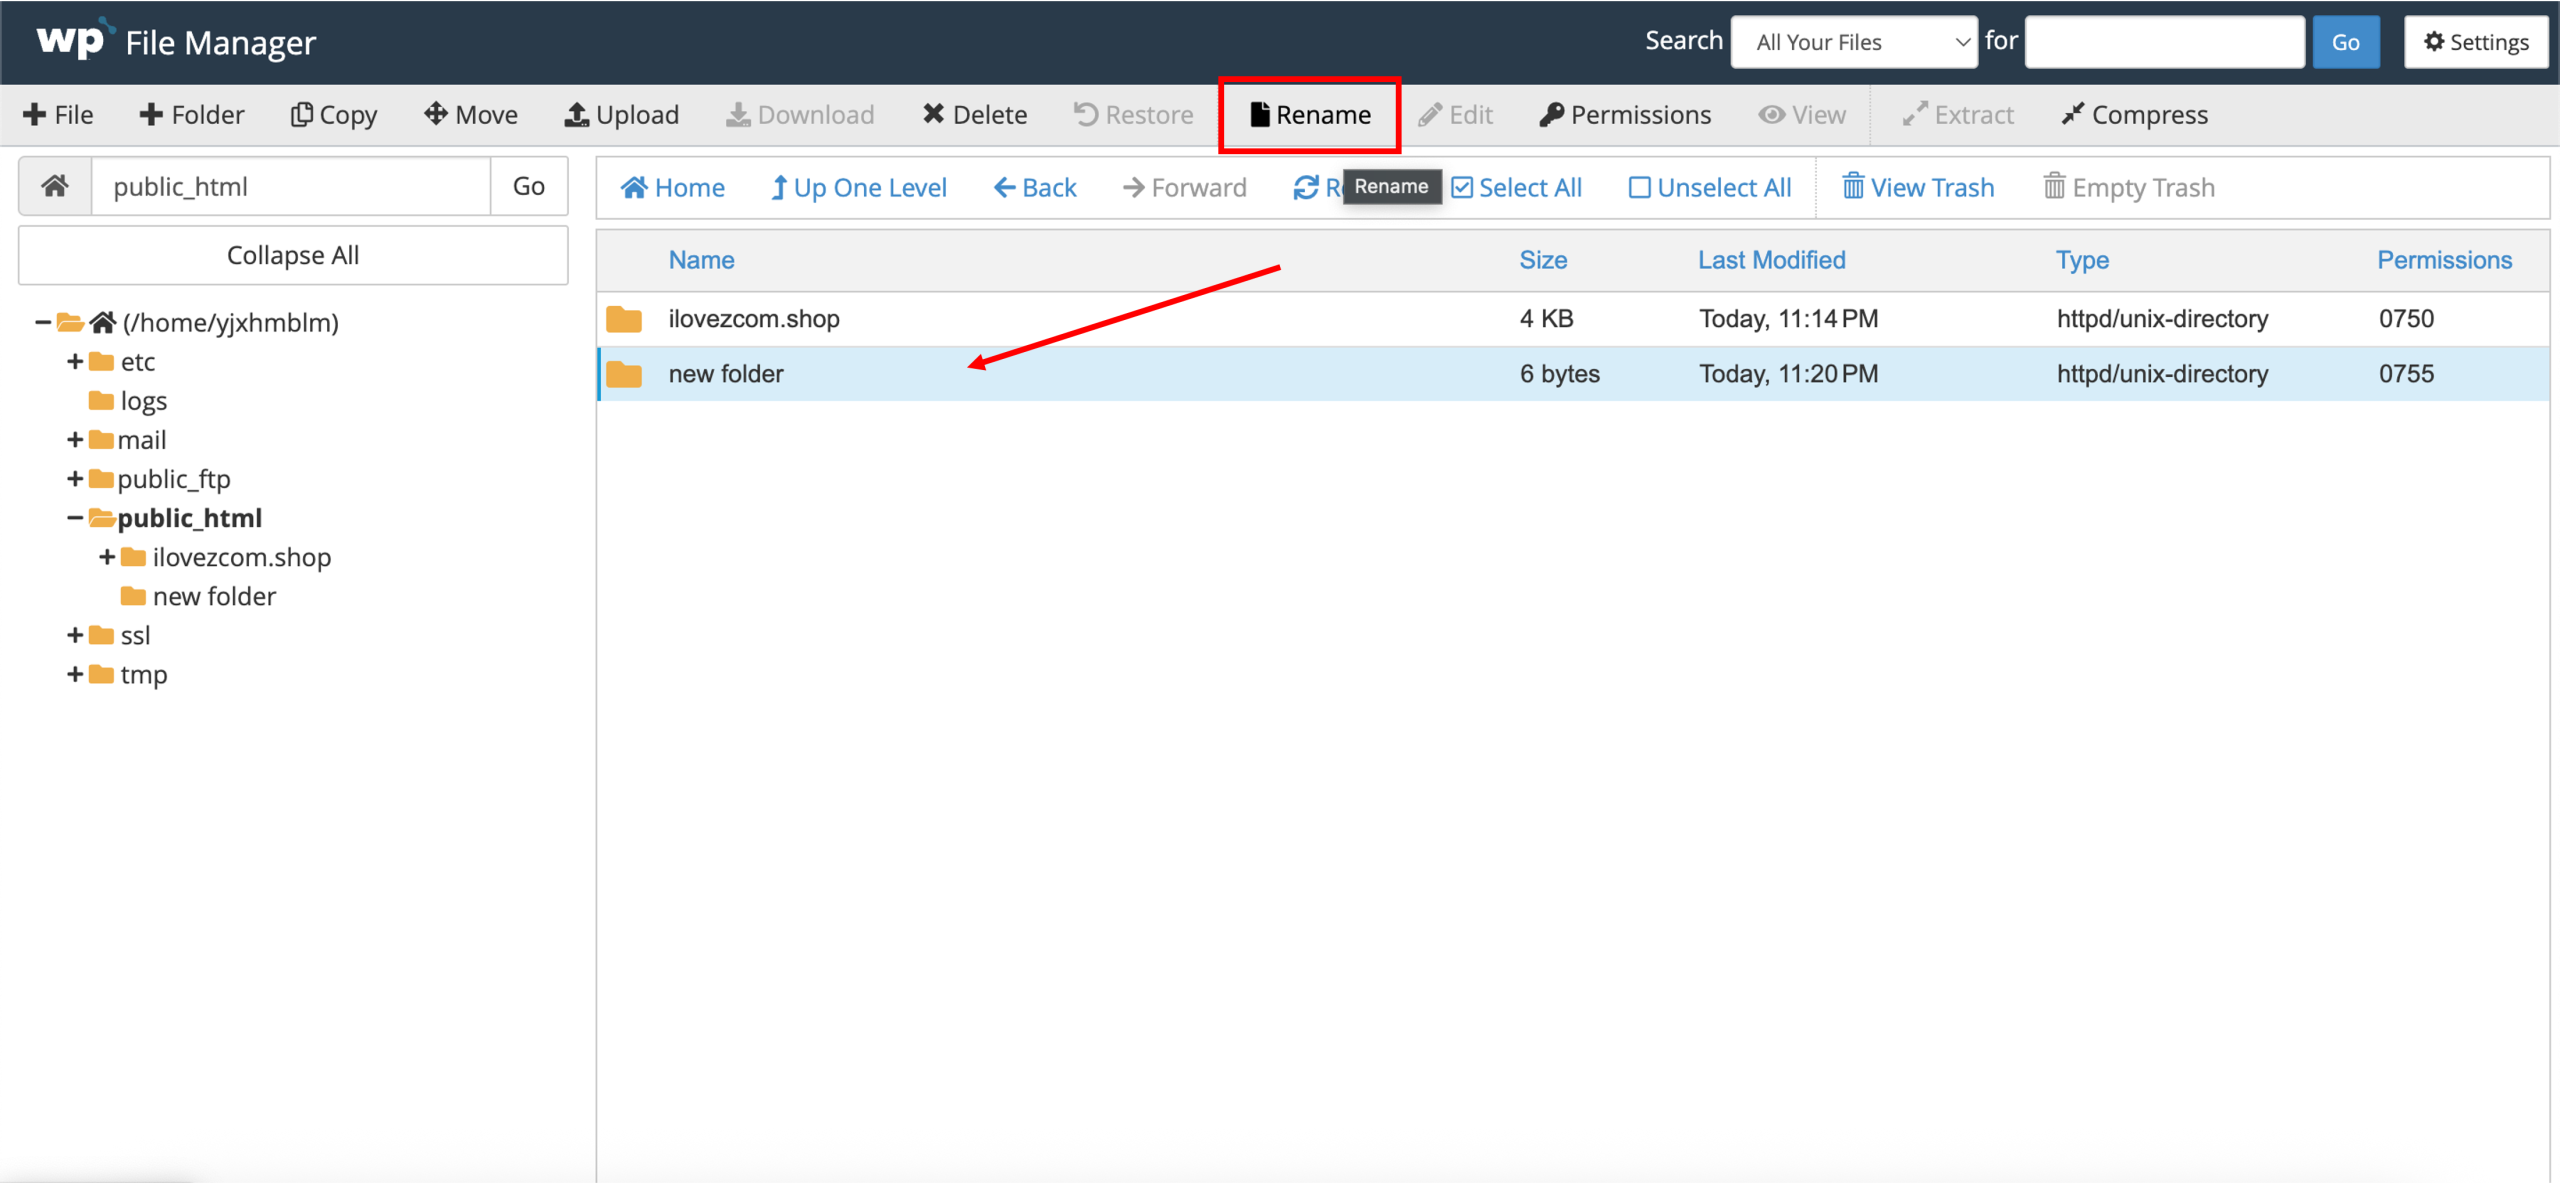
1. Select the file or folder, and click Rename on the top navigation bar.
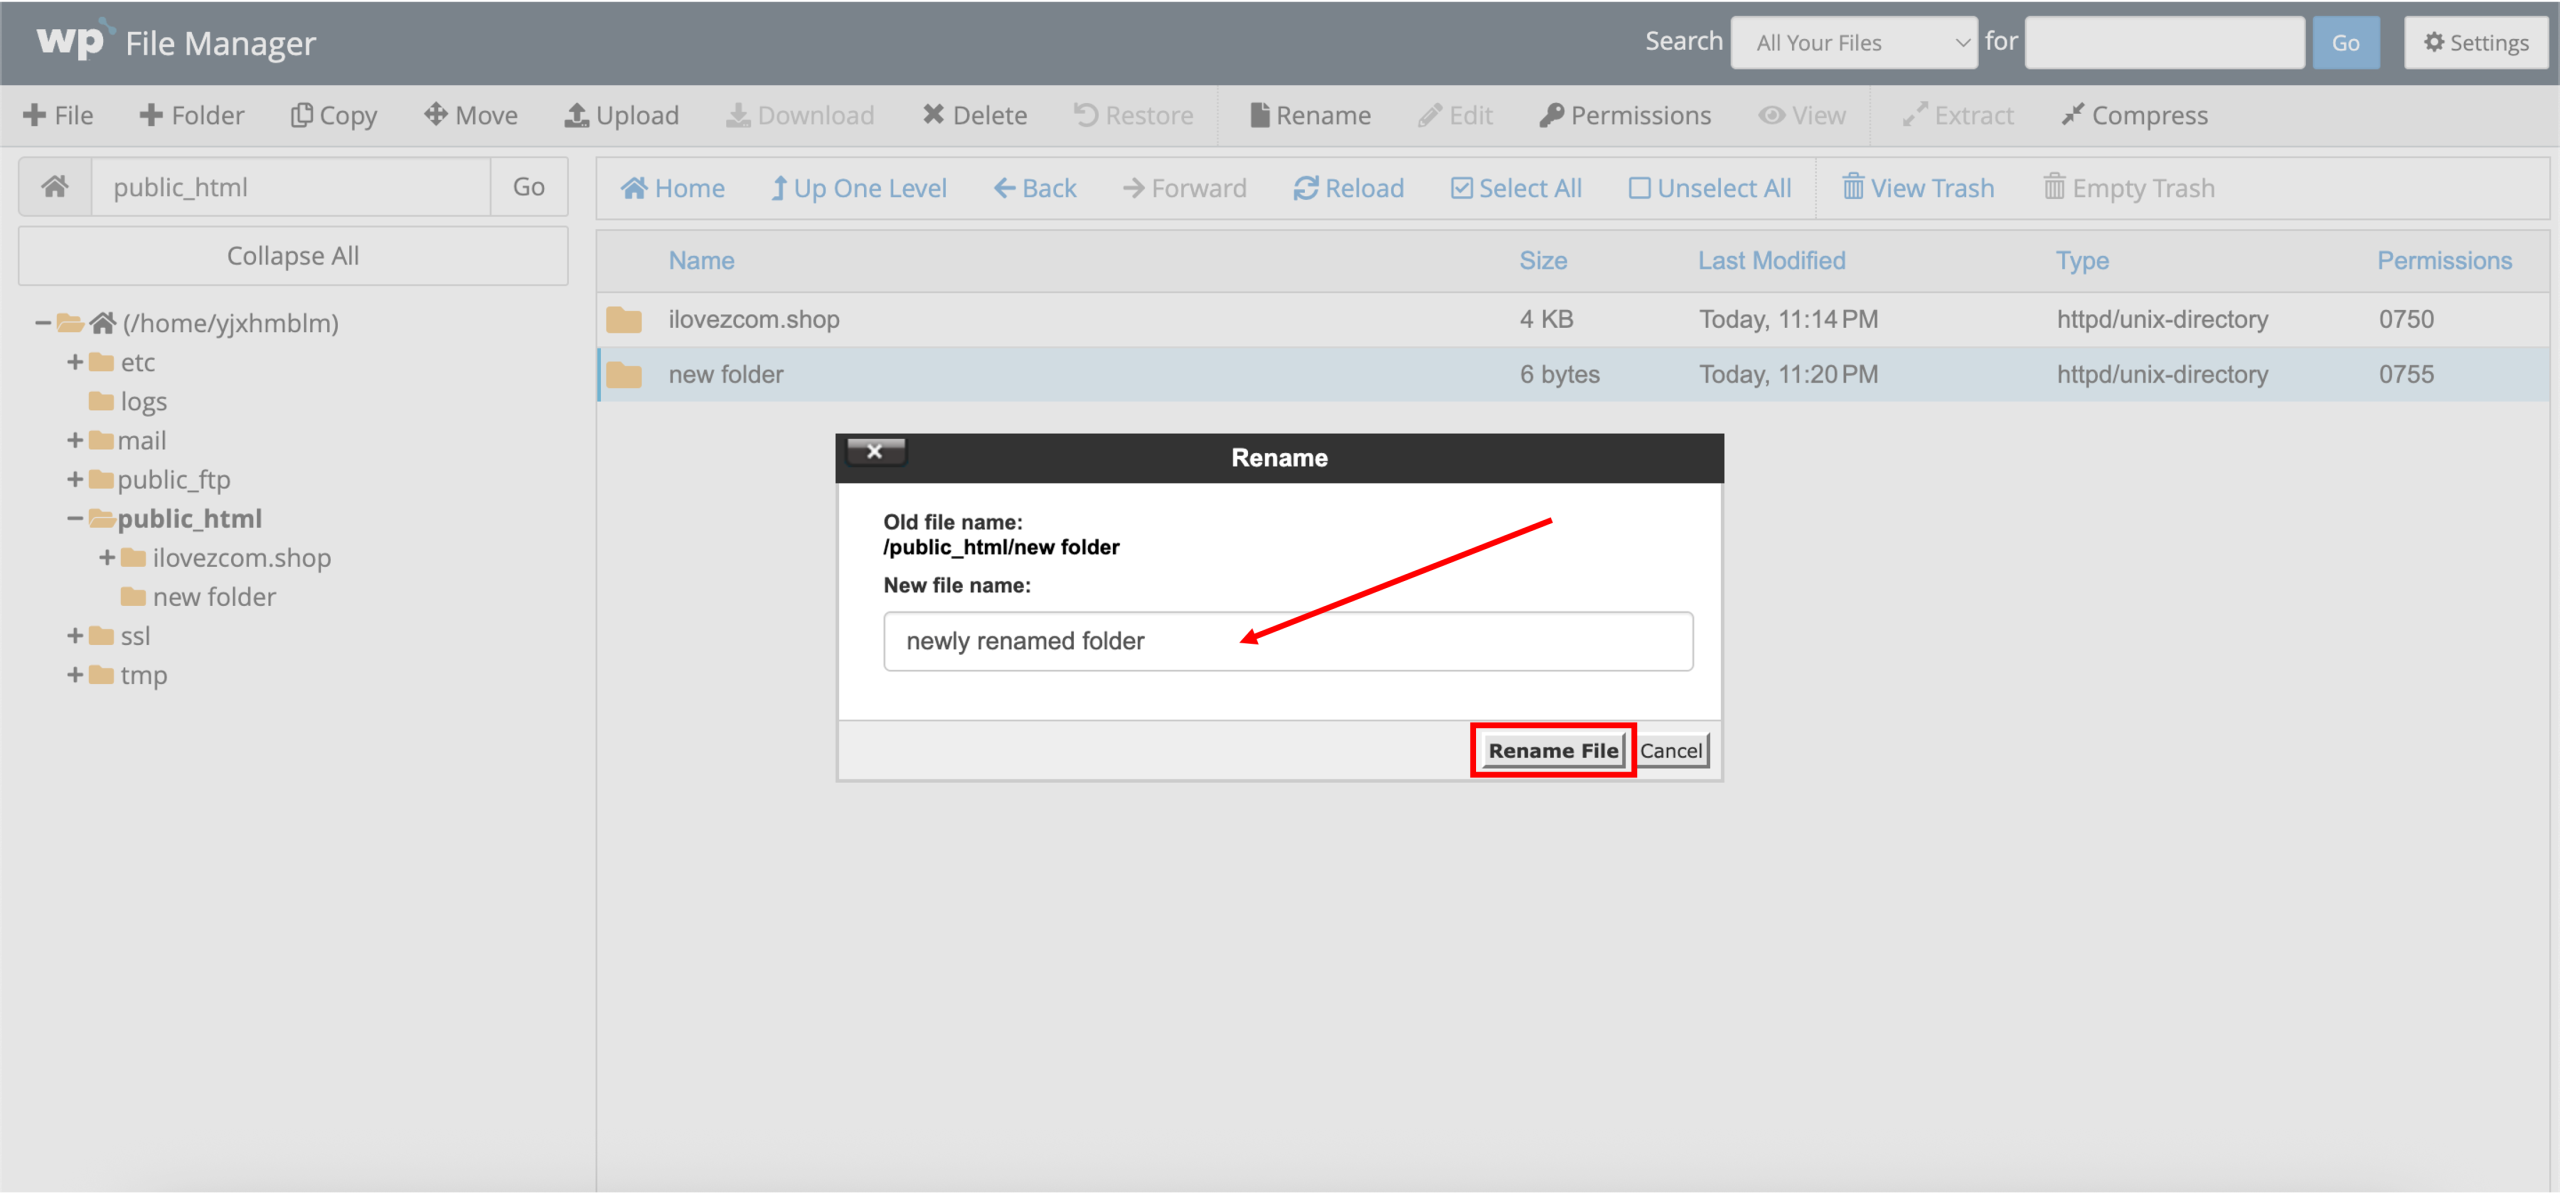
2. A Rename prompt will appear. Enter your desired New file name, then click Rename File.
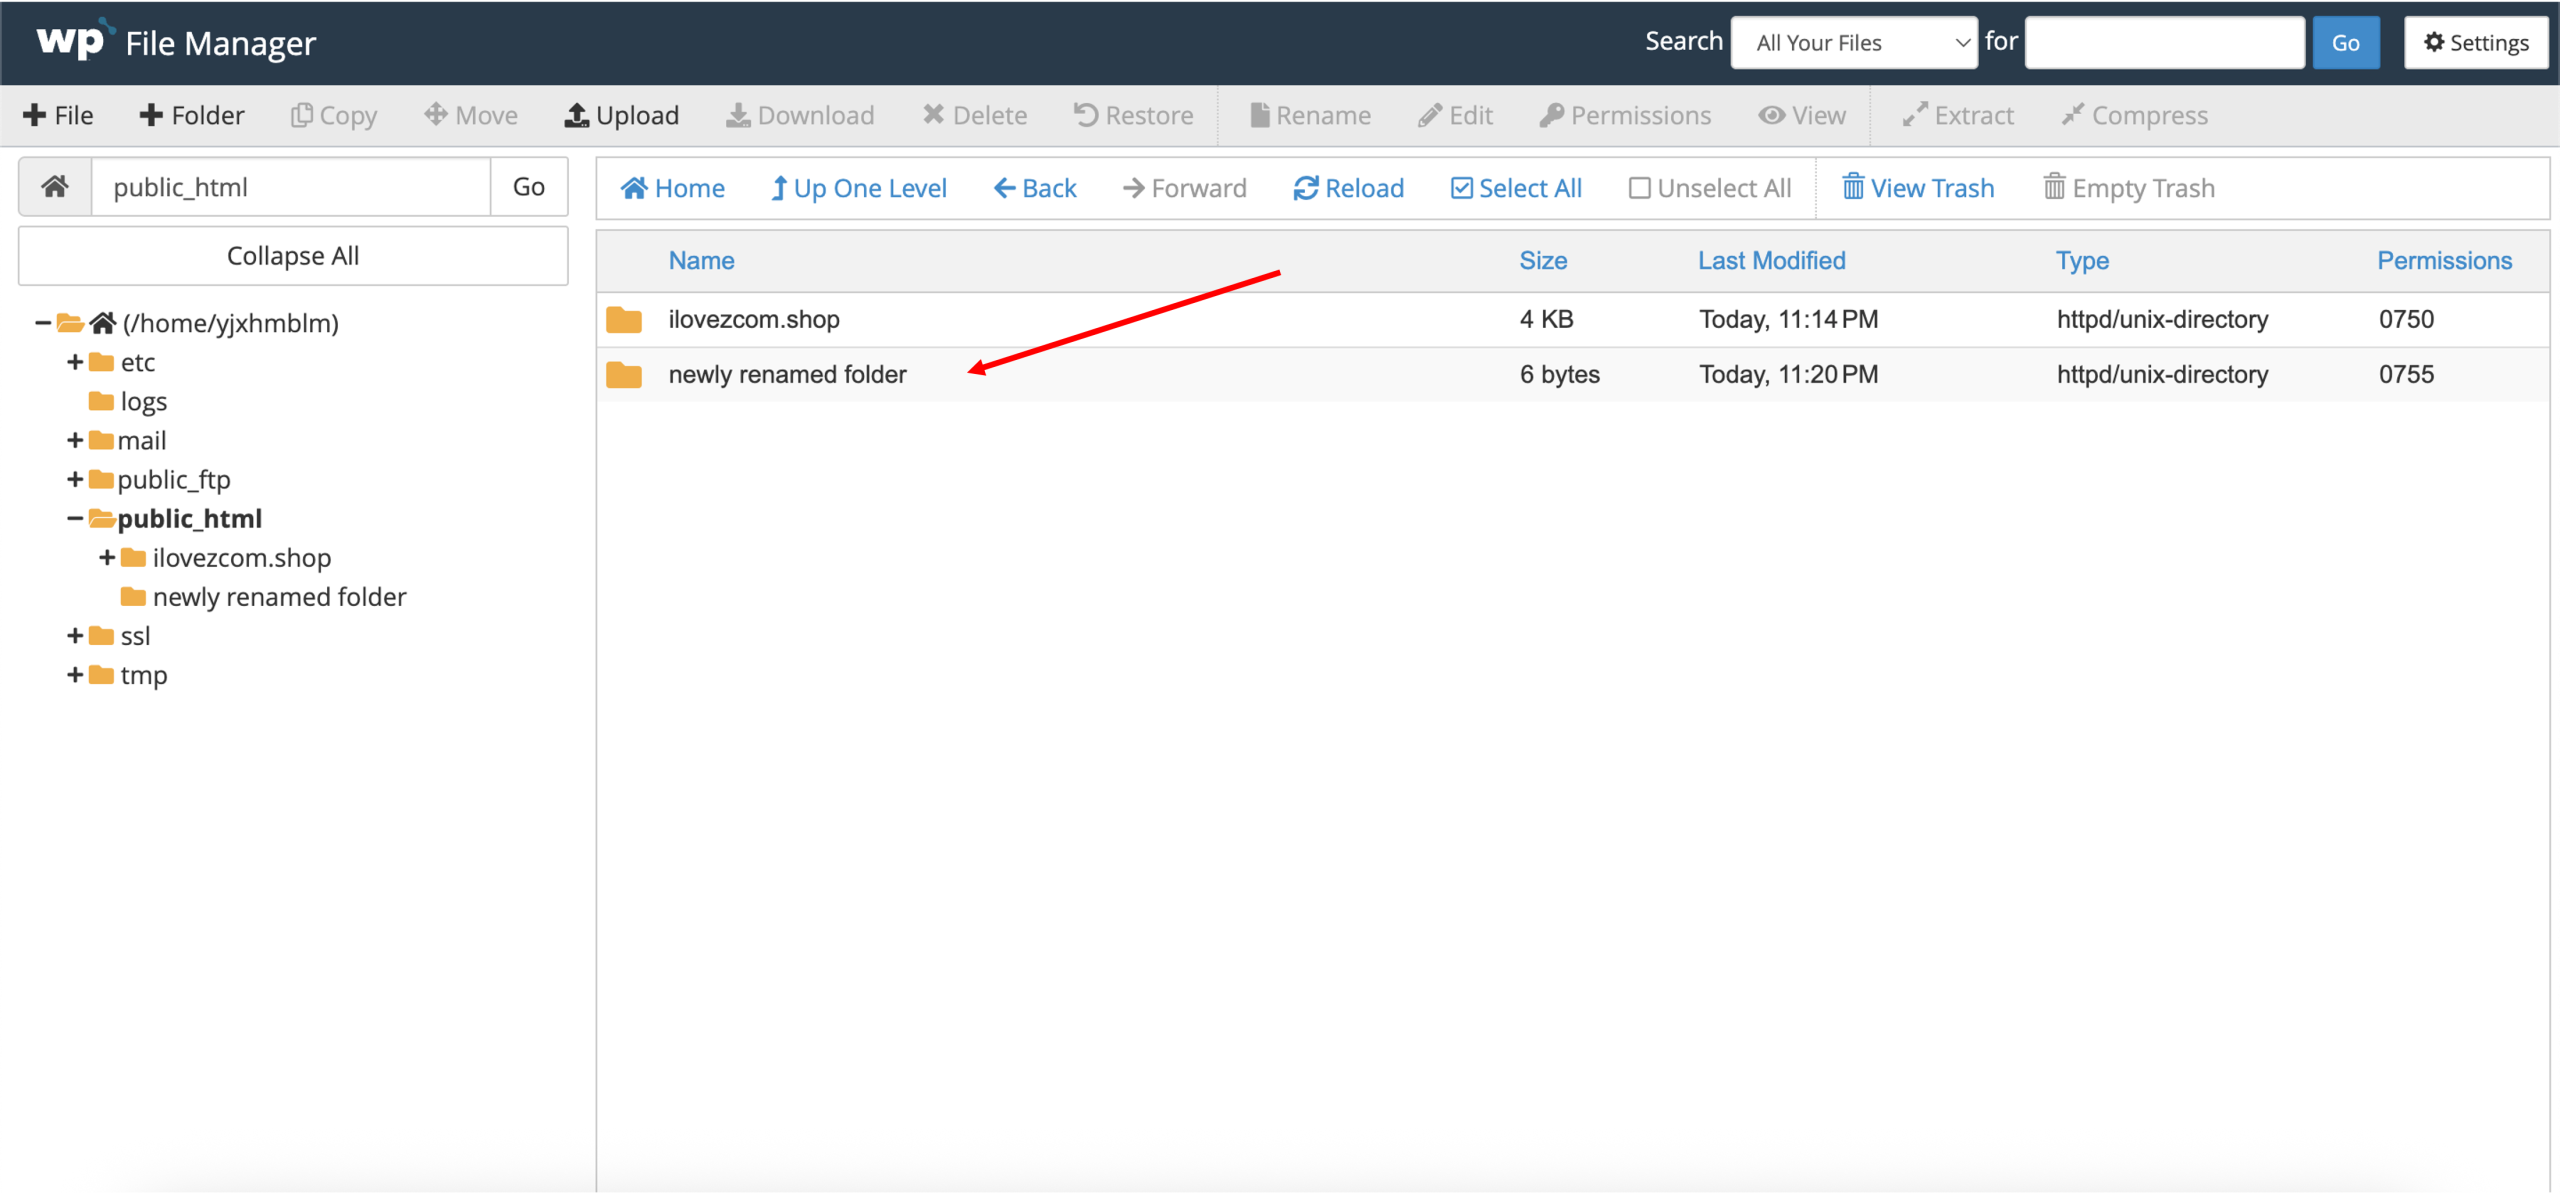
3. Done! The current directory will reload, and the successfully renamed file or folder will reflect the new name.
Note: It is recommended to modify only the files you are familiar with to avoid affecting your website.