Example :
How to set up an email or change my account settings.
- Help Center
- WordPress Hosting
- Websites
- How to back up your WordPress website using the WP Squared dashboard
How to back up your WordPress website using the WP Squared dashboard
Backing up your WordPress website helps protect your data from unexpected issues such as errors, updates, or security problems. With WordPress hosting, you can create backups directly from the WP Squared dashboard without logging in to the WordPress admin dashboard, and even set up recurring backups to automatically protect your website on a regular schedule.
Note:
• Backups created through the WP Squared dashboard include your website files and database.
• You do not need access to the WordPress admin dashboard to perform a backup.
• Backups are especially recommended before making major changes such as installing plugins or themes, updating WordPress, or changing PHP versions.
• Backup files are created in tar.gz format and stored in the /home/wp-backups/<USER> directory.
• The availability of backup features may vary depending on your WordPress hosting plan.*
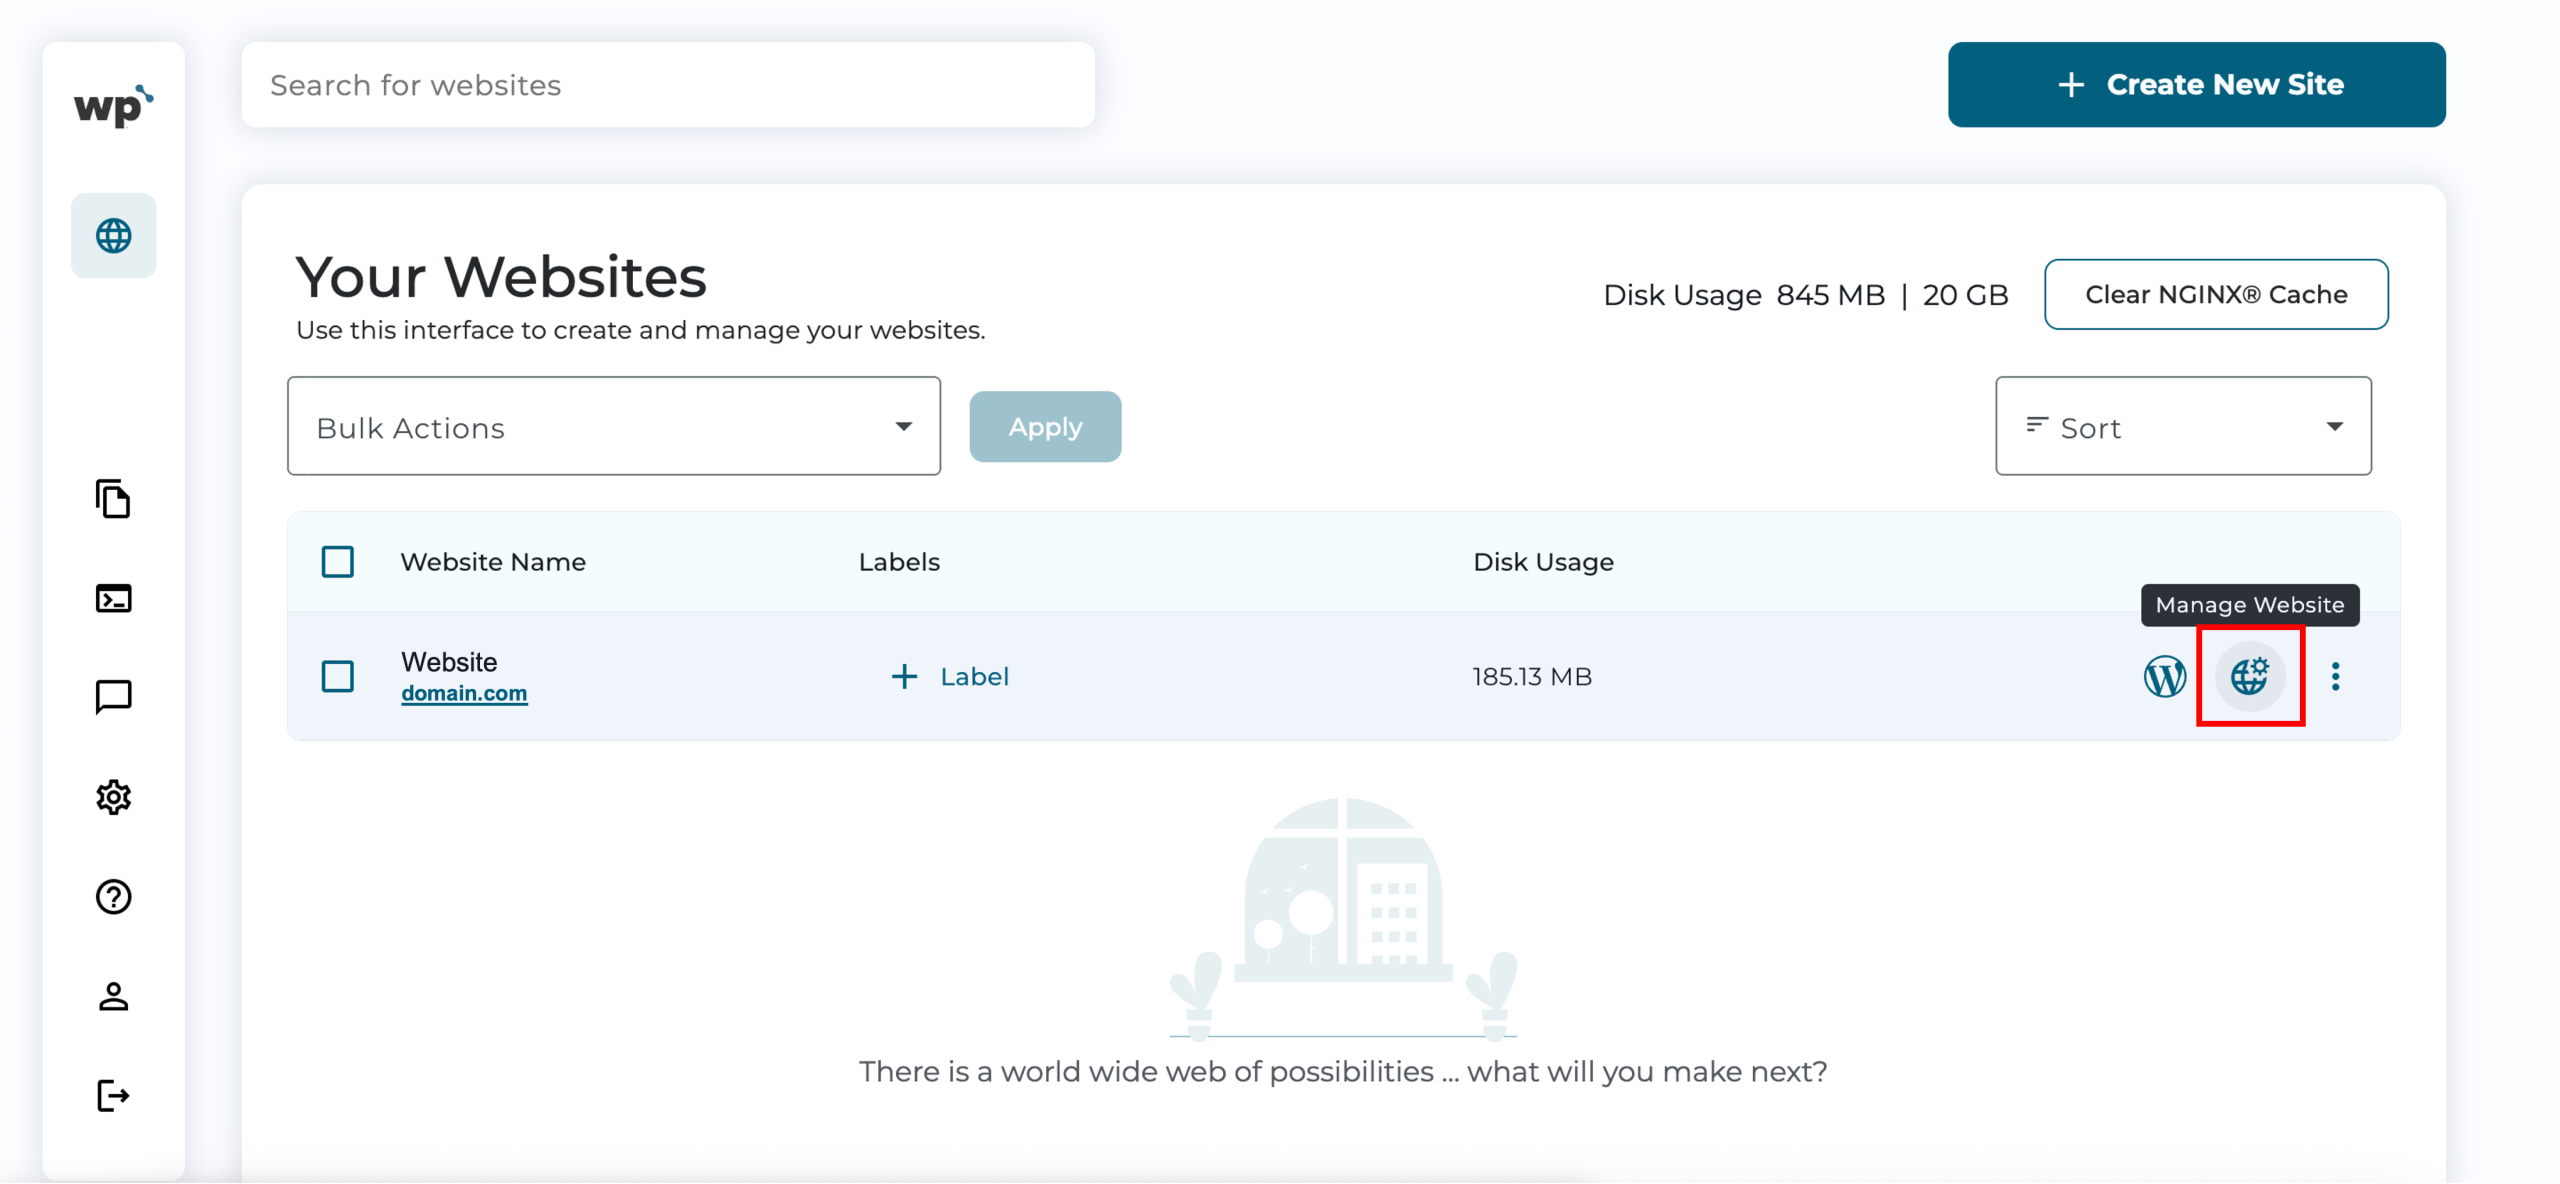
1. Upon reaching your WP Squared dashboard, click Manage Website next to the website you wish to back up.
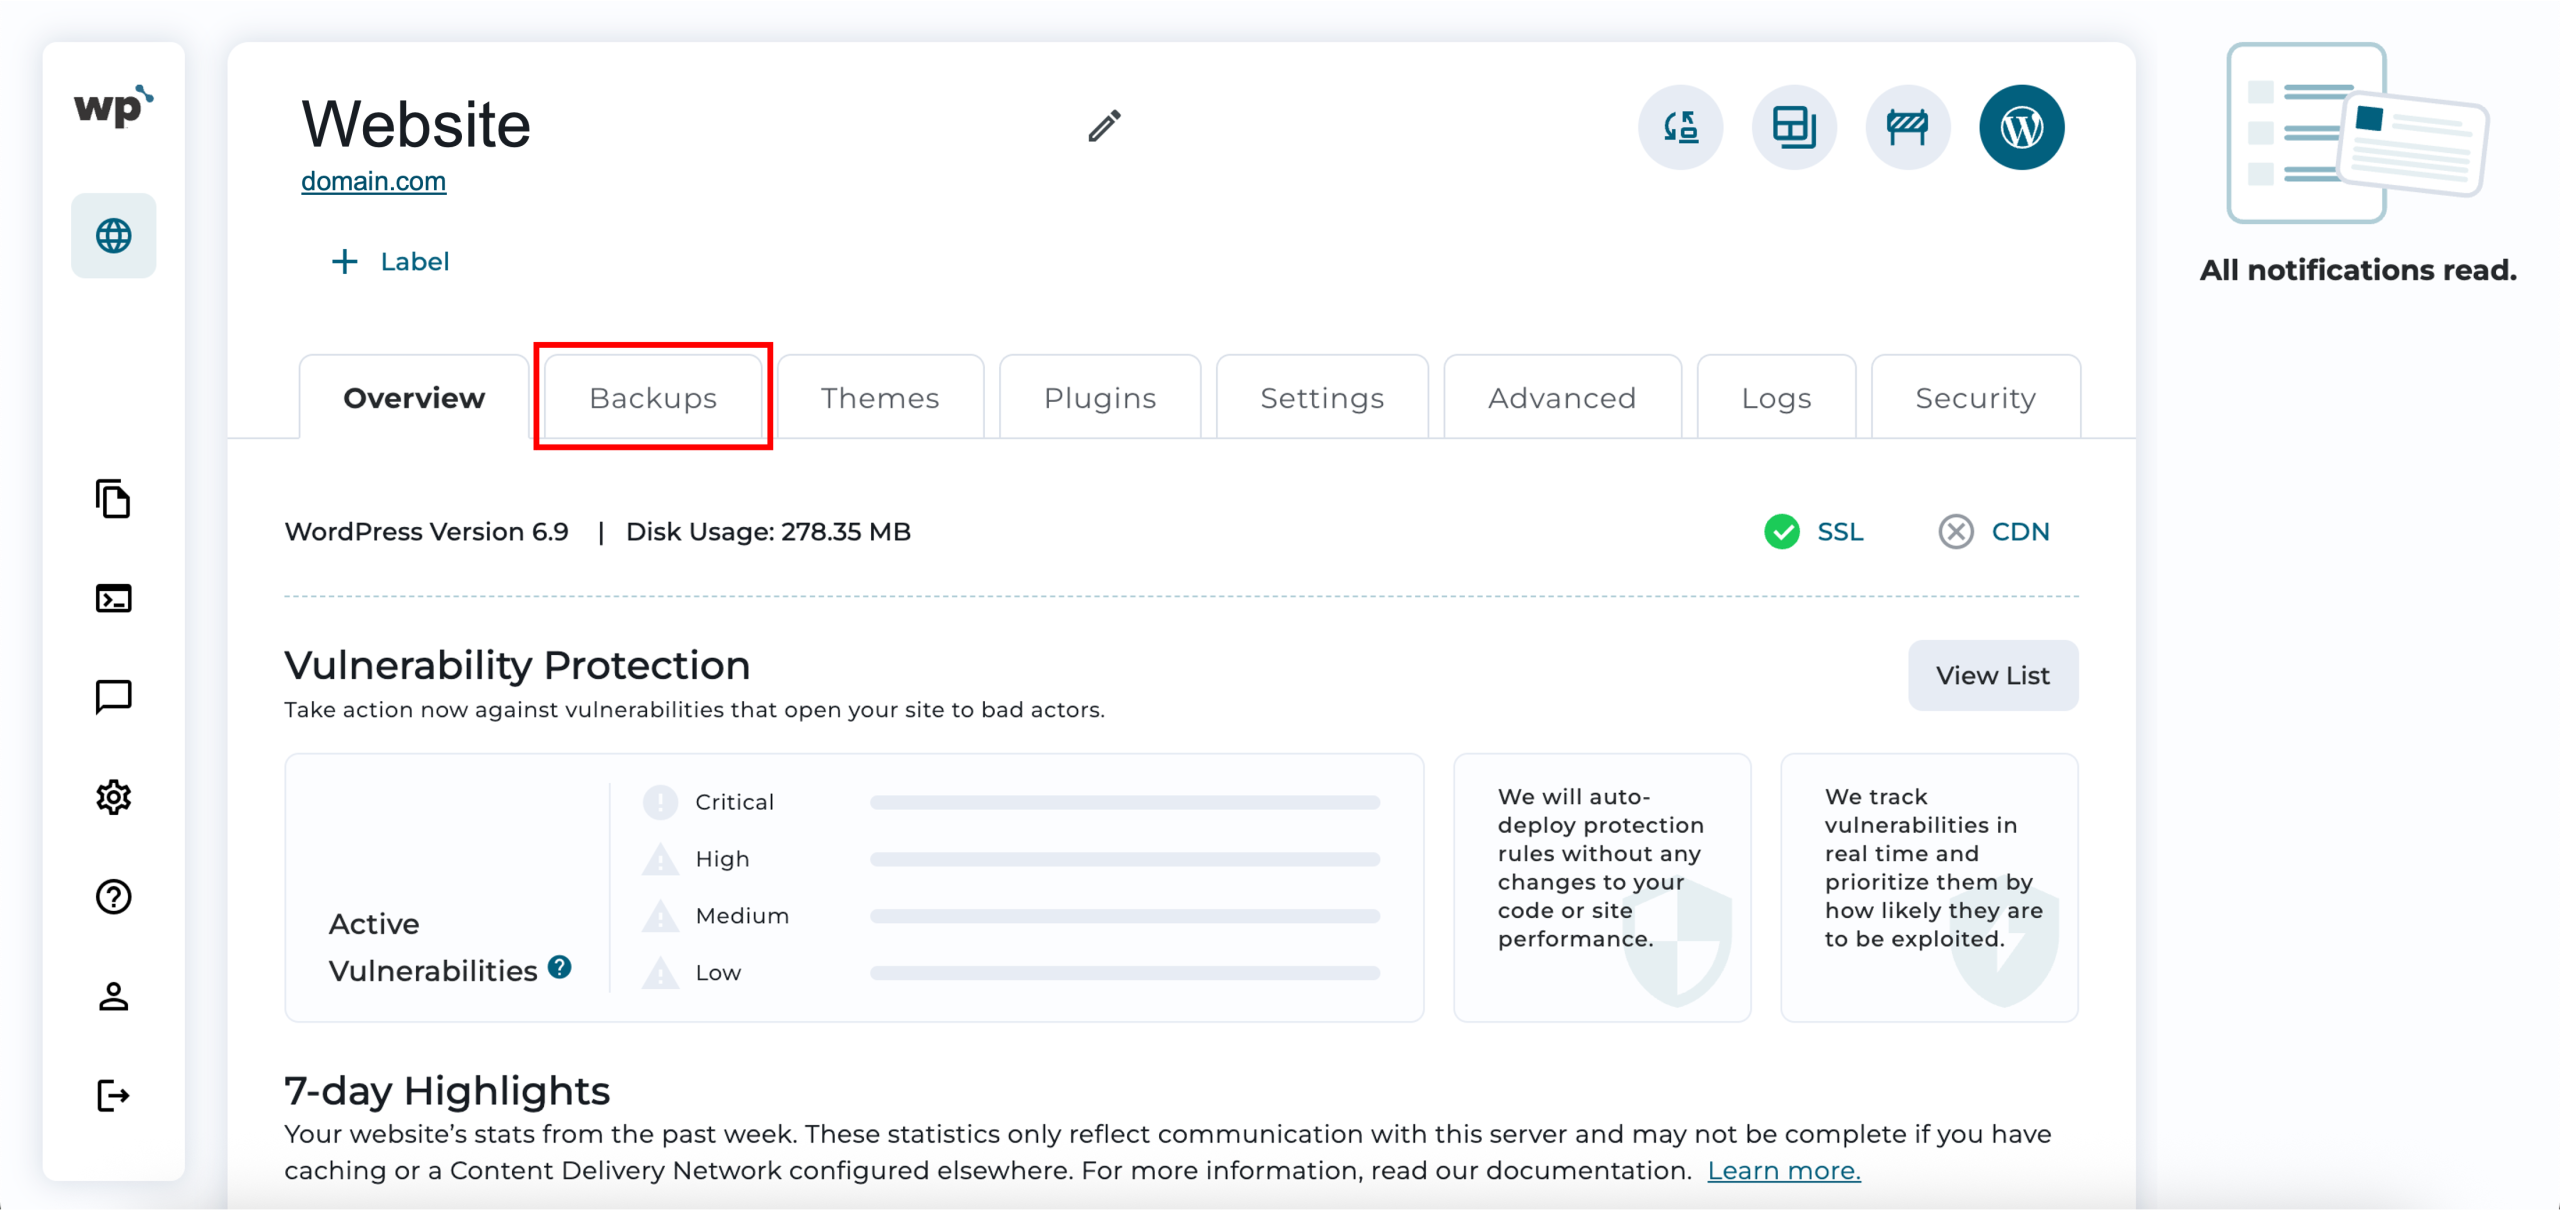
2. Click on the Backups tab.
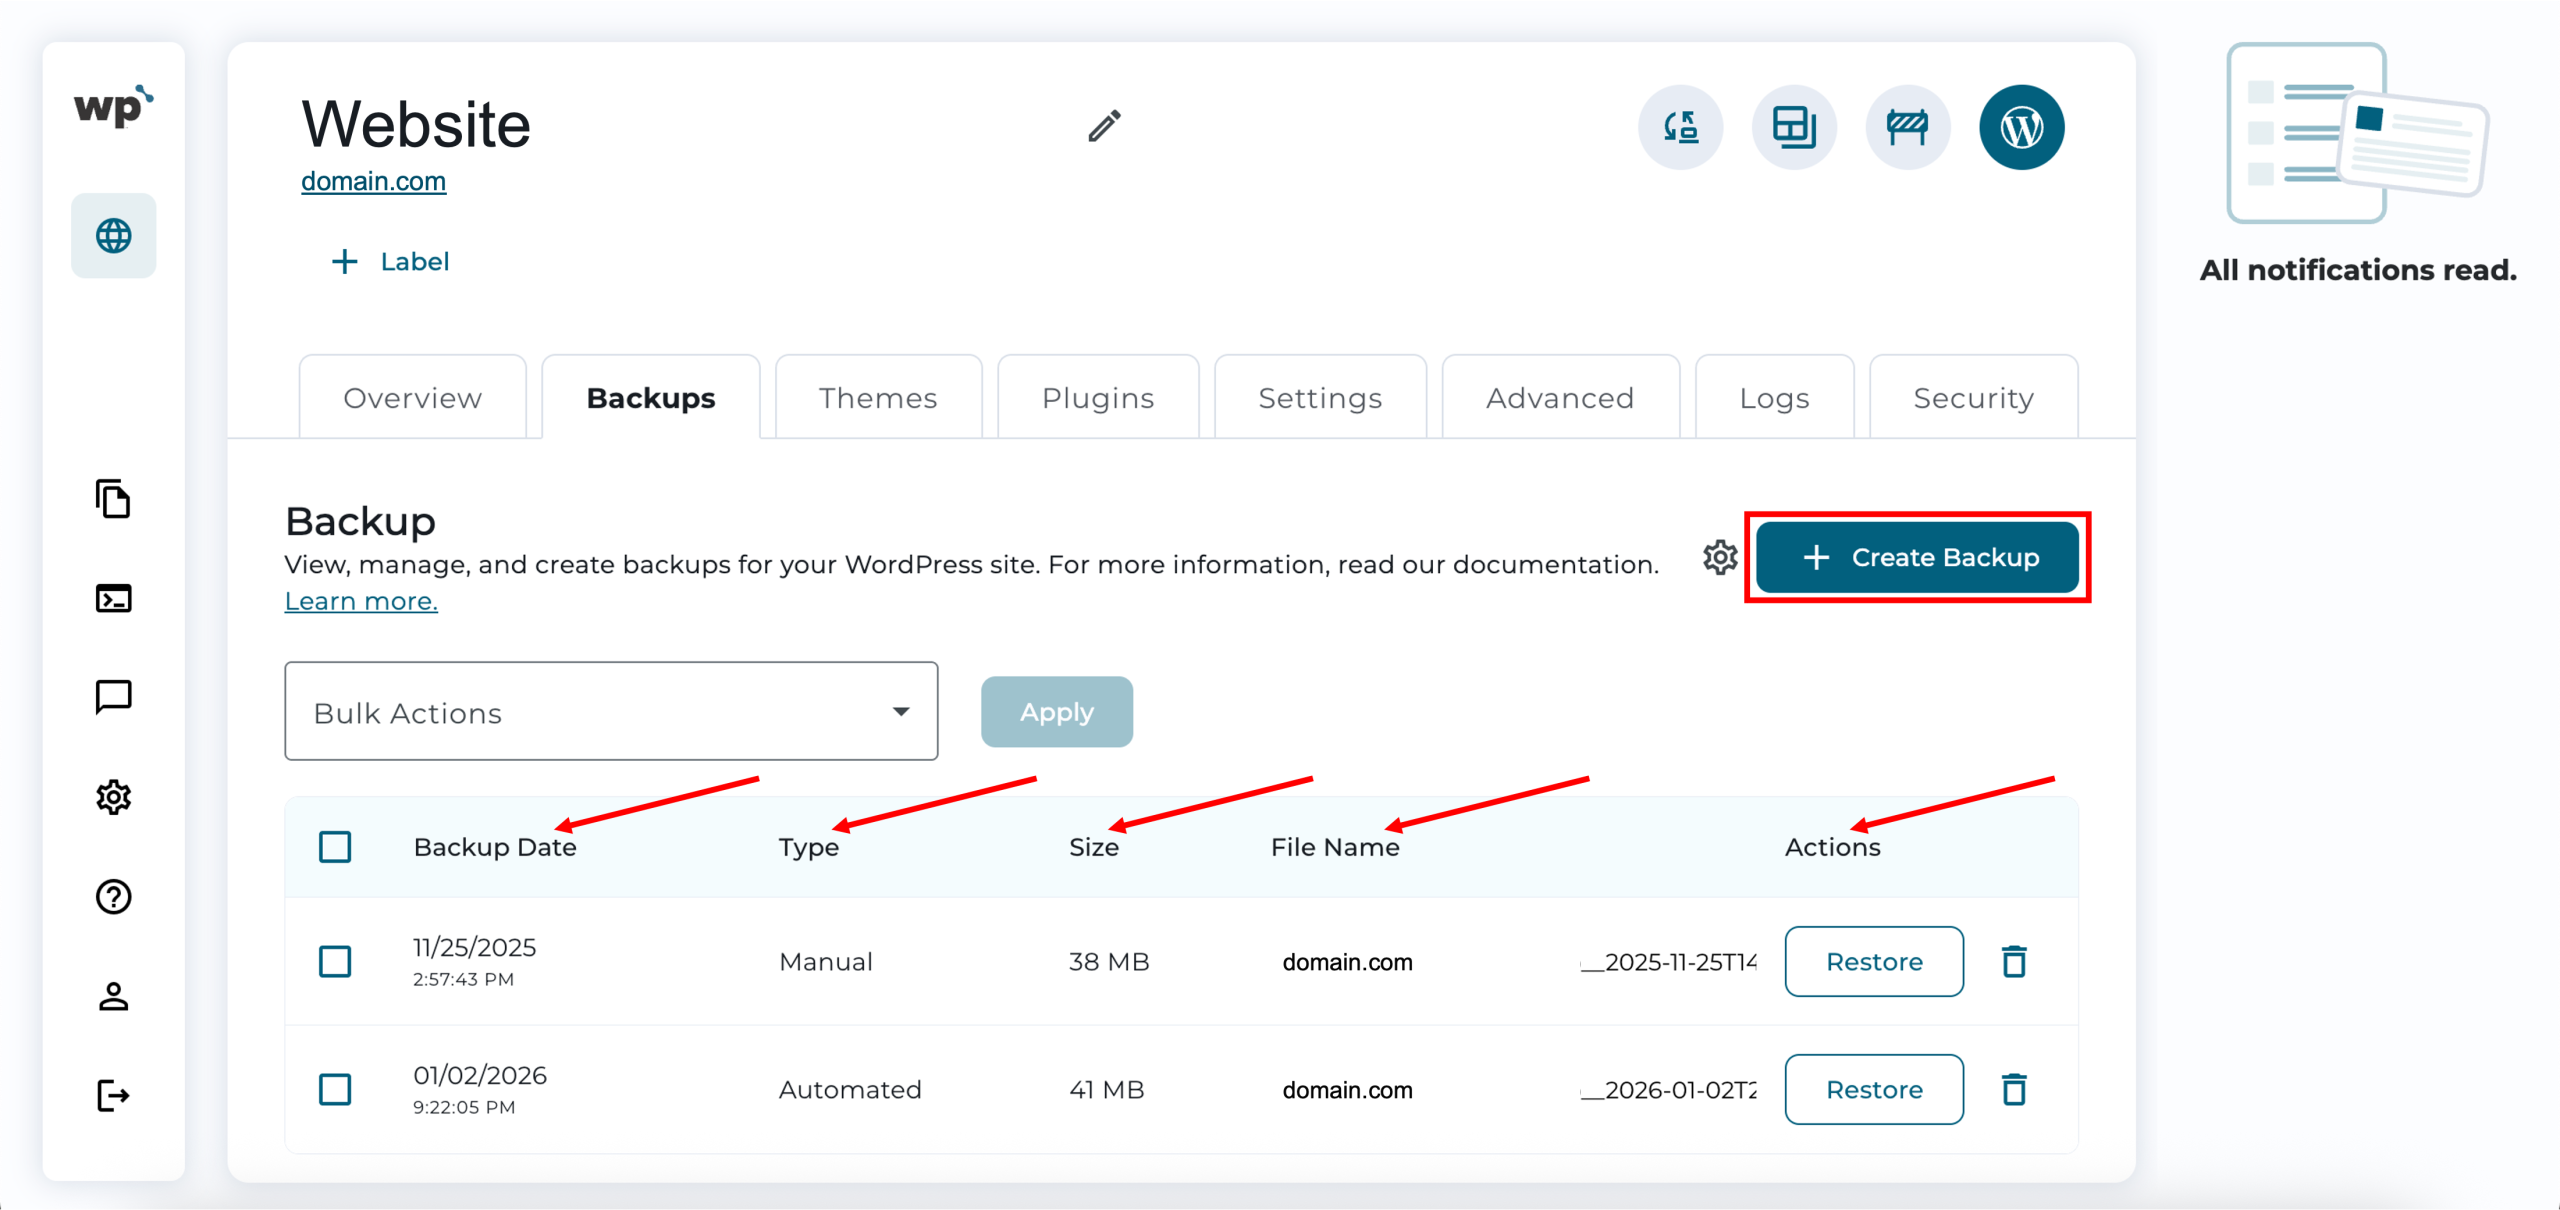
3. Under Backup, you should see a list of existing backups, including their dates, types, sizes, file names, and actions. Click + Create Backup to create a new backup.
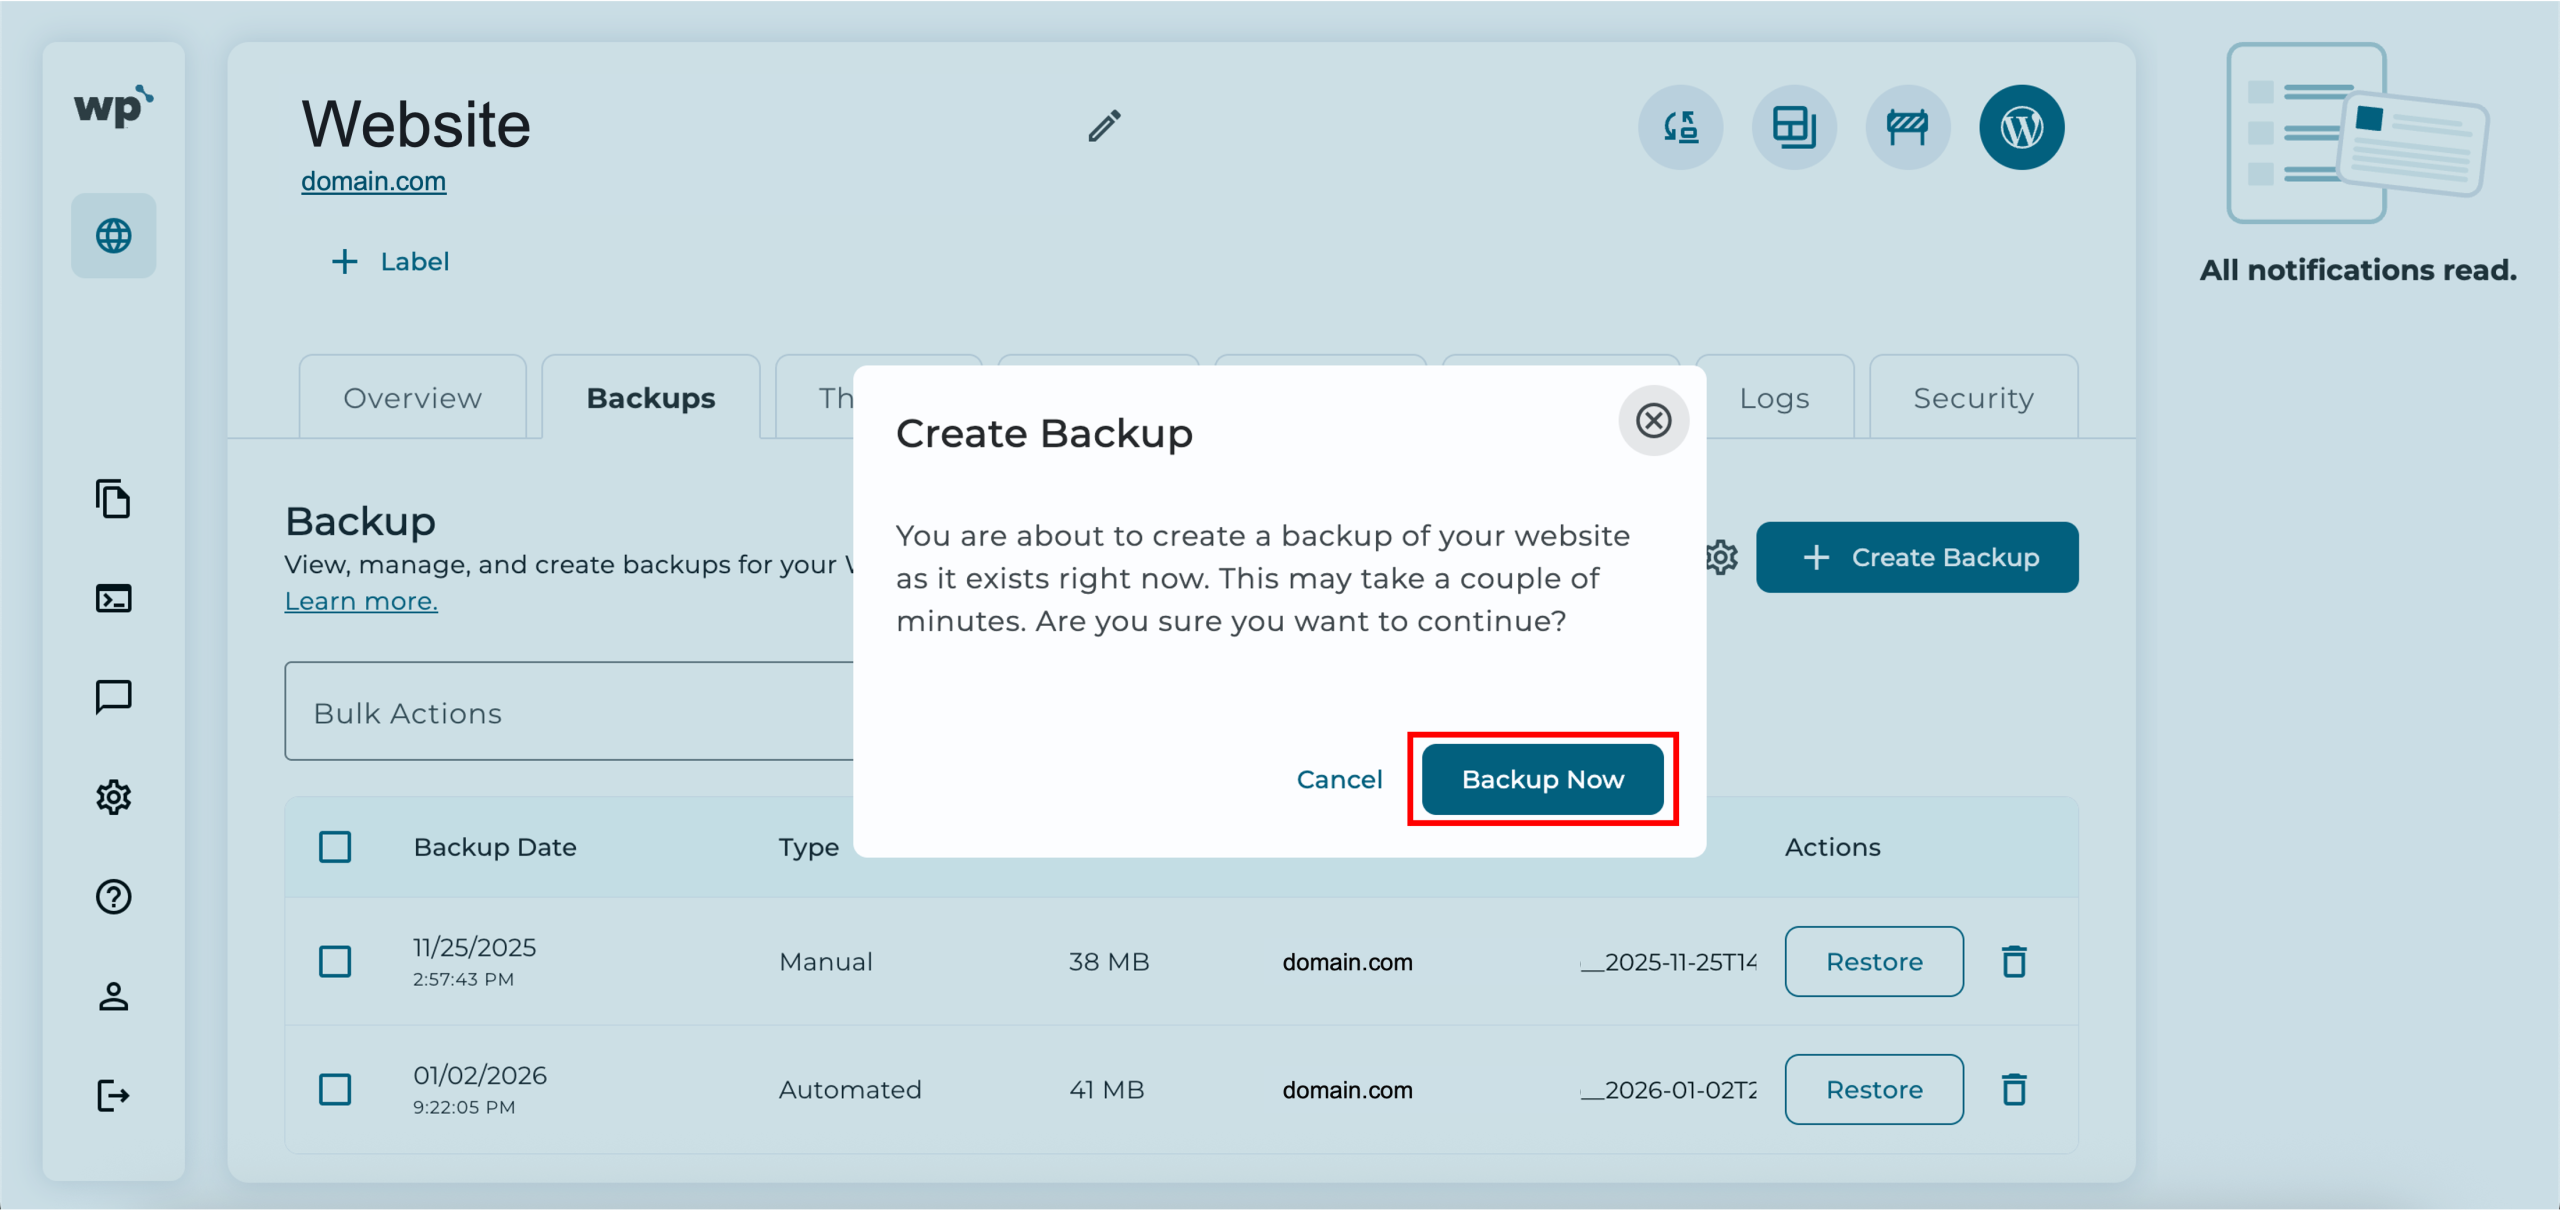
4. Confirm by clicking Backup Now.
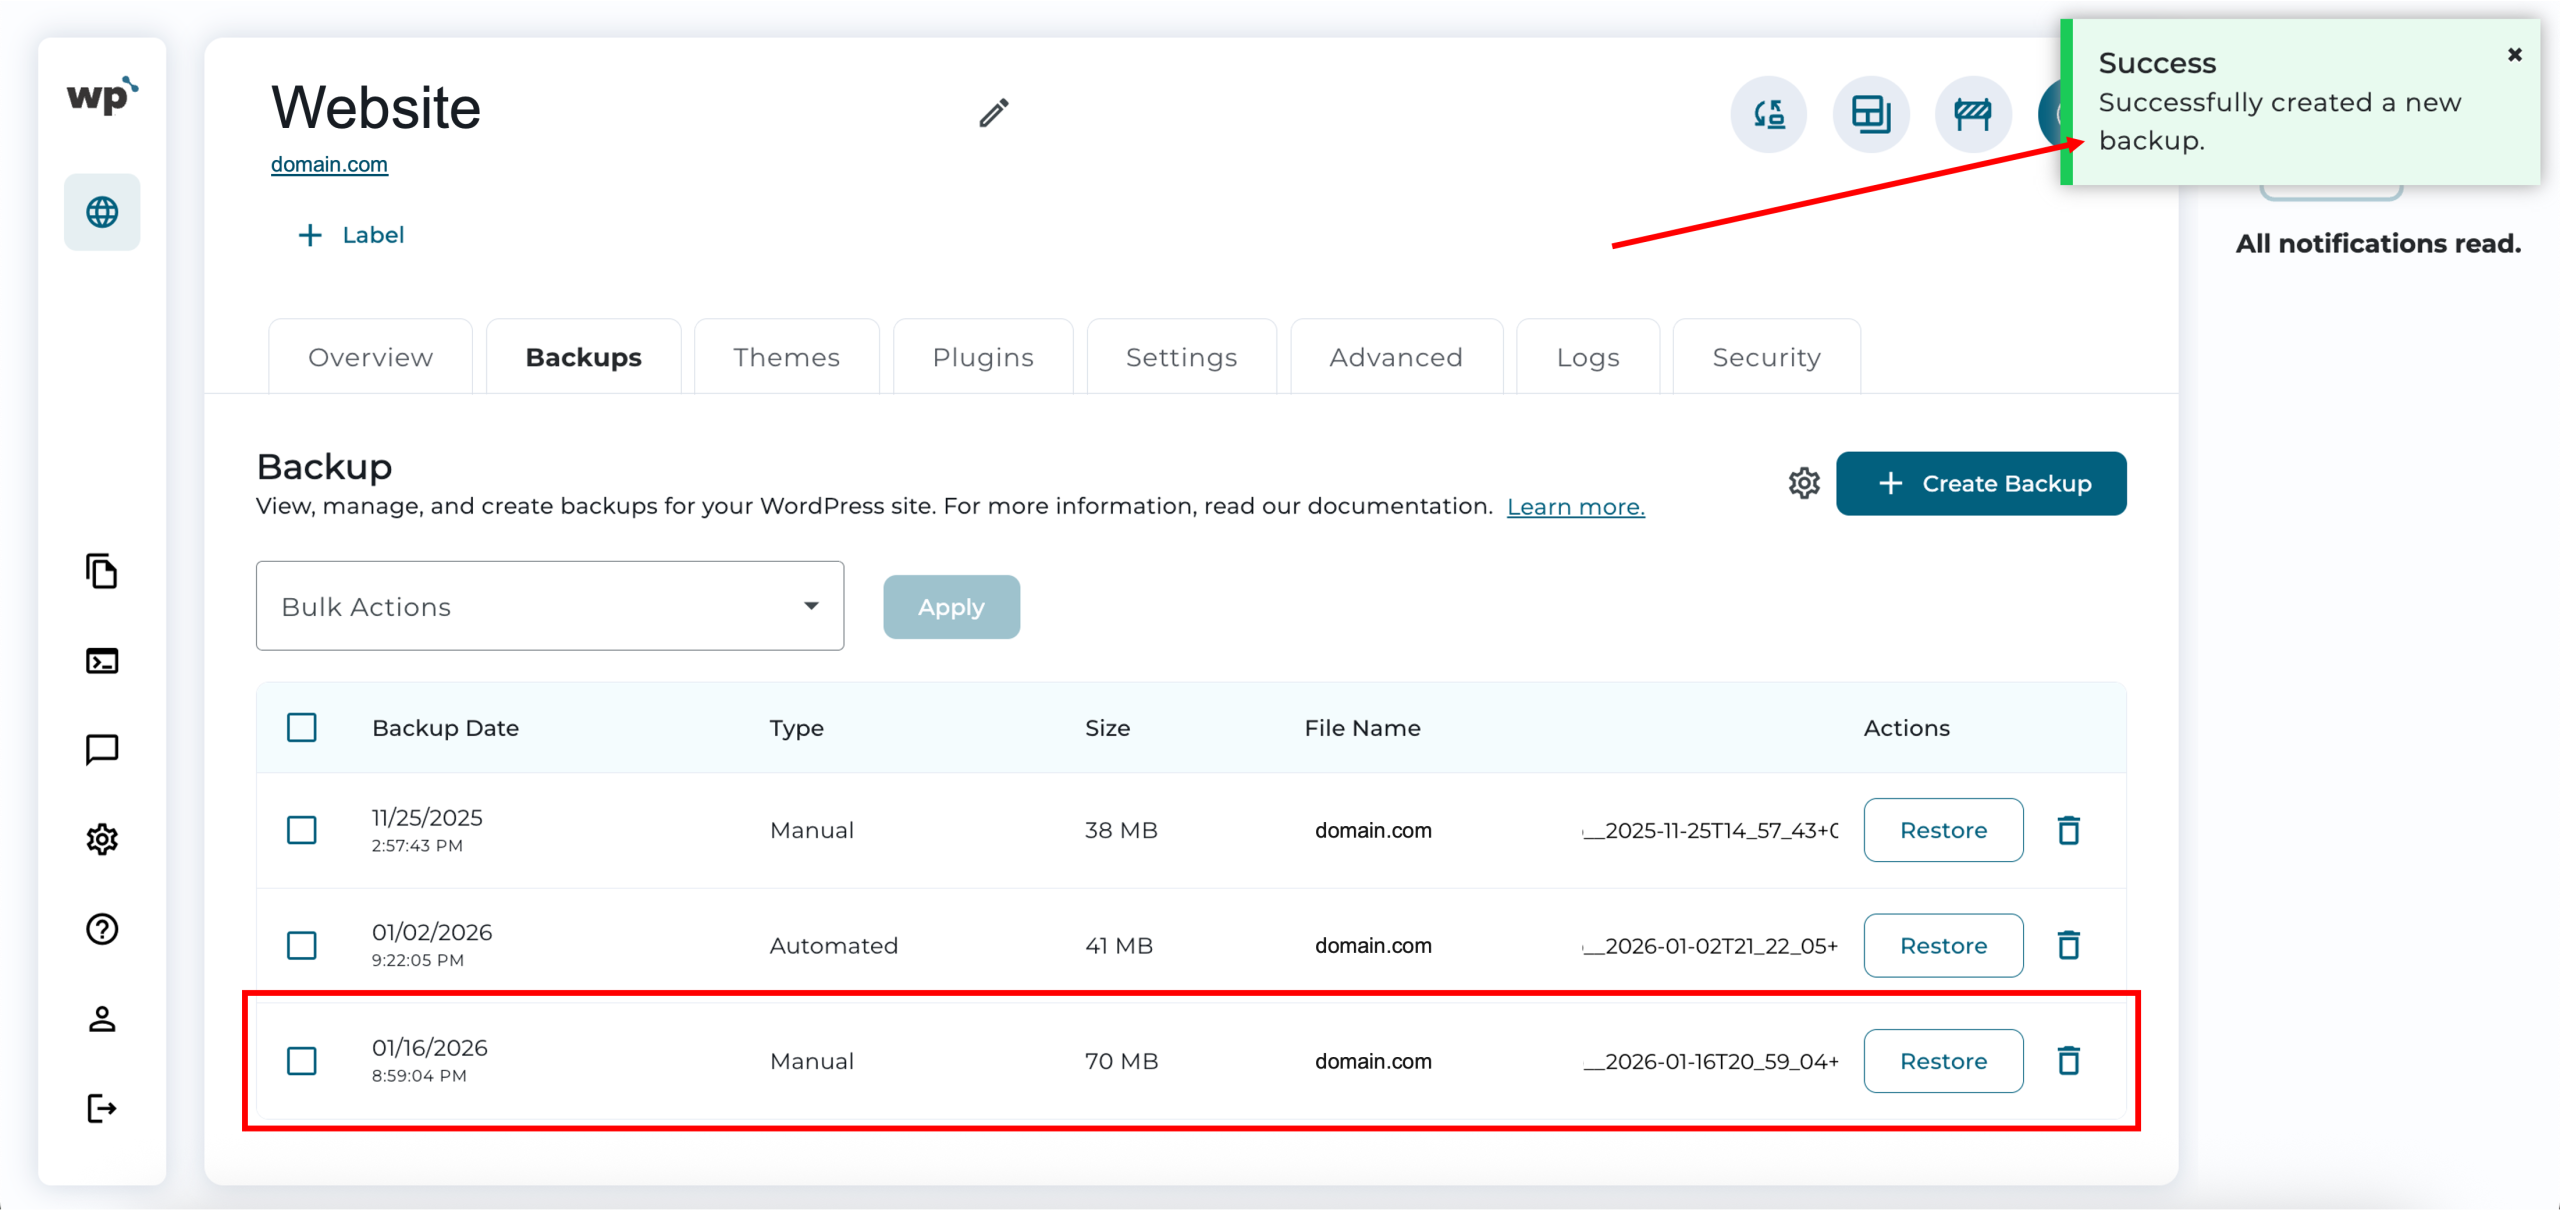
5. Done! Successfully creating a new backup will look like the following, with the successfully created a new backup prompt.
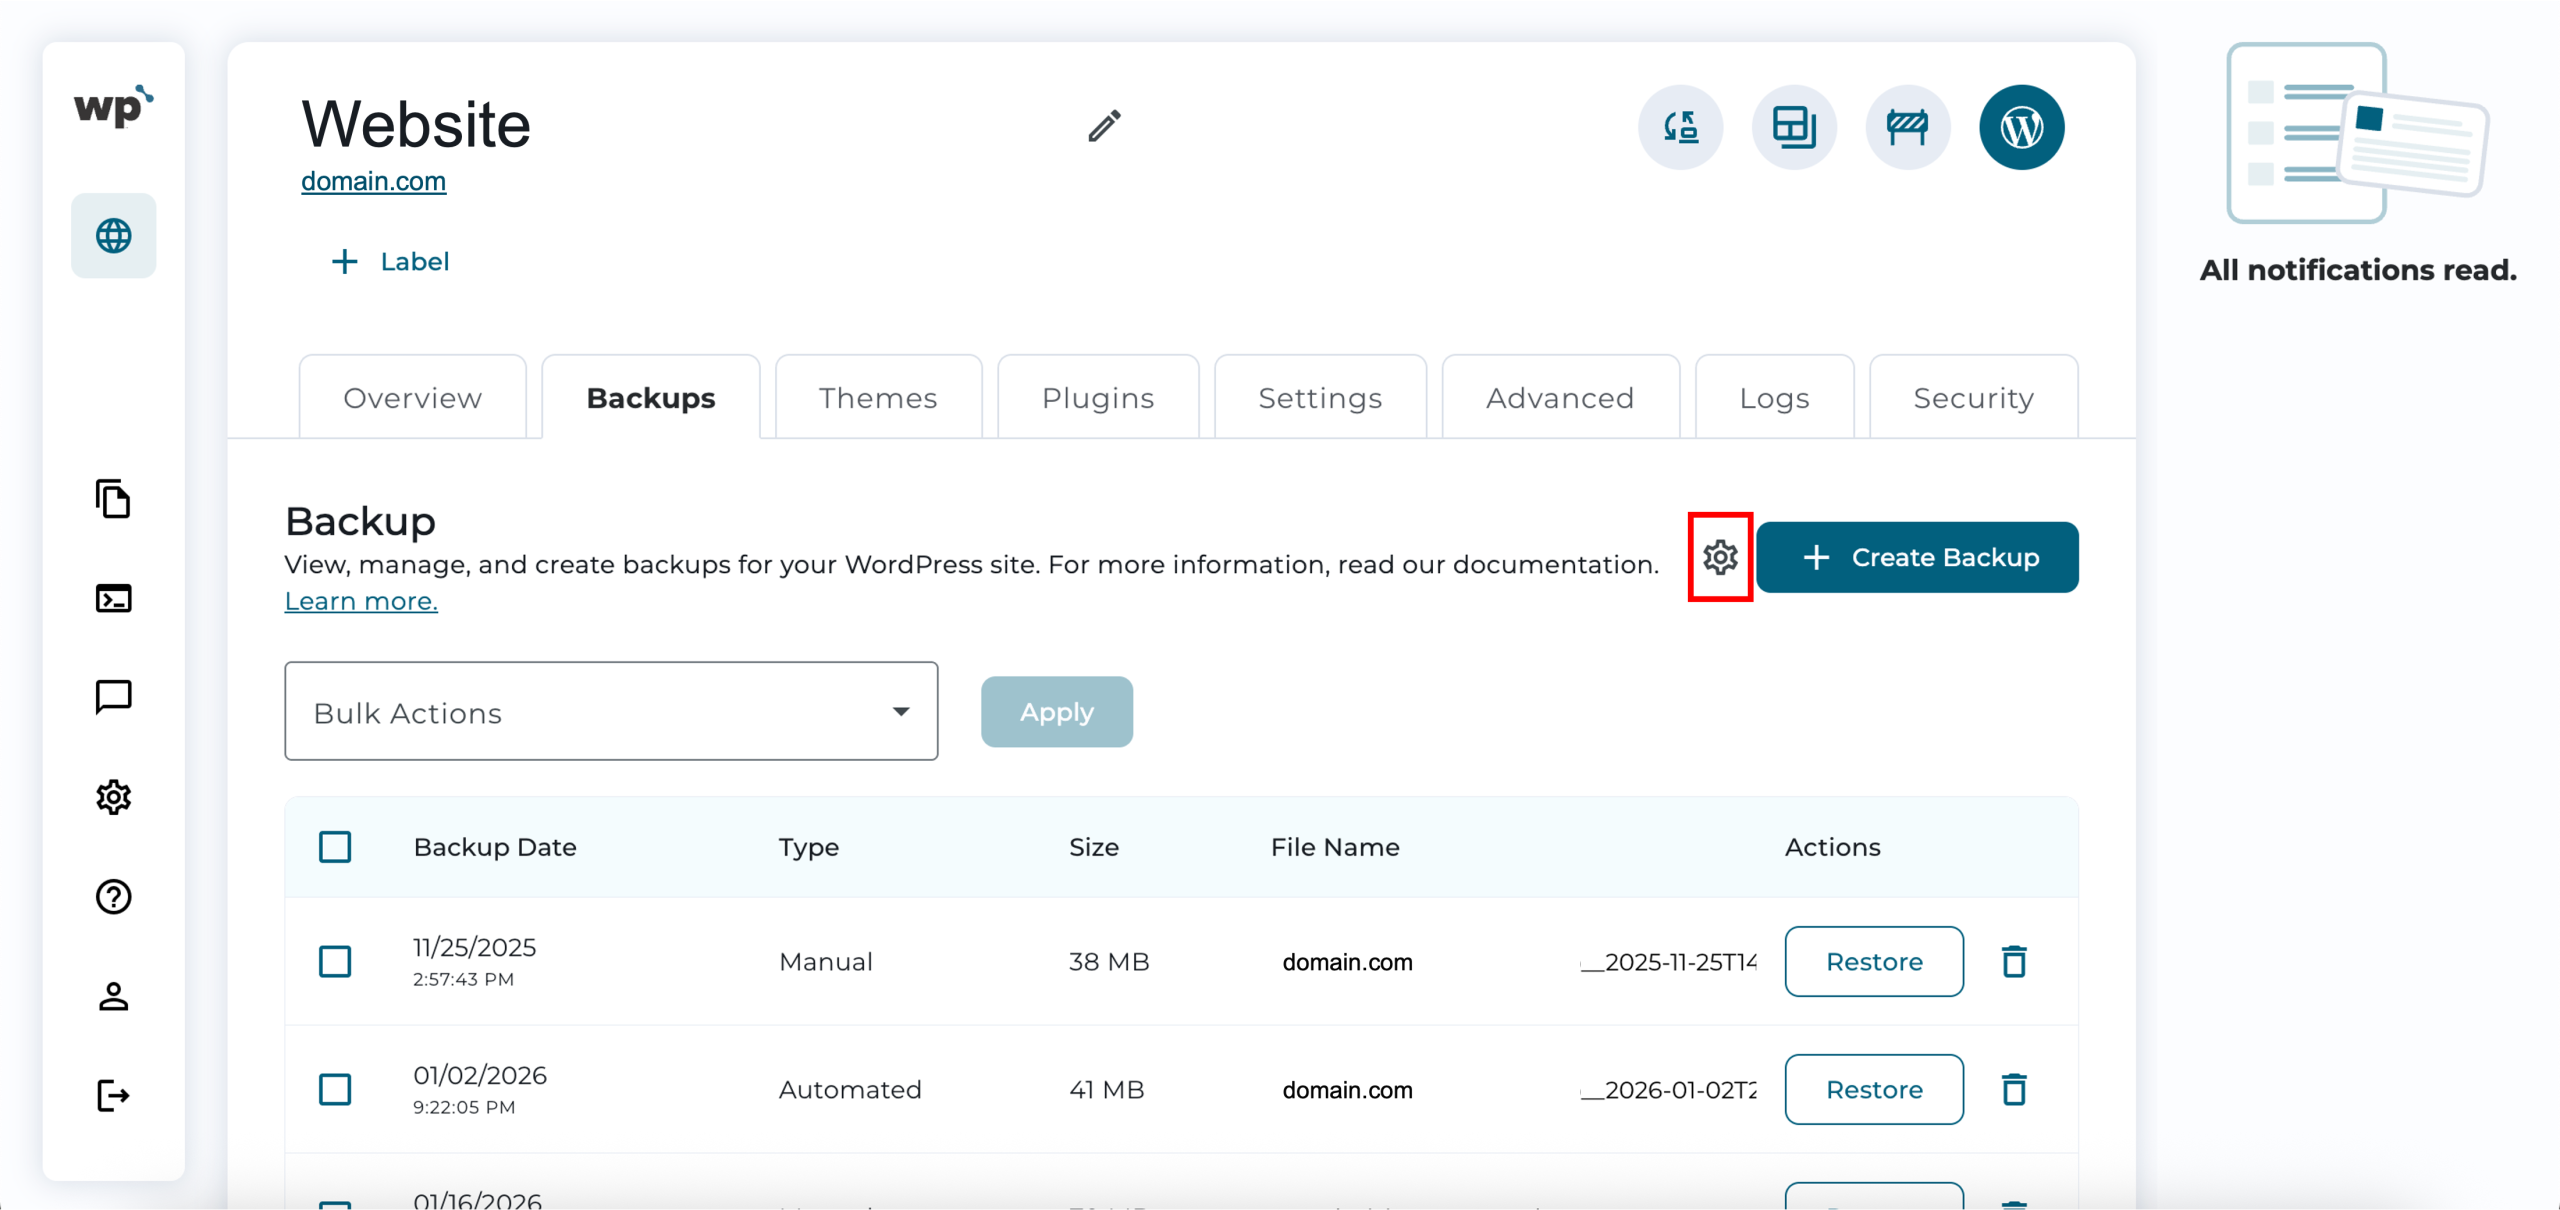
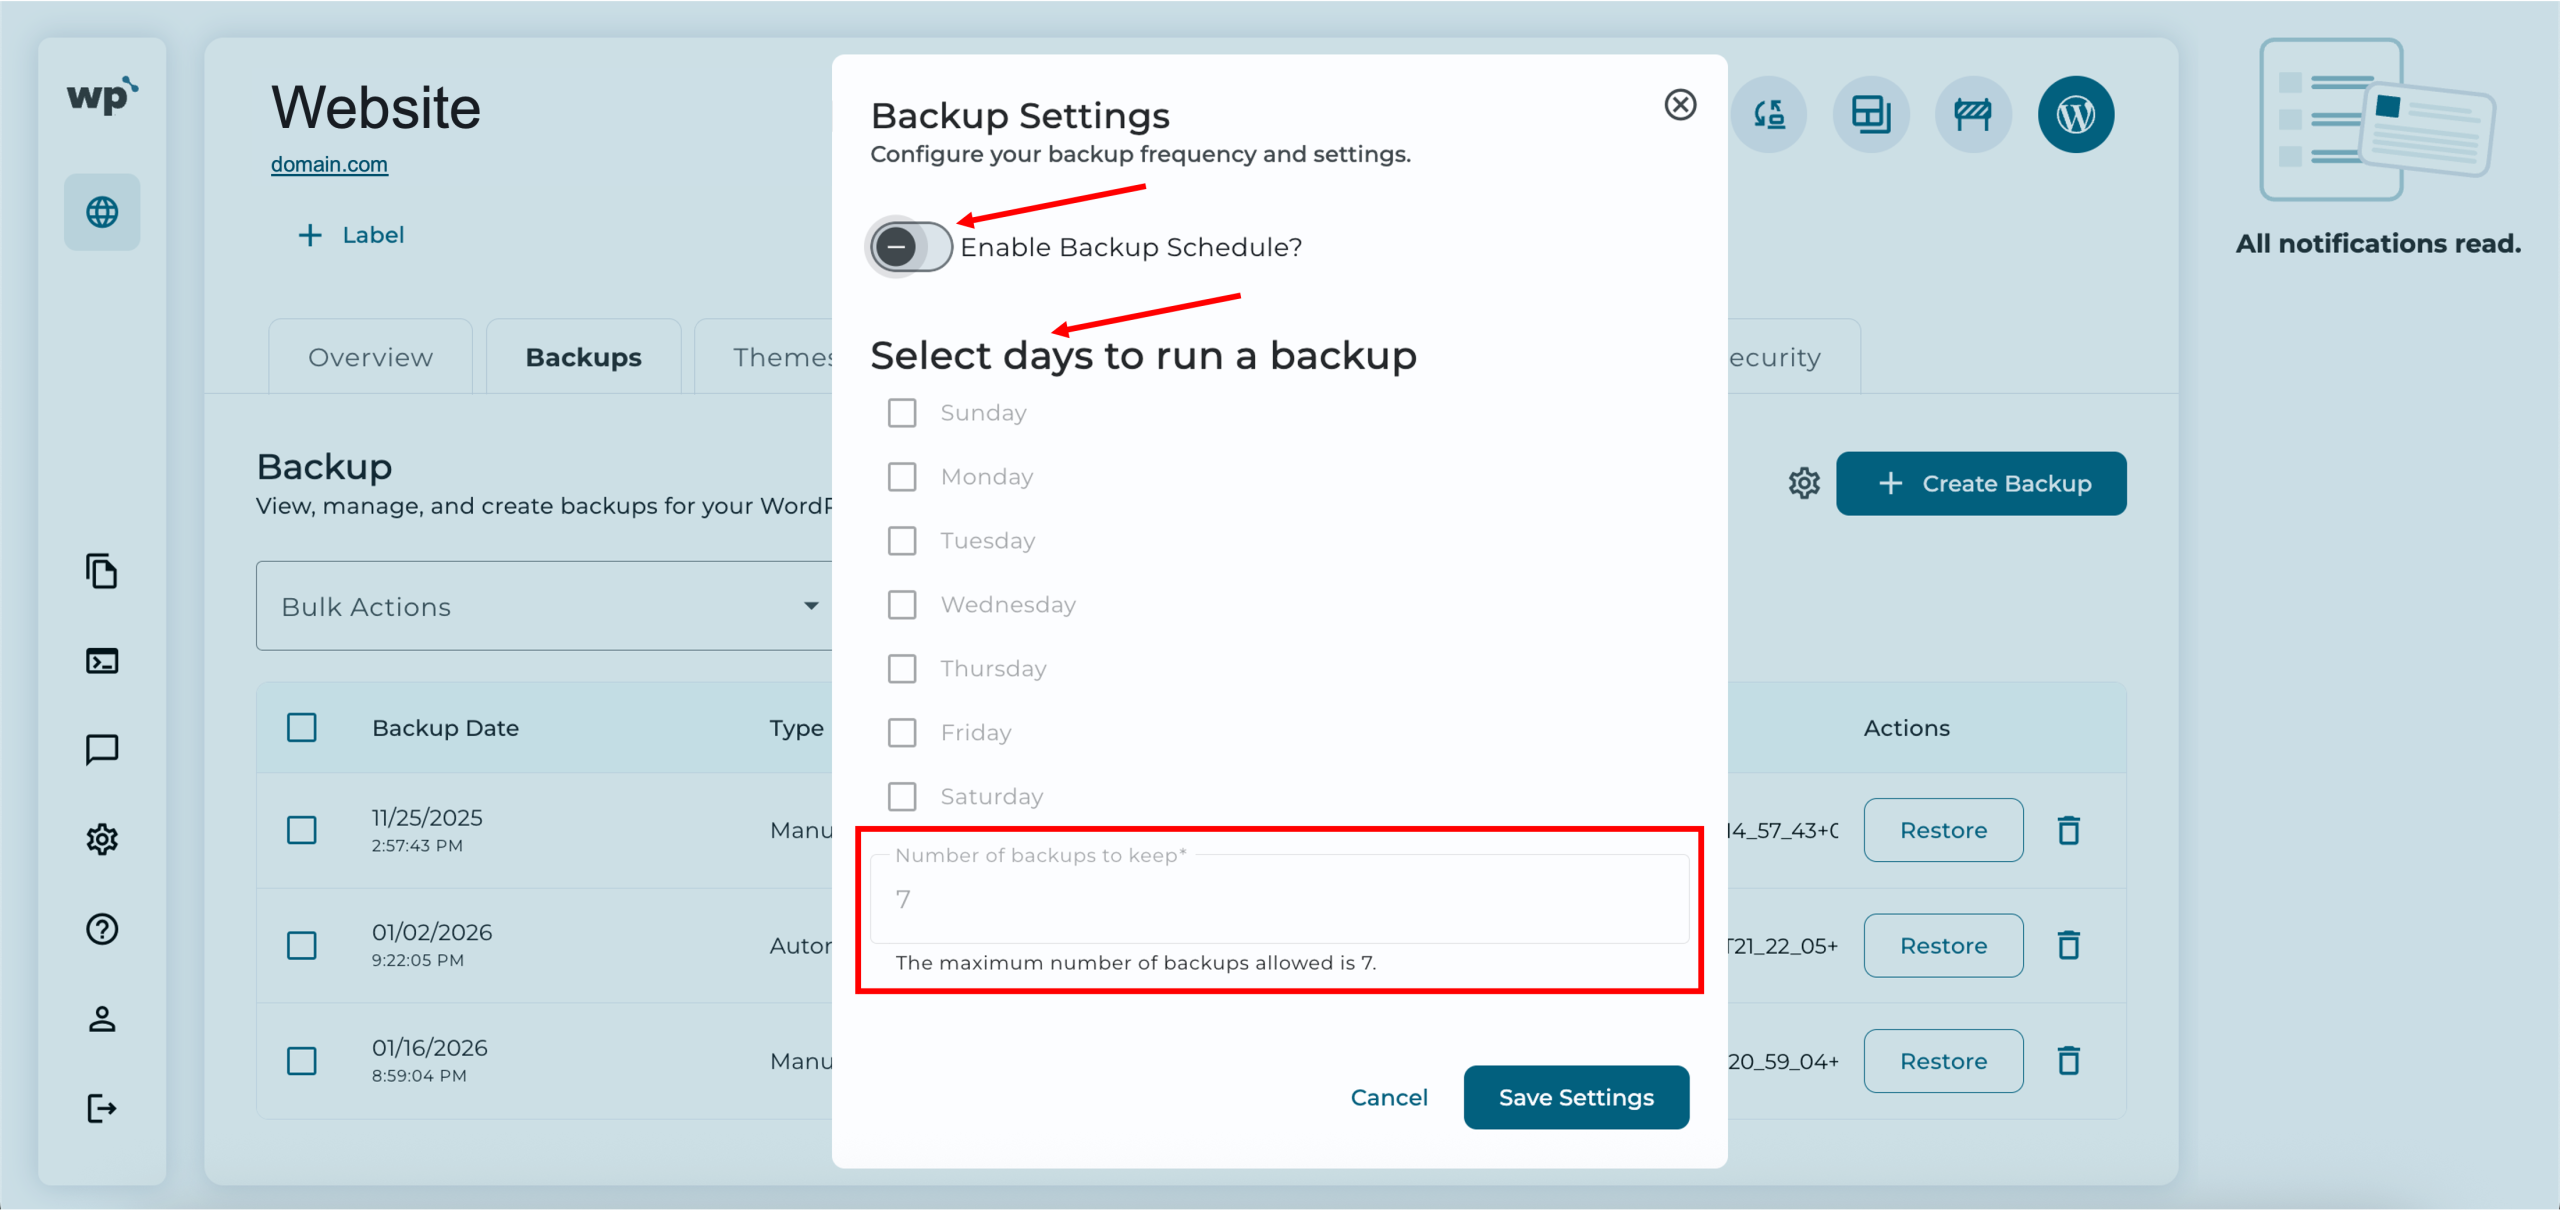
*Backup Settings (Configure your backup frequency and settings.)
Next to the + Create Backup option, you will find a settings icon that lets you configure your backup settings, including the backup frequency. You can enable a backup schedule and specify the days on which to run the backup. Additionally, you can adjust the number of backups you wish to retain, as long as it does not exceed the maximum limit set by your WordPress hosting plan.