Example :
How to set up an email or change my account settings.
- Help Center
- WordPress Hosting
- Websites
- How to build a website with WP Squared
How to build a website with WP Squared
The guide video is available for your reference:
Building a website with WP Squared allows you to quickly set up and manage a WordPress website through a centralised dashboard. The platform simplifies website creation by providing guided setup options, allowing users to launch a new website without manually configuring server settings.
Unlike standard hosting, which usually starts with a blank website and the default “Hello World” post, WP Squared websites created through the guided setup come mostly prebuilt. This means your website is already about 90 per cent complete and ready for you to customise.
From the WP Squared dashboard, you can create a new website, choose a domain, and configure the initial setup for your WordPress installation. This guide explains how to build a website using the WP Squared dashboard.
Note:
• If you do not yet have a WordPress hosting plan, you can compare the available plans that we currently offer on our WordPress hosting page and choose the one that best suits your needs.
• A website can be created using a temporary domain if a registered domain is not yet available.
• If you are using a domain that you already own, ensure the domain’s nameservers are set to ns-wh1.web.z.com and ns-wh2.web.z.com before creating the website.
• The website setup process may take a few minutes to complete while the system provisions the new WordPress installation.
1. Go to our Sign-in page.
2. Enter your Email Address and Password, and proceed to log in.
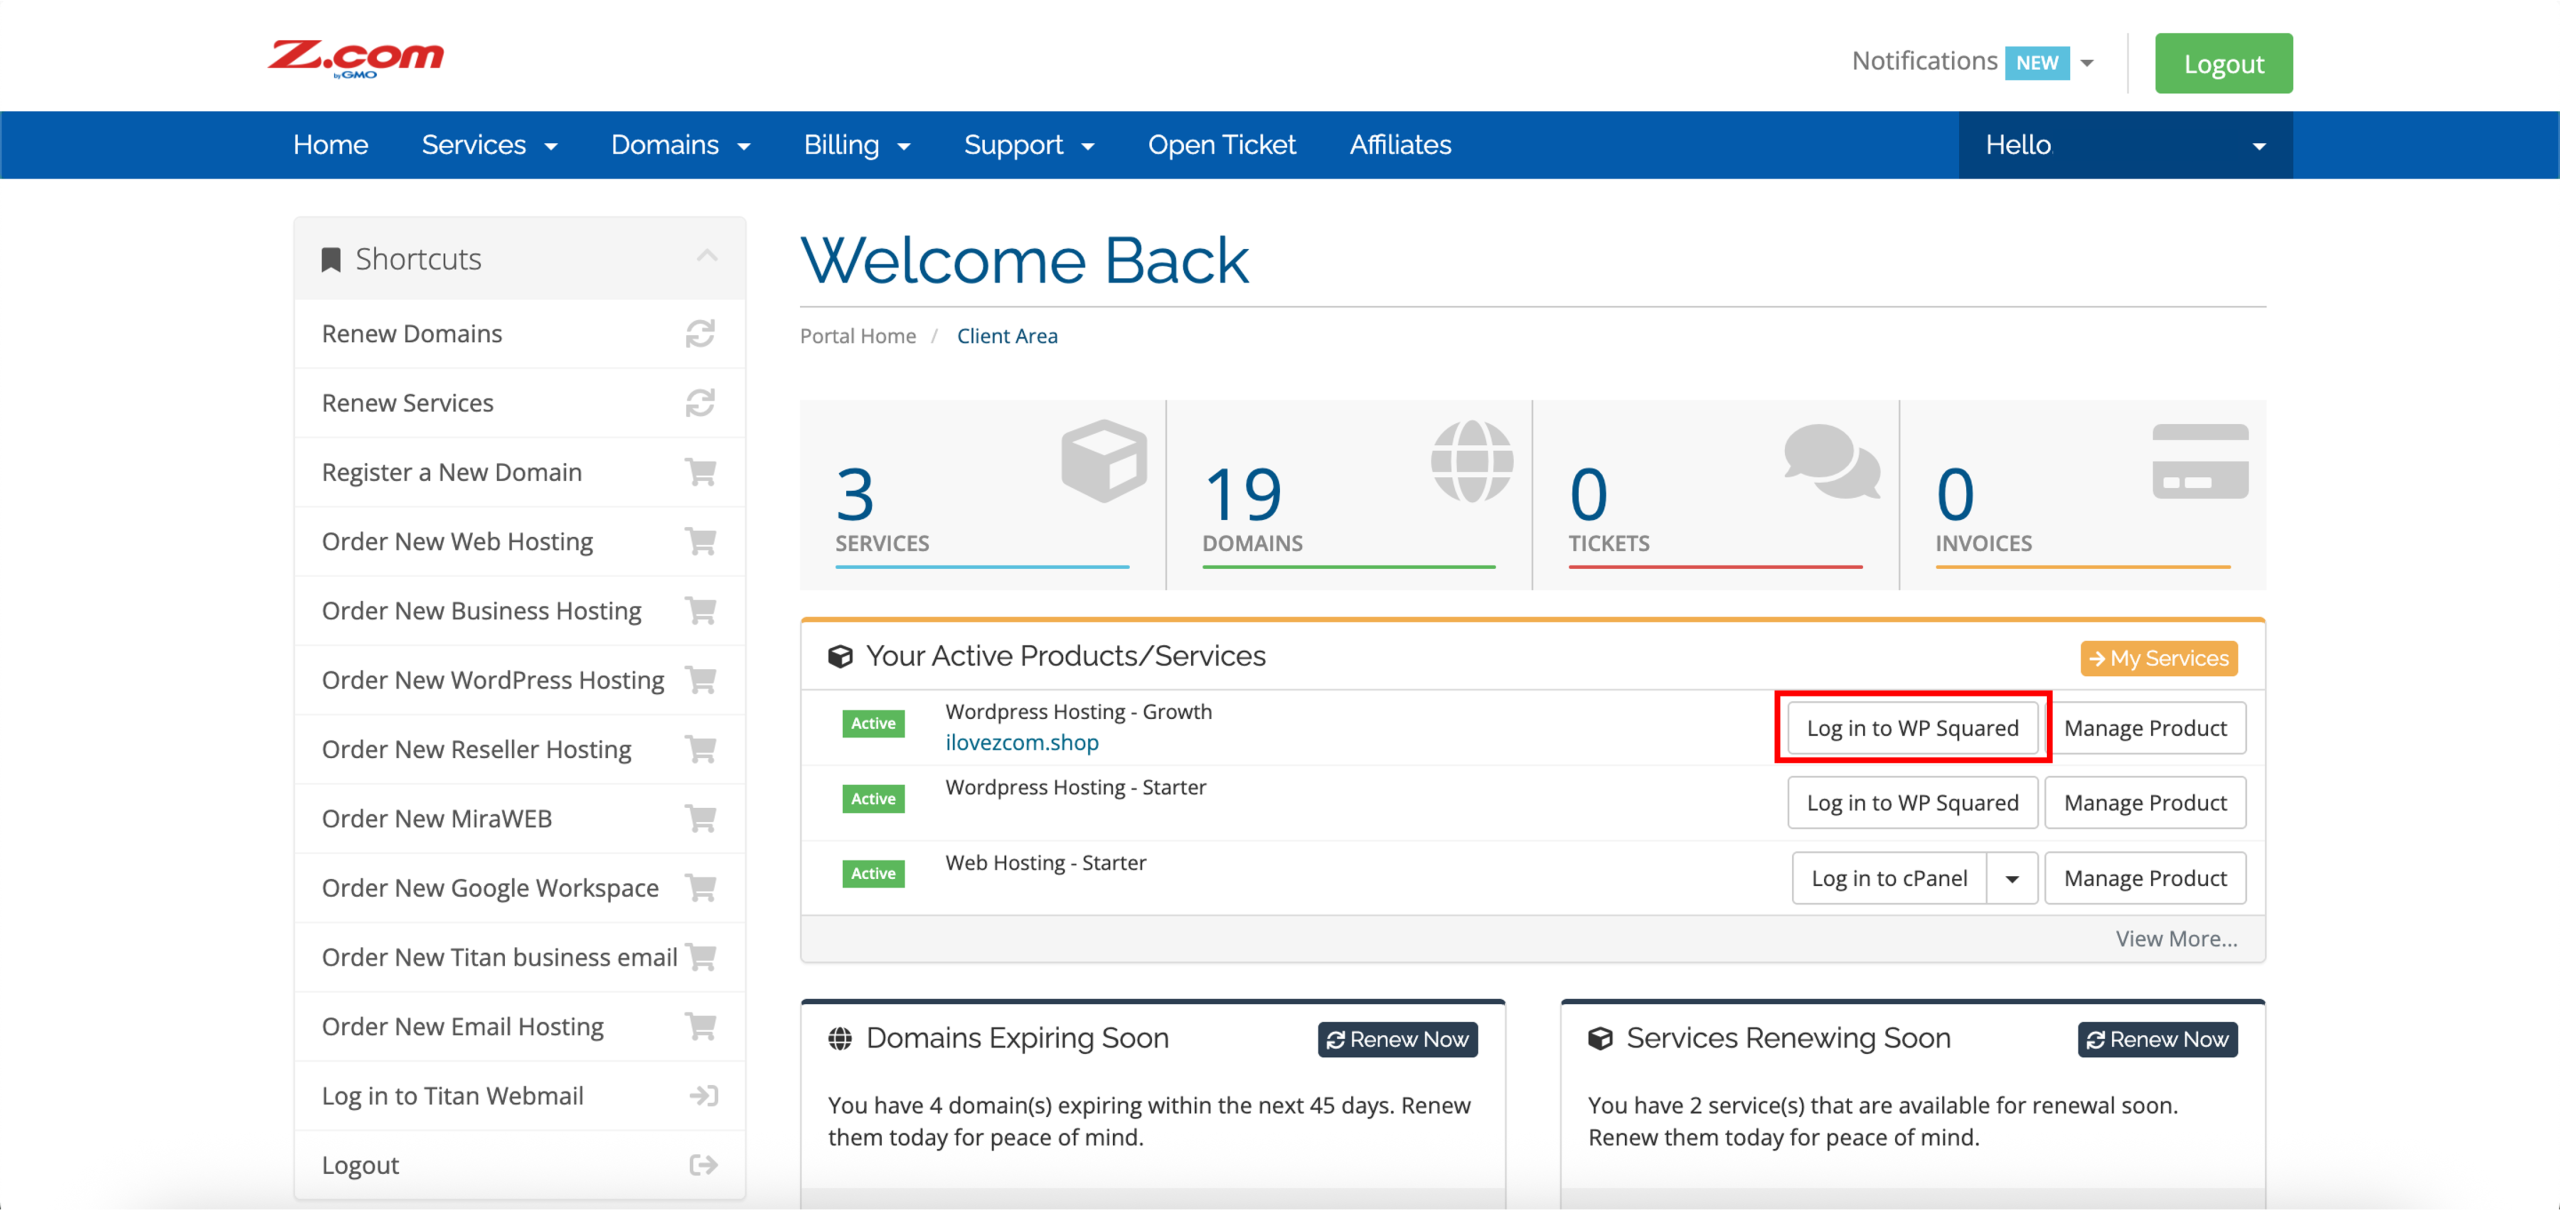
3. Aligned with your new WordPress Hosting service, click Log in to WP Squared.
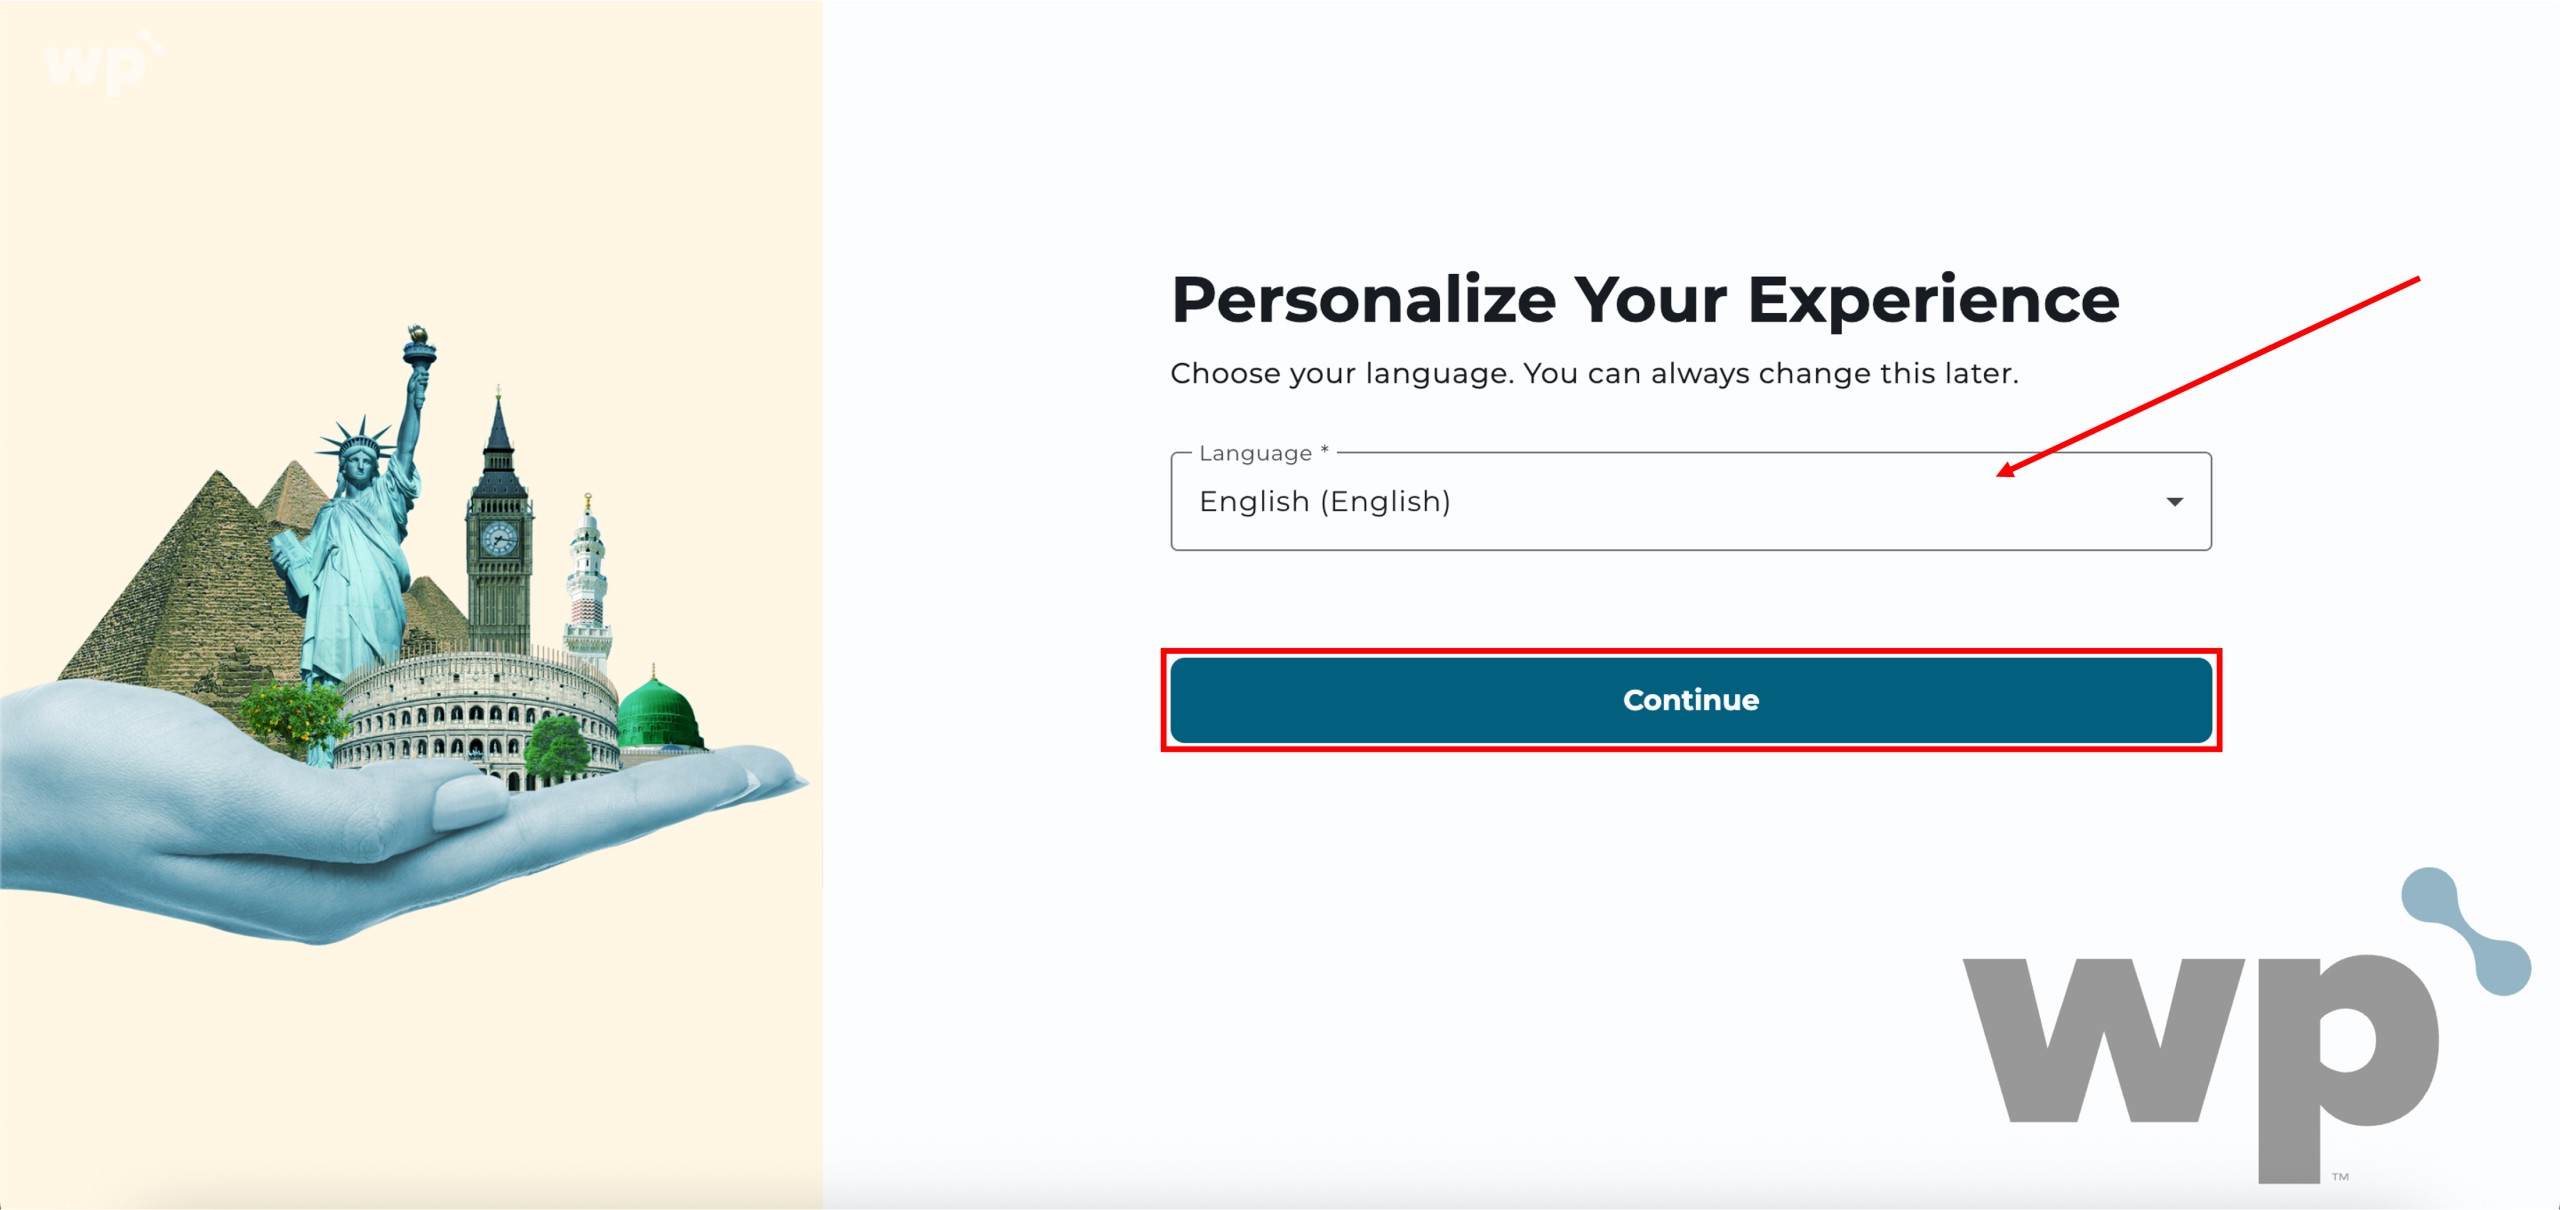
4. A new tab will open, directing you to the WP Squared front-end page, which is also the first step to building your WordPress website. First, choose your language from the drop-down menu. You can always change this later. Once done, click Continue.
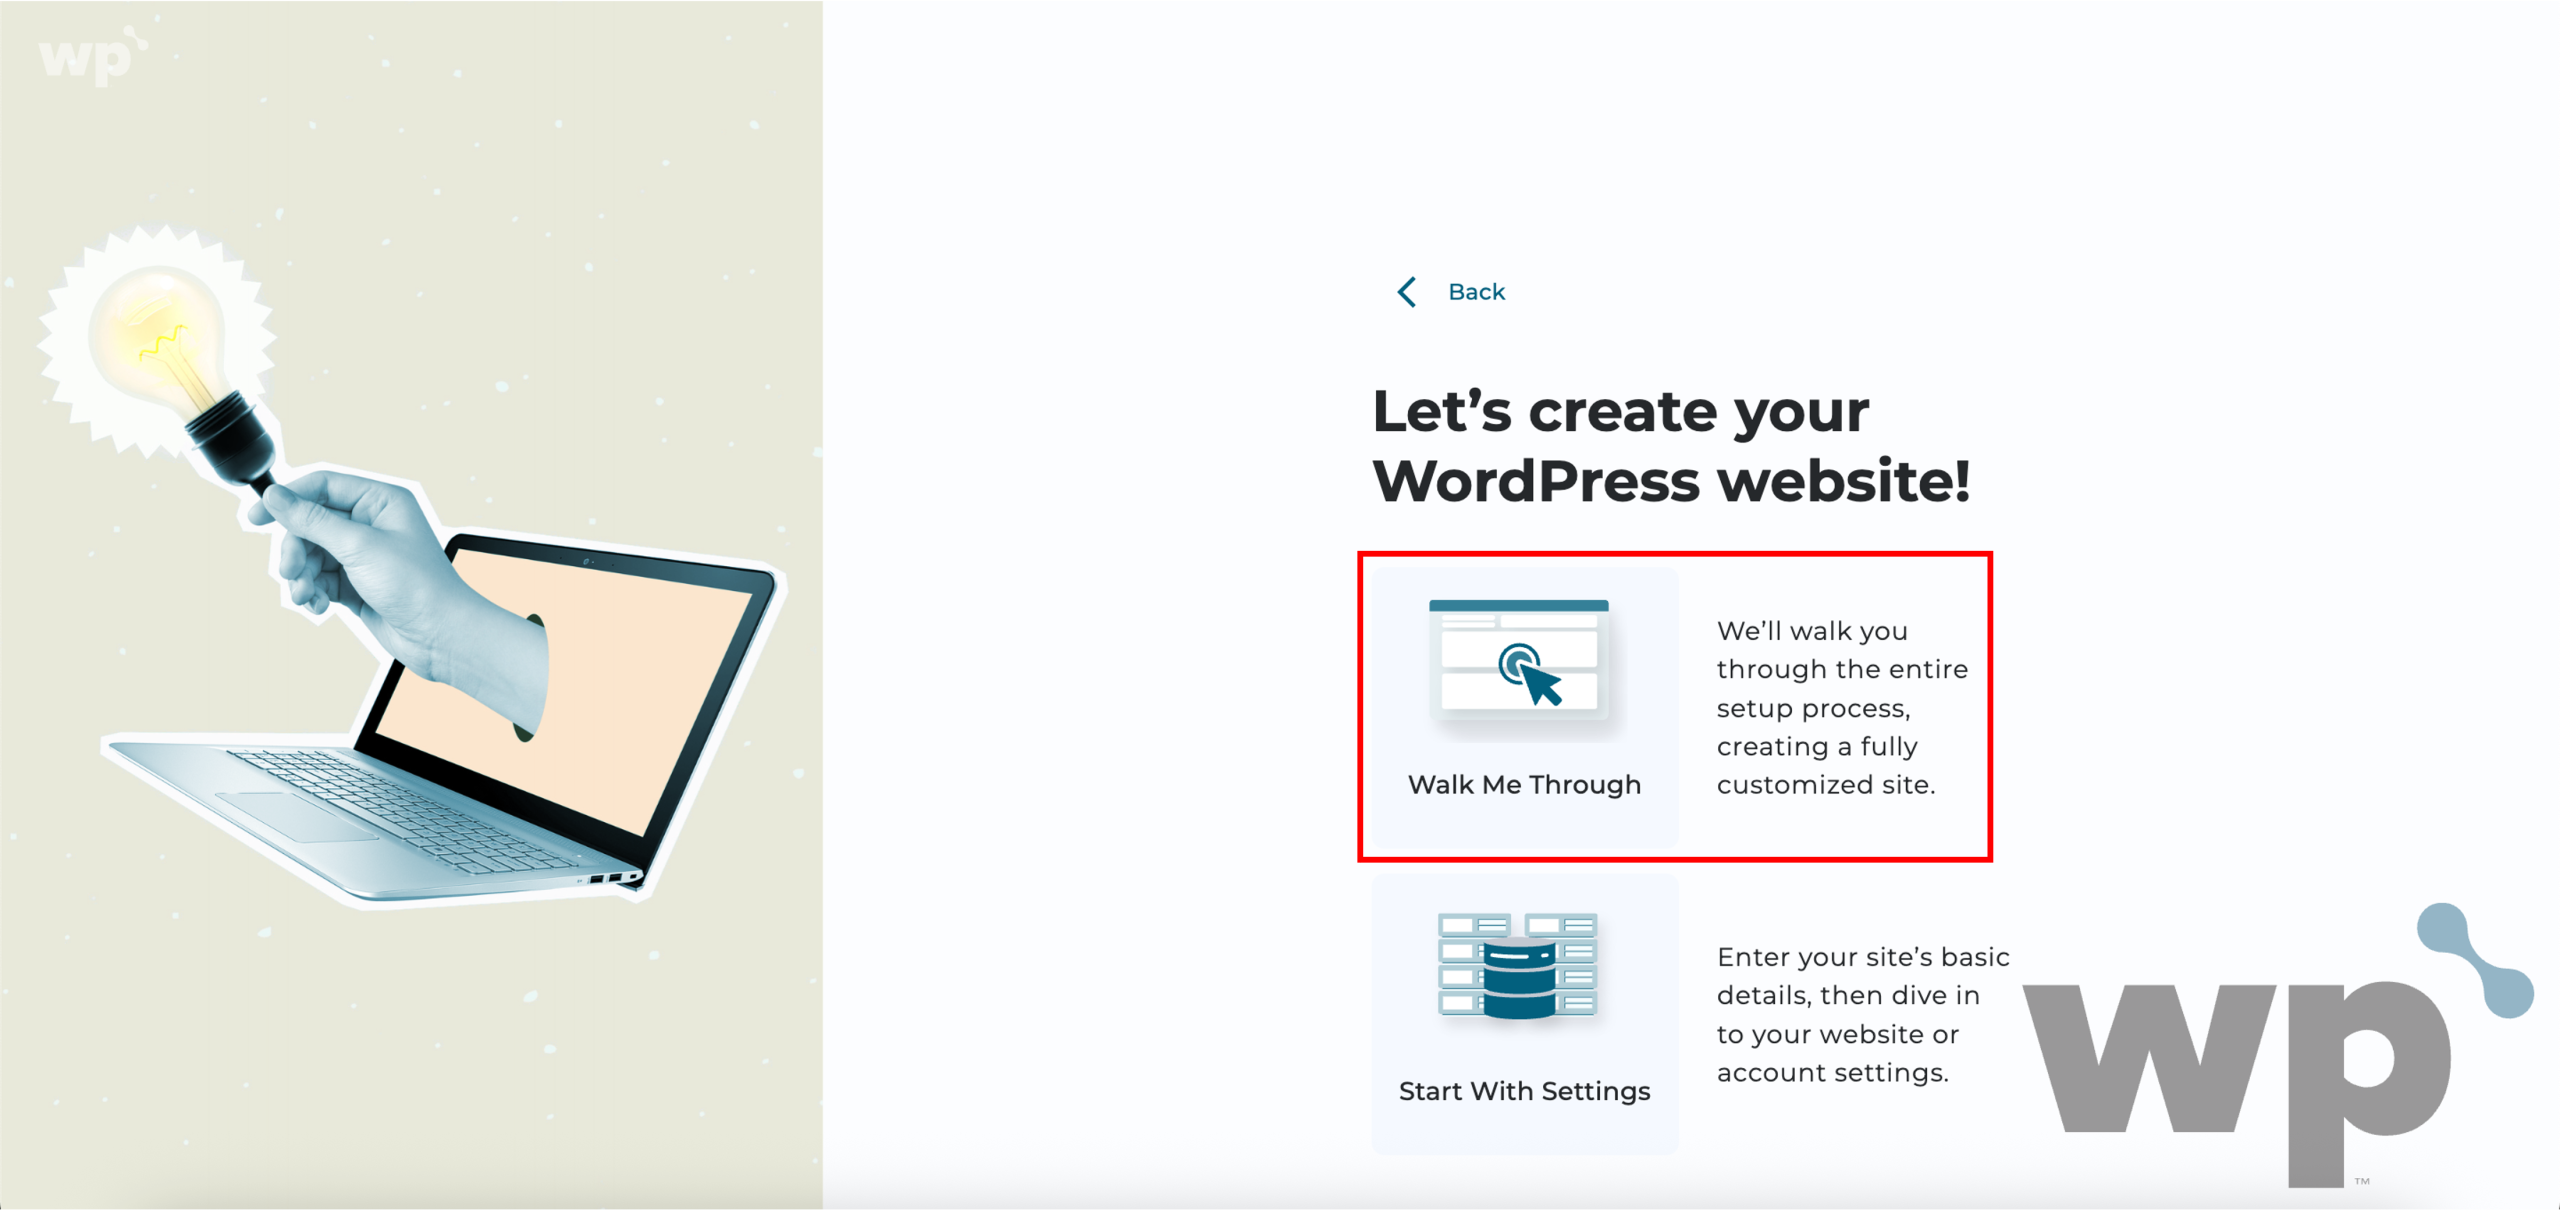
5. Click Walk Me Through and let WP Squared handle the rest for you (this option will automatically create the database, configure the WordPress installation, secure your website, and customise the initial design).
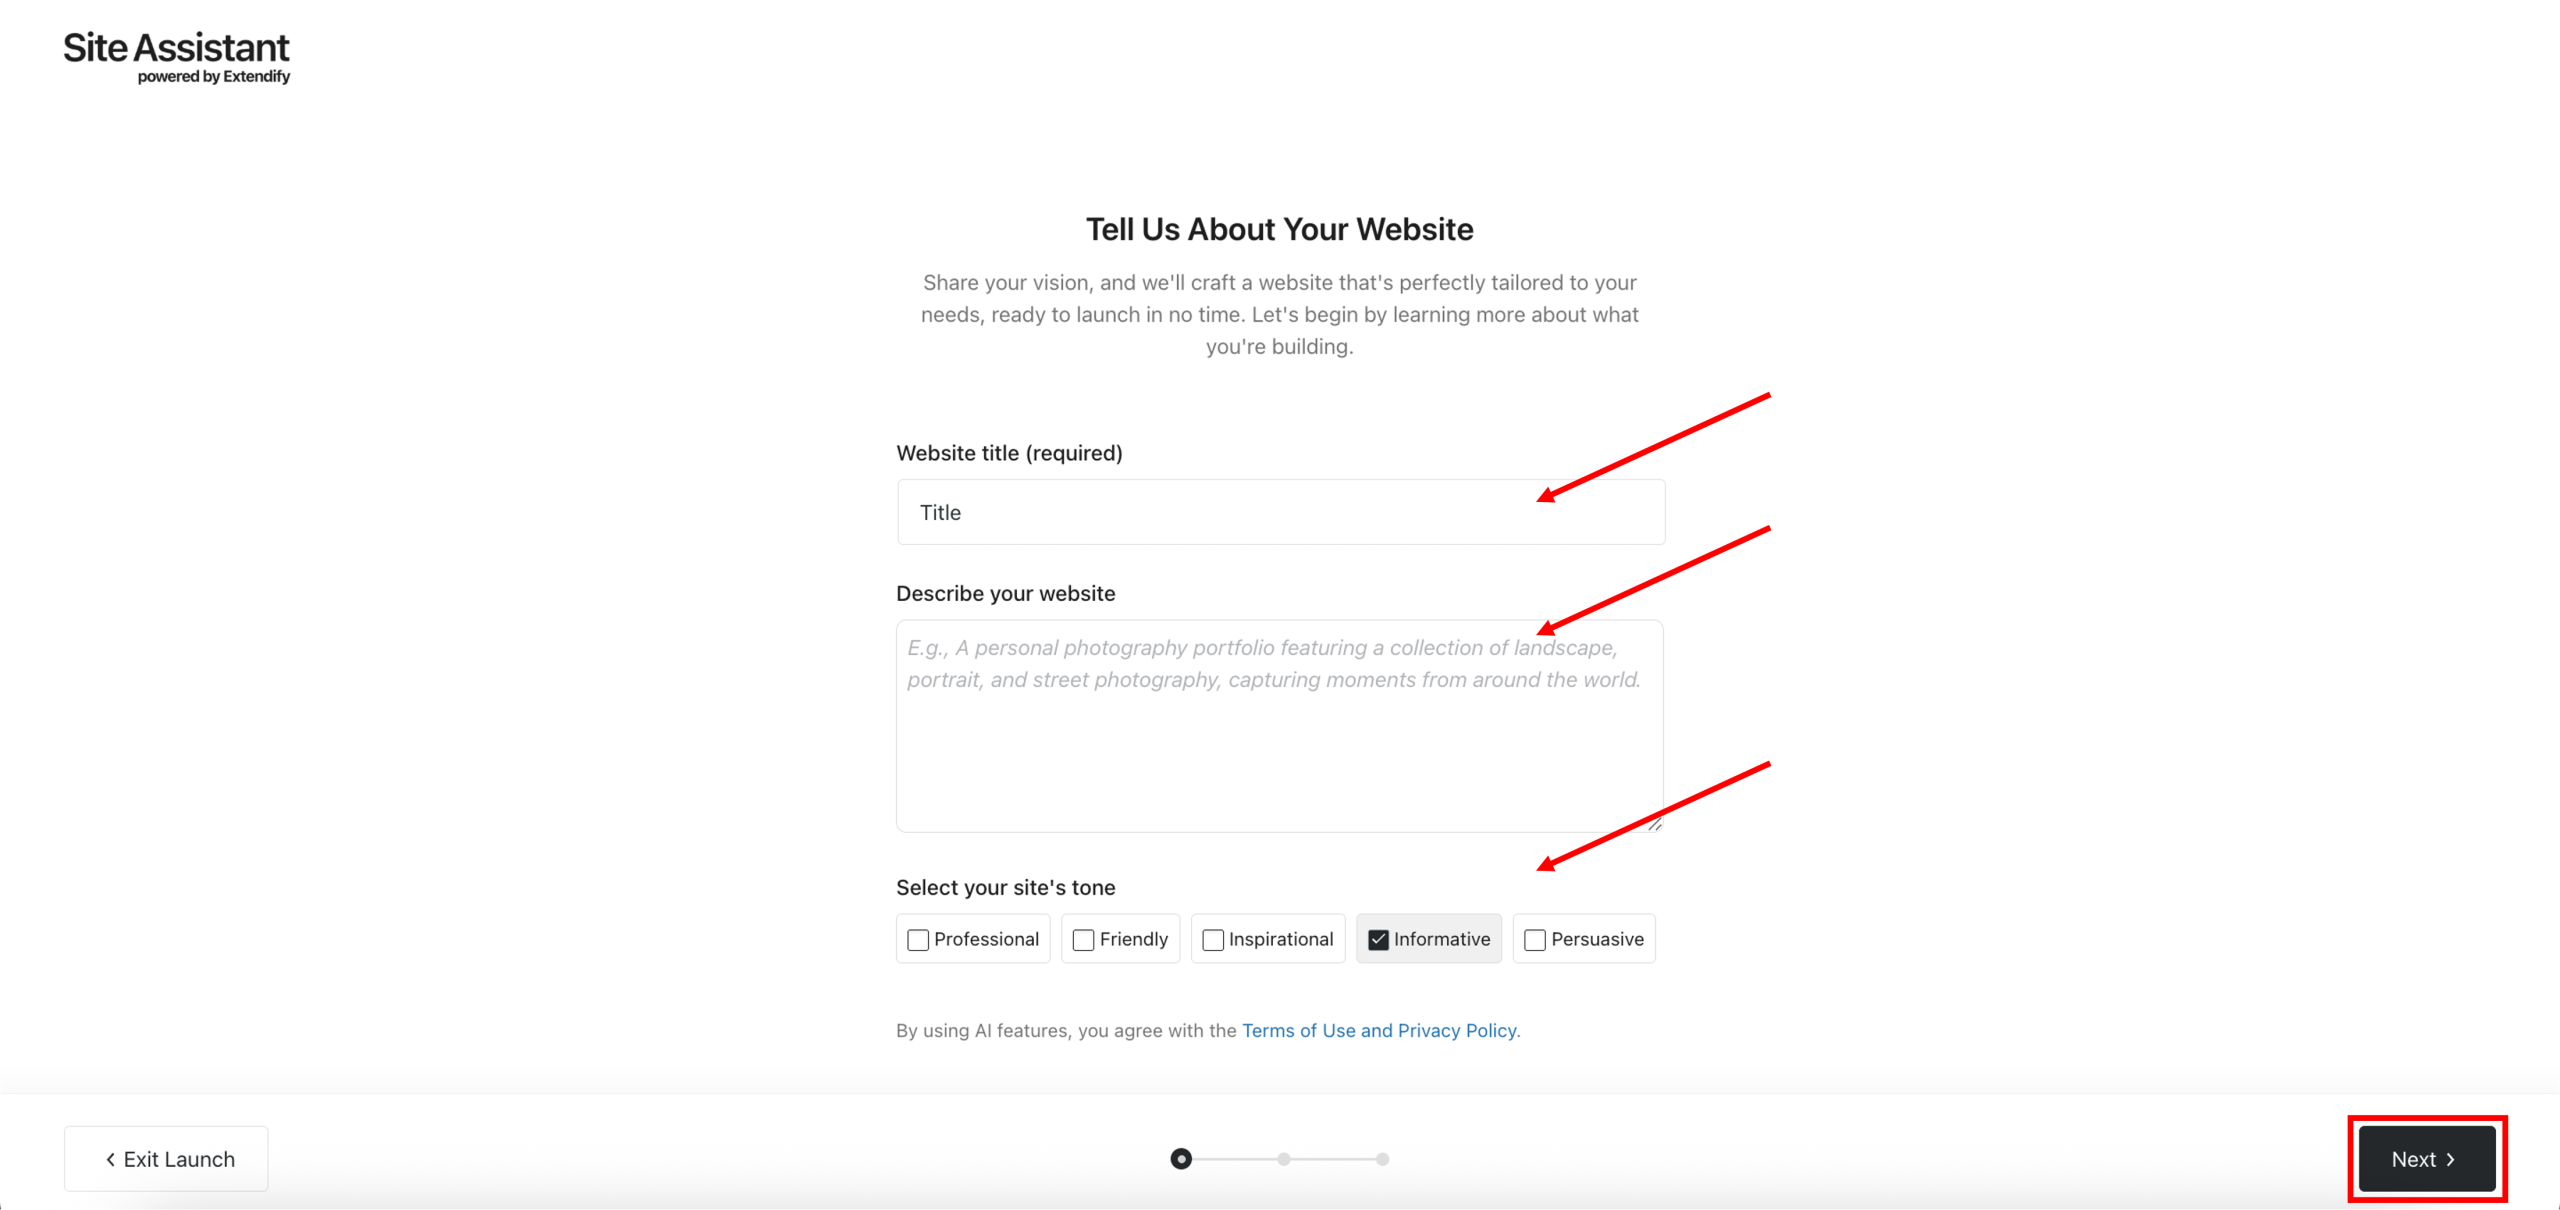
6. Now is the time to provide the essential details to launch your WordPress website with Site Assistant (powered by Extendify). Enter your website title, a brief description of your website, and select your website’s tone. Once done, click Next.
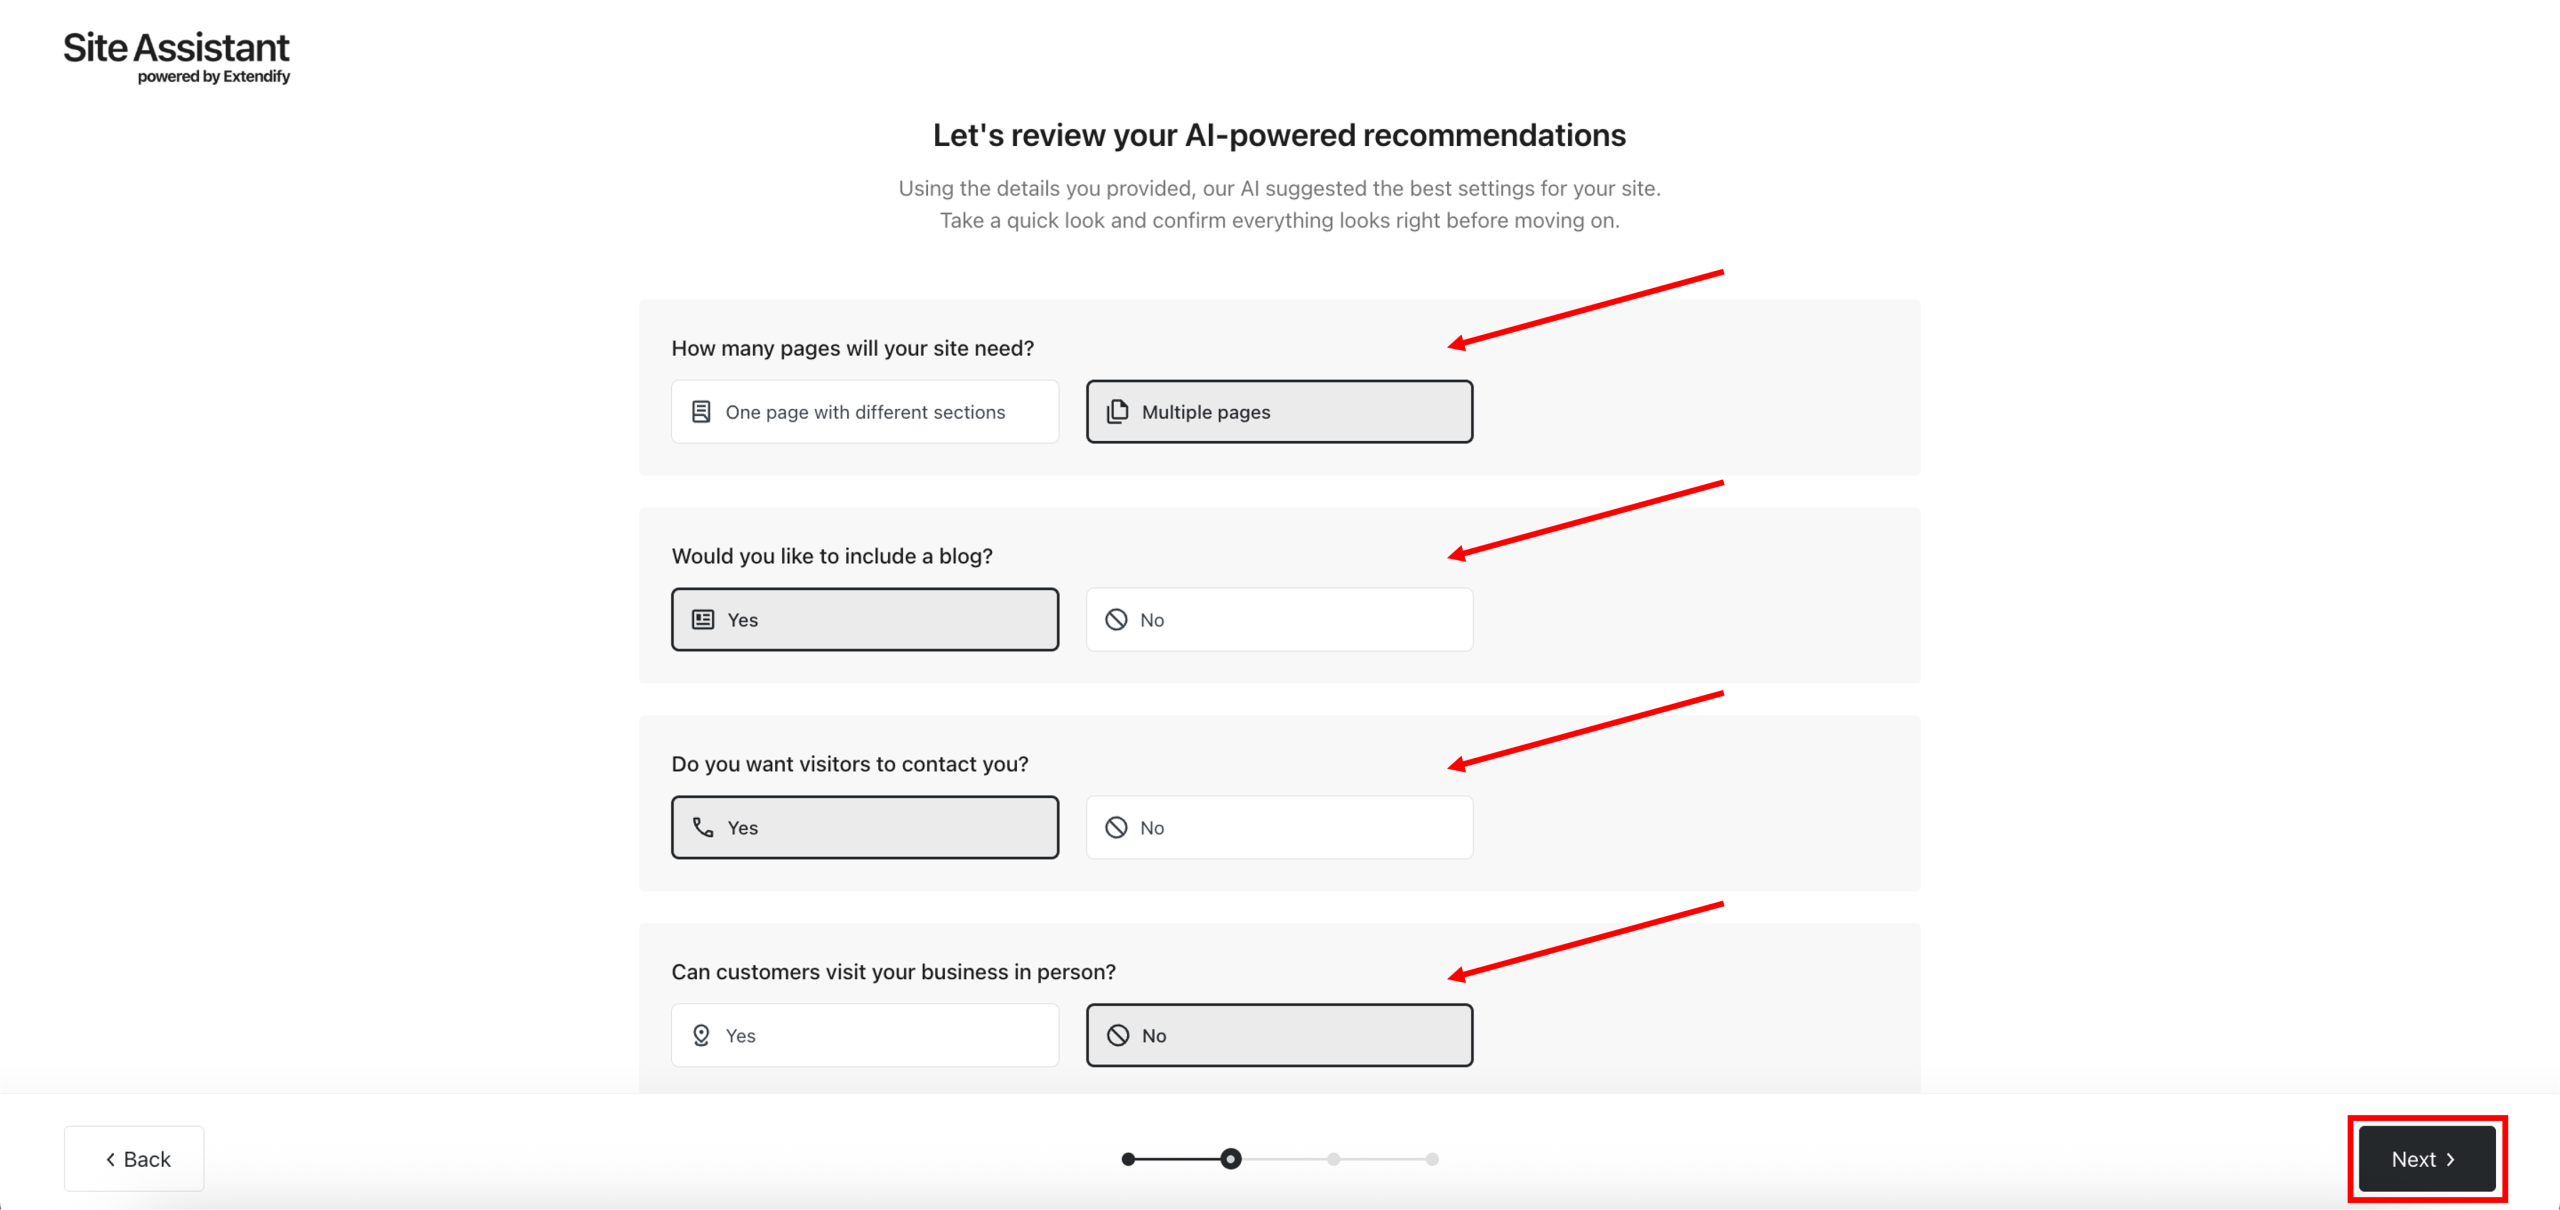
7. Next, review and refine the functional recommendations suggested by the AI based on your previous inputs. Once done, click Next.
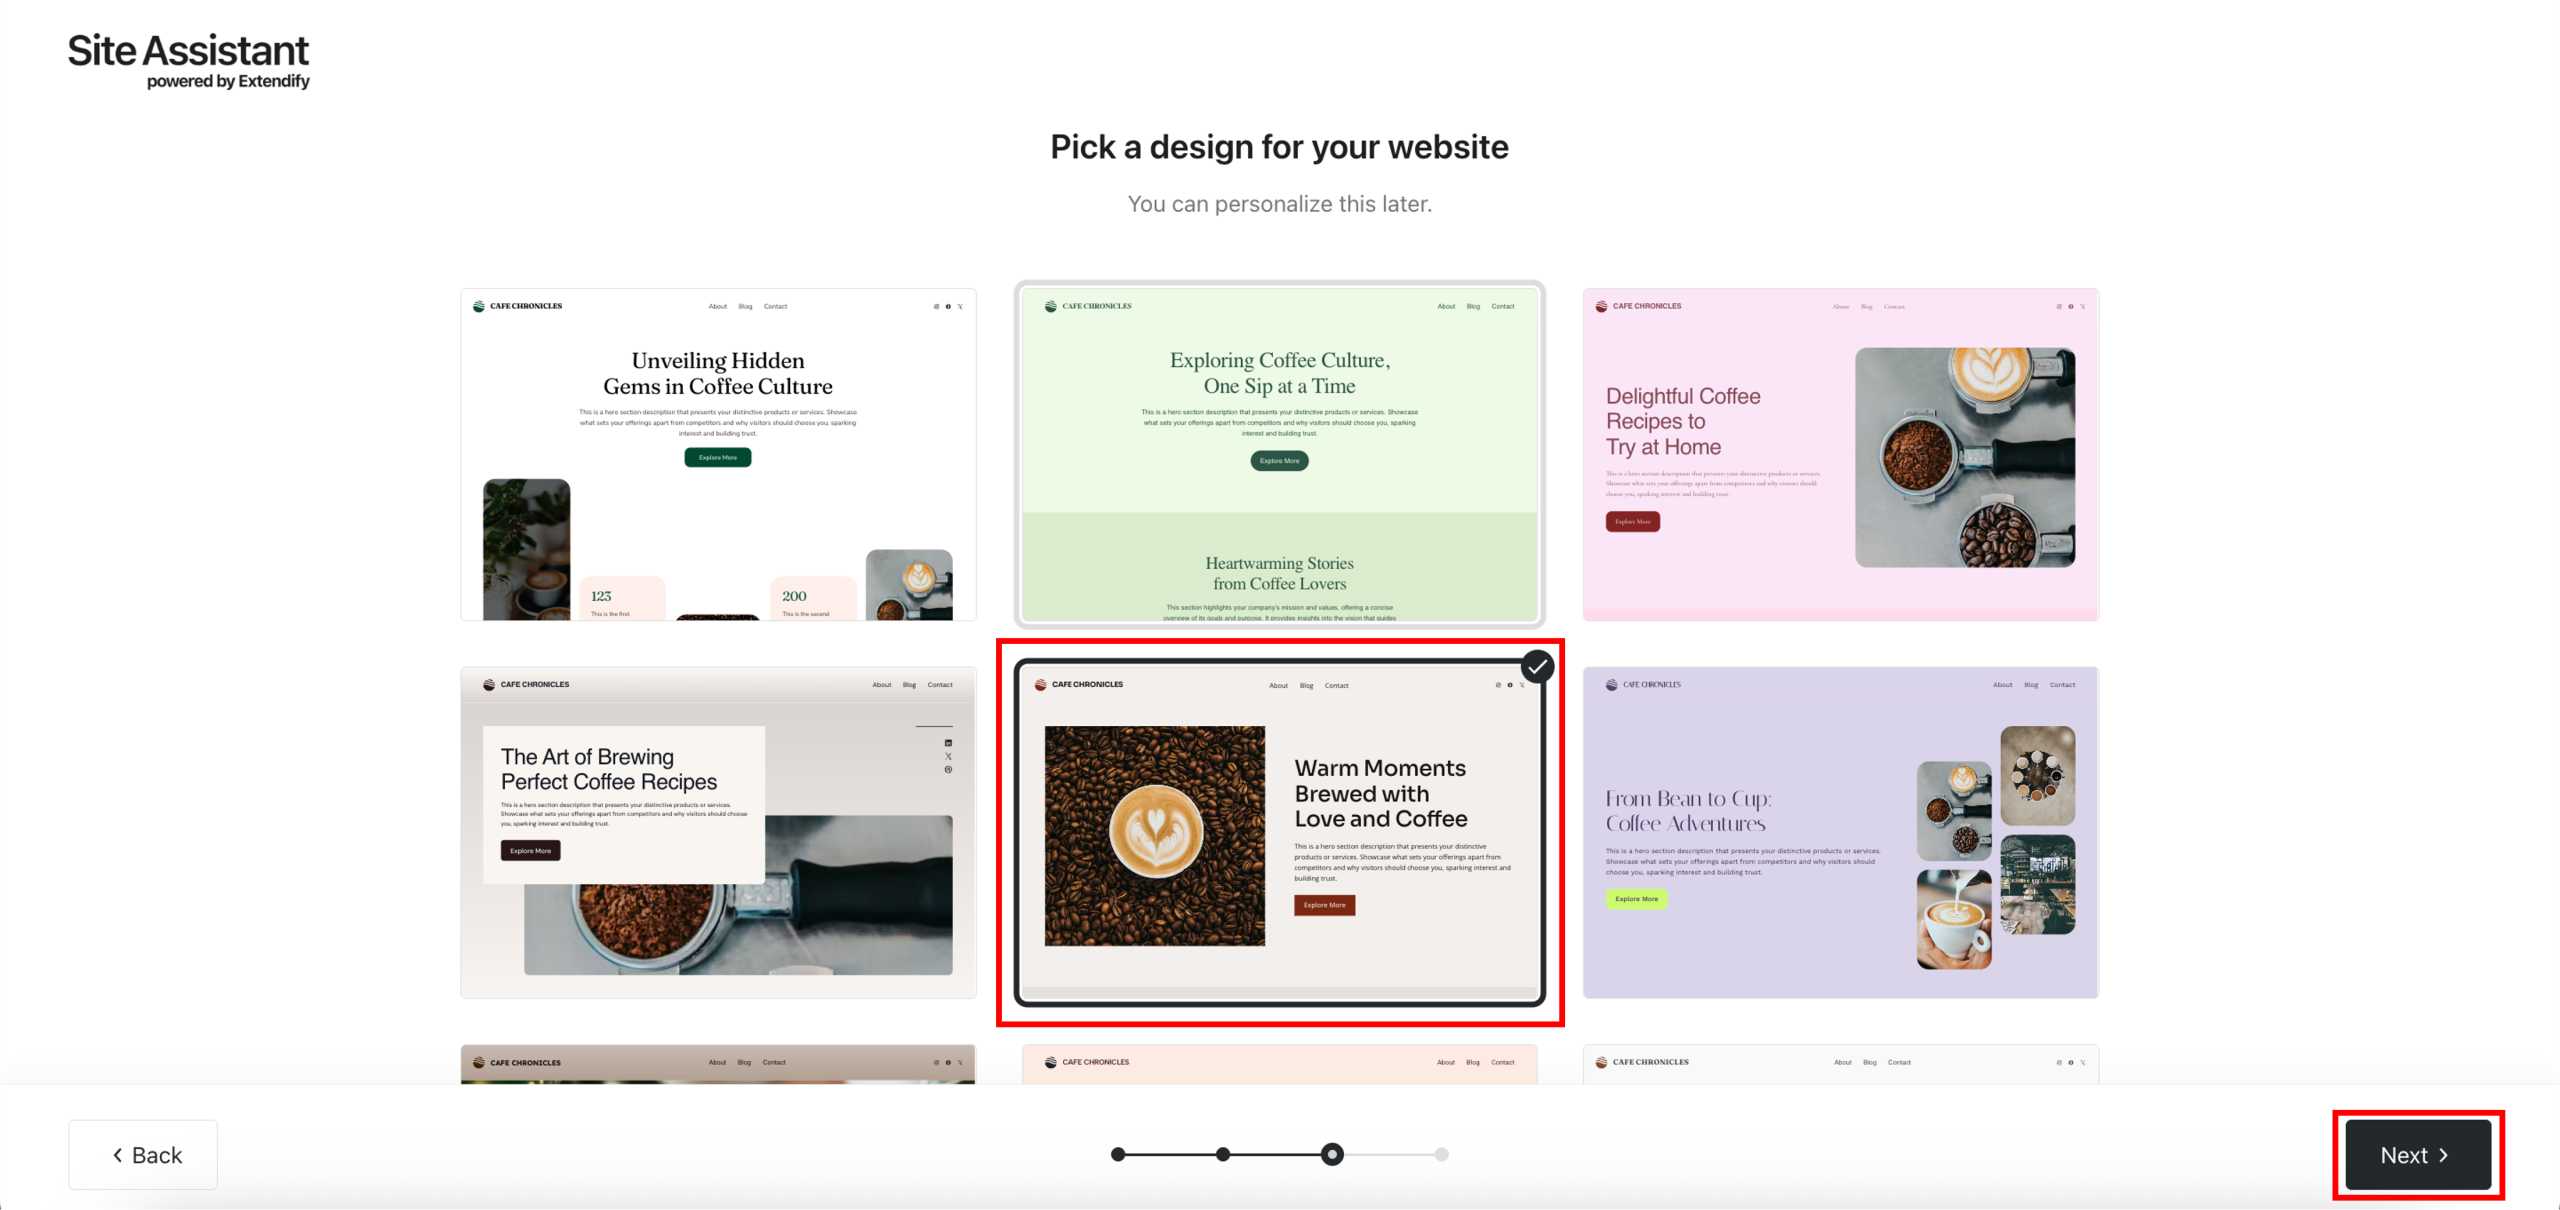
8. Browse through the generated themes and pick a design for your website. You can personalise this later. Once done, click Next.
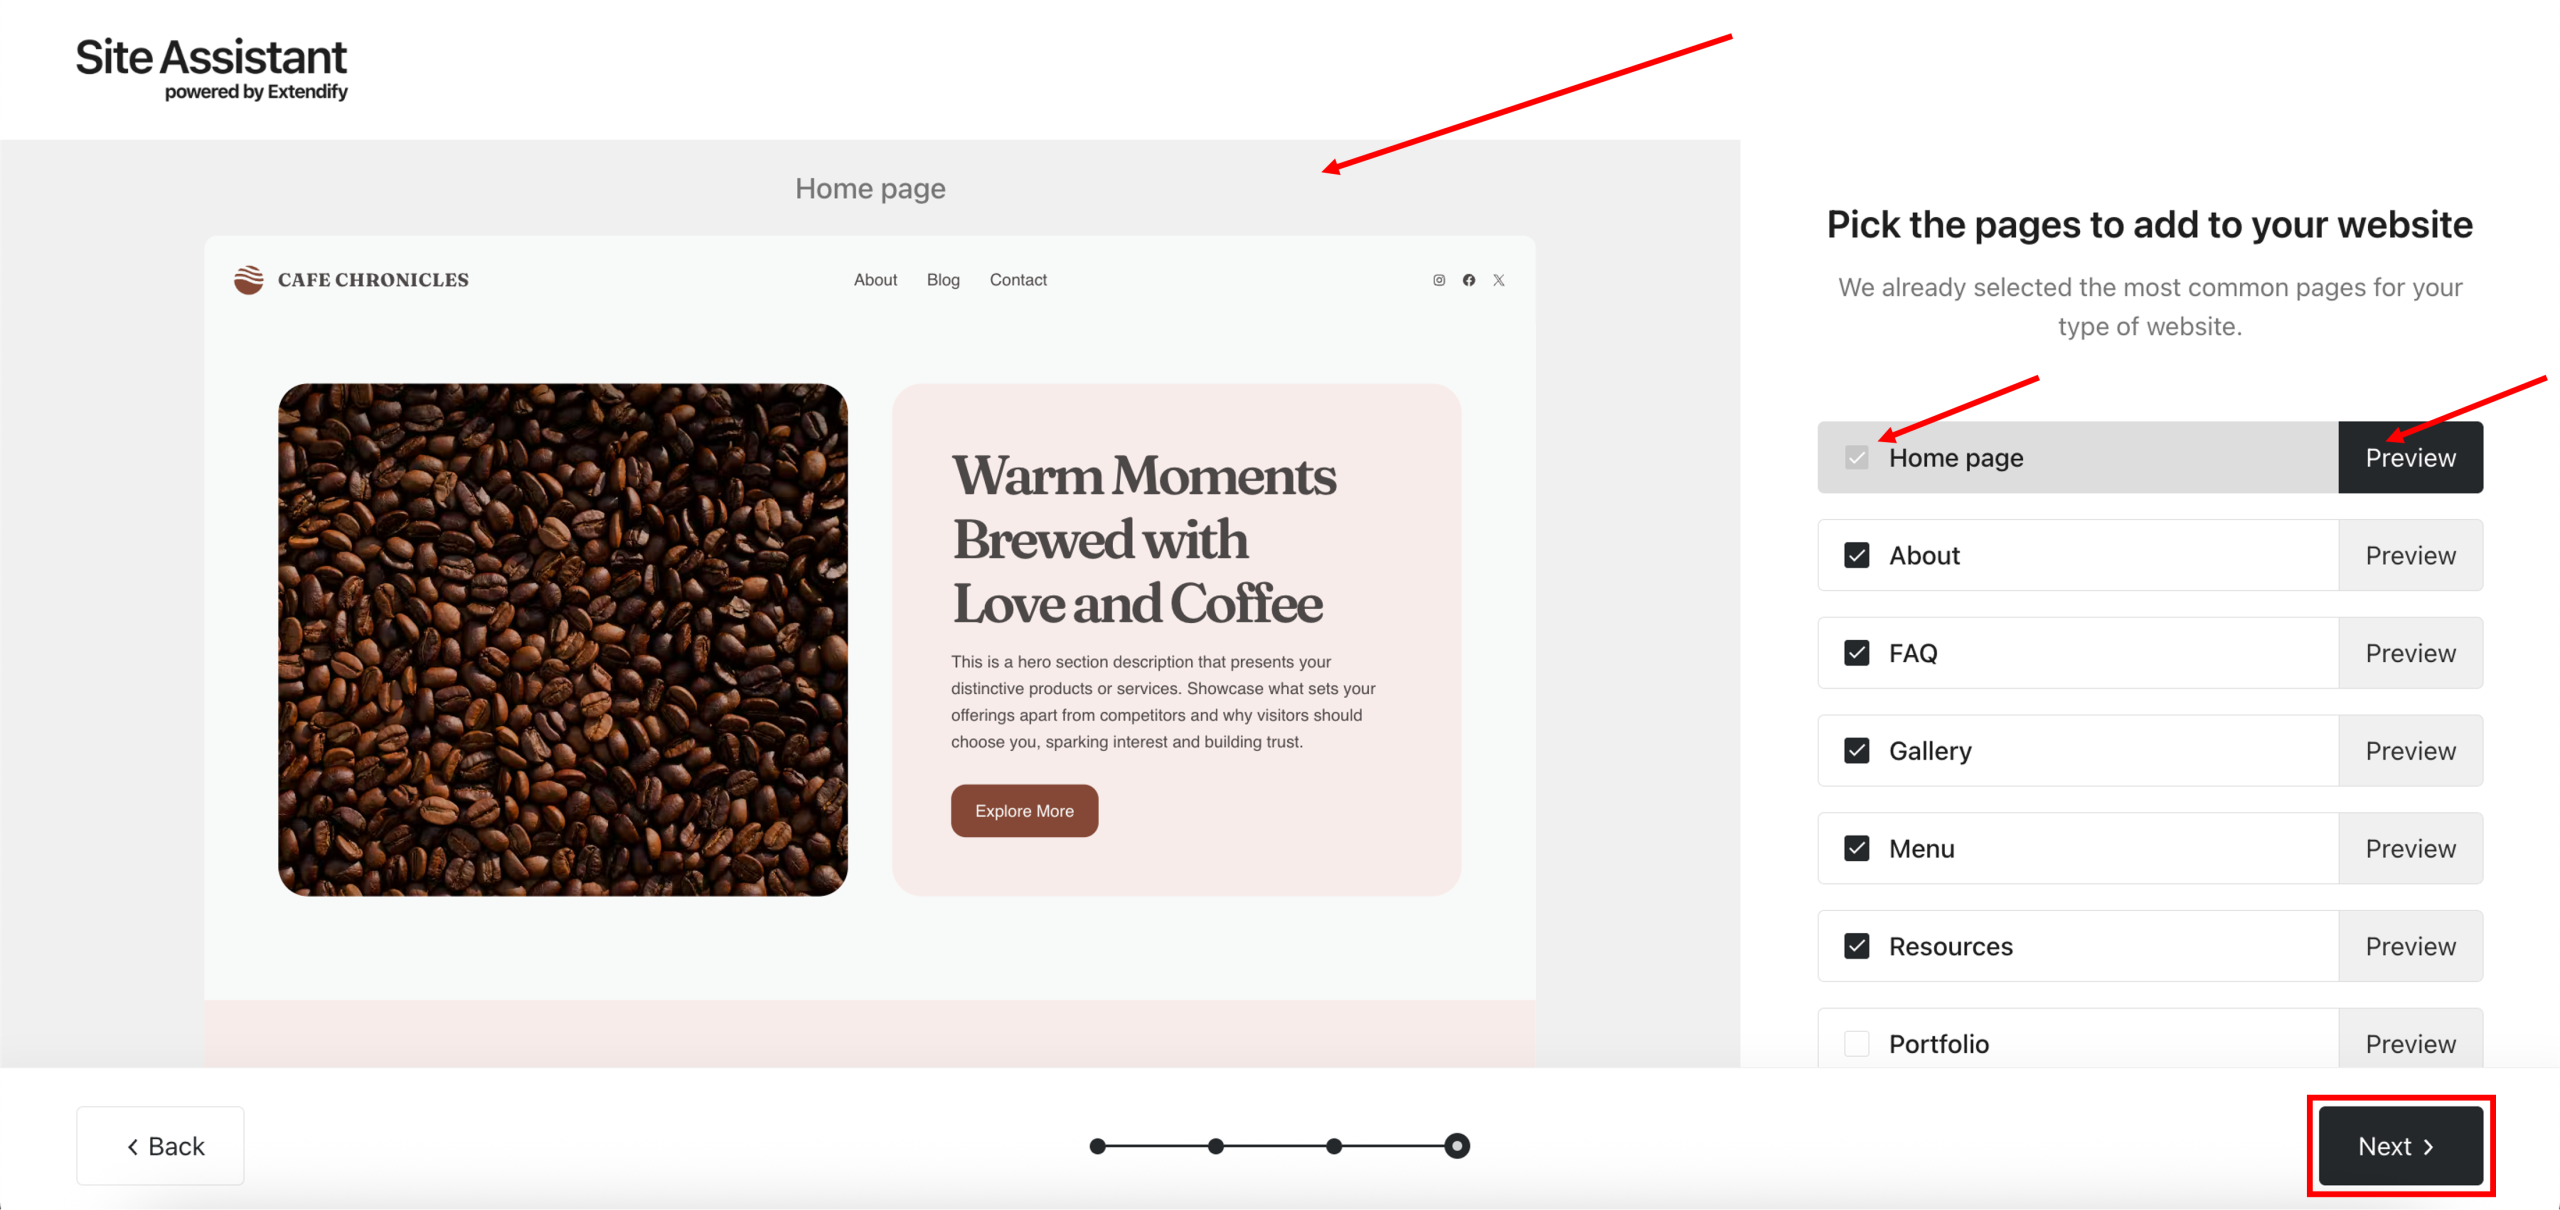
9. Finally, pick the pages to add to your website for the initial launch. Check the boxes next to your preferred pages and preview them if you wish. Once done, click Next.
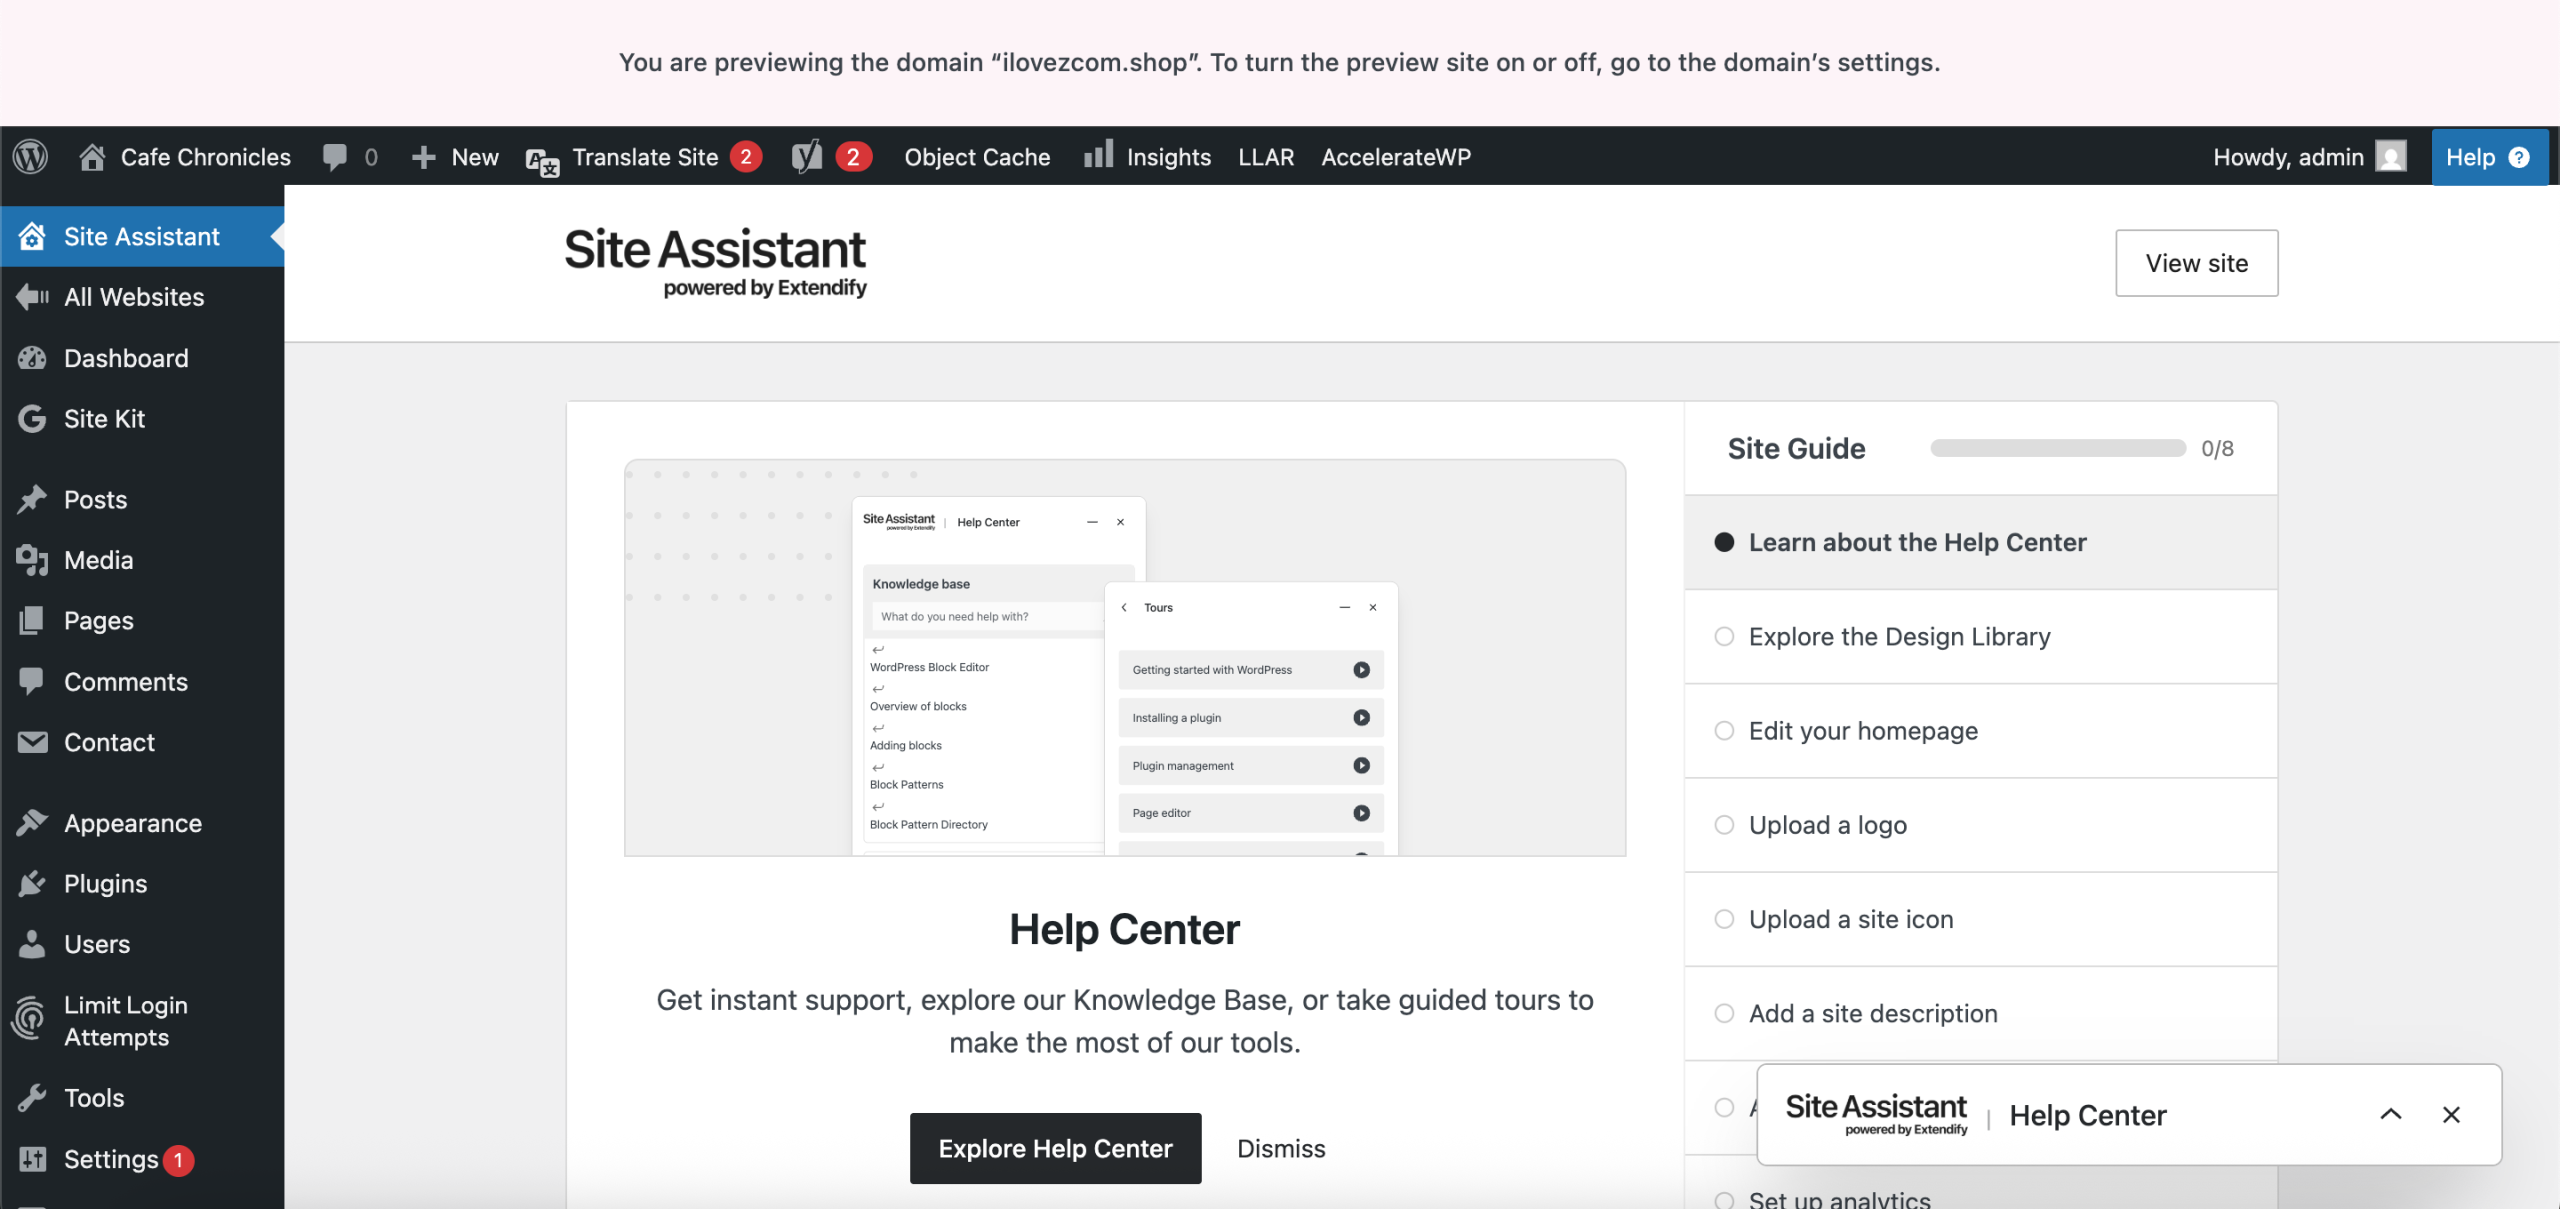
10. Done! The website setup process may take a few minutes to complete, while the AI generates the key pages for you. Once complete, you should be redirected to your WordPress admin page.