
Example :
How to set up an email or change my account settings.
- Help Center
- Web Hosting
- Get Started with Web Hosting for New Customer
- How to create a website with cPanel?
How to create a website with cPanel?
The guide video is available for your reference:
There are several ways to create a website using cPanel, depending on your experience level and website requirements.
Whether you prefer to use a content management system such as WordPress, a visual website builder like Sitejet Builder, or to create a website manually with your own HTML files, cPanel provides the tools you need to get your website online.
This guide introduces the available website creation methods in cPanel and shows you how to get started with each option.
Note:
• Ensure that you have an active web hosting plan with access to cPanel. If you do not yet have one, you can compare the available plans that we currently offer on our Web Hosting page and choose the one that best suits your needs.
• Before creating a website, ensure that your domain is properly connected to your hosting service.
• WordPress is recommended for users who want a flexible website with minimal coding knowledge.
• Sitejet Builder is recommended for users who prefer creating websites using a visual drag-and-drop interface.
• Manual website creation requires basic knowledge of HTML, CSS, or other web development technologies.
• Changes made to website files may affect how your website appears or functions.
Table of contents
1. WordPress
1. Access cPanel directly through your Z.com account.
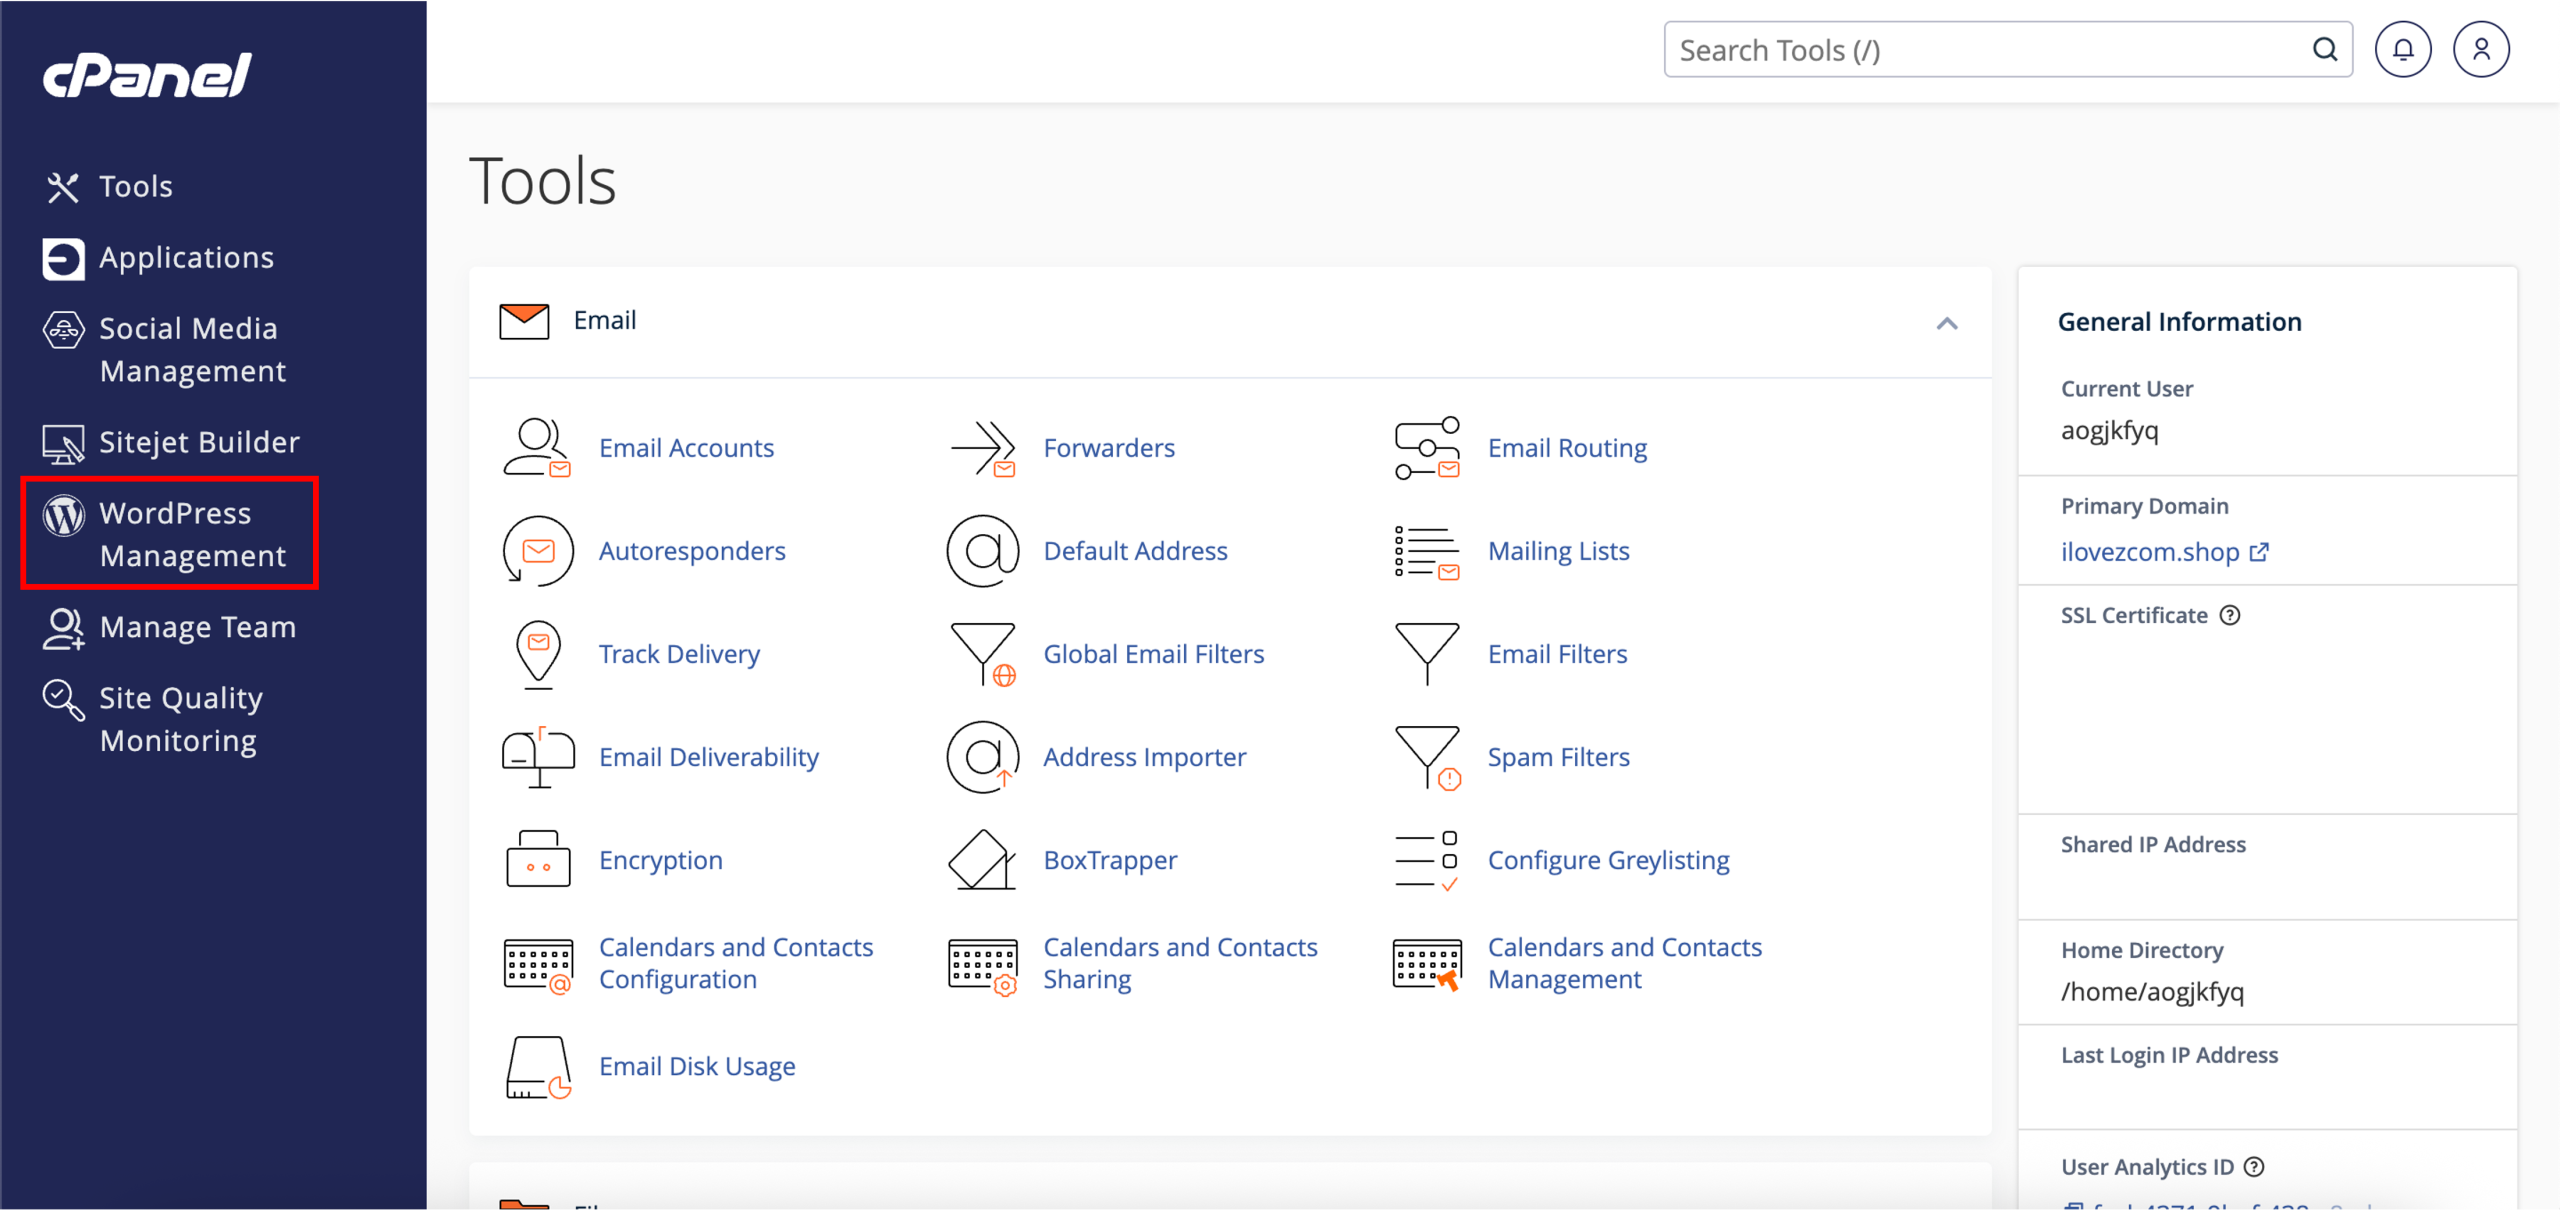
2. Once you have reached the cPanel dashboard, locate WordPress Management on the left.
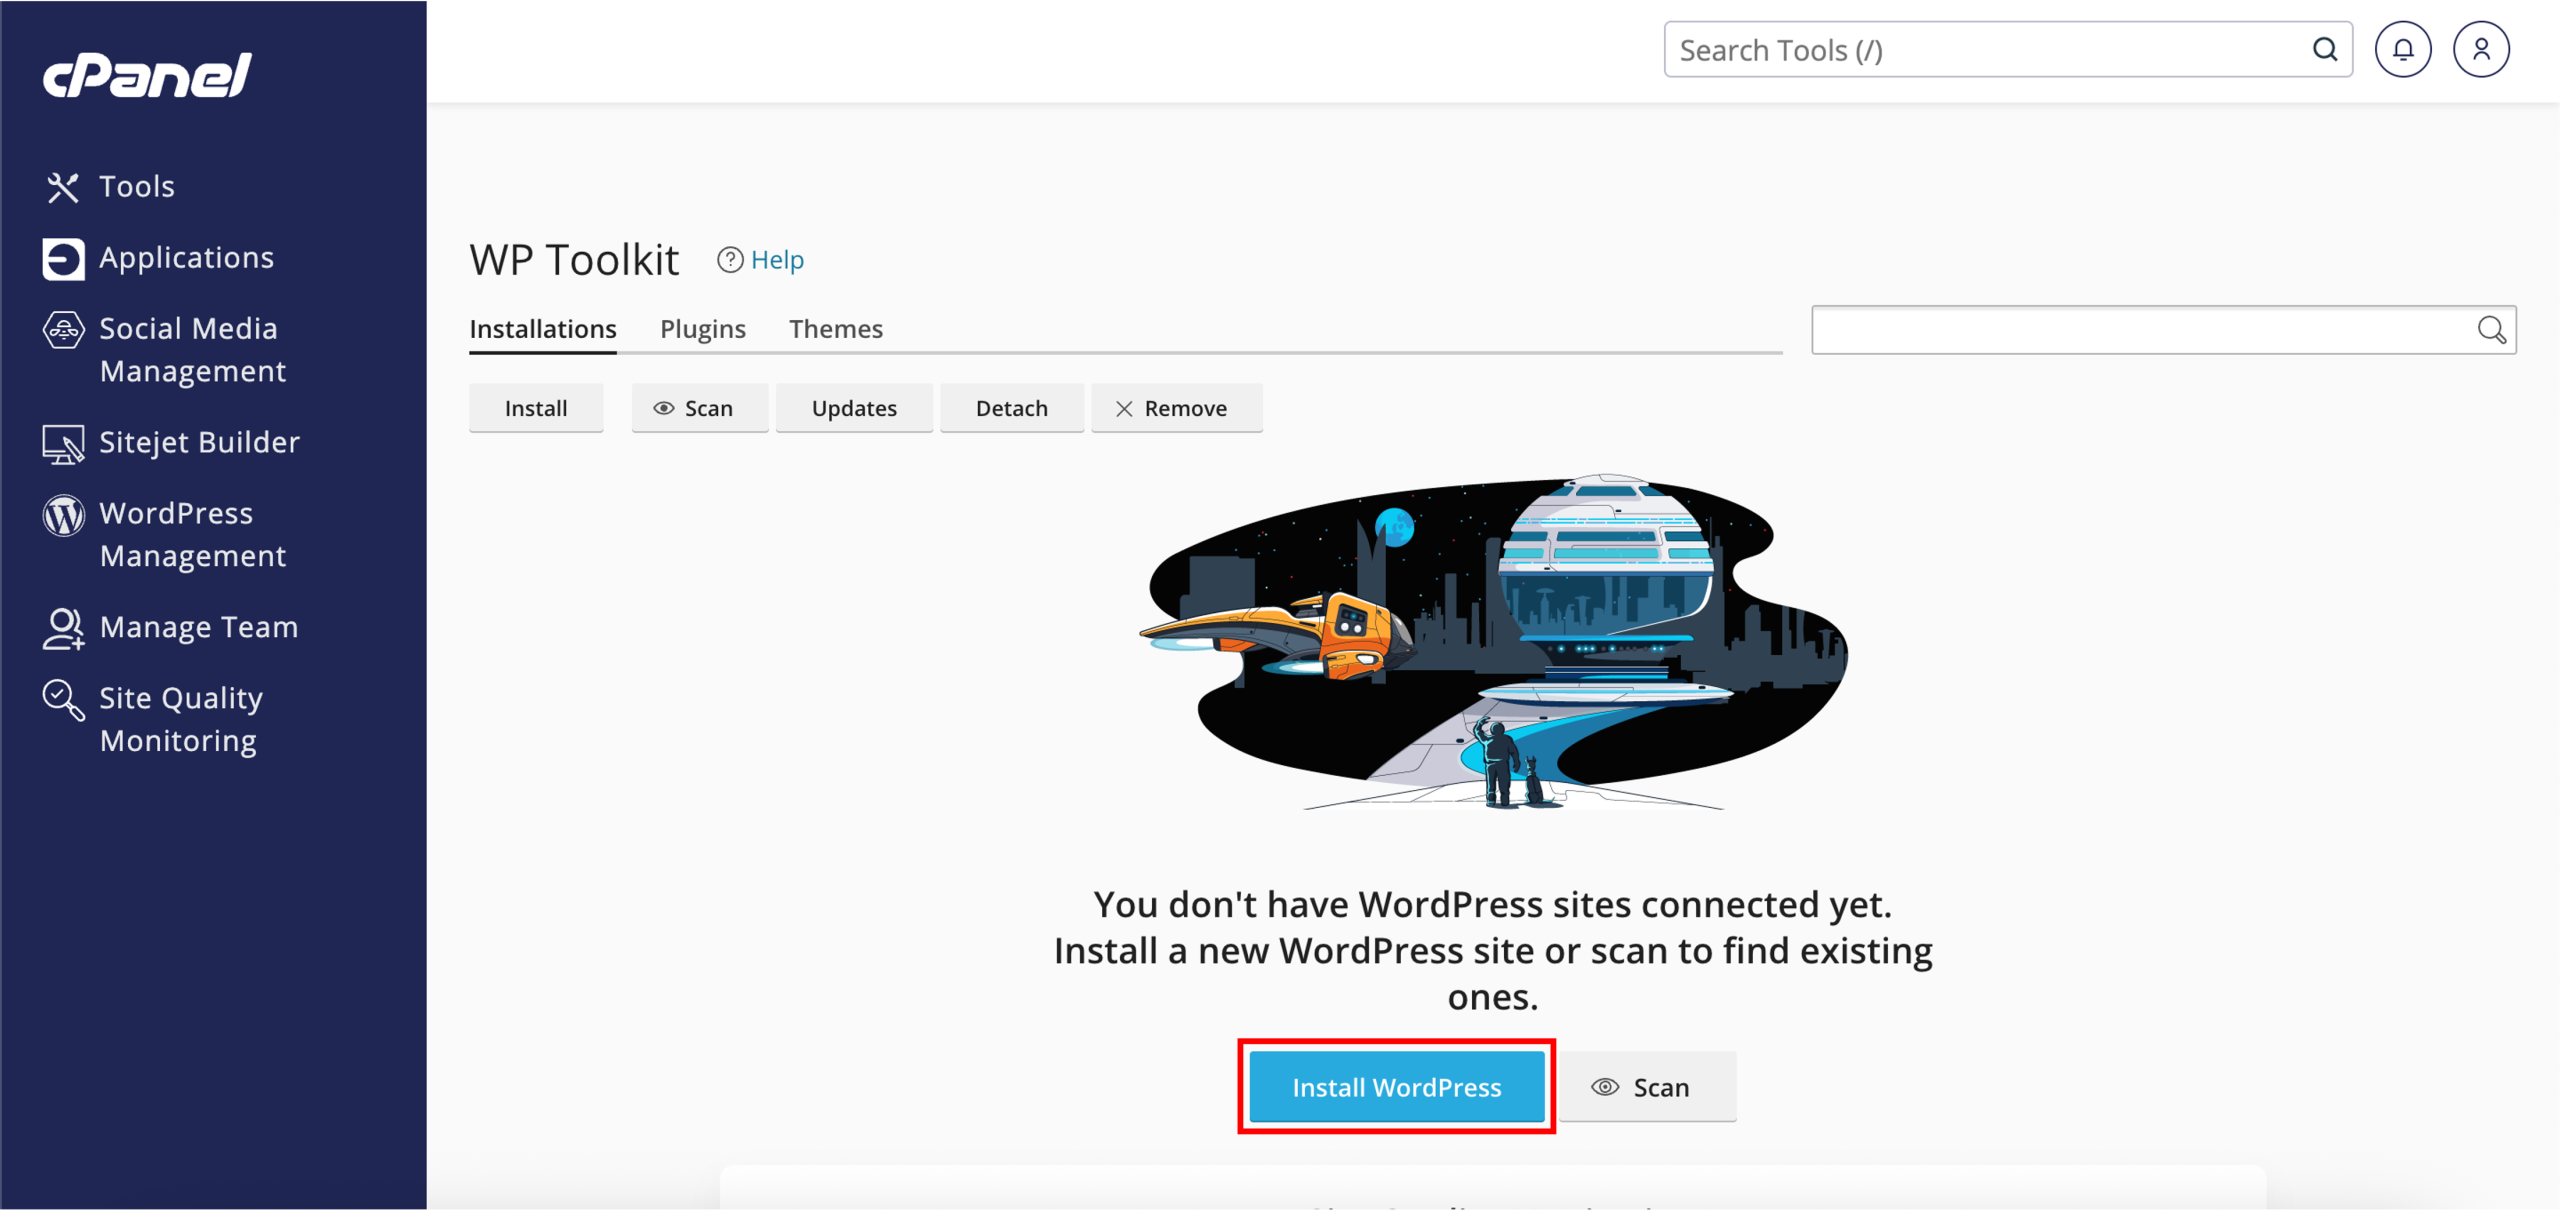
3. On the WP Toolkit page, click Install WordPress to start the setup process.
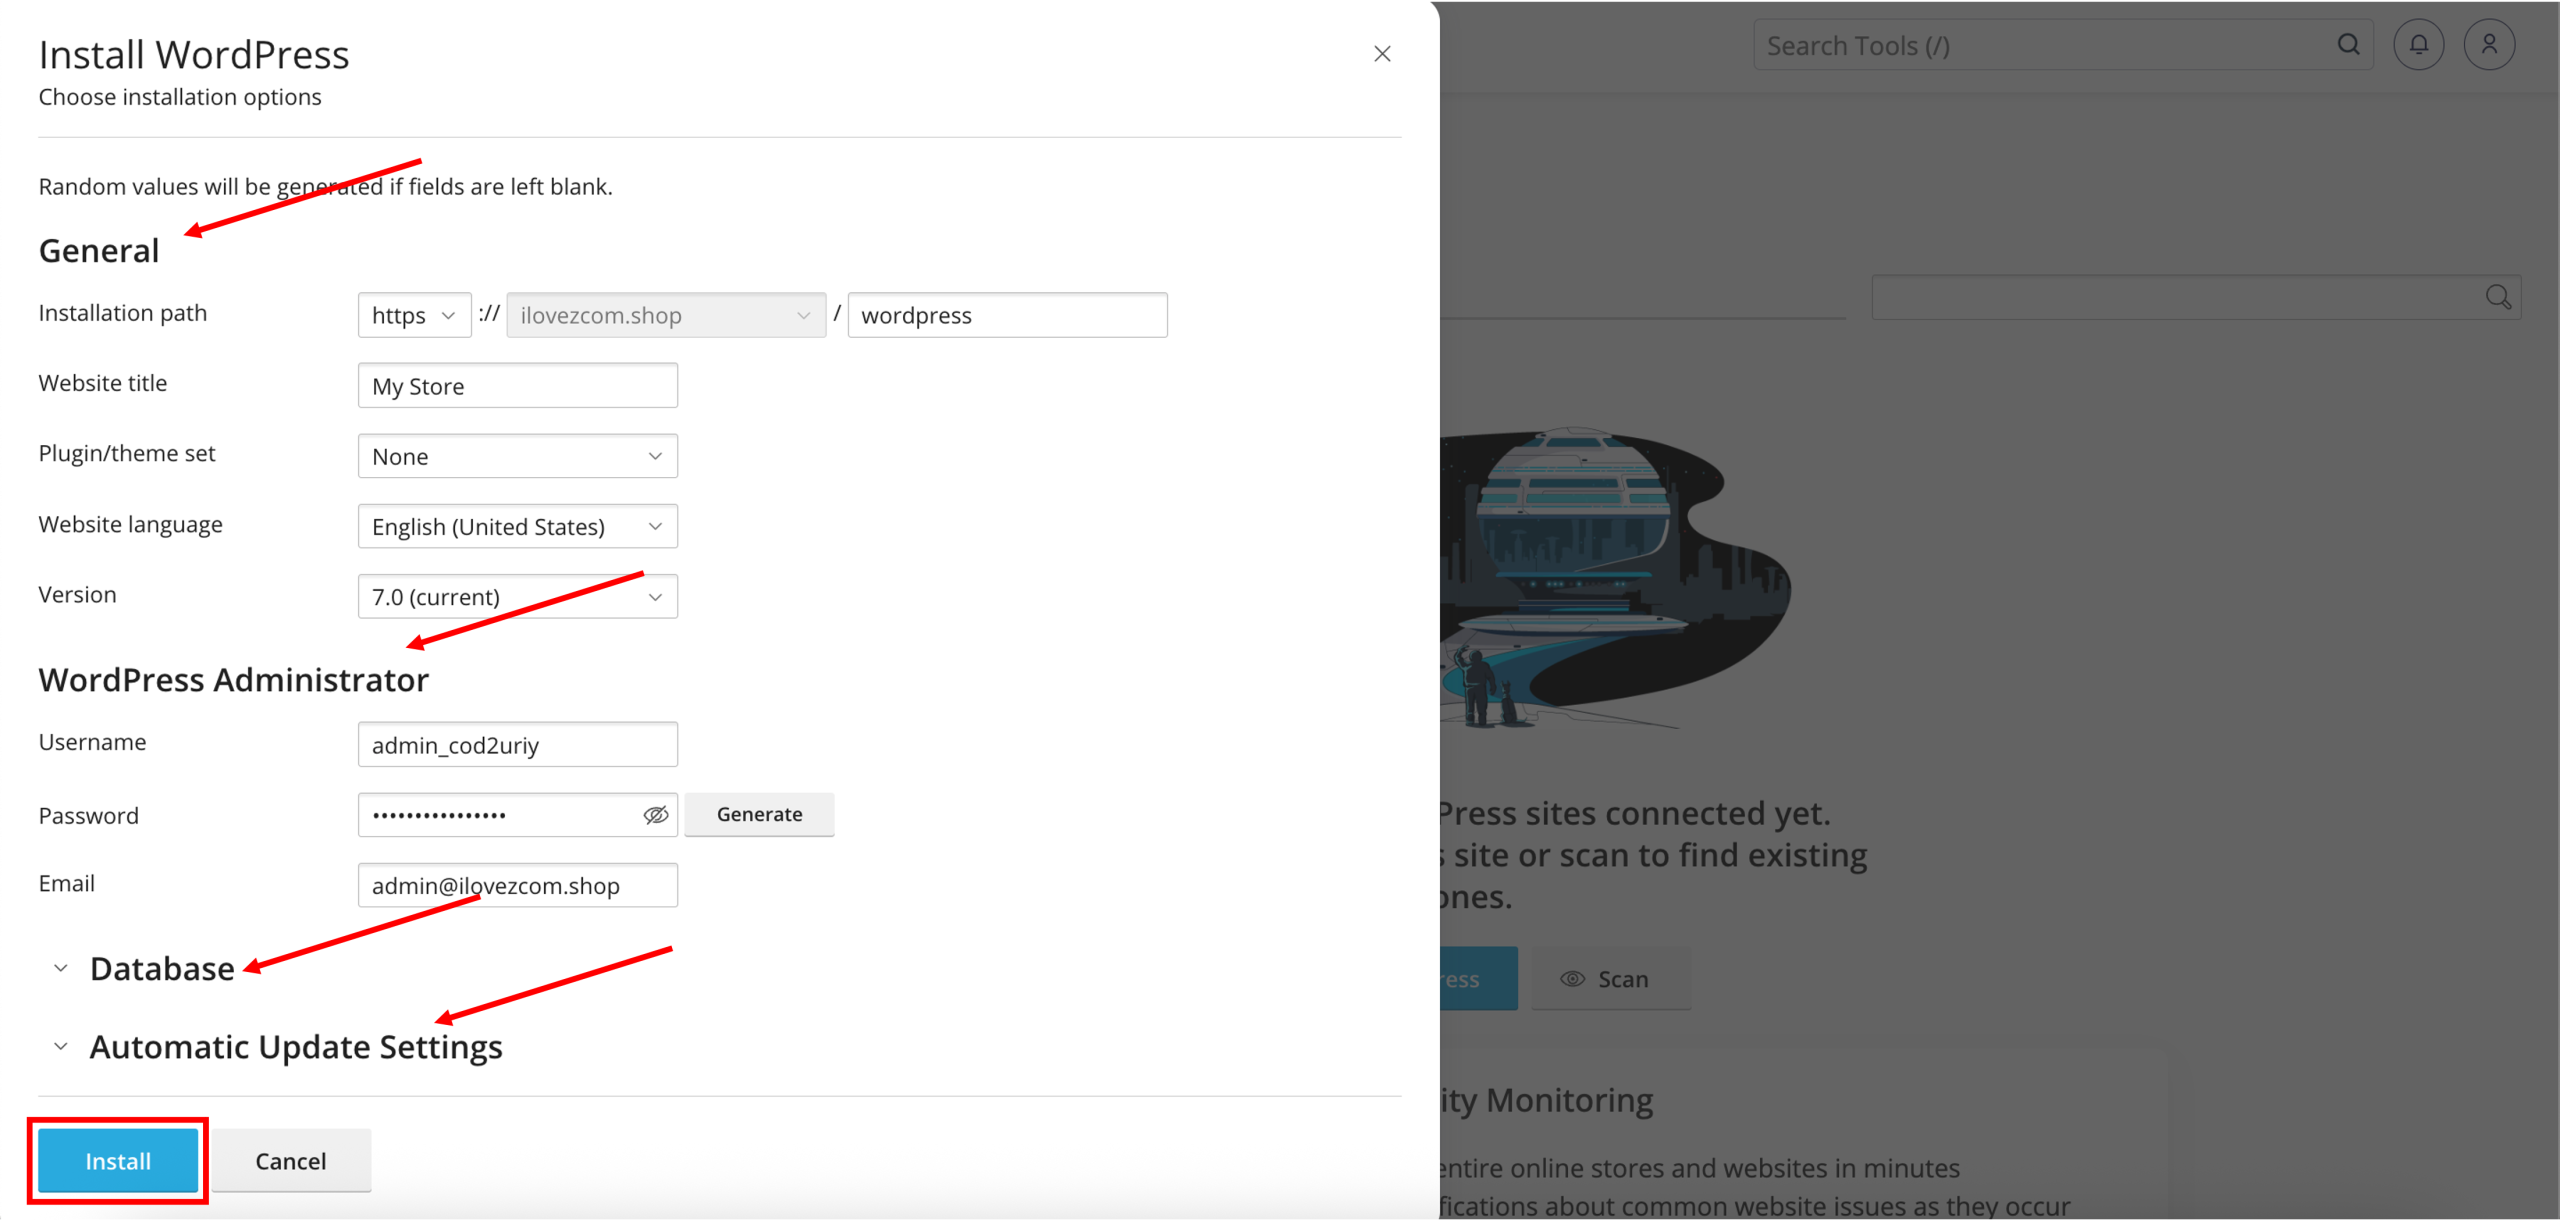
4. An installation options tab will appear on the left, with several fields and drop-down menus that you can configure before proceeding with the installation.
Under the General section:
• Installation path – Defines the location on your server where WordPress will be installed.
• Website title – The name of your website, which can be updated after installation if needed.
• Plugin/theme set – Lets you install a predefined set of plugins and themes together with WordPress to add additional functionality right after installation.
• Website language – Sets the default language for the WordPress admin dashboard.
• Version – Specifies the WordPress version that will be installed.
Under the WordPress Administrator section:
• Username – The username used to log in to the WordPress dashboard.
• Password – The password used to secure the administrator account and log in to the WordPress dashboard.
• Email – The email address linked to the administrator account, used for notifications, password resets, and other account-related communications.
Under the Database section, WordPress will automatically create and configure a database for your website. These settings are pre-generated and typically do not require any changes.
Under the Automatic Update Settings section, you can review the available options and configure them according to your preference. These settings can be adjusted based on your website management needs.
Once done, click Install.
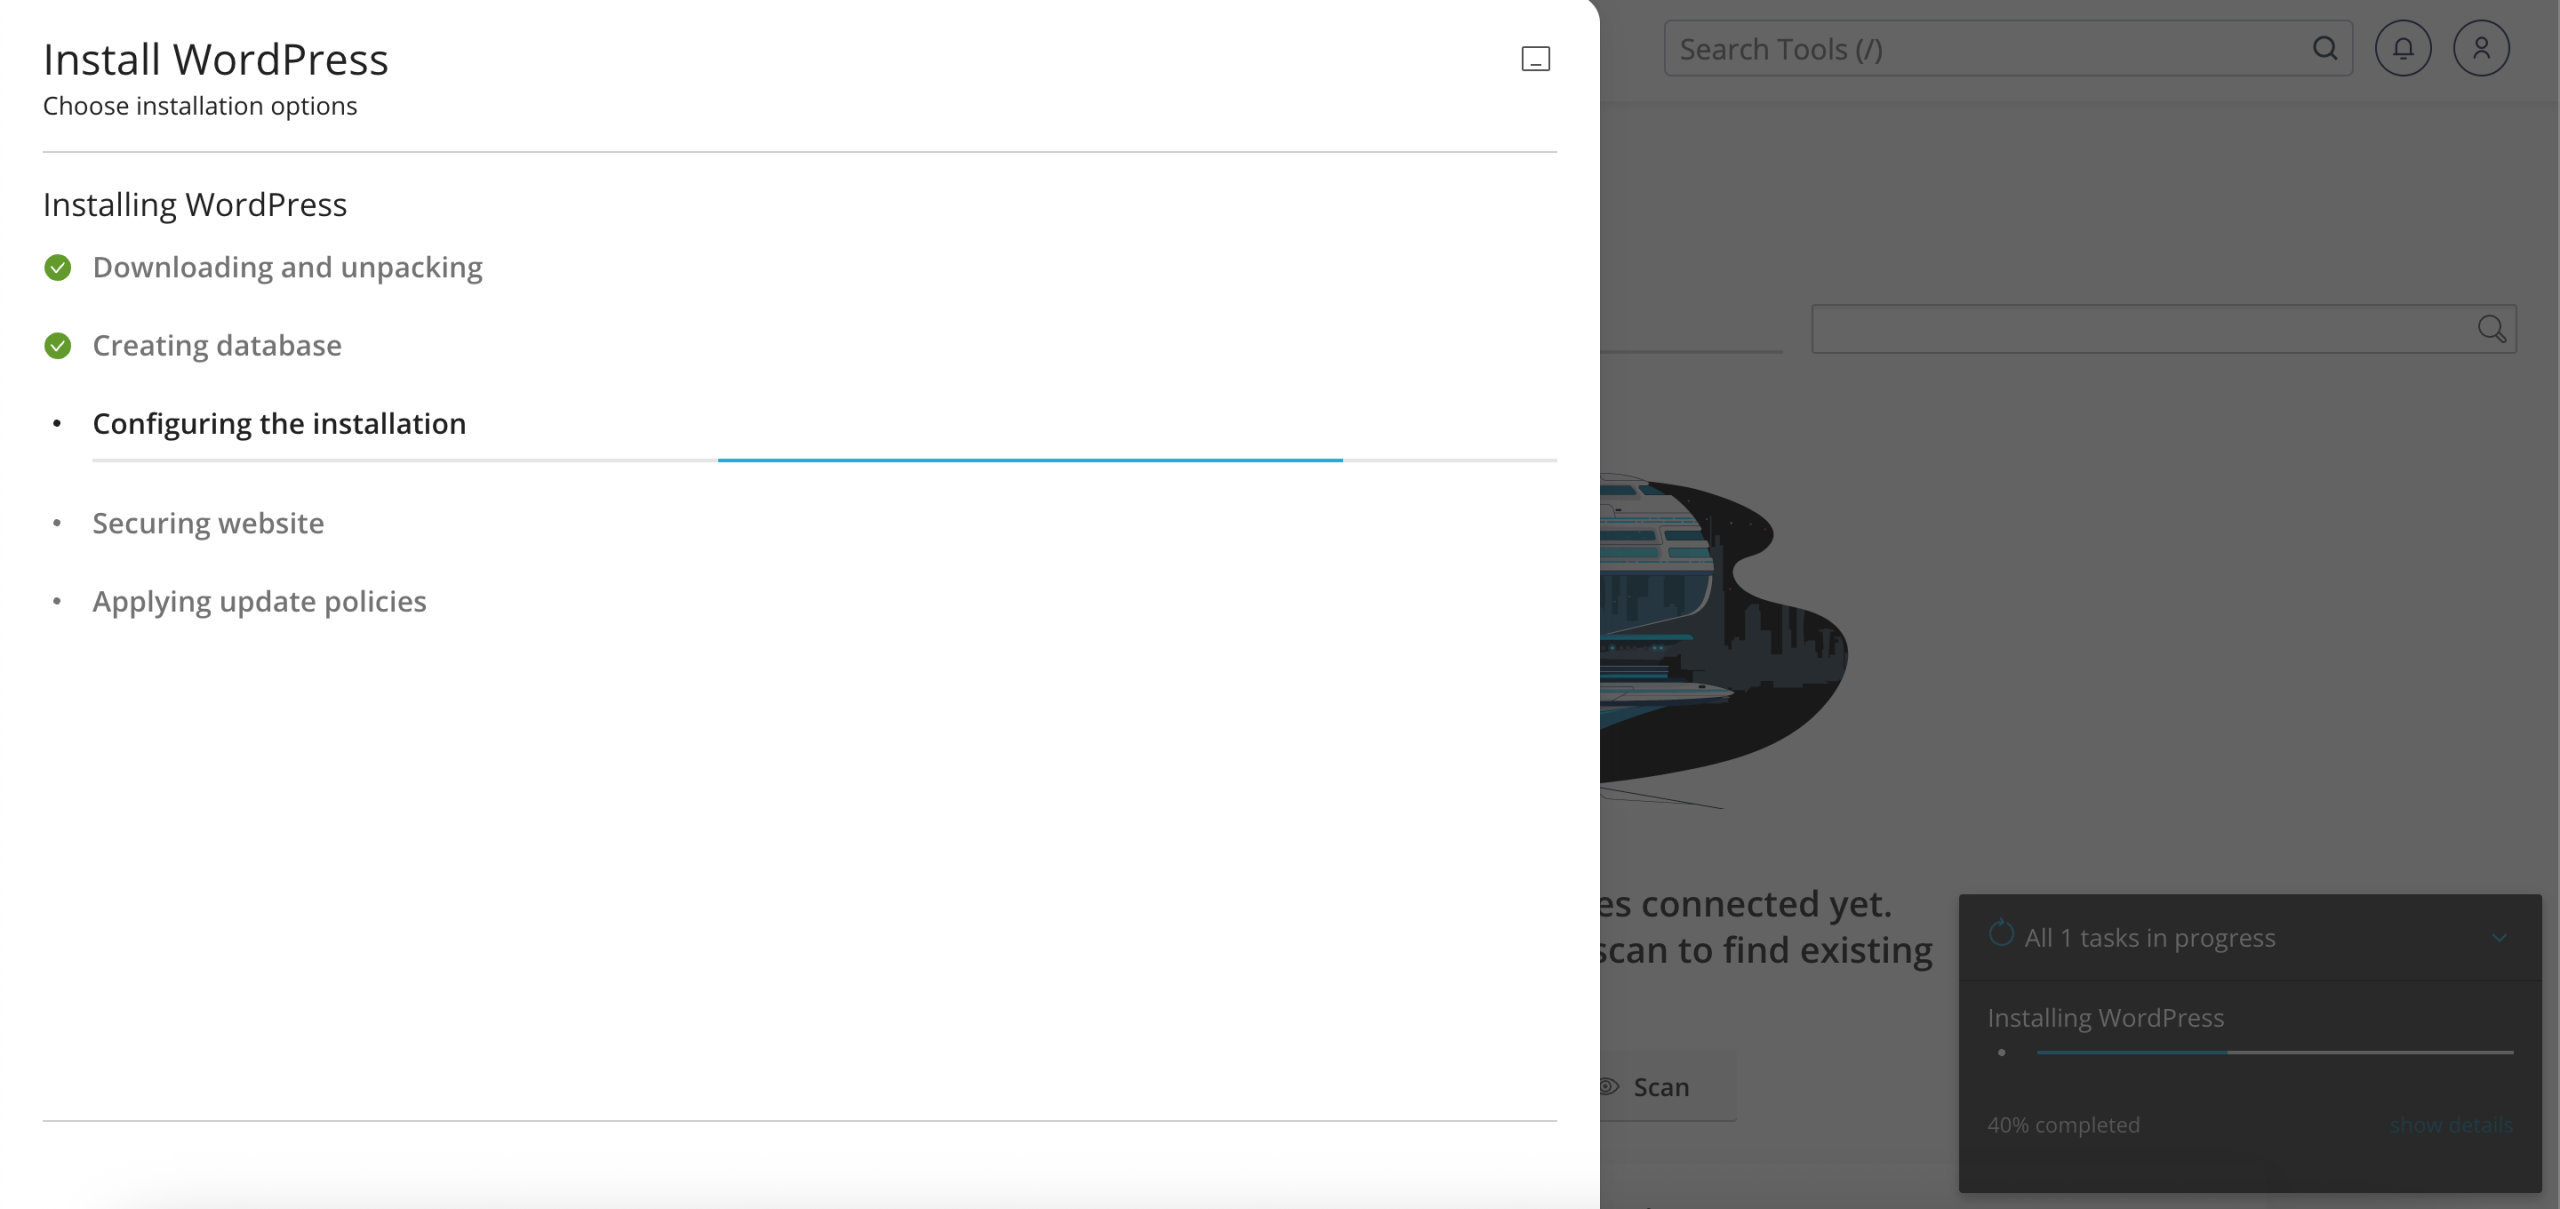
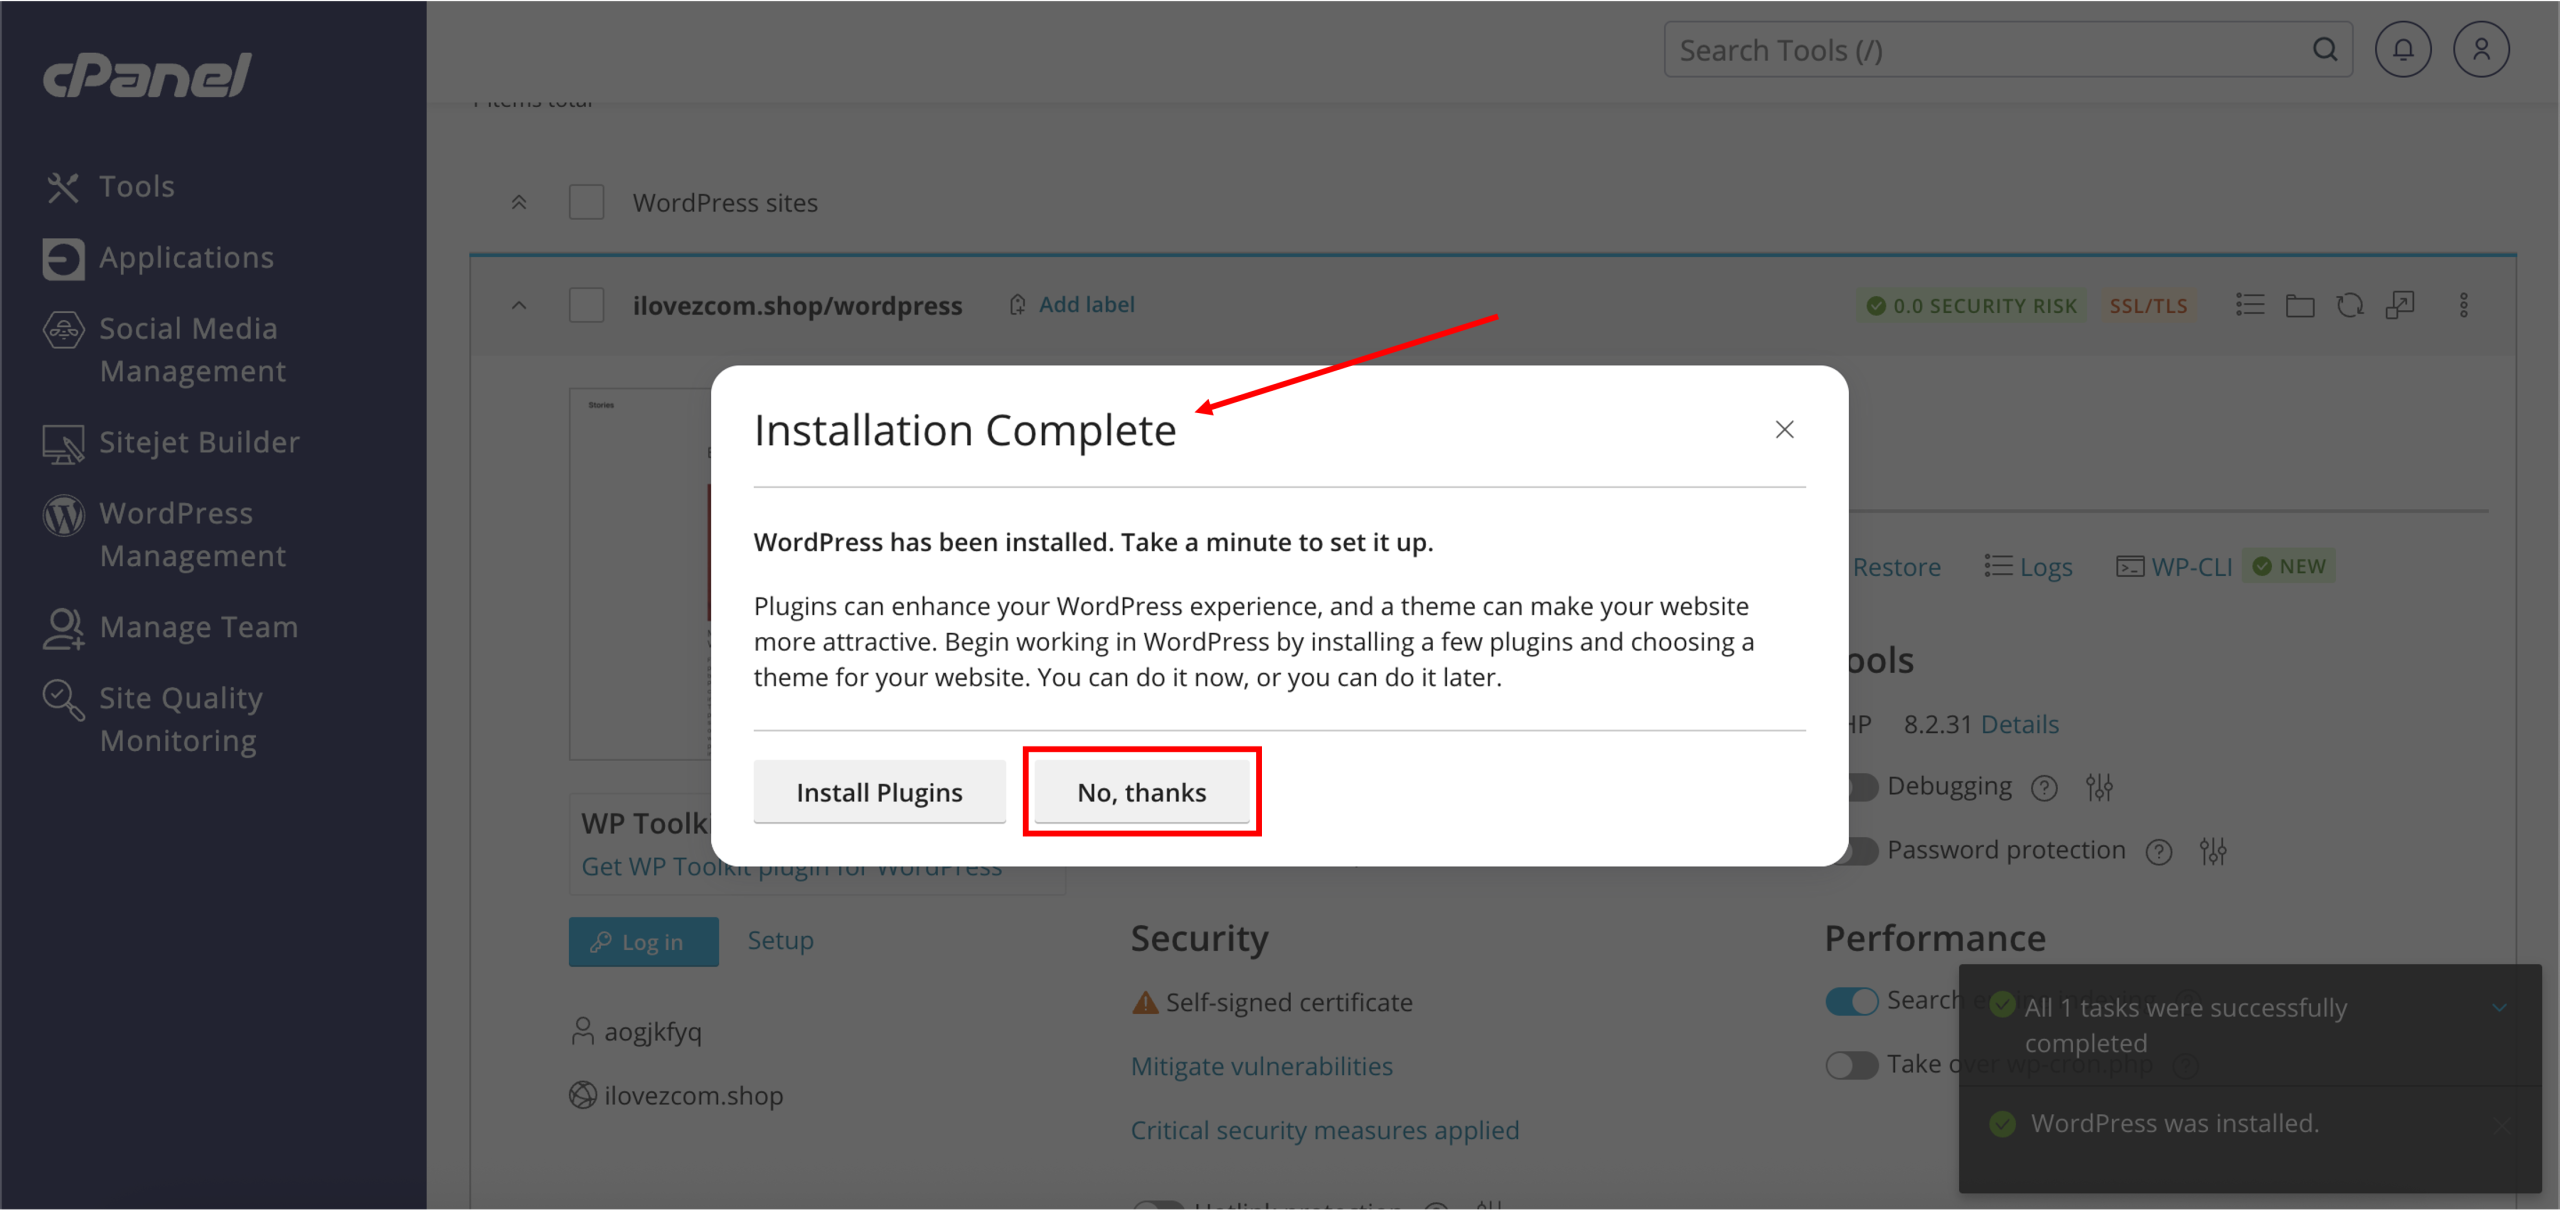
5. Done! Successfully installing WordPress should look like the following, with the installation complete prompt. You can click Install Plugins to begin working in WordPress, or click No, thanks to do it later.
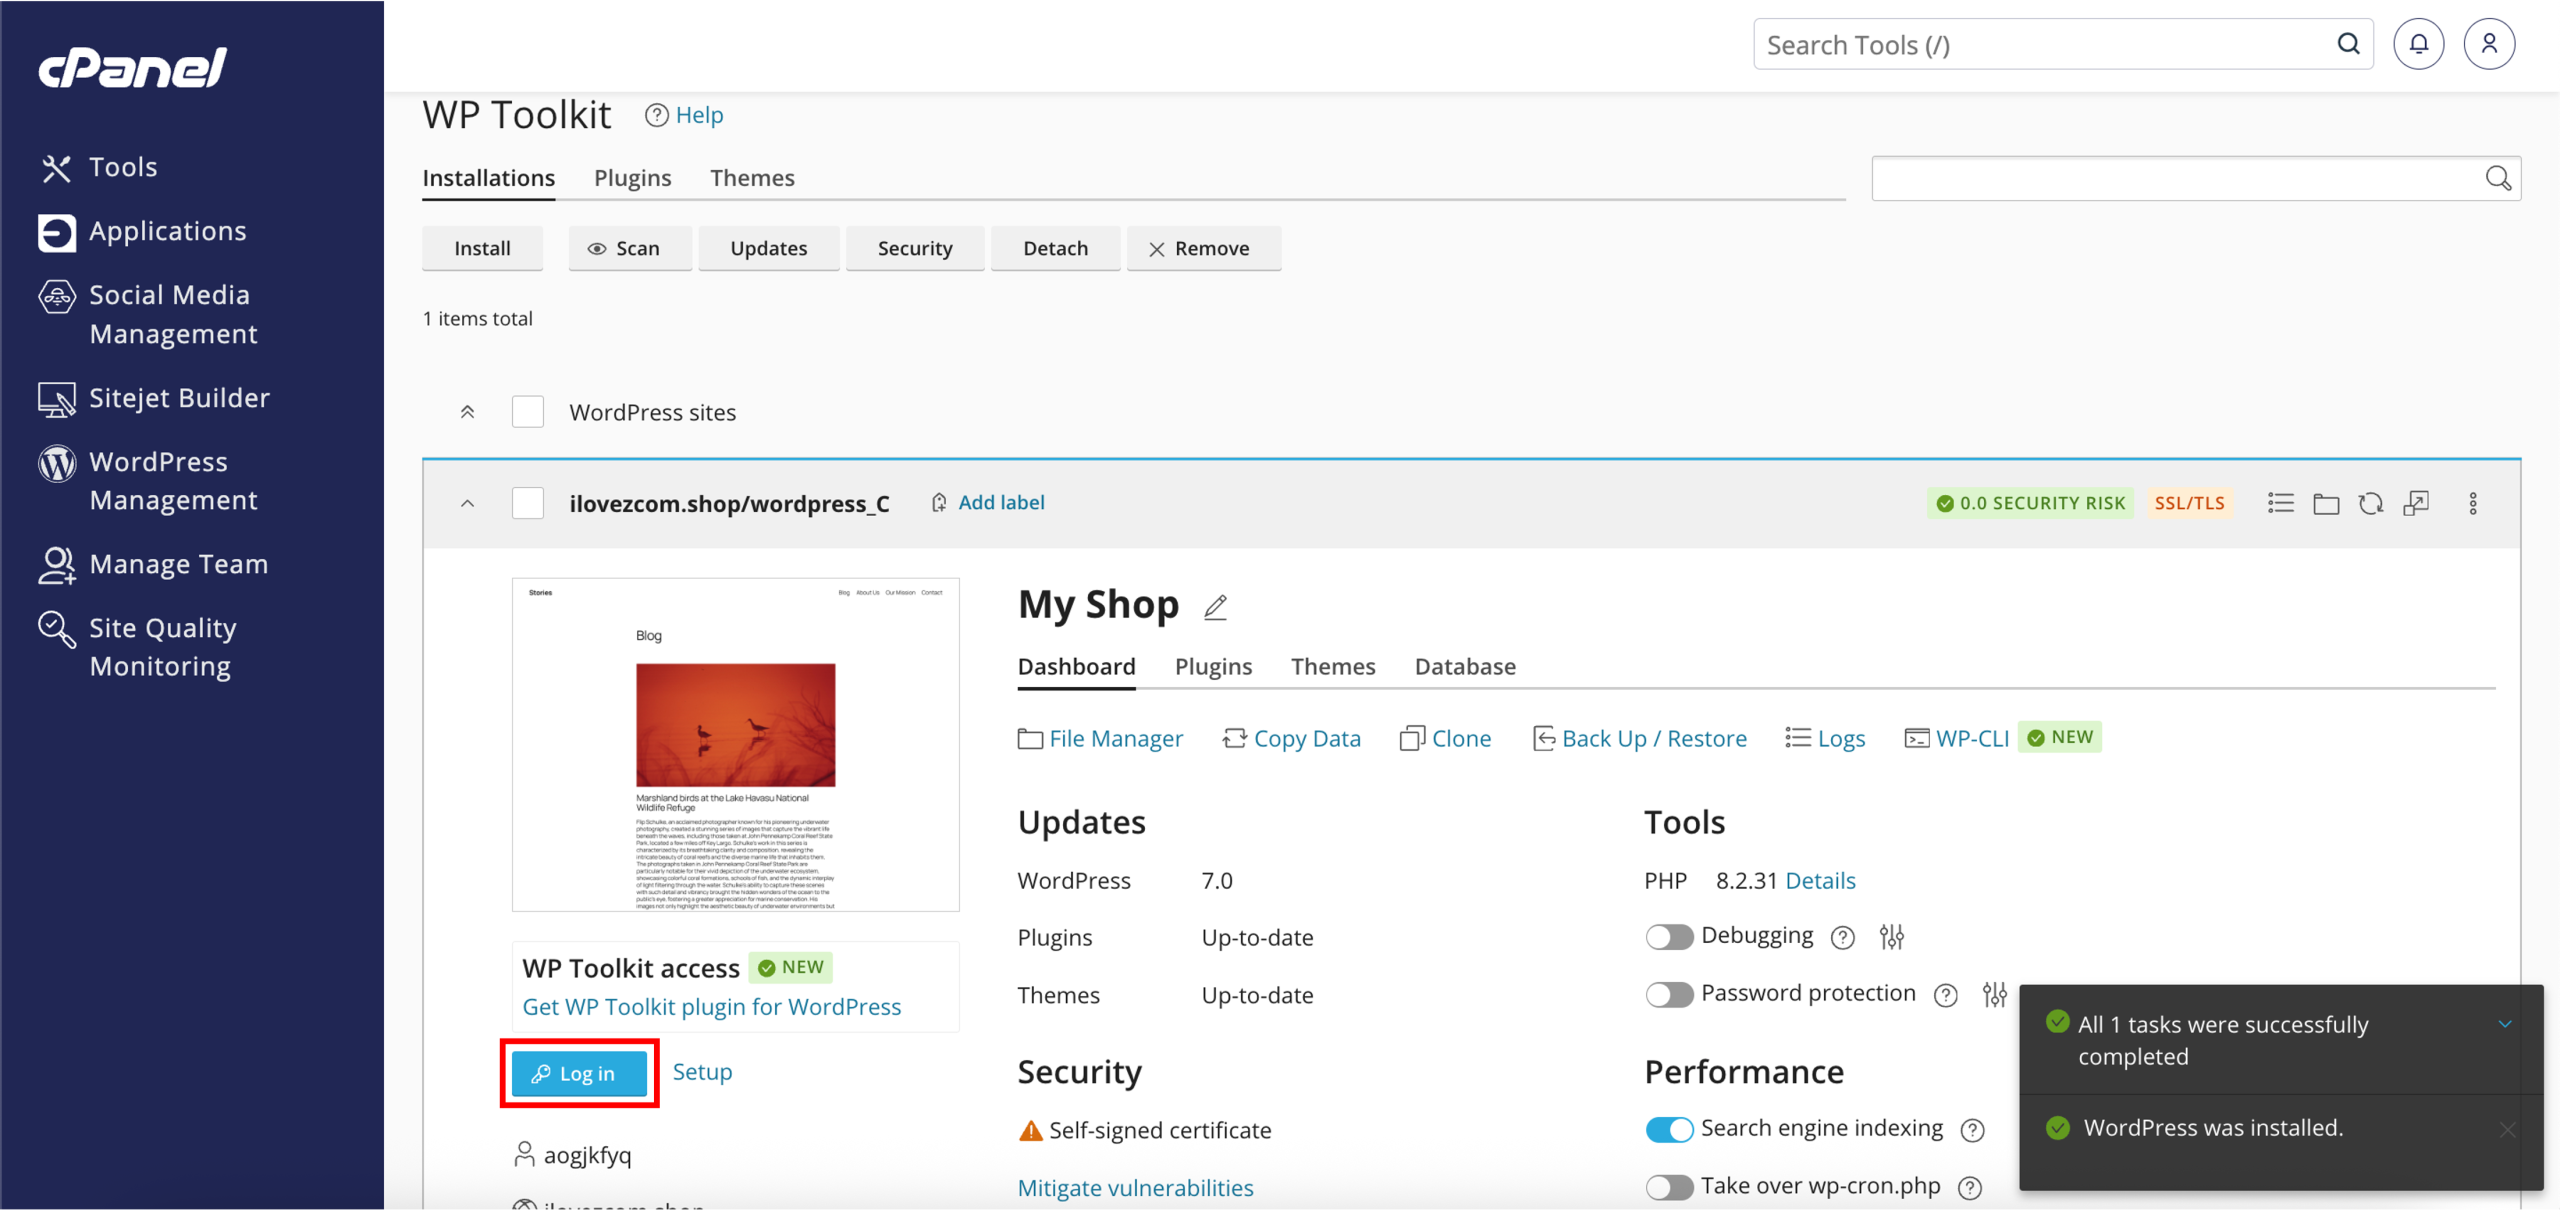
6. A preview of your website will be displayed on the left, while the management options and website information are shown on the right. To access the WordPress admin dashboard, where you can begin building your website, click Log In.
2. Sitejet Builder
1. Access cPanel directly through your Z.com account.
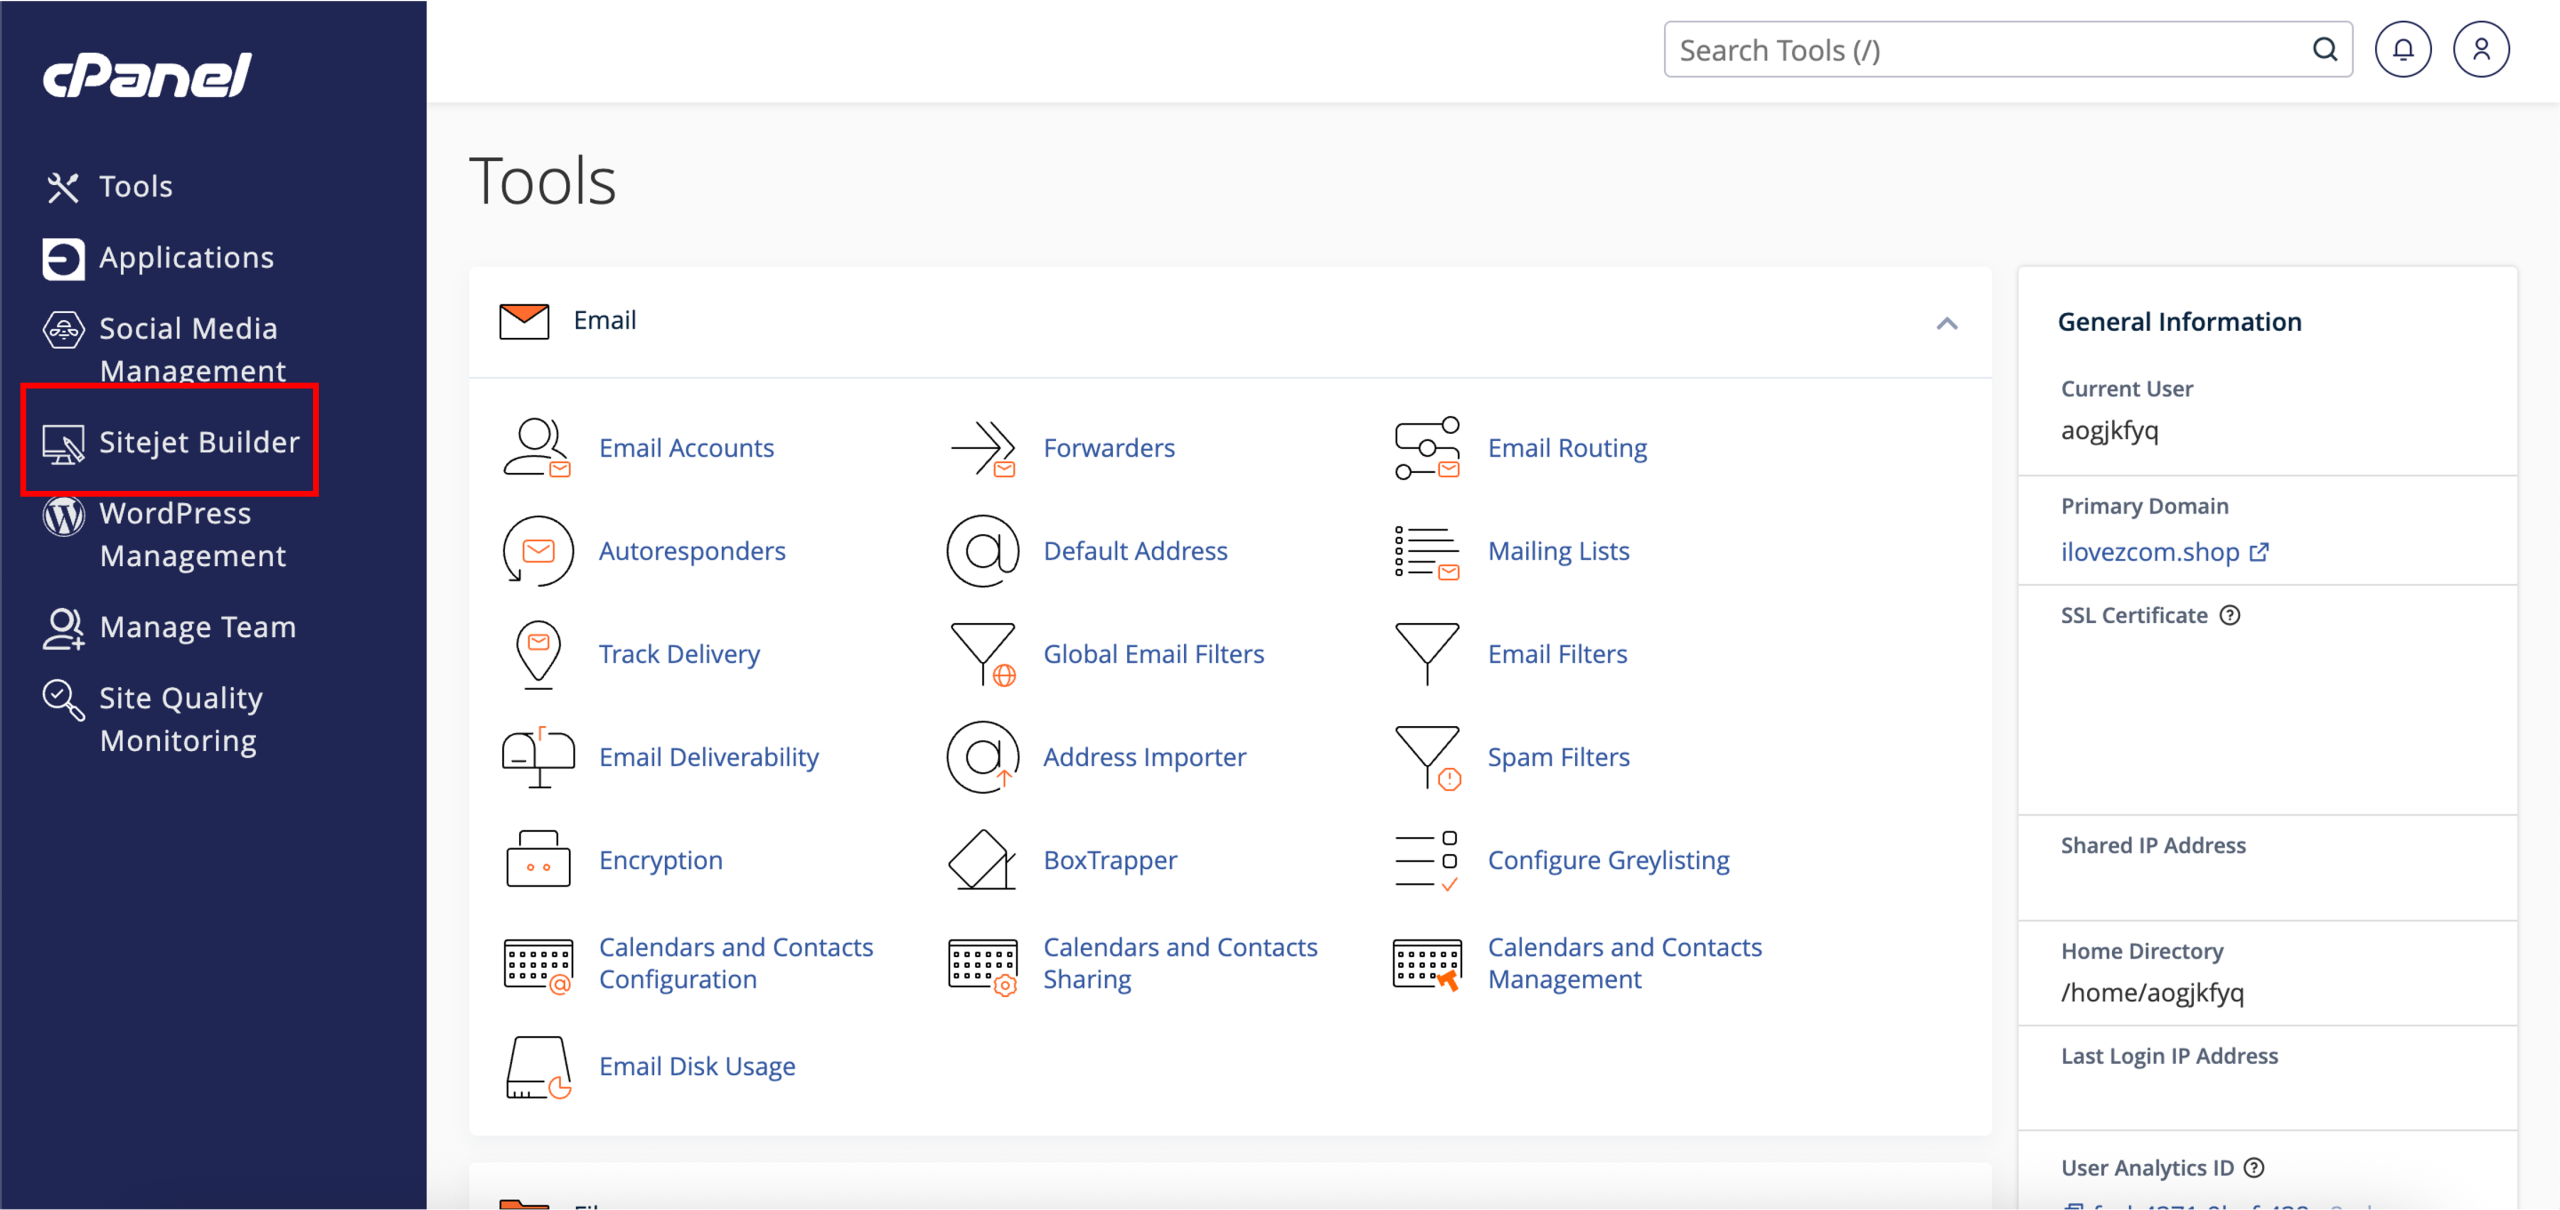
2. Once you have reached the cPanel dashboard, locate Sitejet Builder on the left.
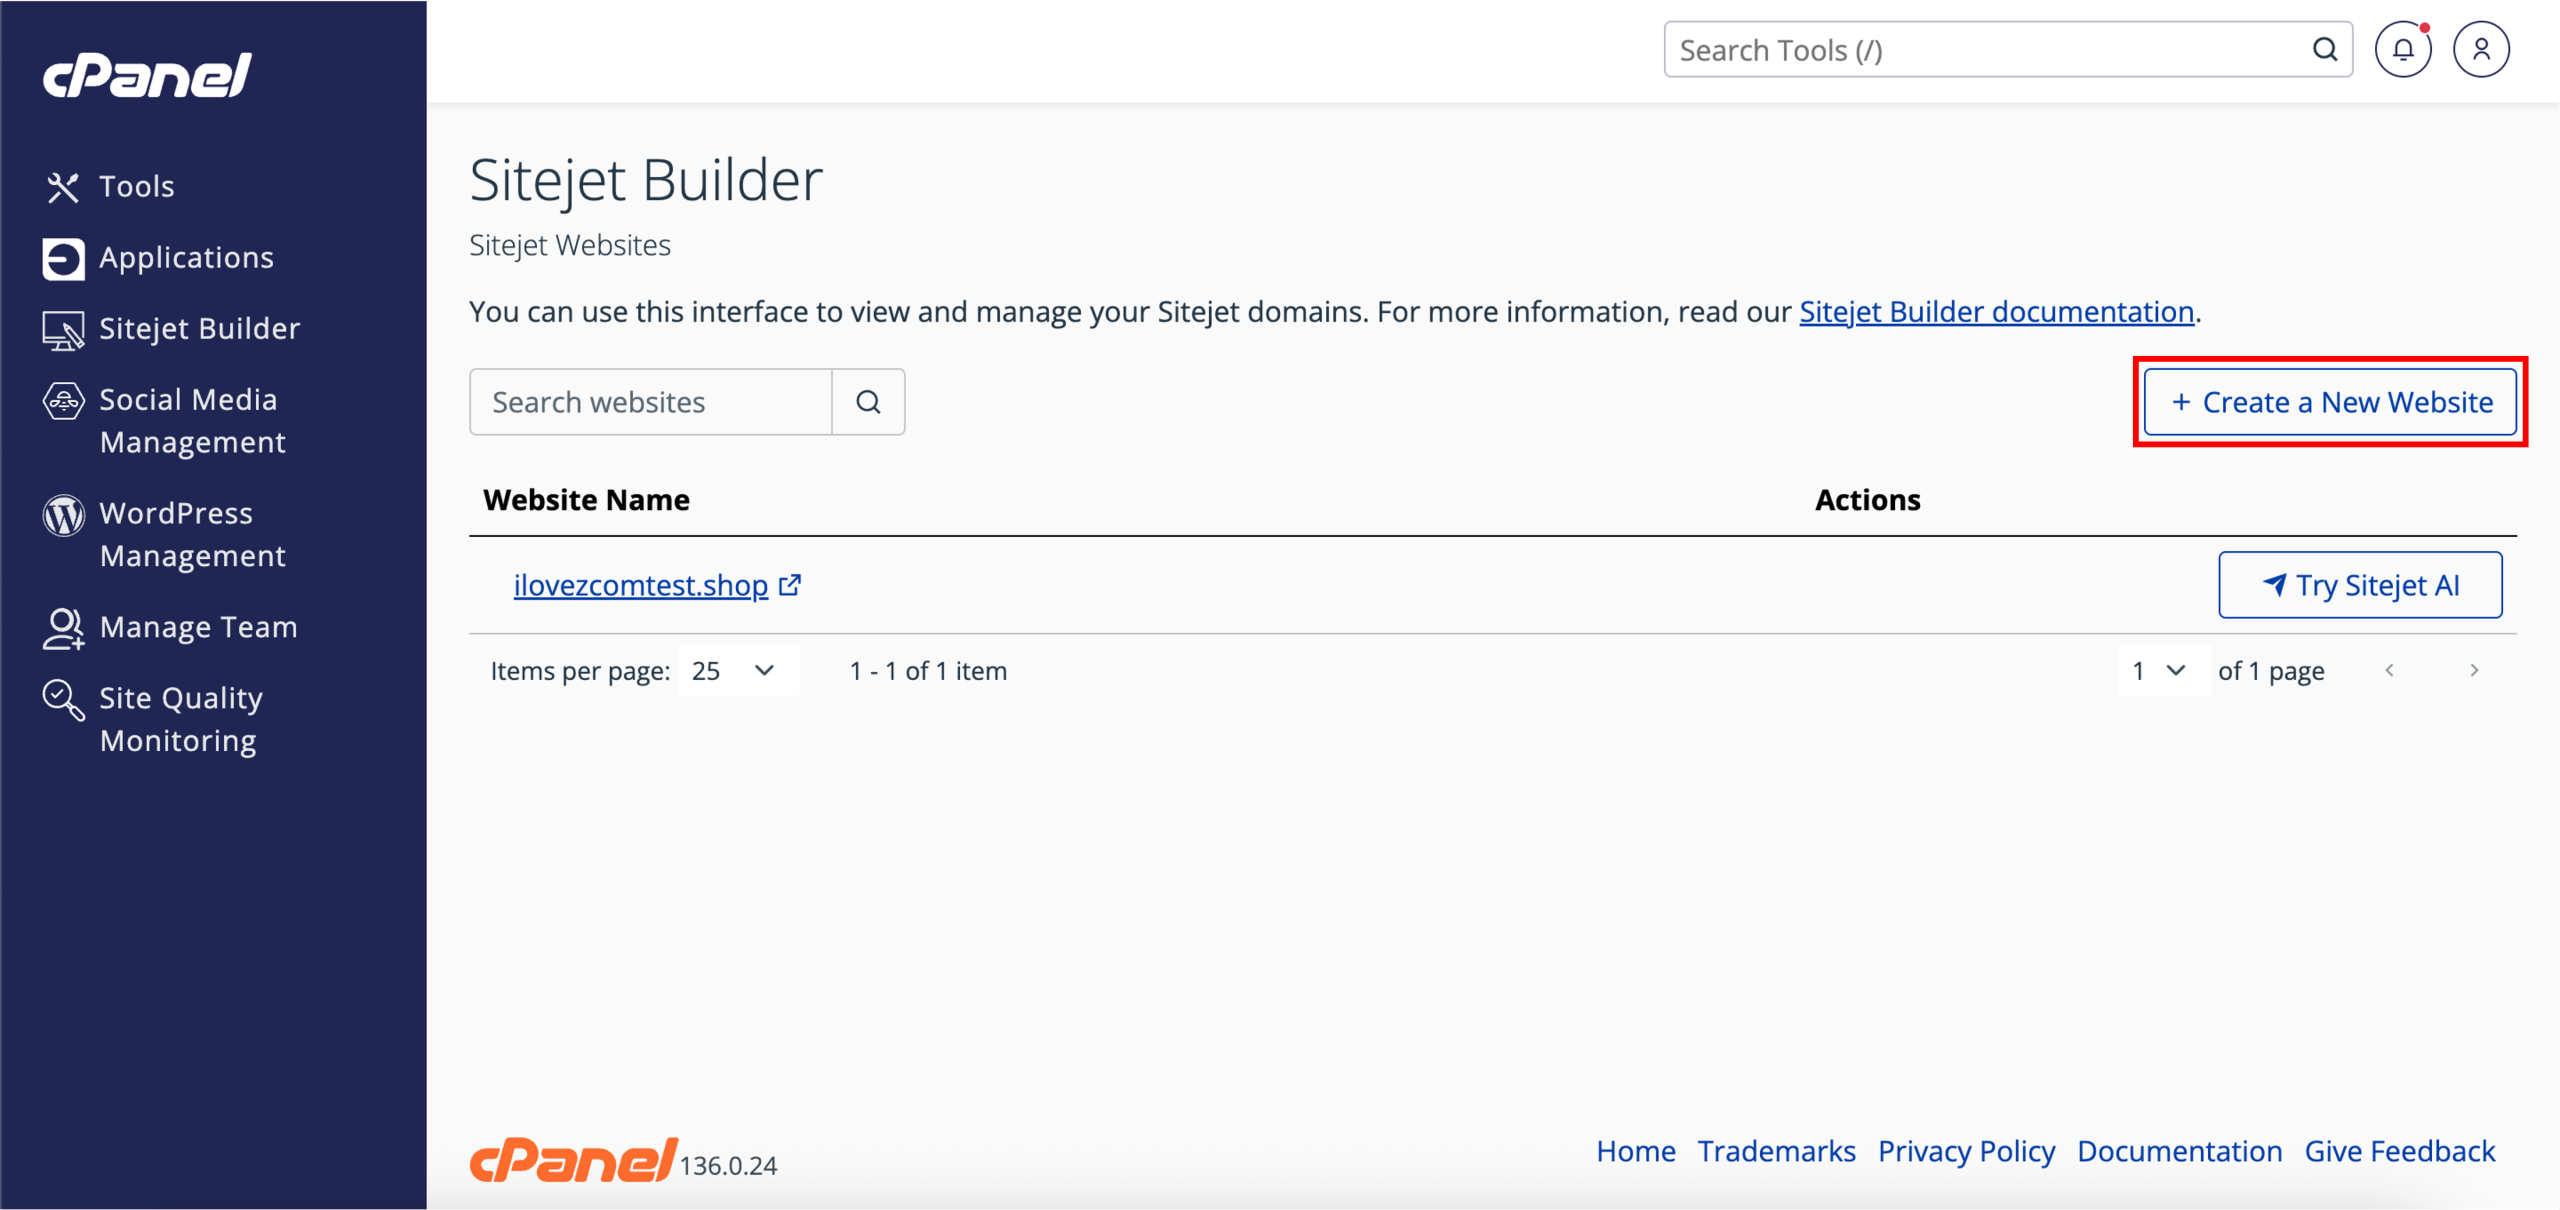
3. On the Sitejet Builder page, click + Create a New Website on the right.
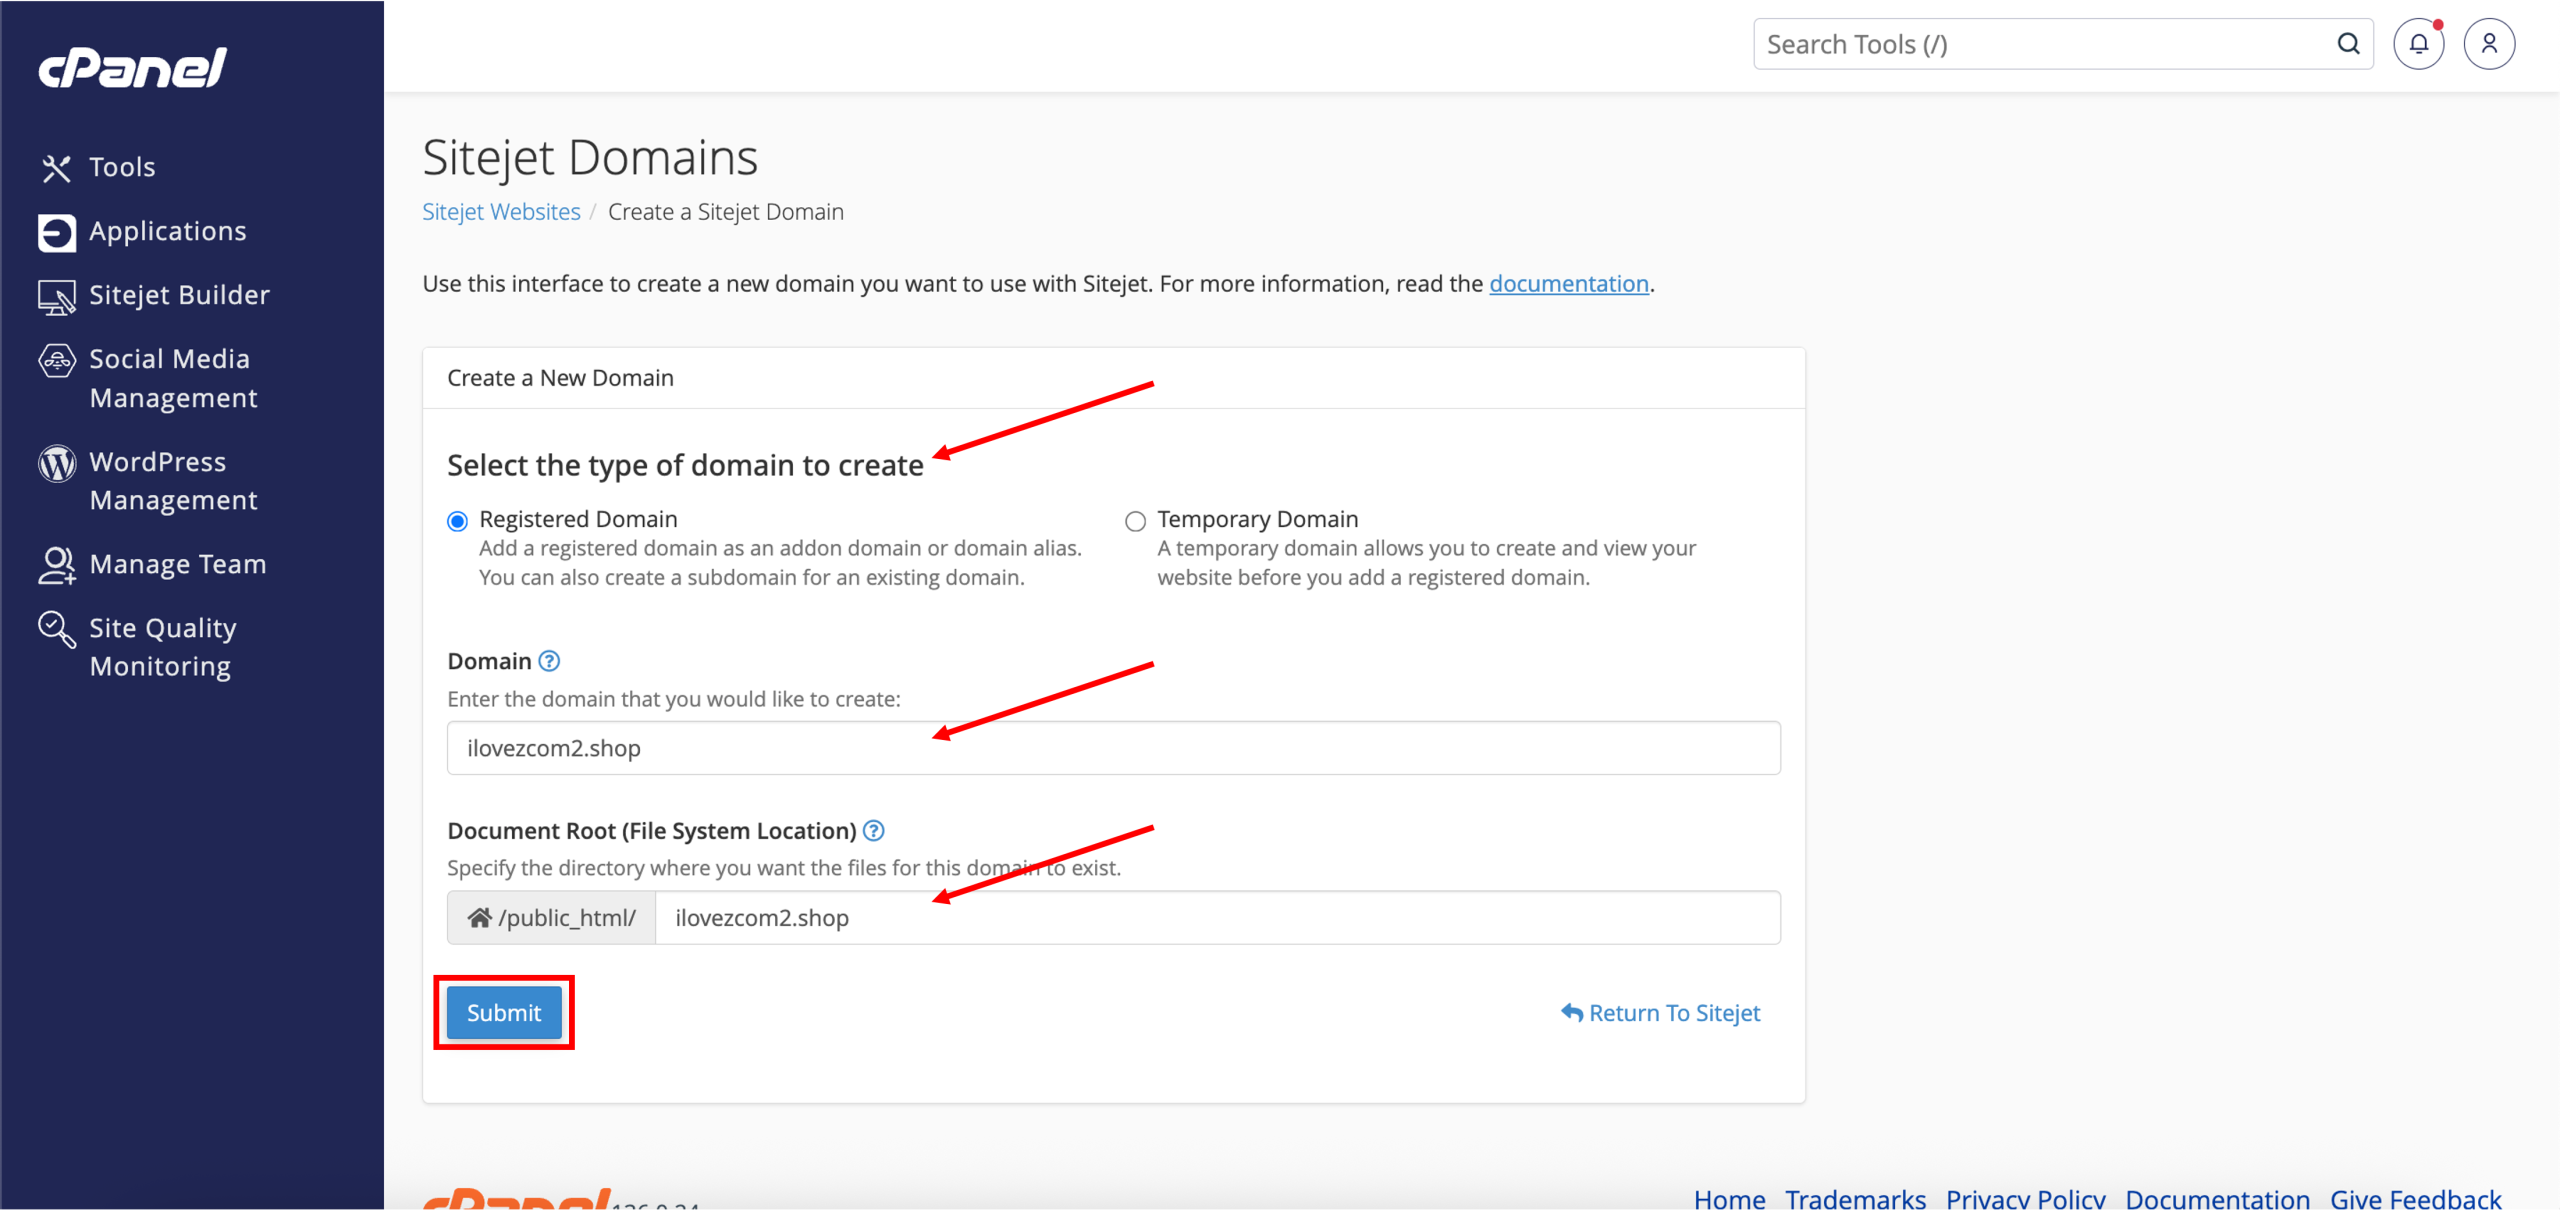
4. On the Sitejet Domains page, select the type of domain you would like to create. You may choose to add a registered domain as an addon domain or domain alias, or create a temporary domain to preview your website before connecting a registered domain. Next, enter the domain name you would like to use and specify the document root (file system location), which determines the directory where the website files for this domain will be stored (e.g. /public_html/). Once done, click Submit.
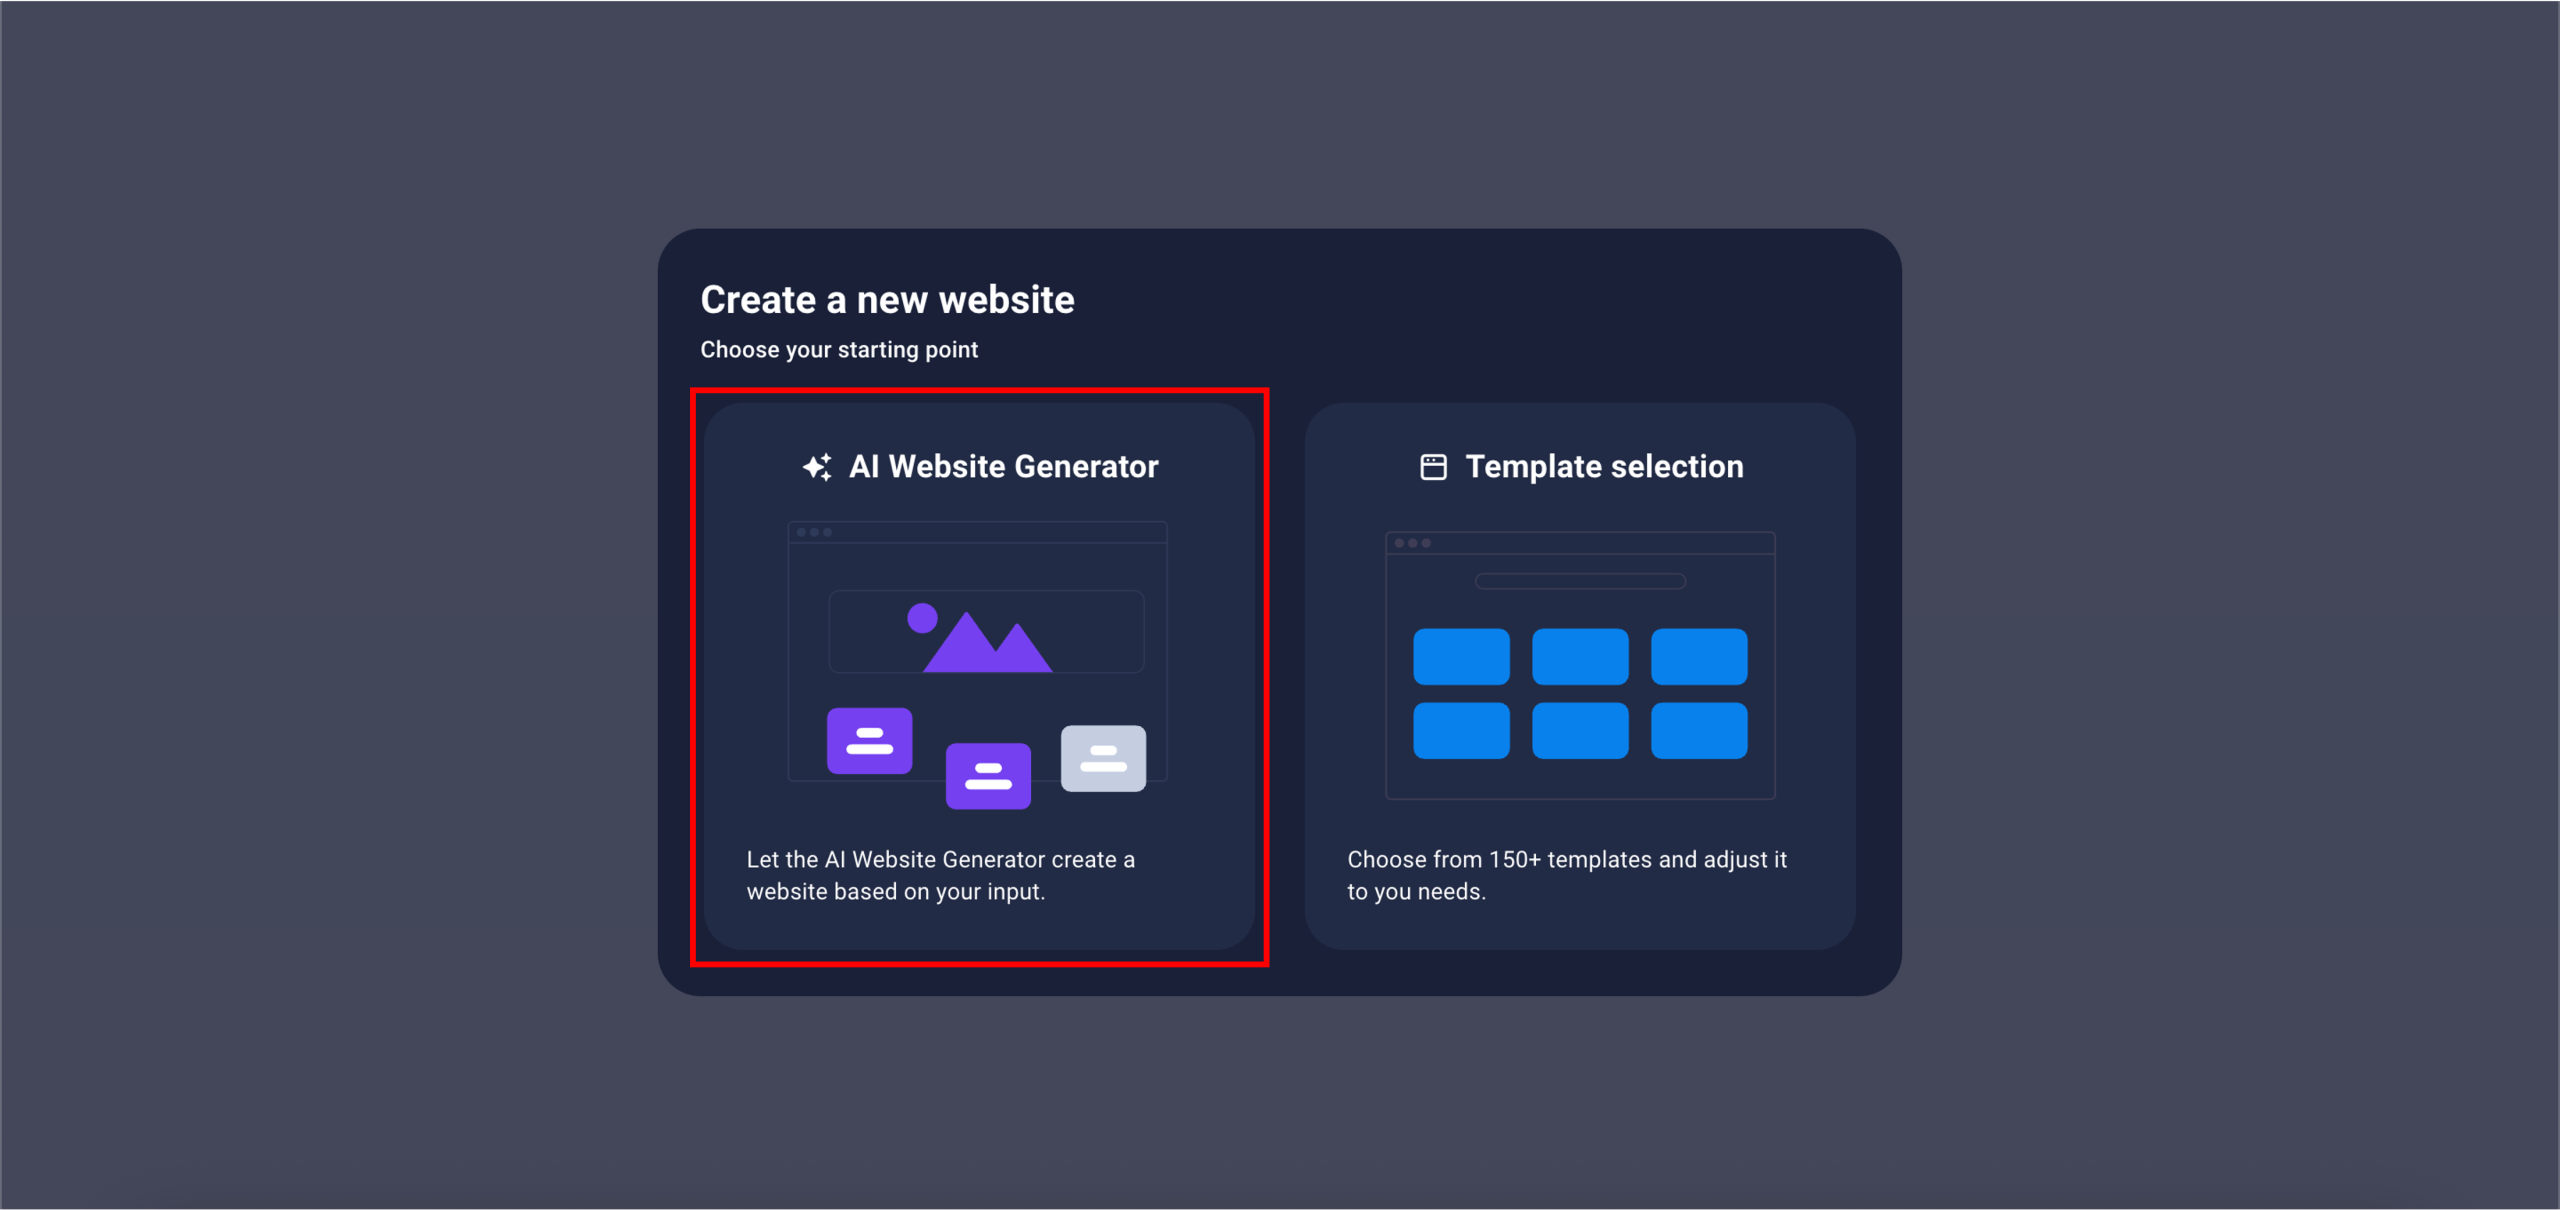
5. You will be automatically redirected to the Sitejet Builder interface page in a new tab, where you can begin creating your website. Choose between two options: AI Website Generator or Template selection. For example, the AI Website Generator option.
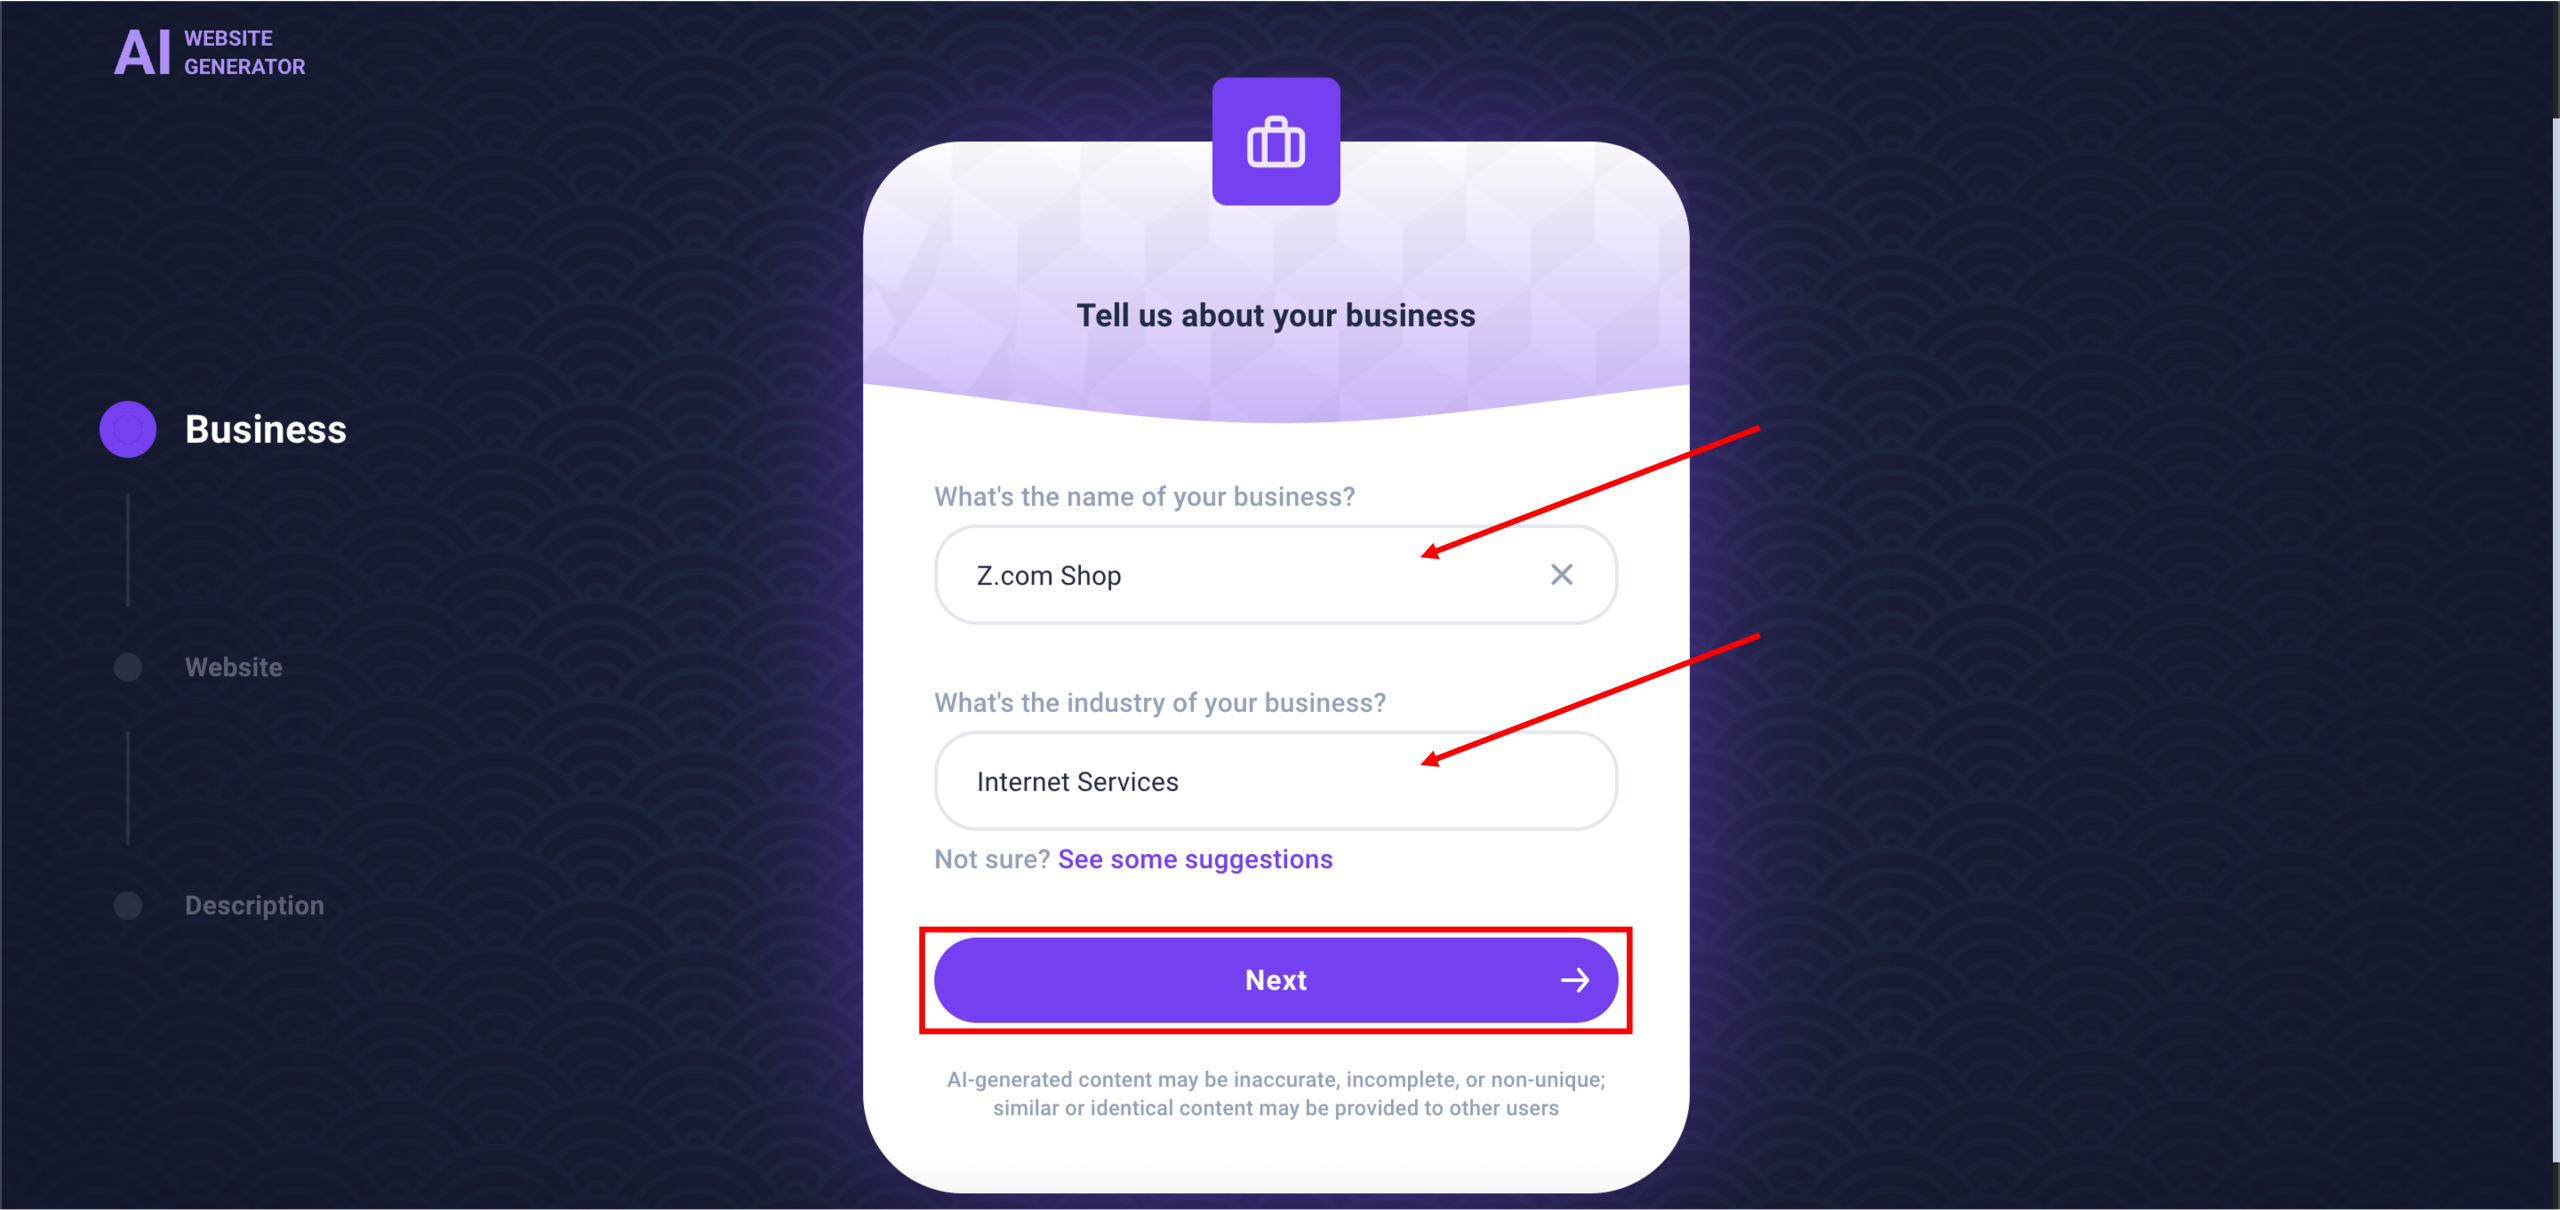
6. Fill in the first field, then select one of the many options from the drop-down menu. Once done, click Next.
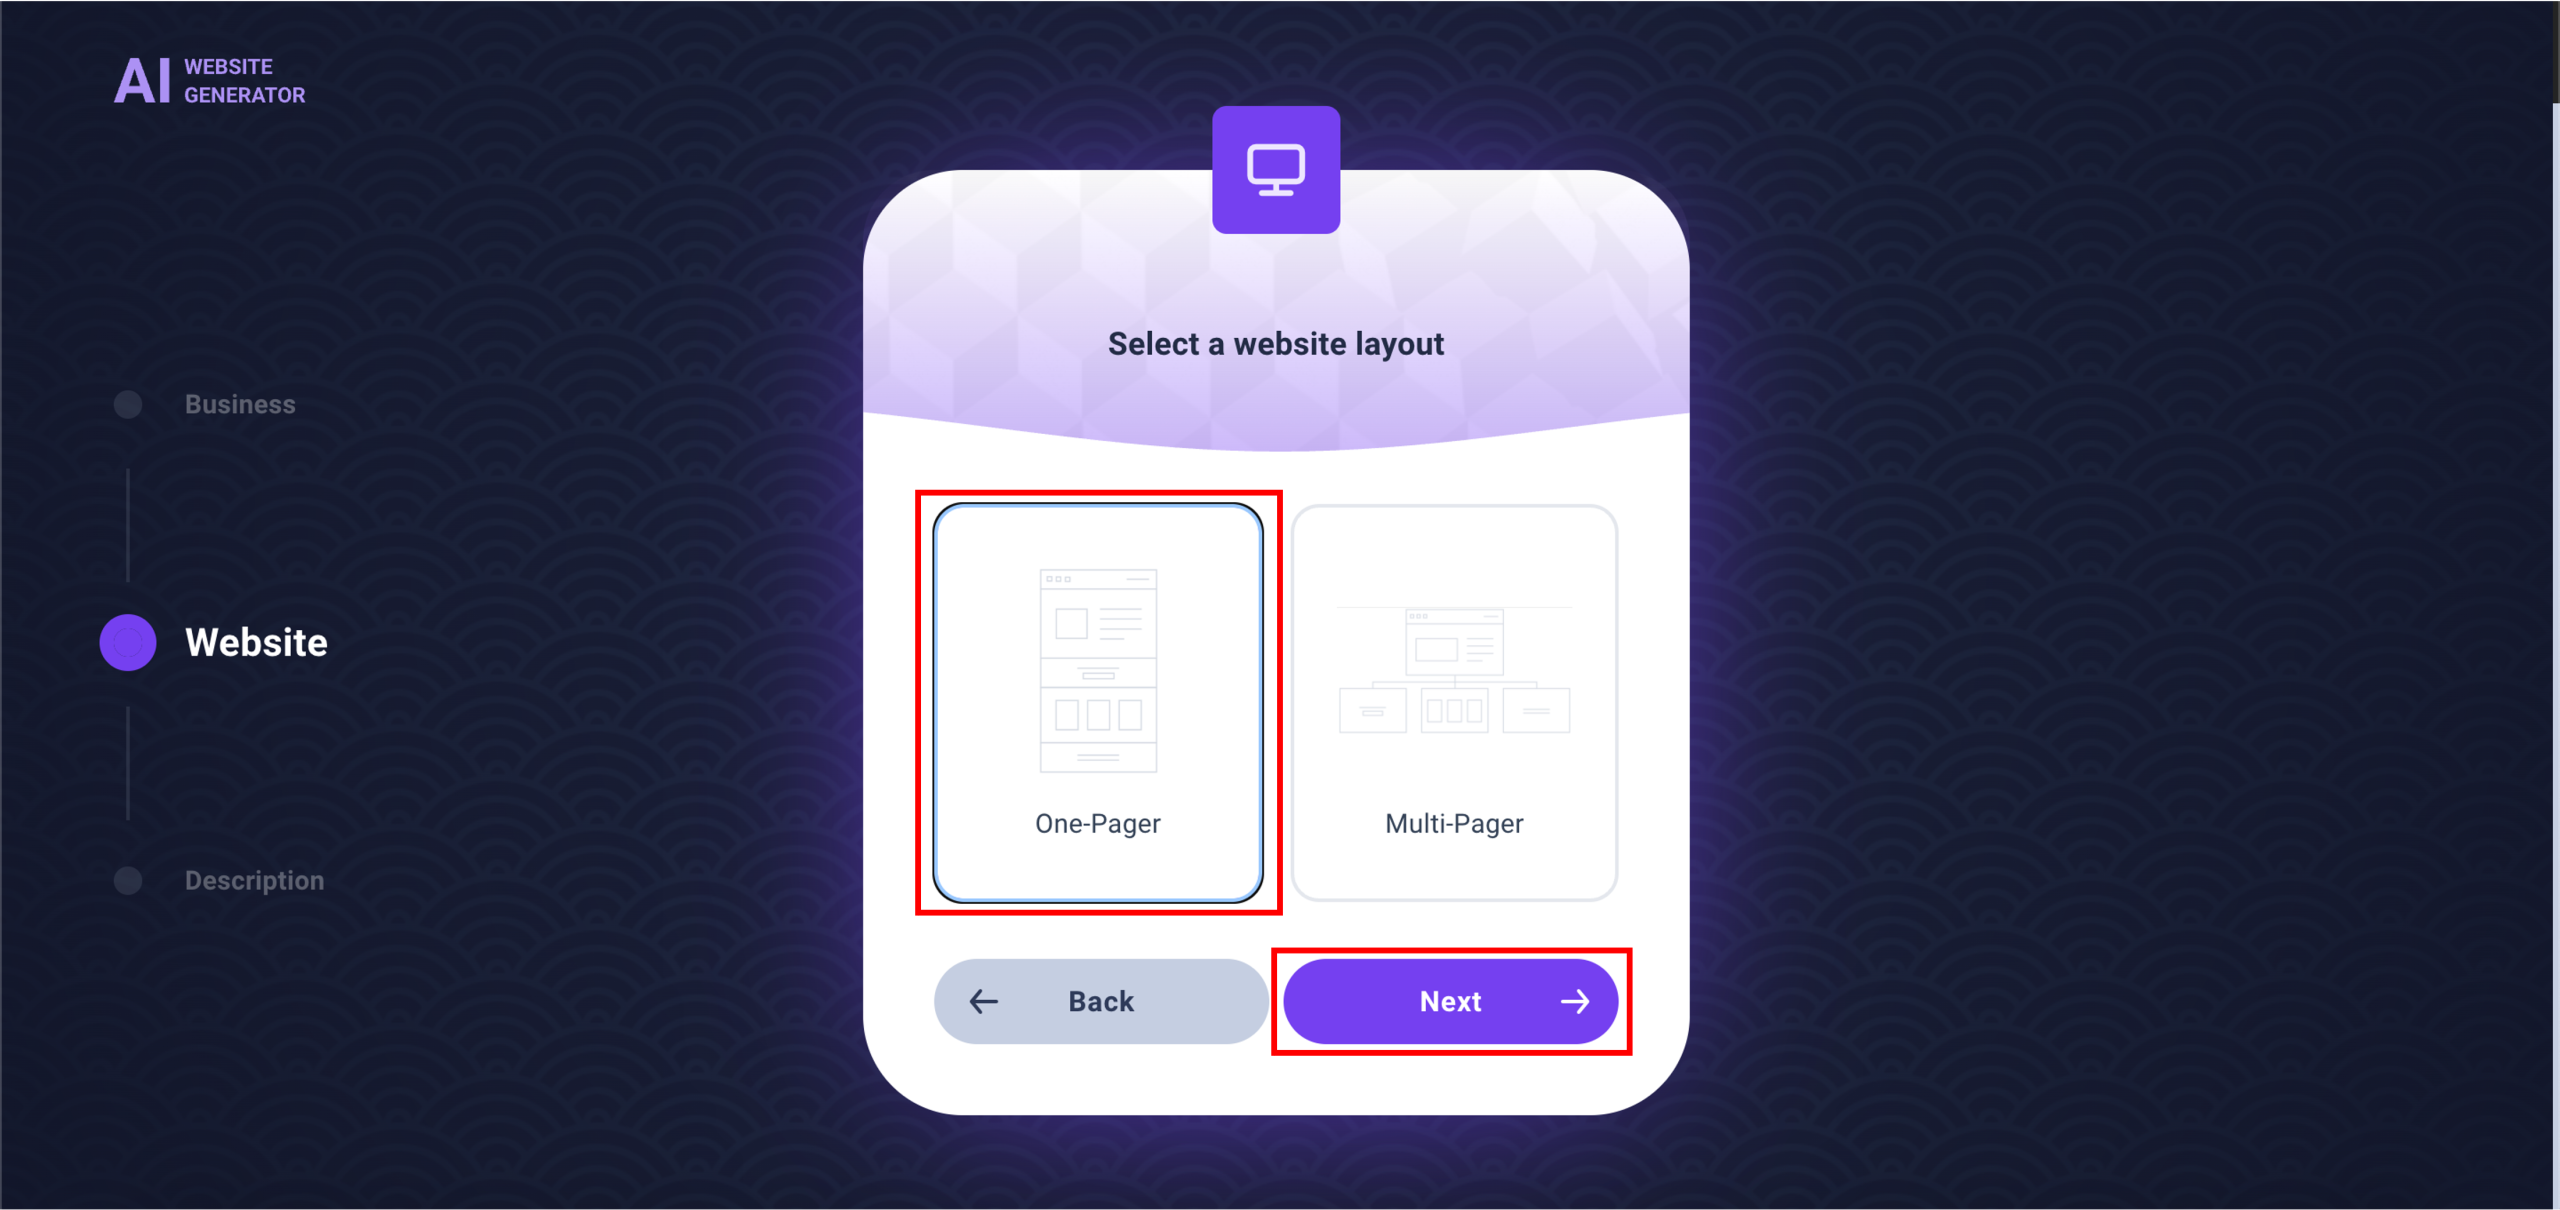
7. Select a website layout. Once done, click Next.
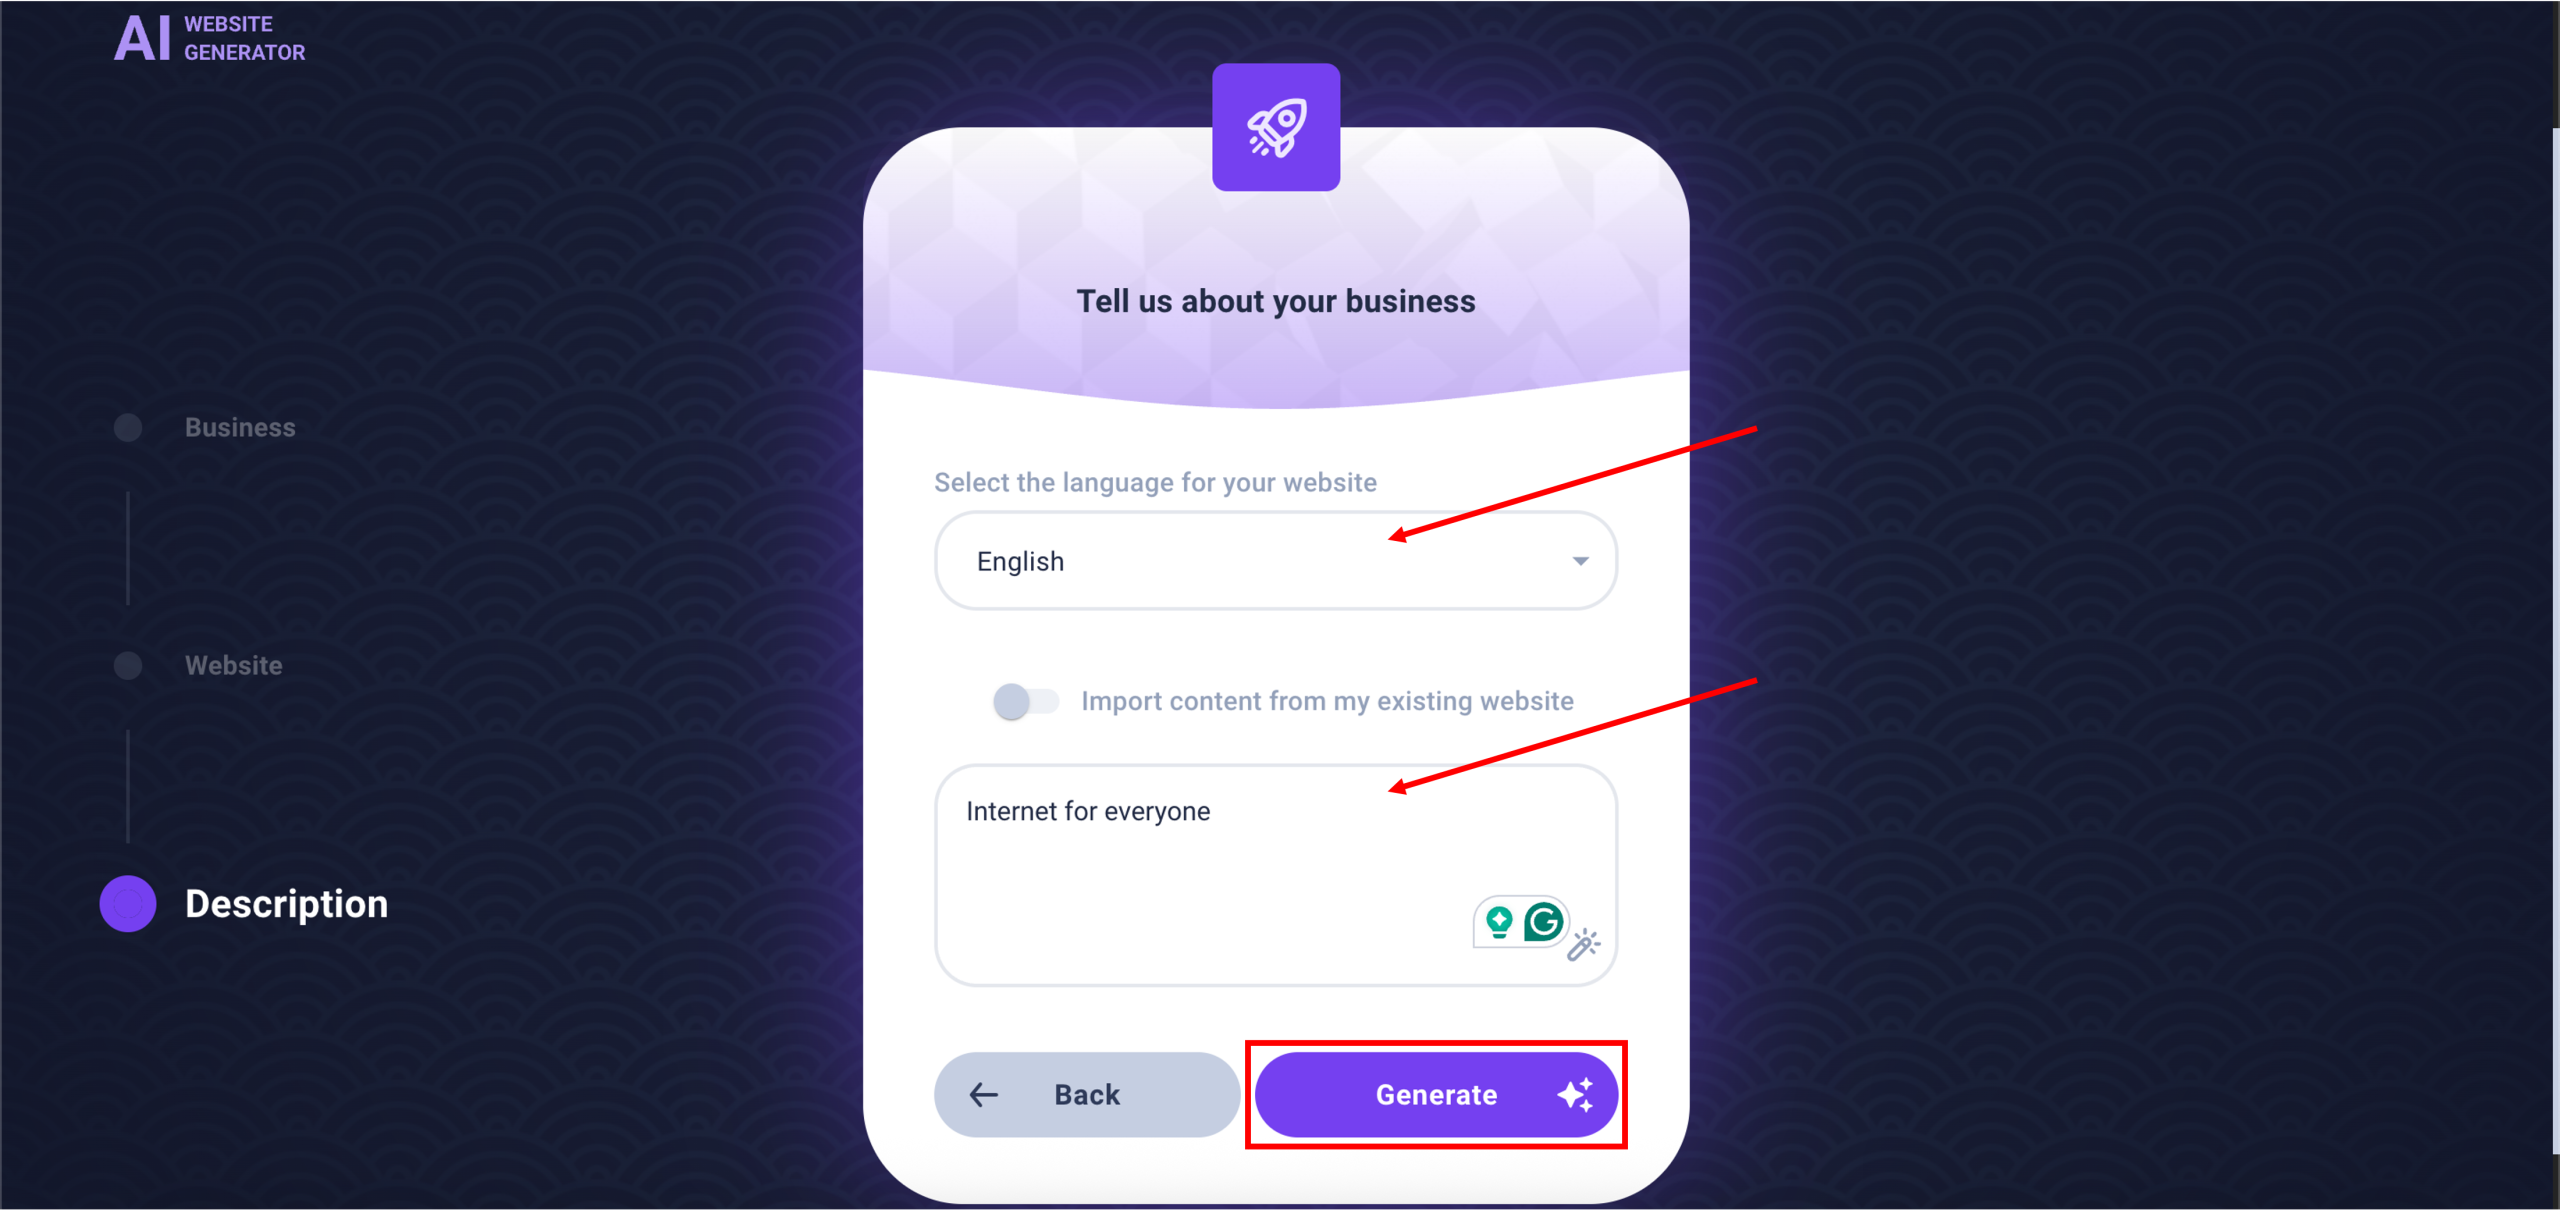
8. Select the language for your website and provide additional information about your business. Once done, click Generate.
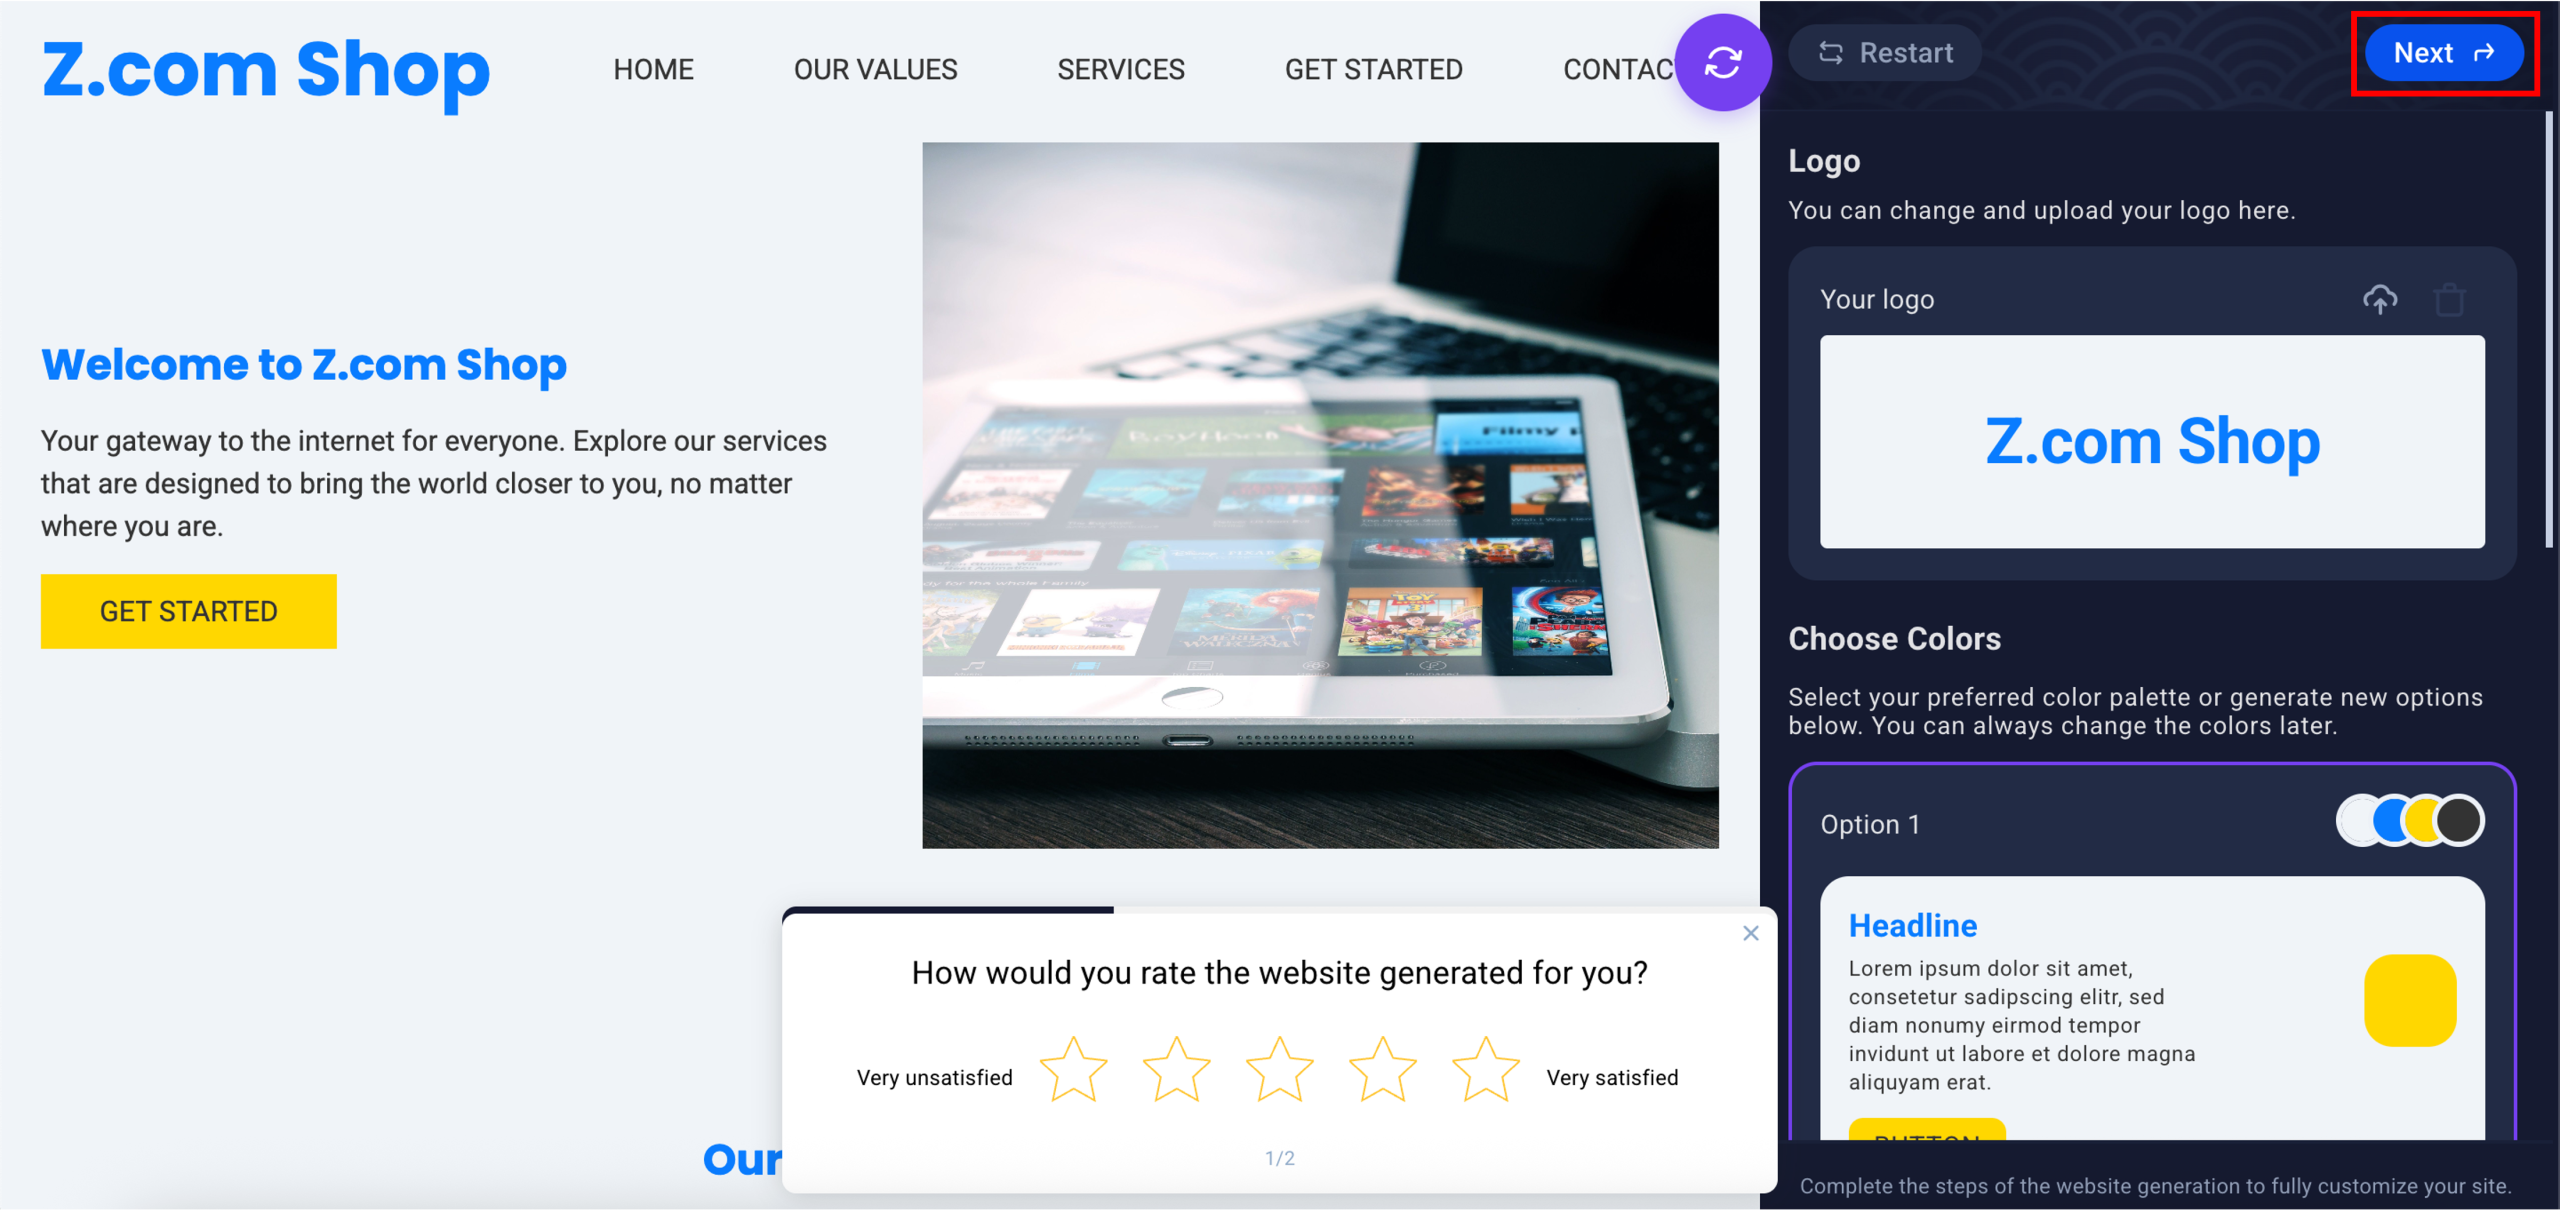
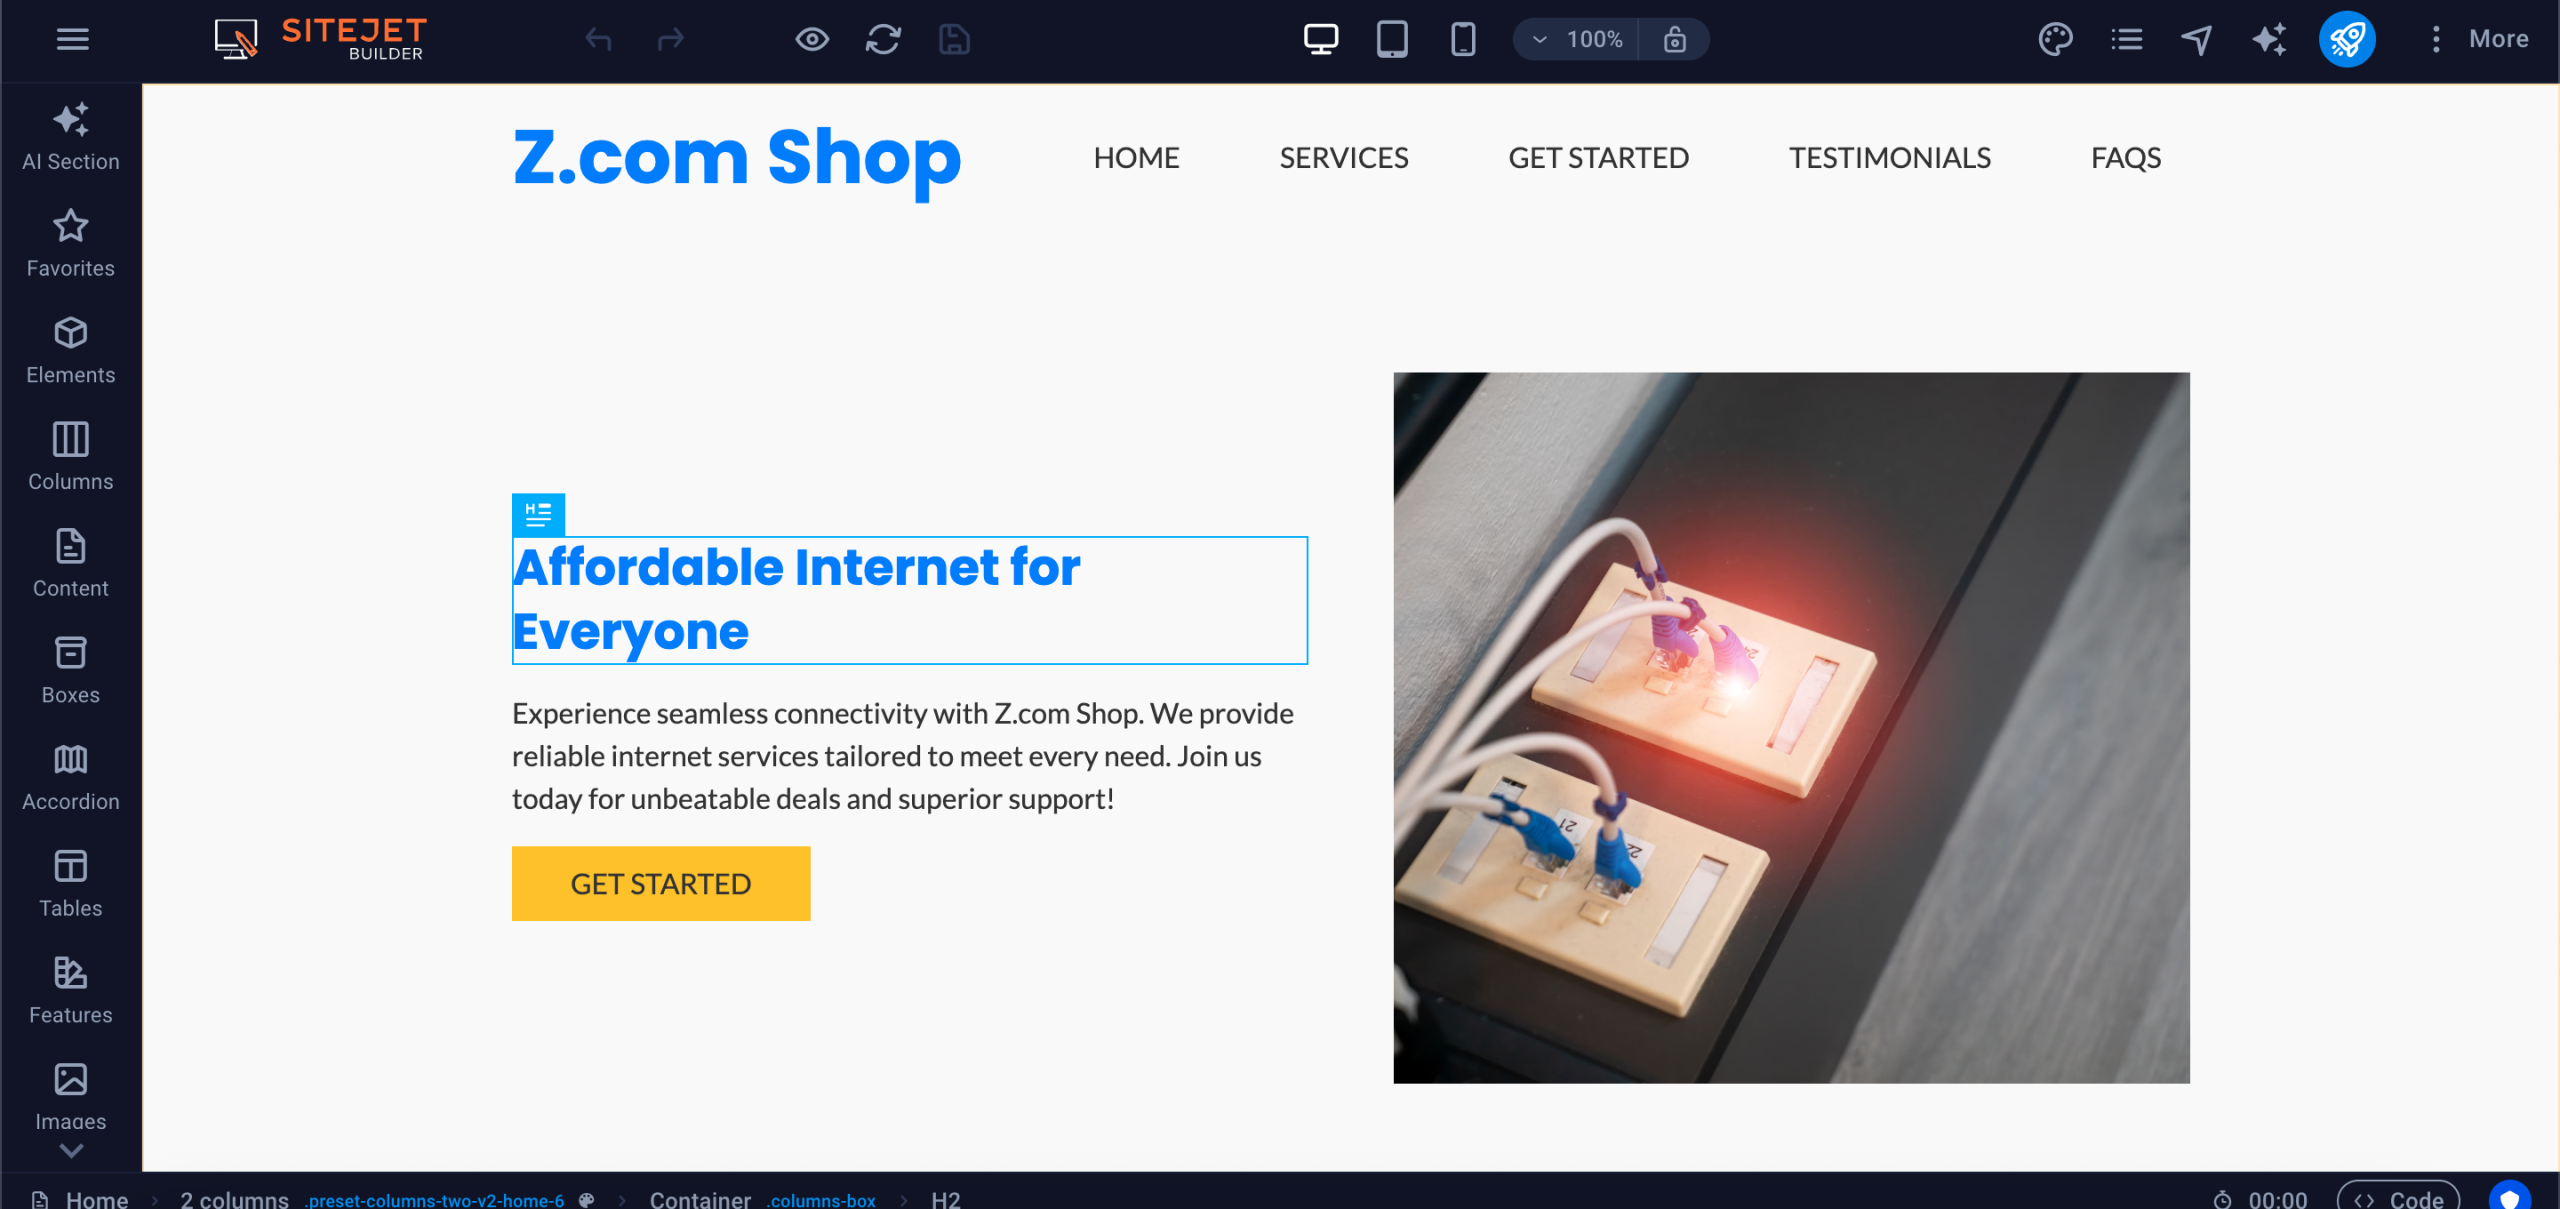
9. Done! Successfully creating your Sitejet website should look like the following. You can begin customising your website on the right.
3. Manual website creation
1. Access cPanel directly through your Z.com account.
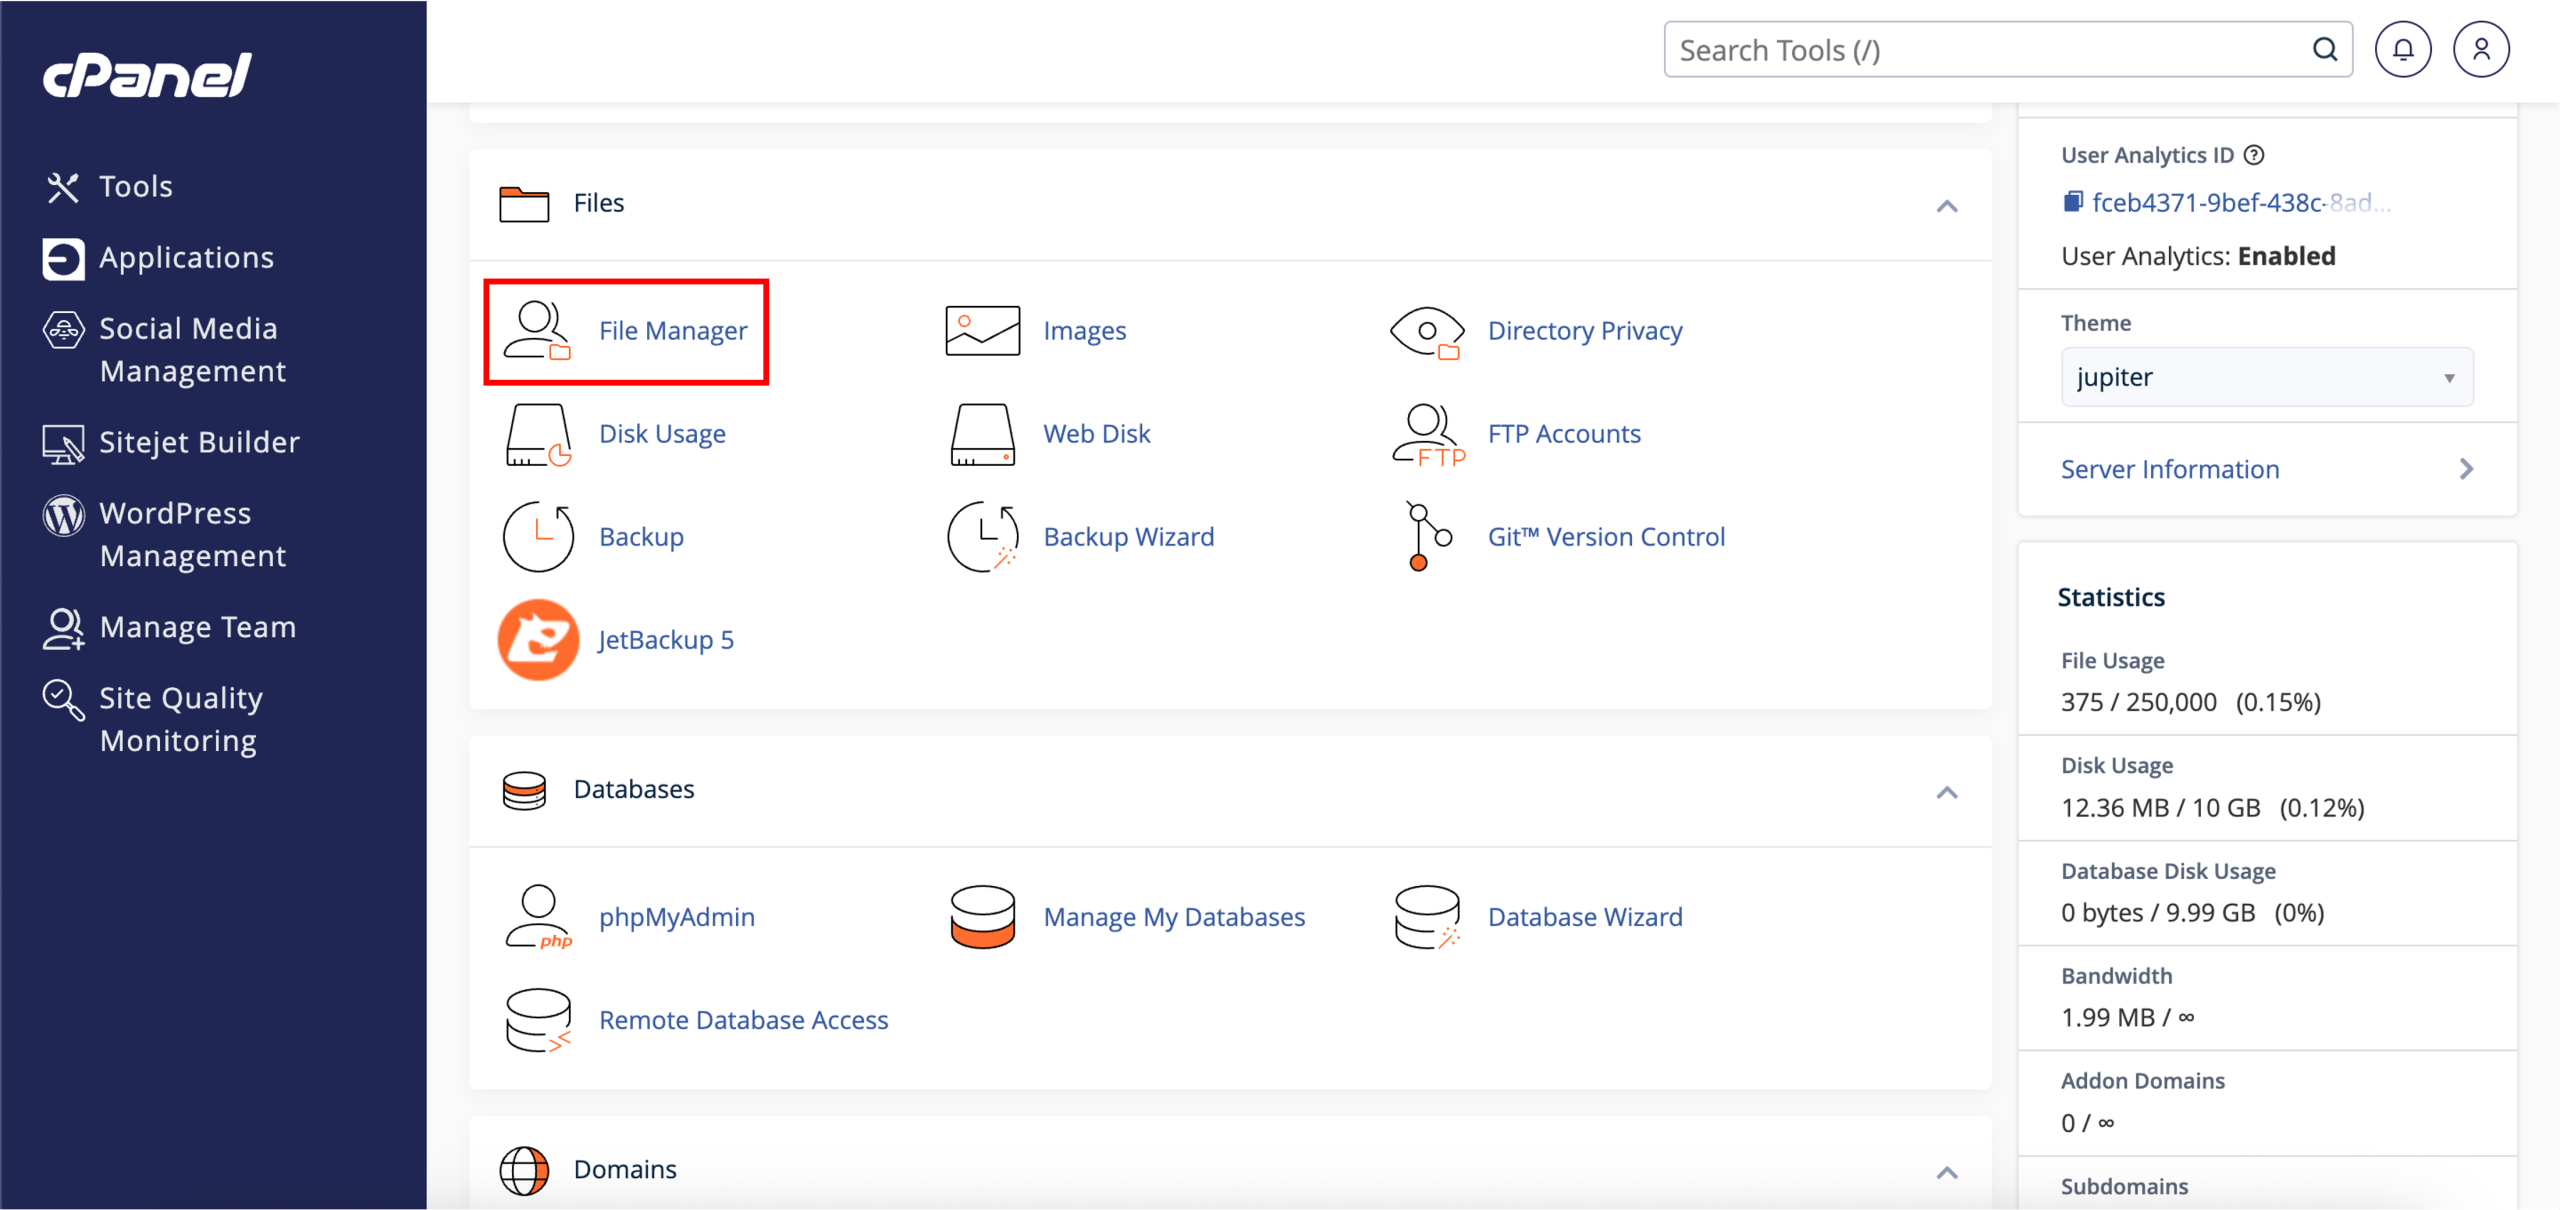
2. Once you have reached the cPanel dashboard, locate File Manager under Files.
3. A new tab will open, directing you to the cPanel File Manager interface, where you can manage your website files. Locate and click on the public_html directory.
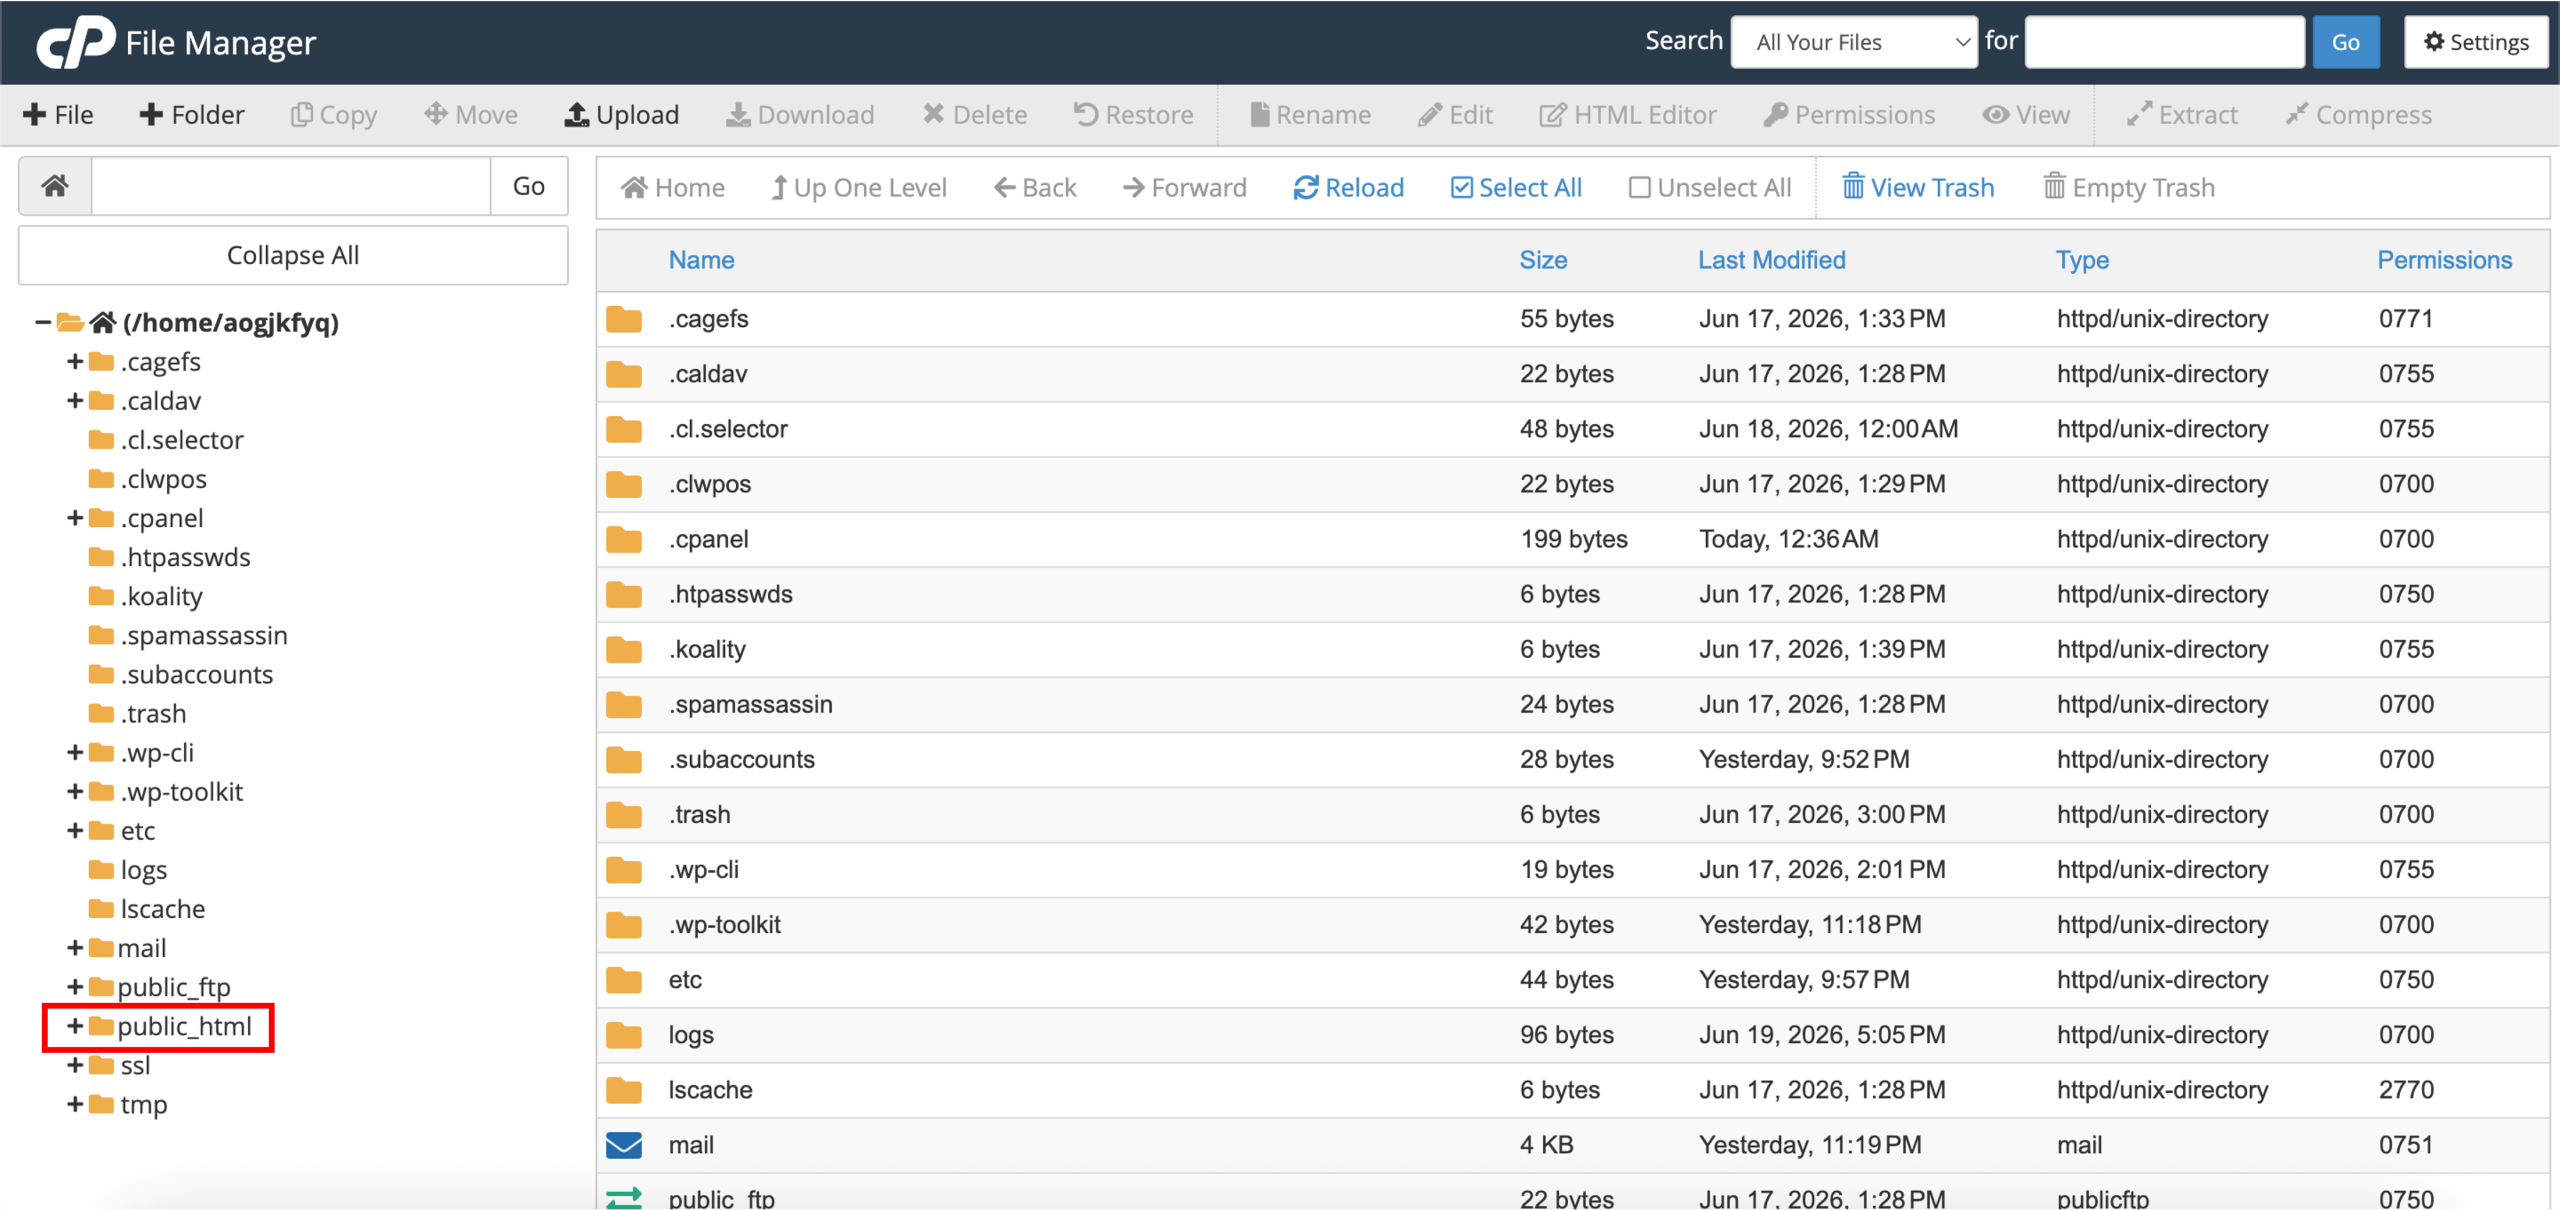
4. To create a simple webpage, click + File on the top navigation bar.
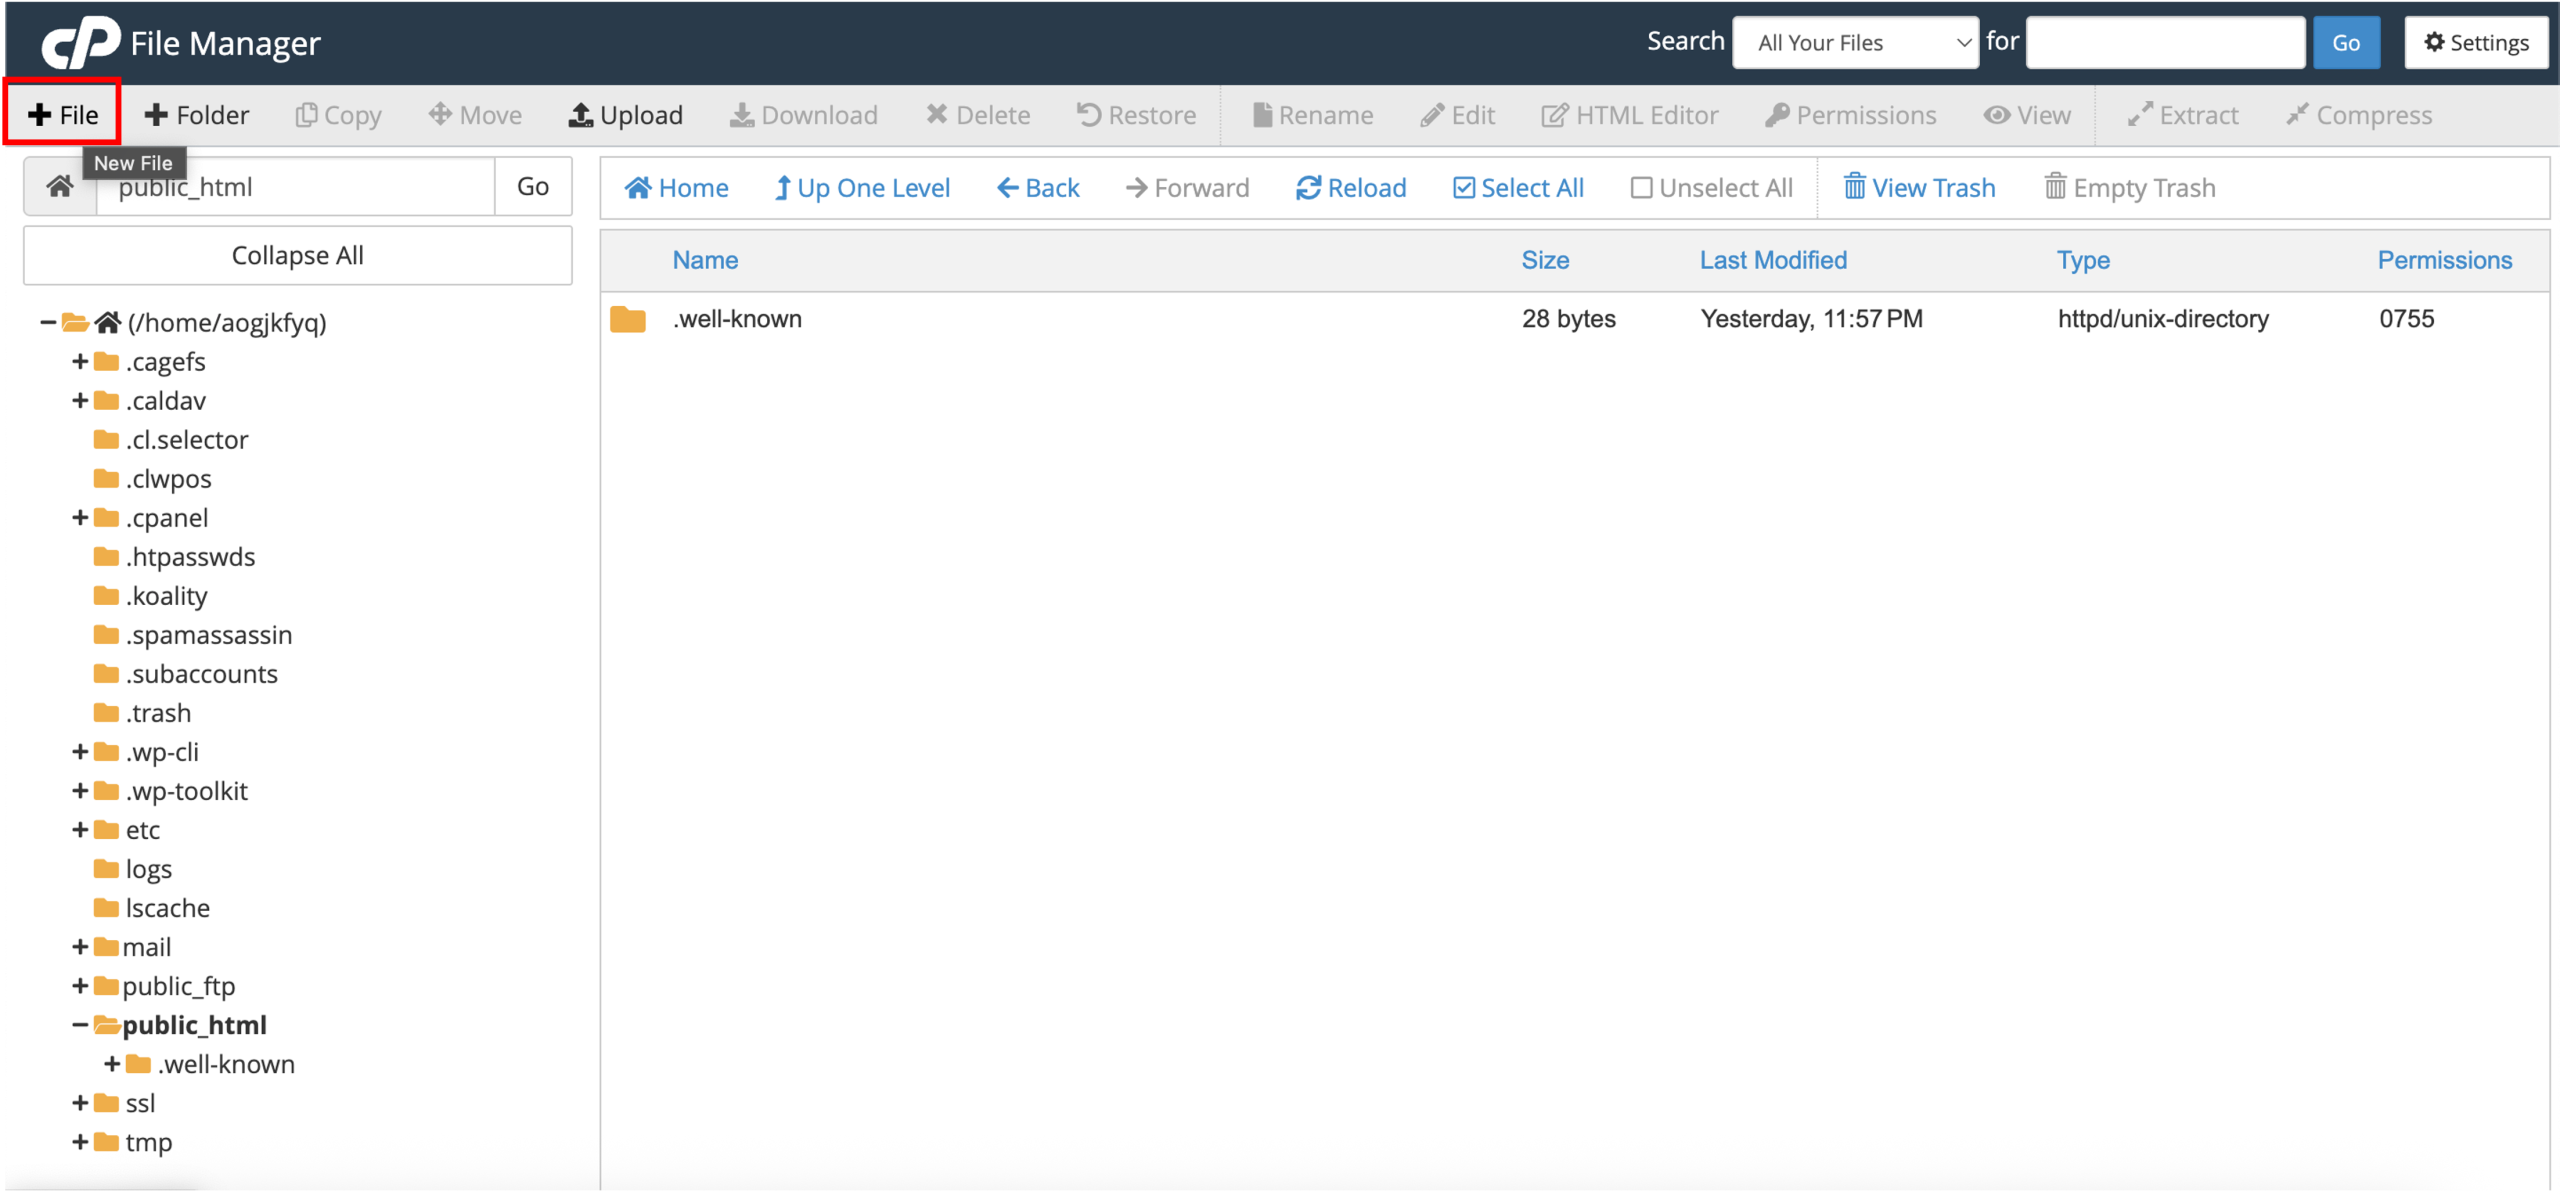
5. Enter the New File Name (for example, index.php), then click Create New File.
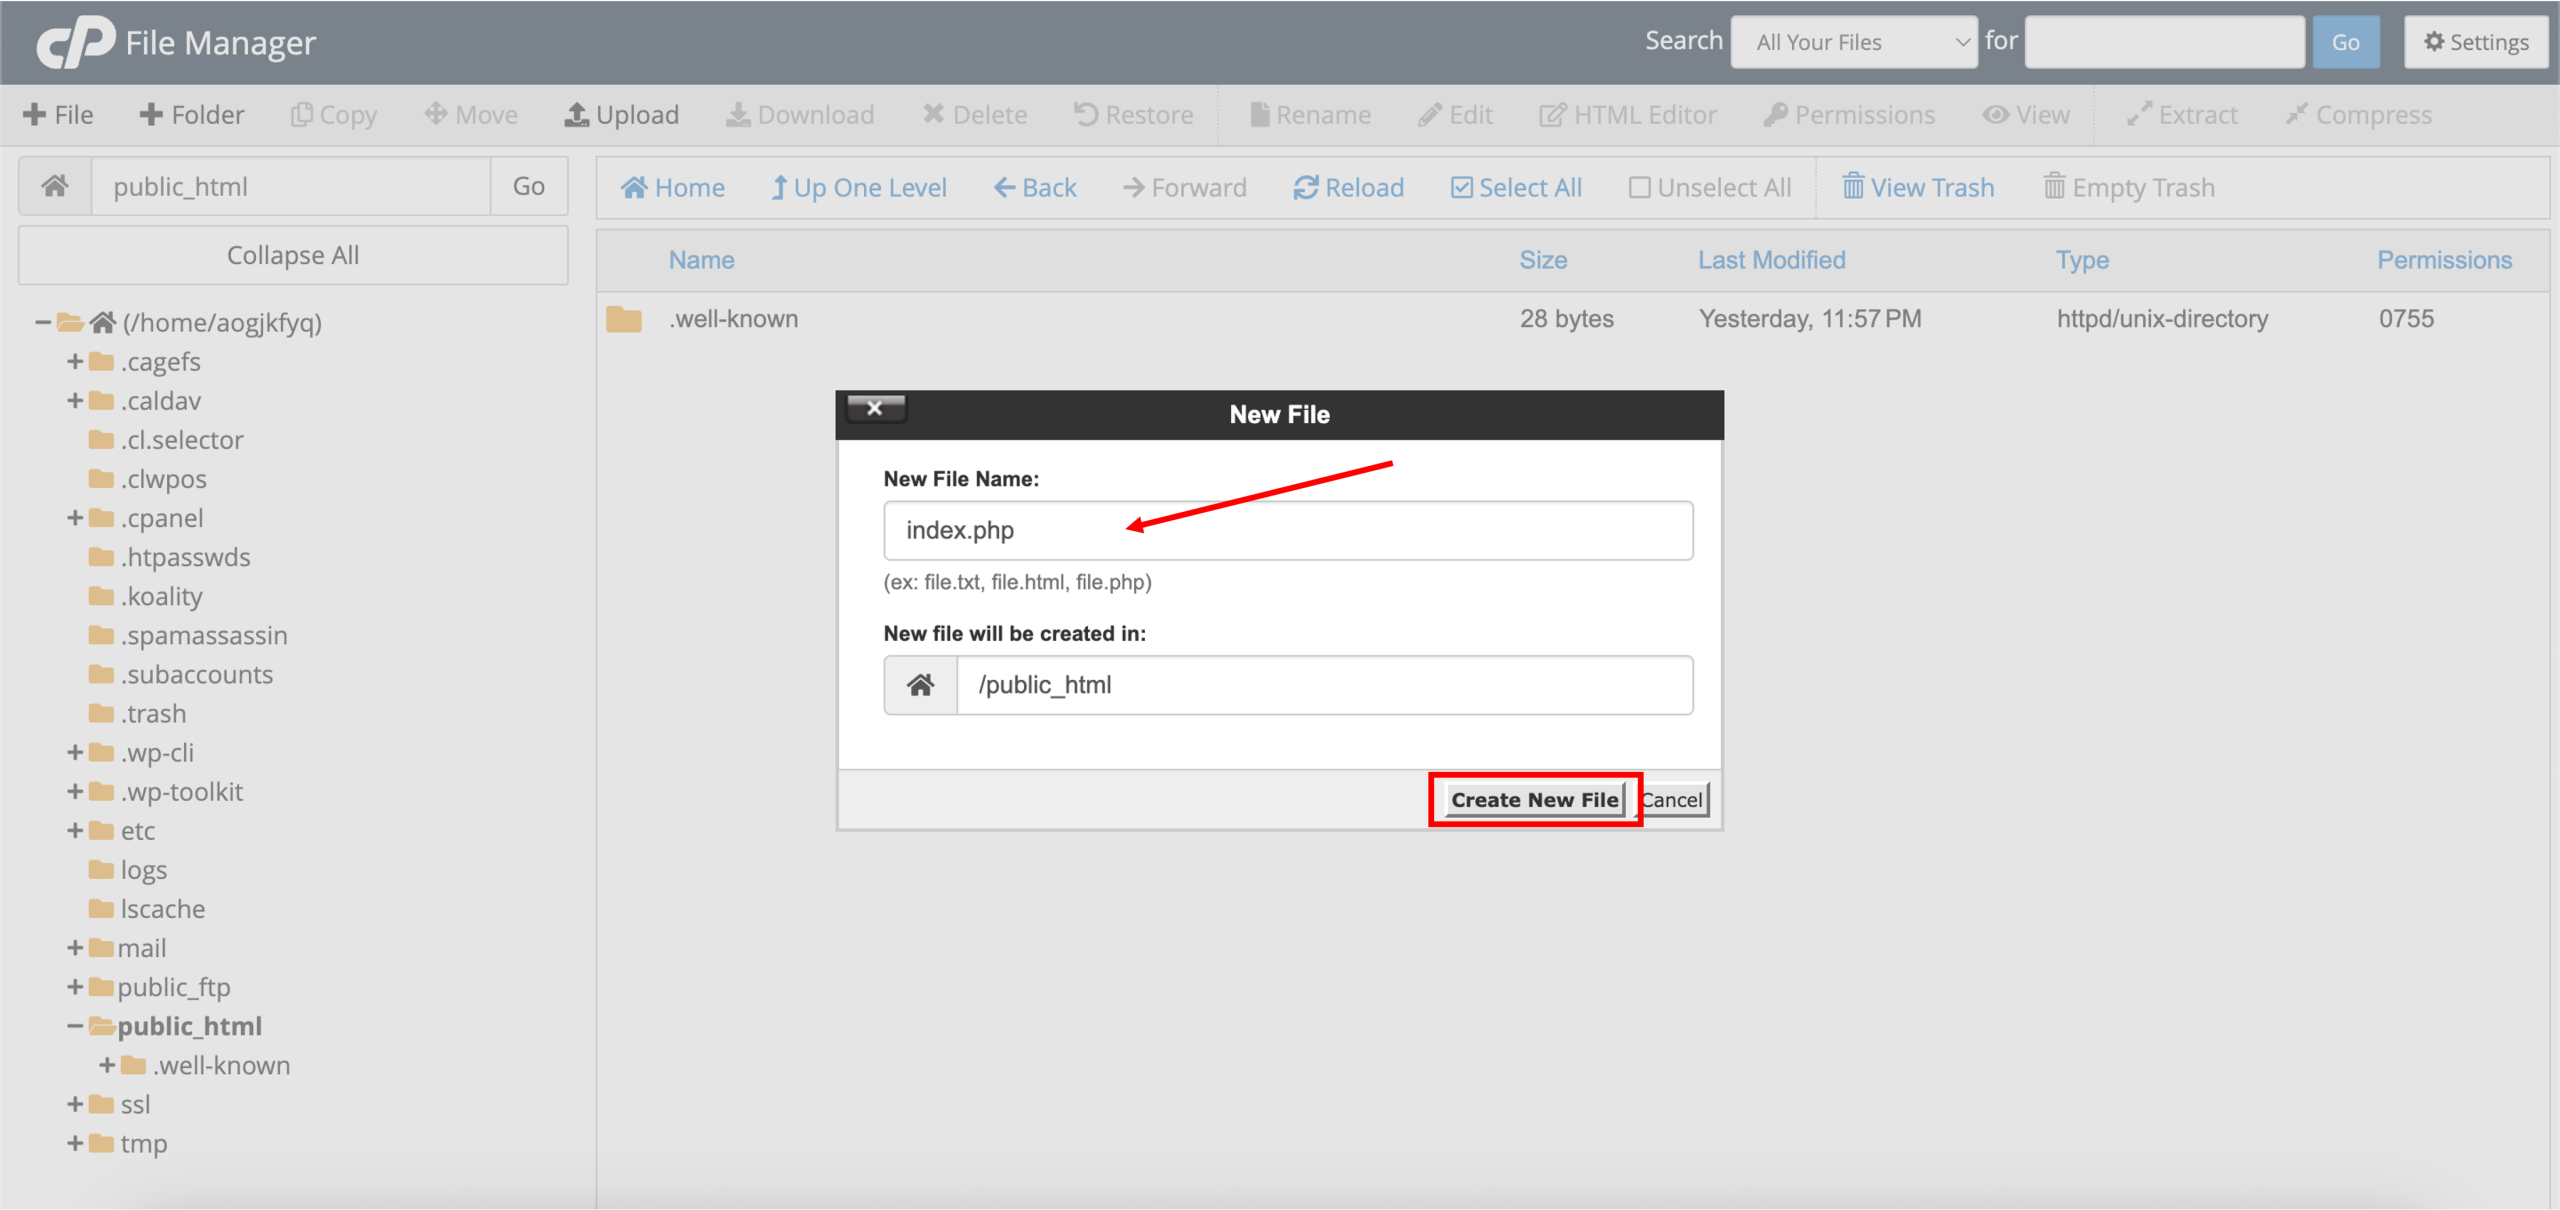
6. Once created, select or right-click on the index.php file and click Edit.
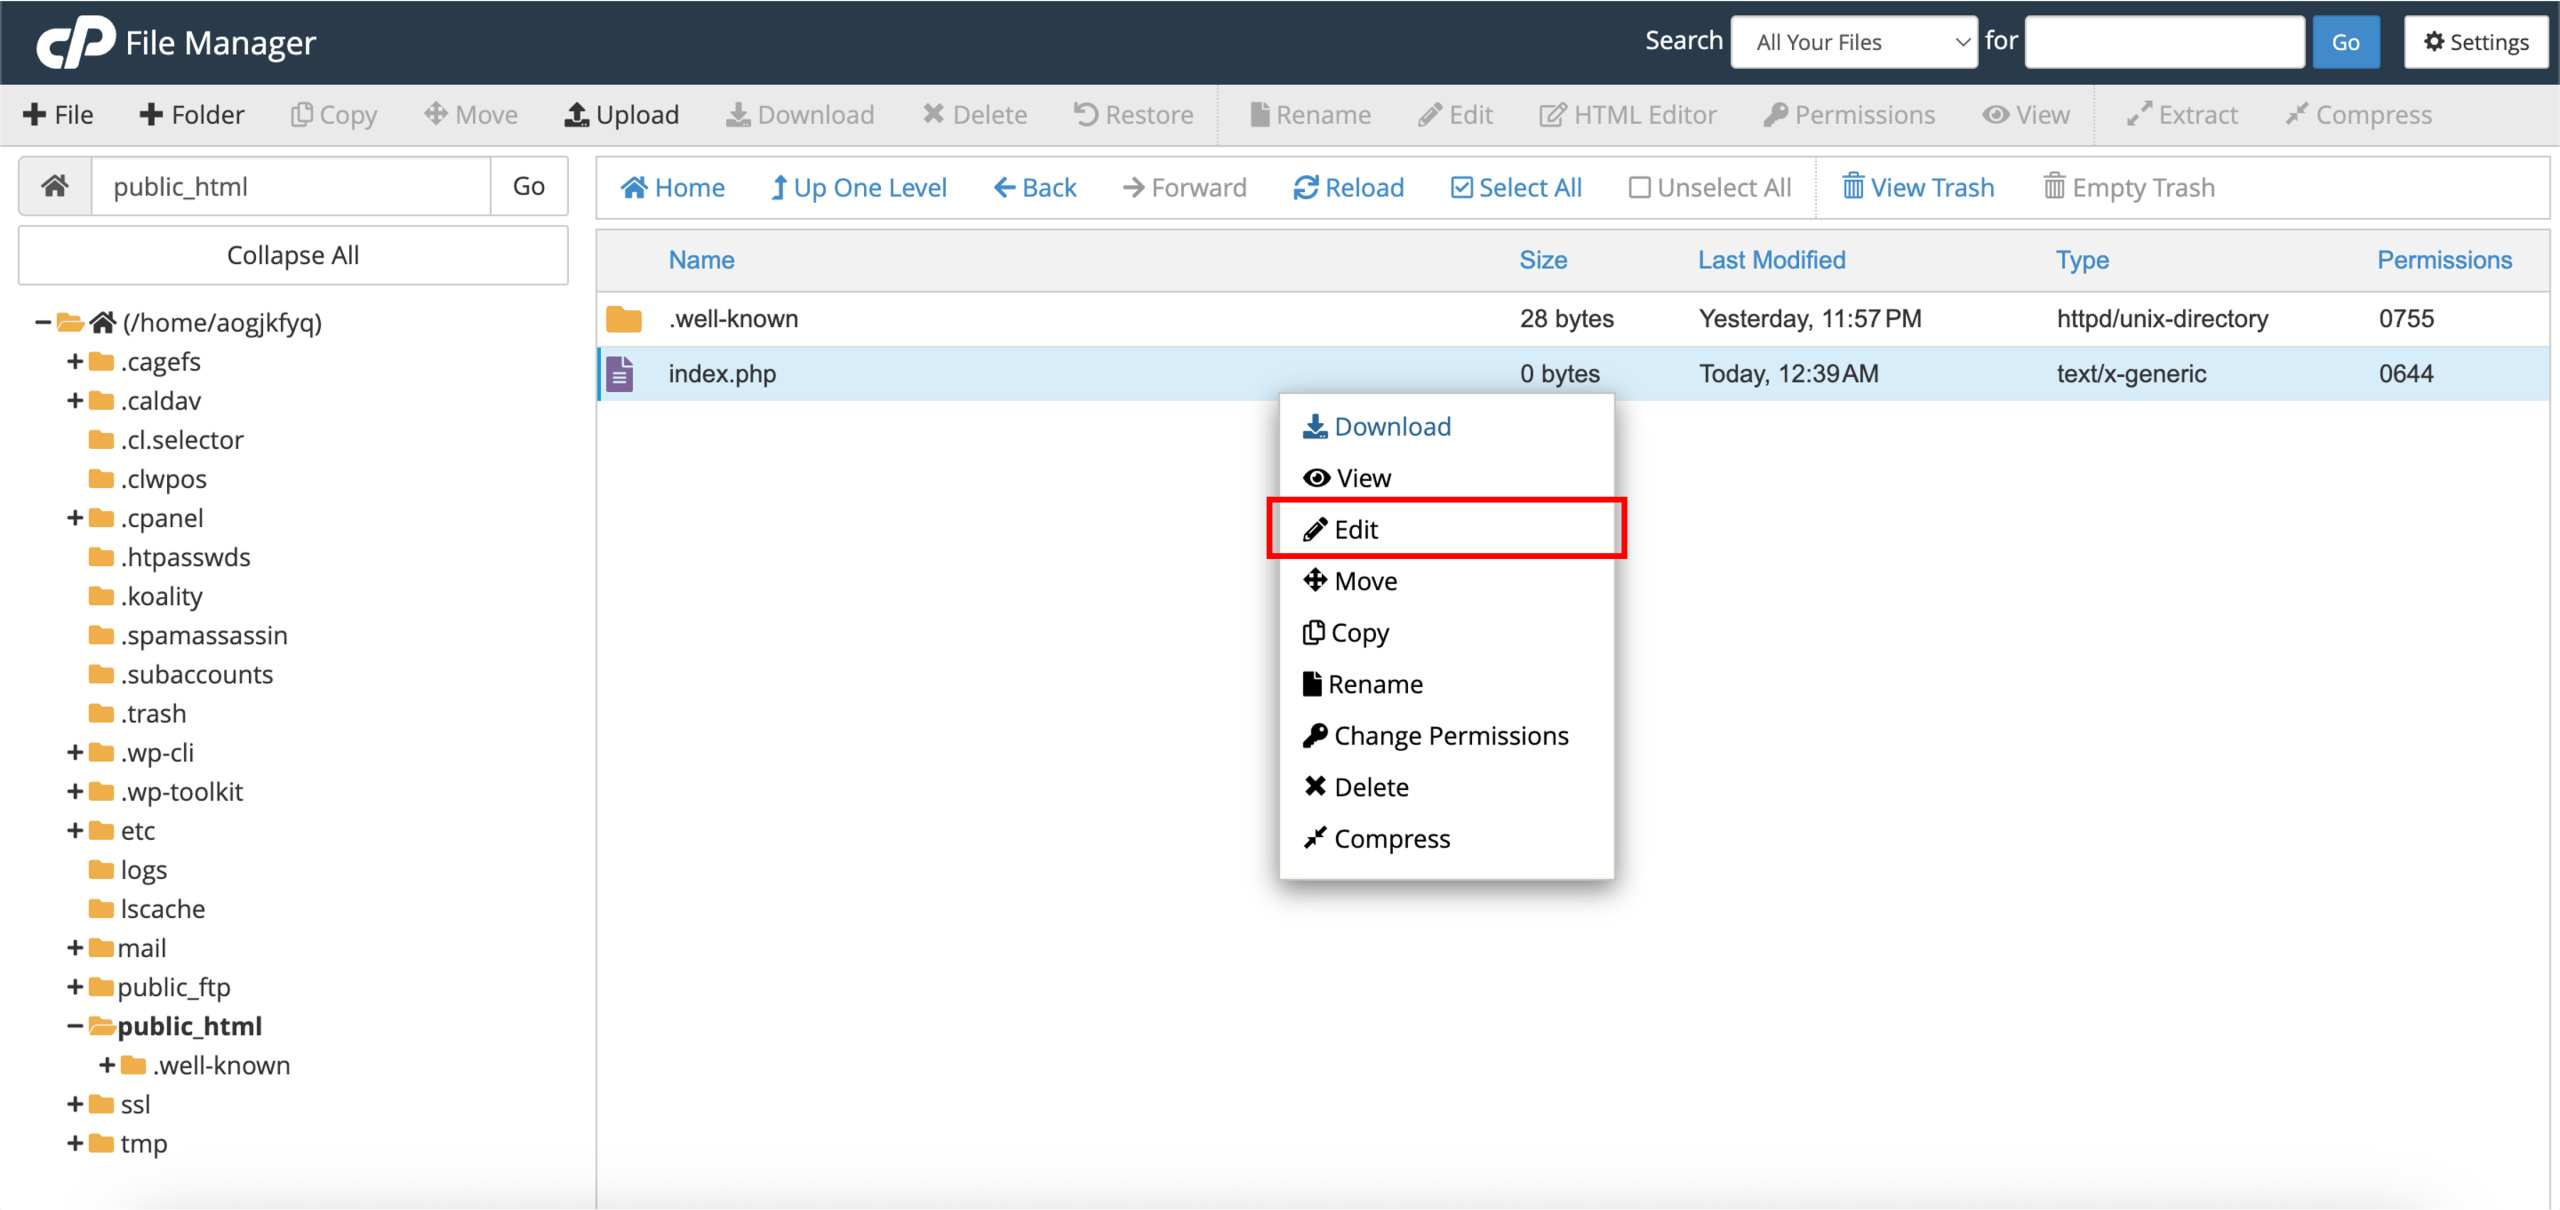
7. Once you are directed to the new tab, you can edit the file content. For example, enter the text “Hello world”. Once done, click Save Changes.
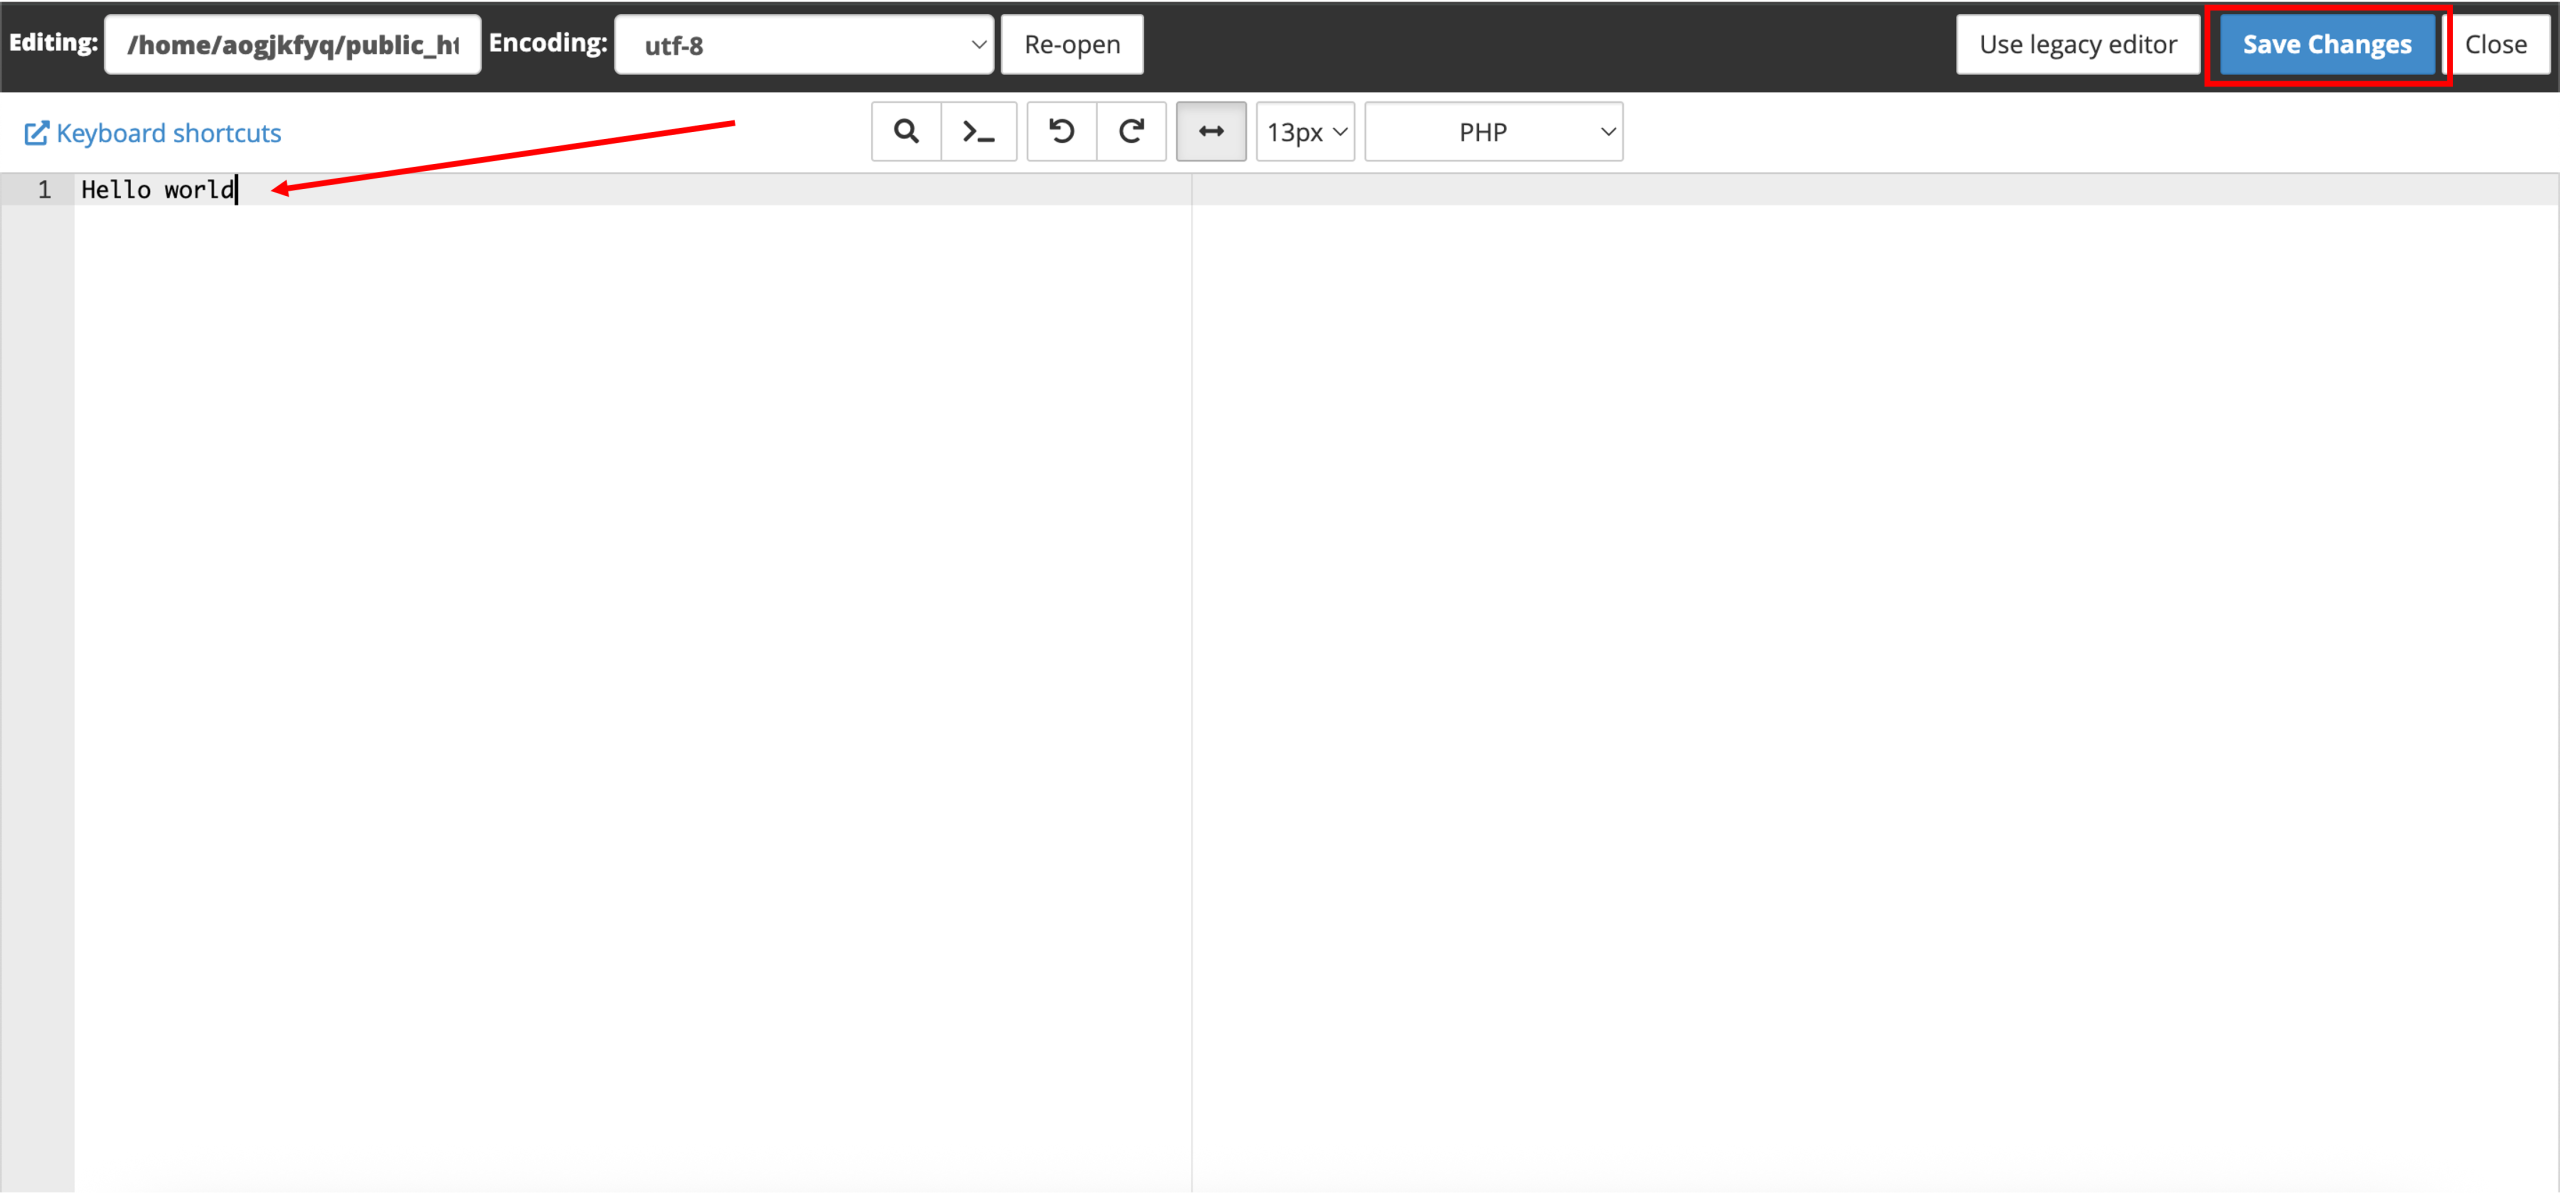
8. Done! Once saved, access your website to view the updated content. The changes should be reflected immediately.
