Example :
How to set up an email or change my account settings.
- Help Center
- WordPress Hosting
- WordPress Management
- How to add a domain name and enable free SSL for your WordPress website
How to add a domain name and enable free SSL for your WordPress website
Adding a domain name to your WordPress hosting account allows you to create additional websites under the same plan. With Z.com’s WordPress hosting, you can easily connect new domains and manage multiple websites from one place. Once your domain is added, you can also enable free SSL to keep your website secure and build trust with your visitors.
Note: Depending on your WordPress hosting plan, you can add multiple domain names to create separate WordPress websites. Before adding a domain, make sure its nameservers are correctly pointed to Z.com’s (ns-wh1.web.z.com, ns-wh2.web.z.com). This ensures your domain connects properly to your WordPress hosting account. If your domain is under Z.com, you can click here to refer to our guide on how to edit your domain DNS.
To add a new domain name:
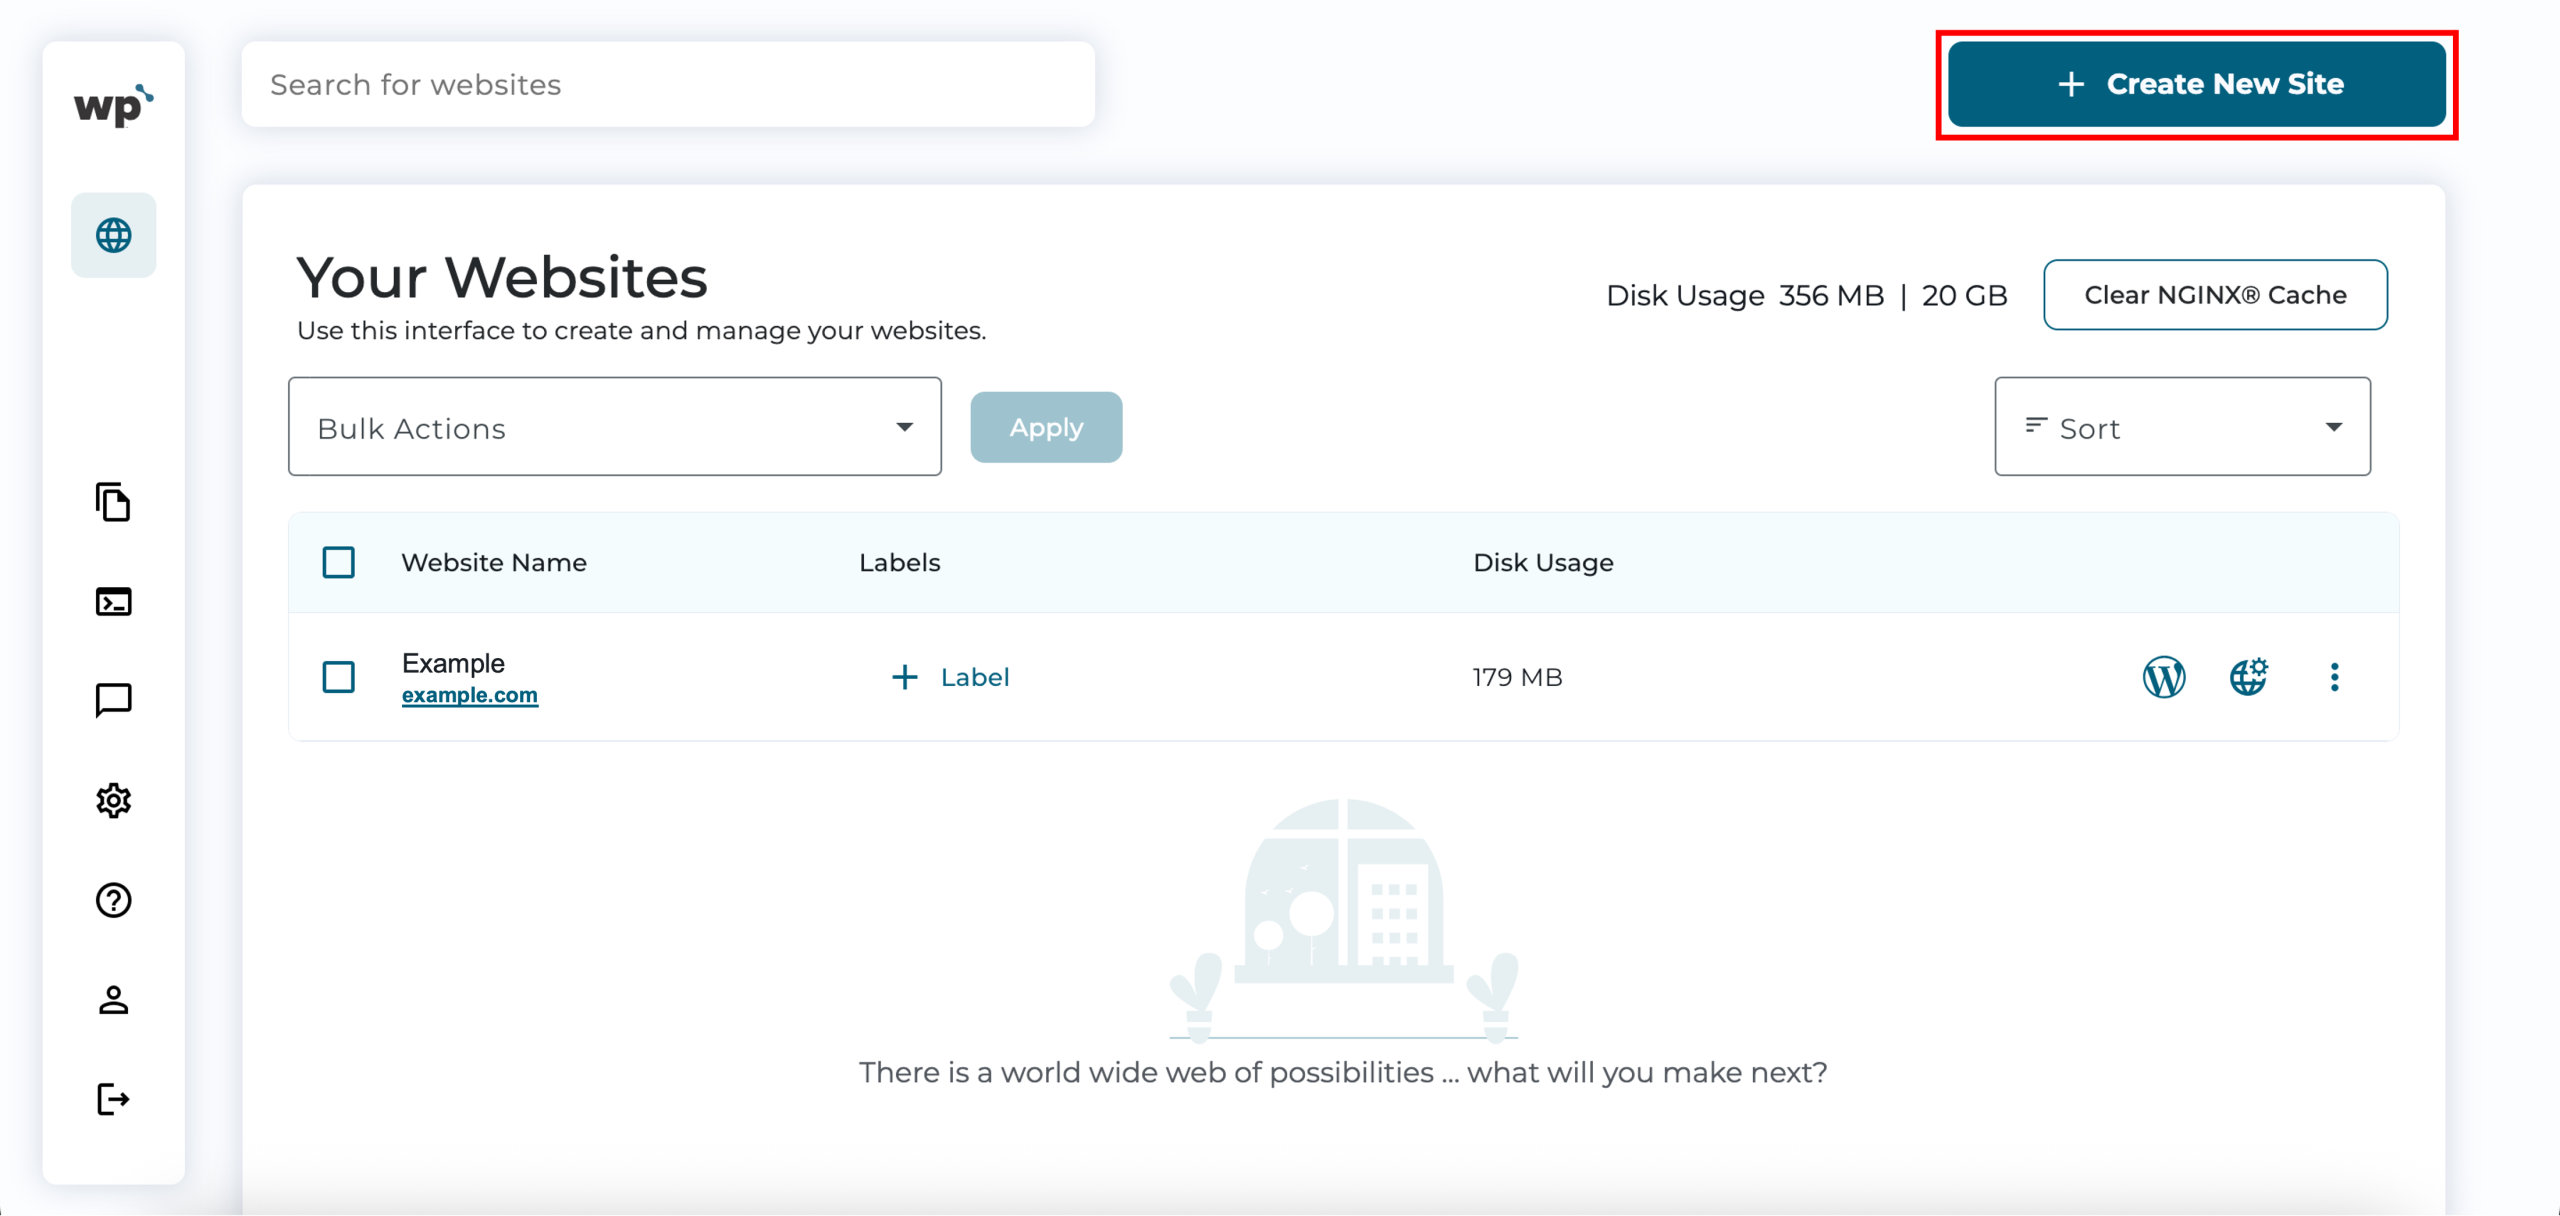
1. Log in to WP Squared. Upon reaching your WP Squared dashboard, click + Create New Site.
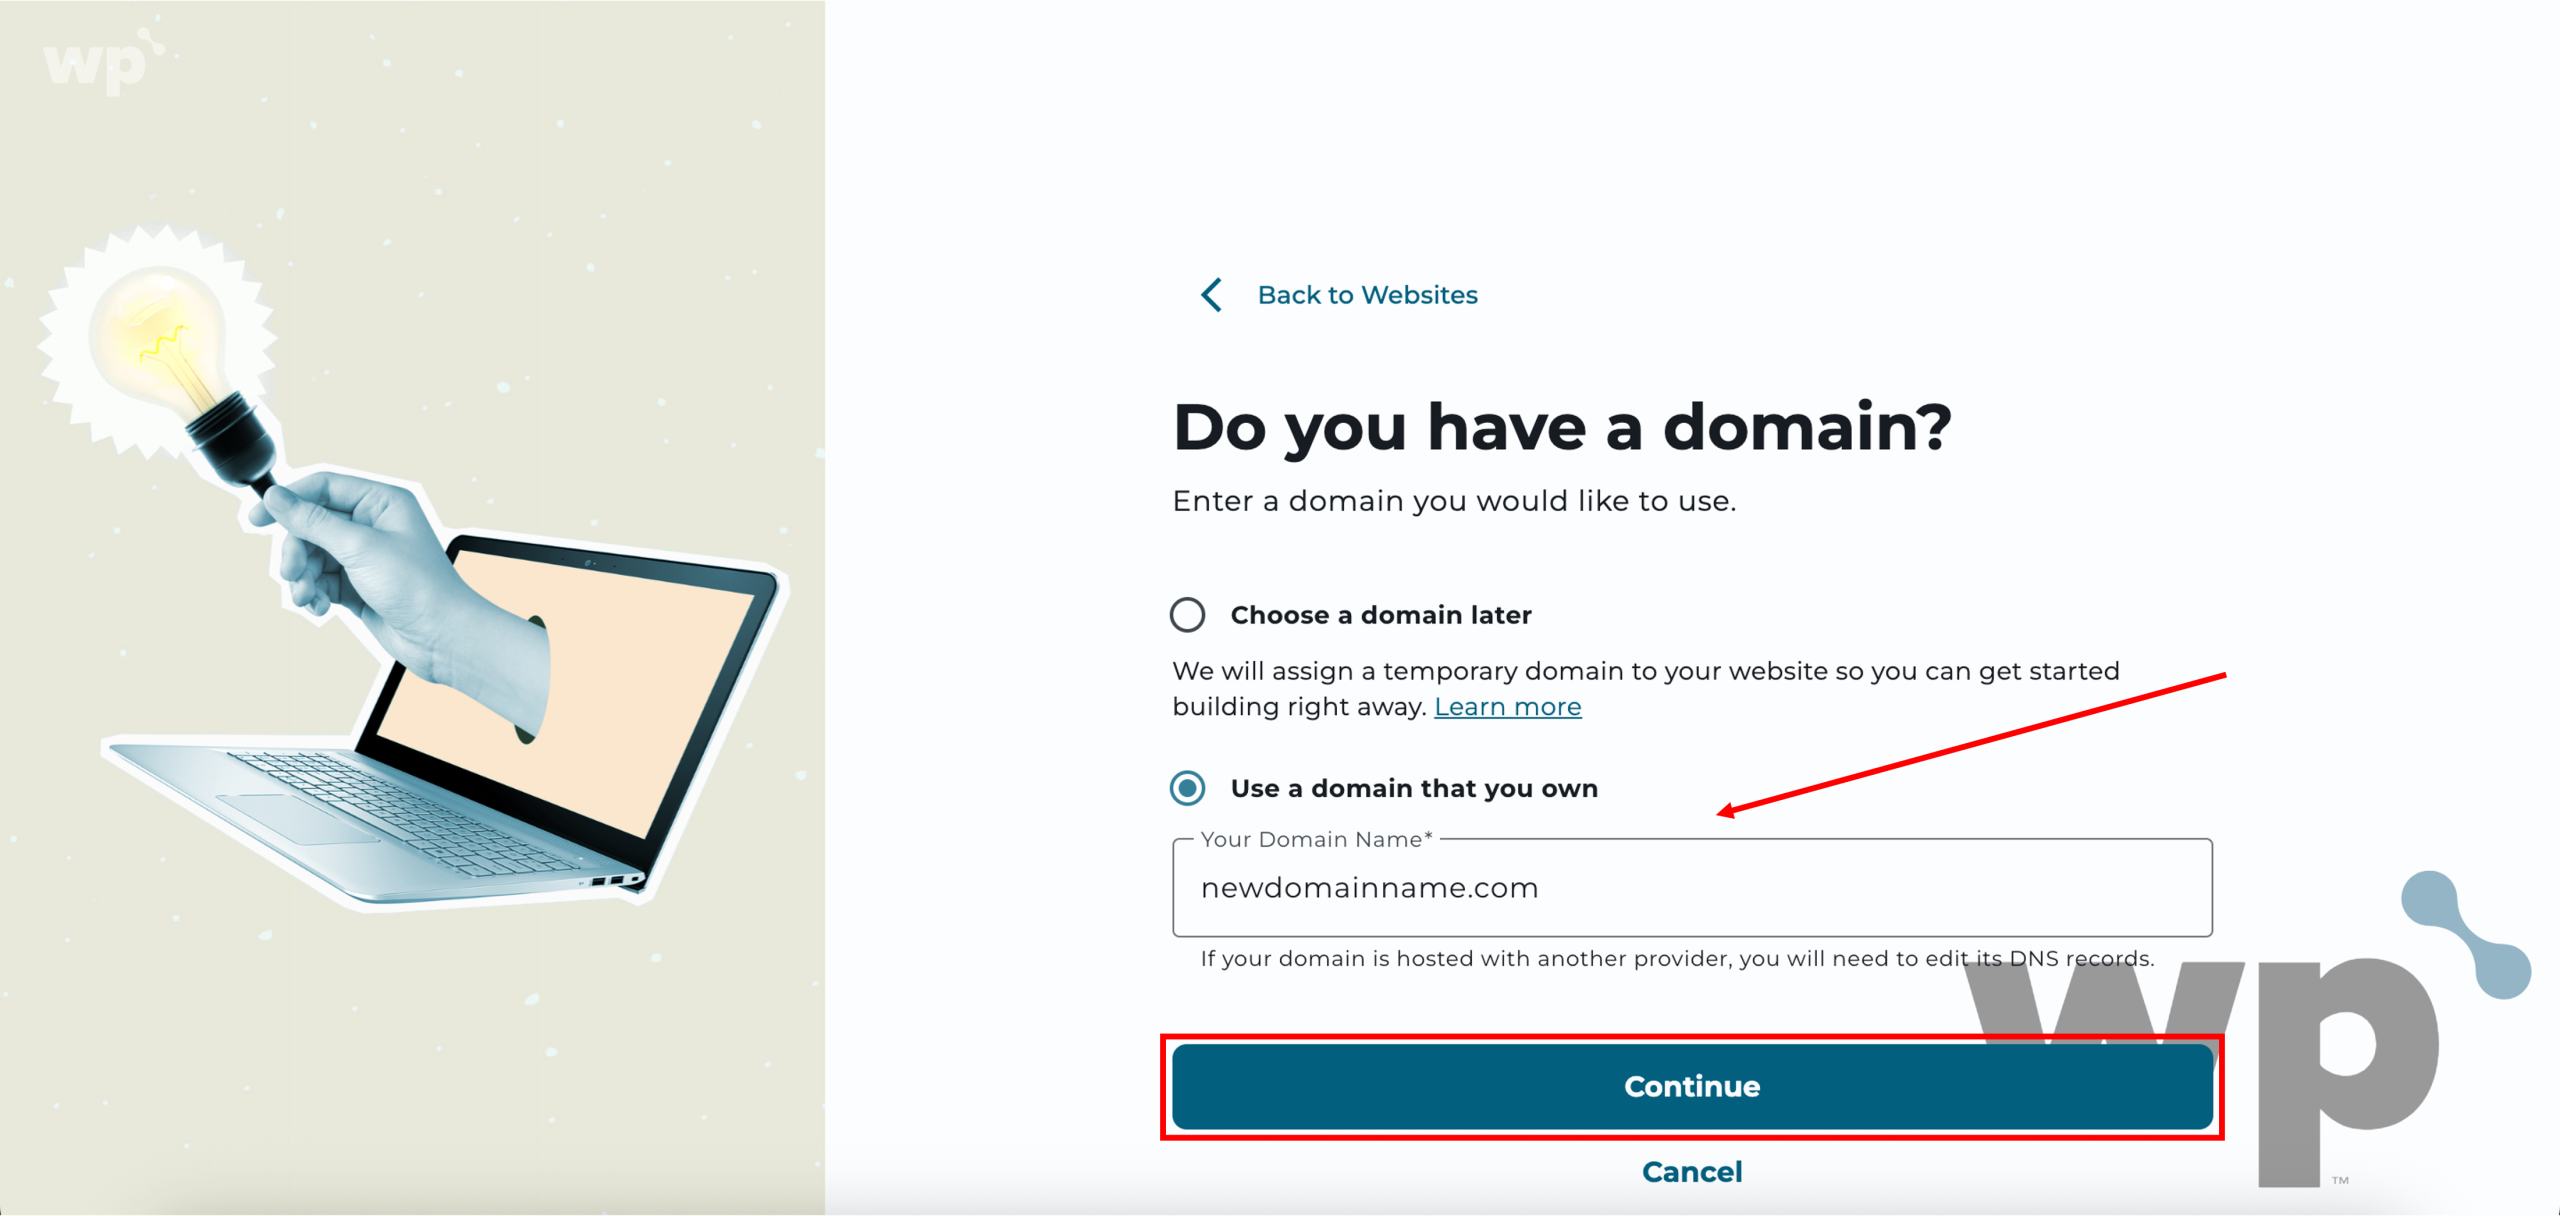
2. Select the Use a domain that you own option and enter the domain name in the field. Once done, click Continue.
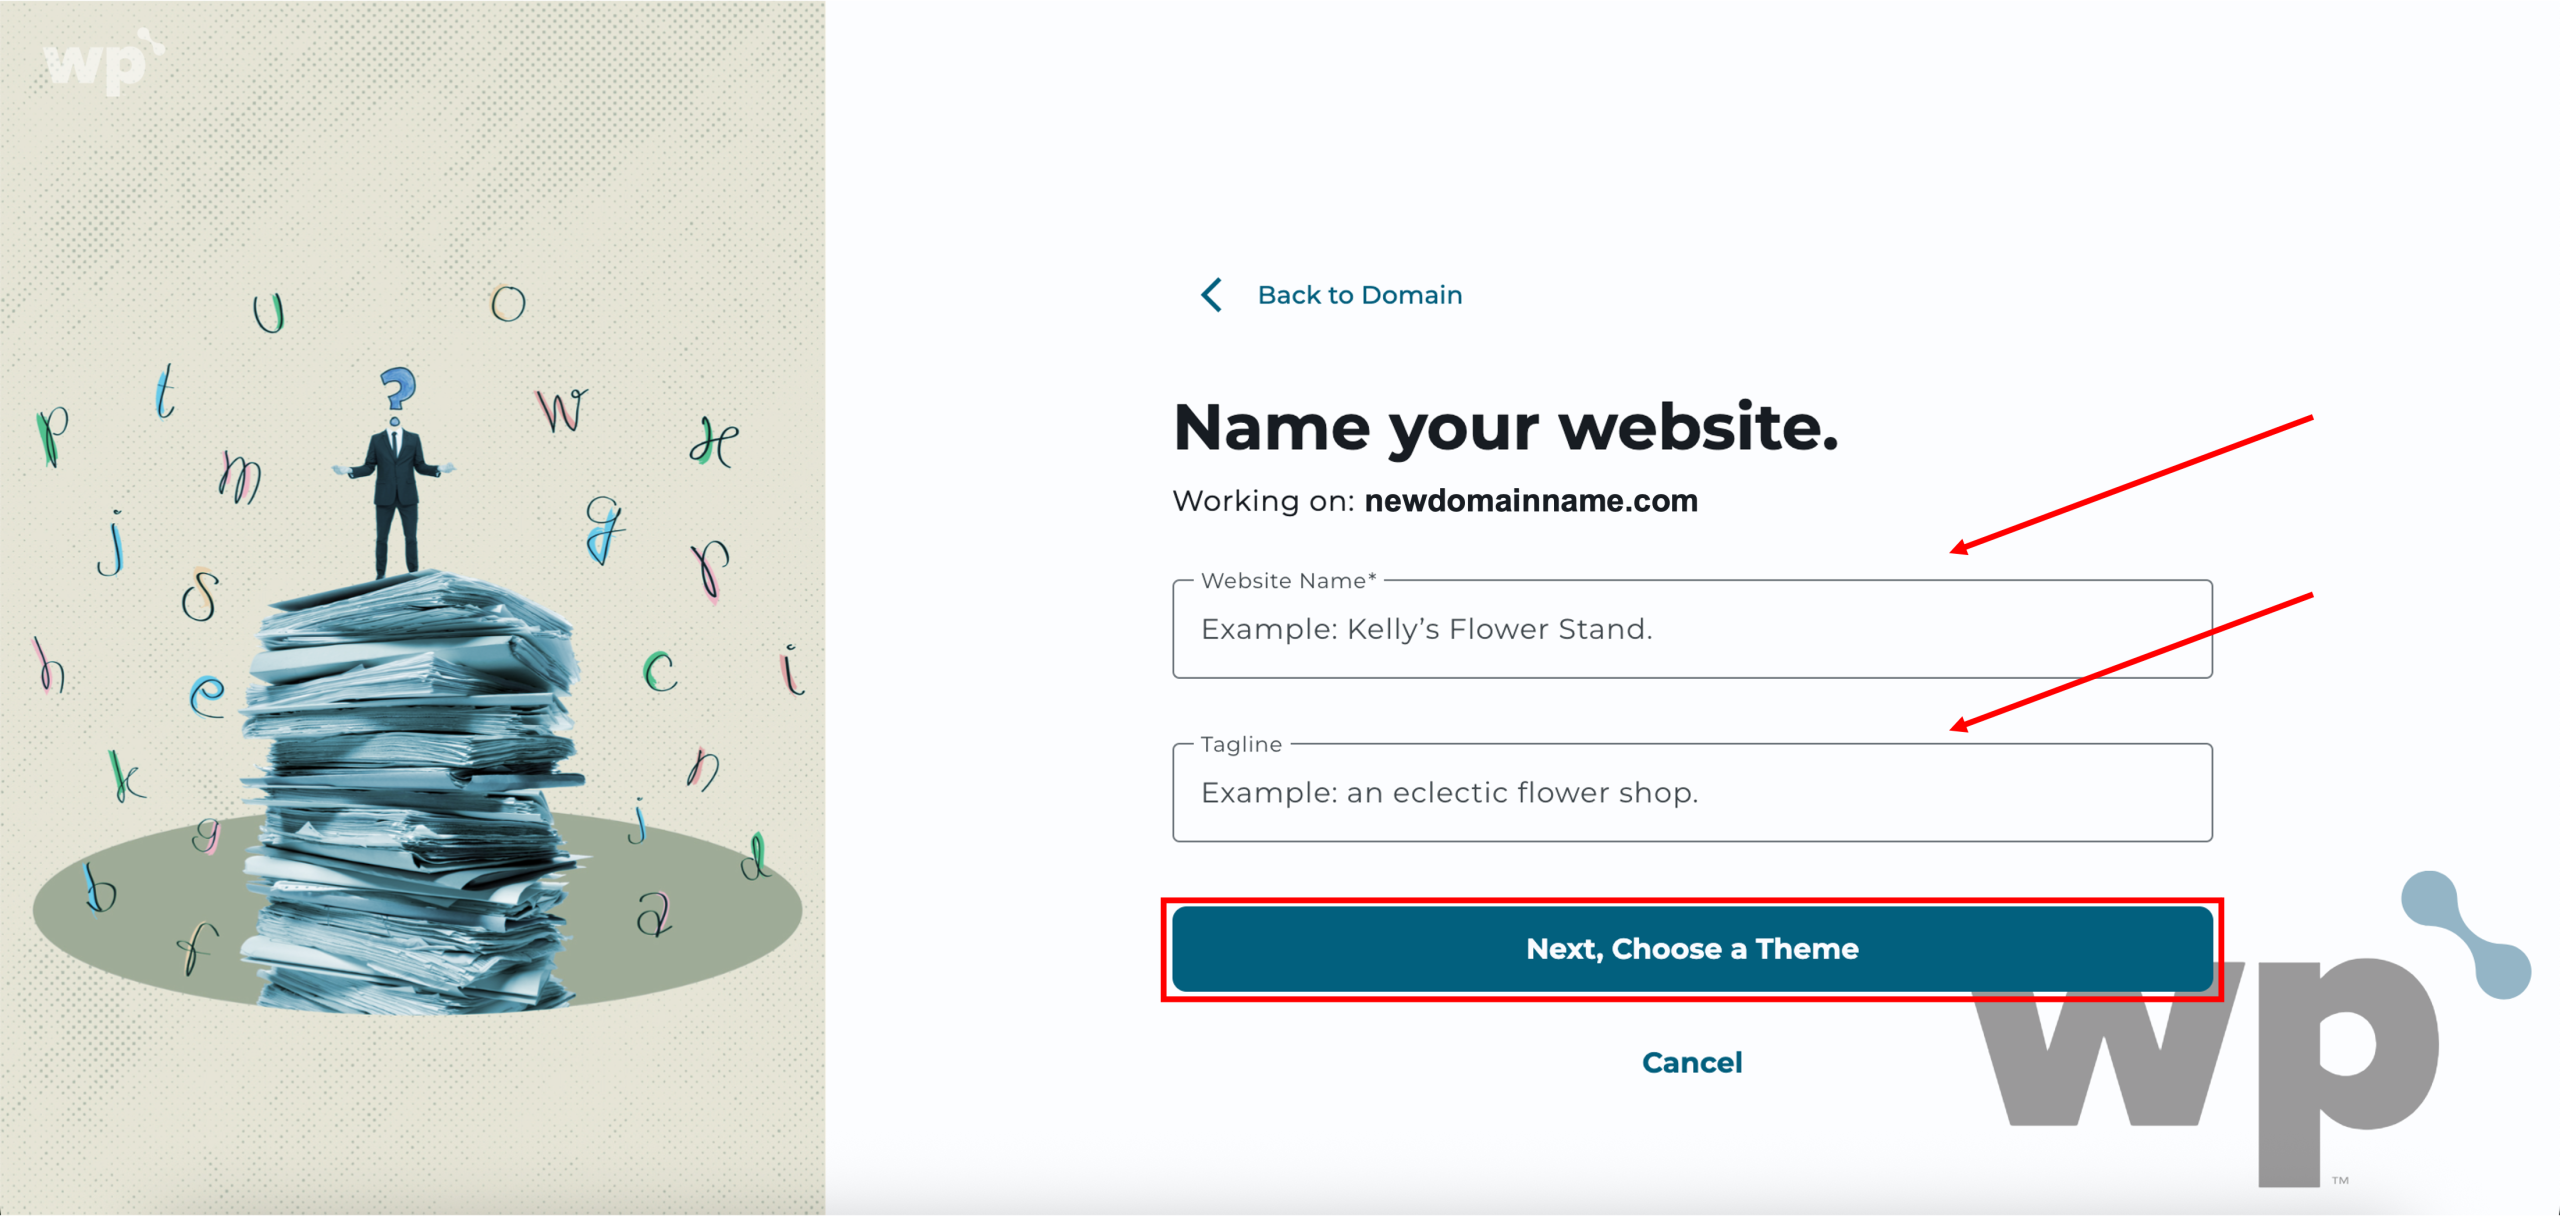
3. Enter your desired Website Name and Tagline. Once done, click Next, Choose a Theme.
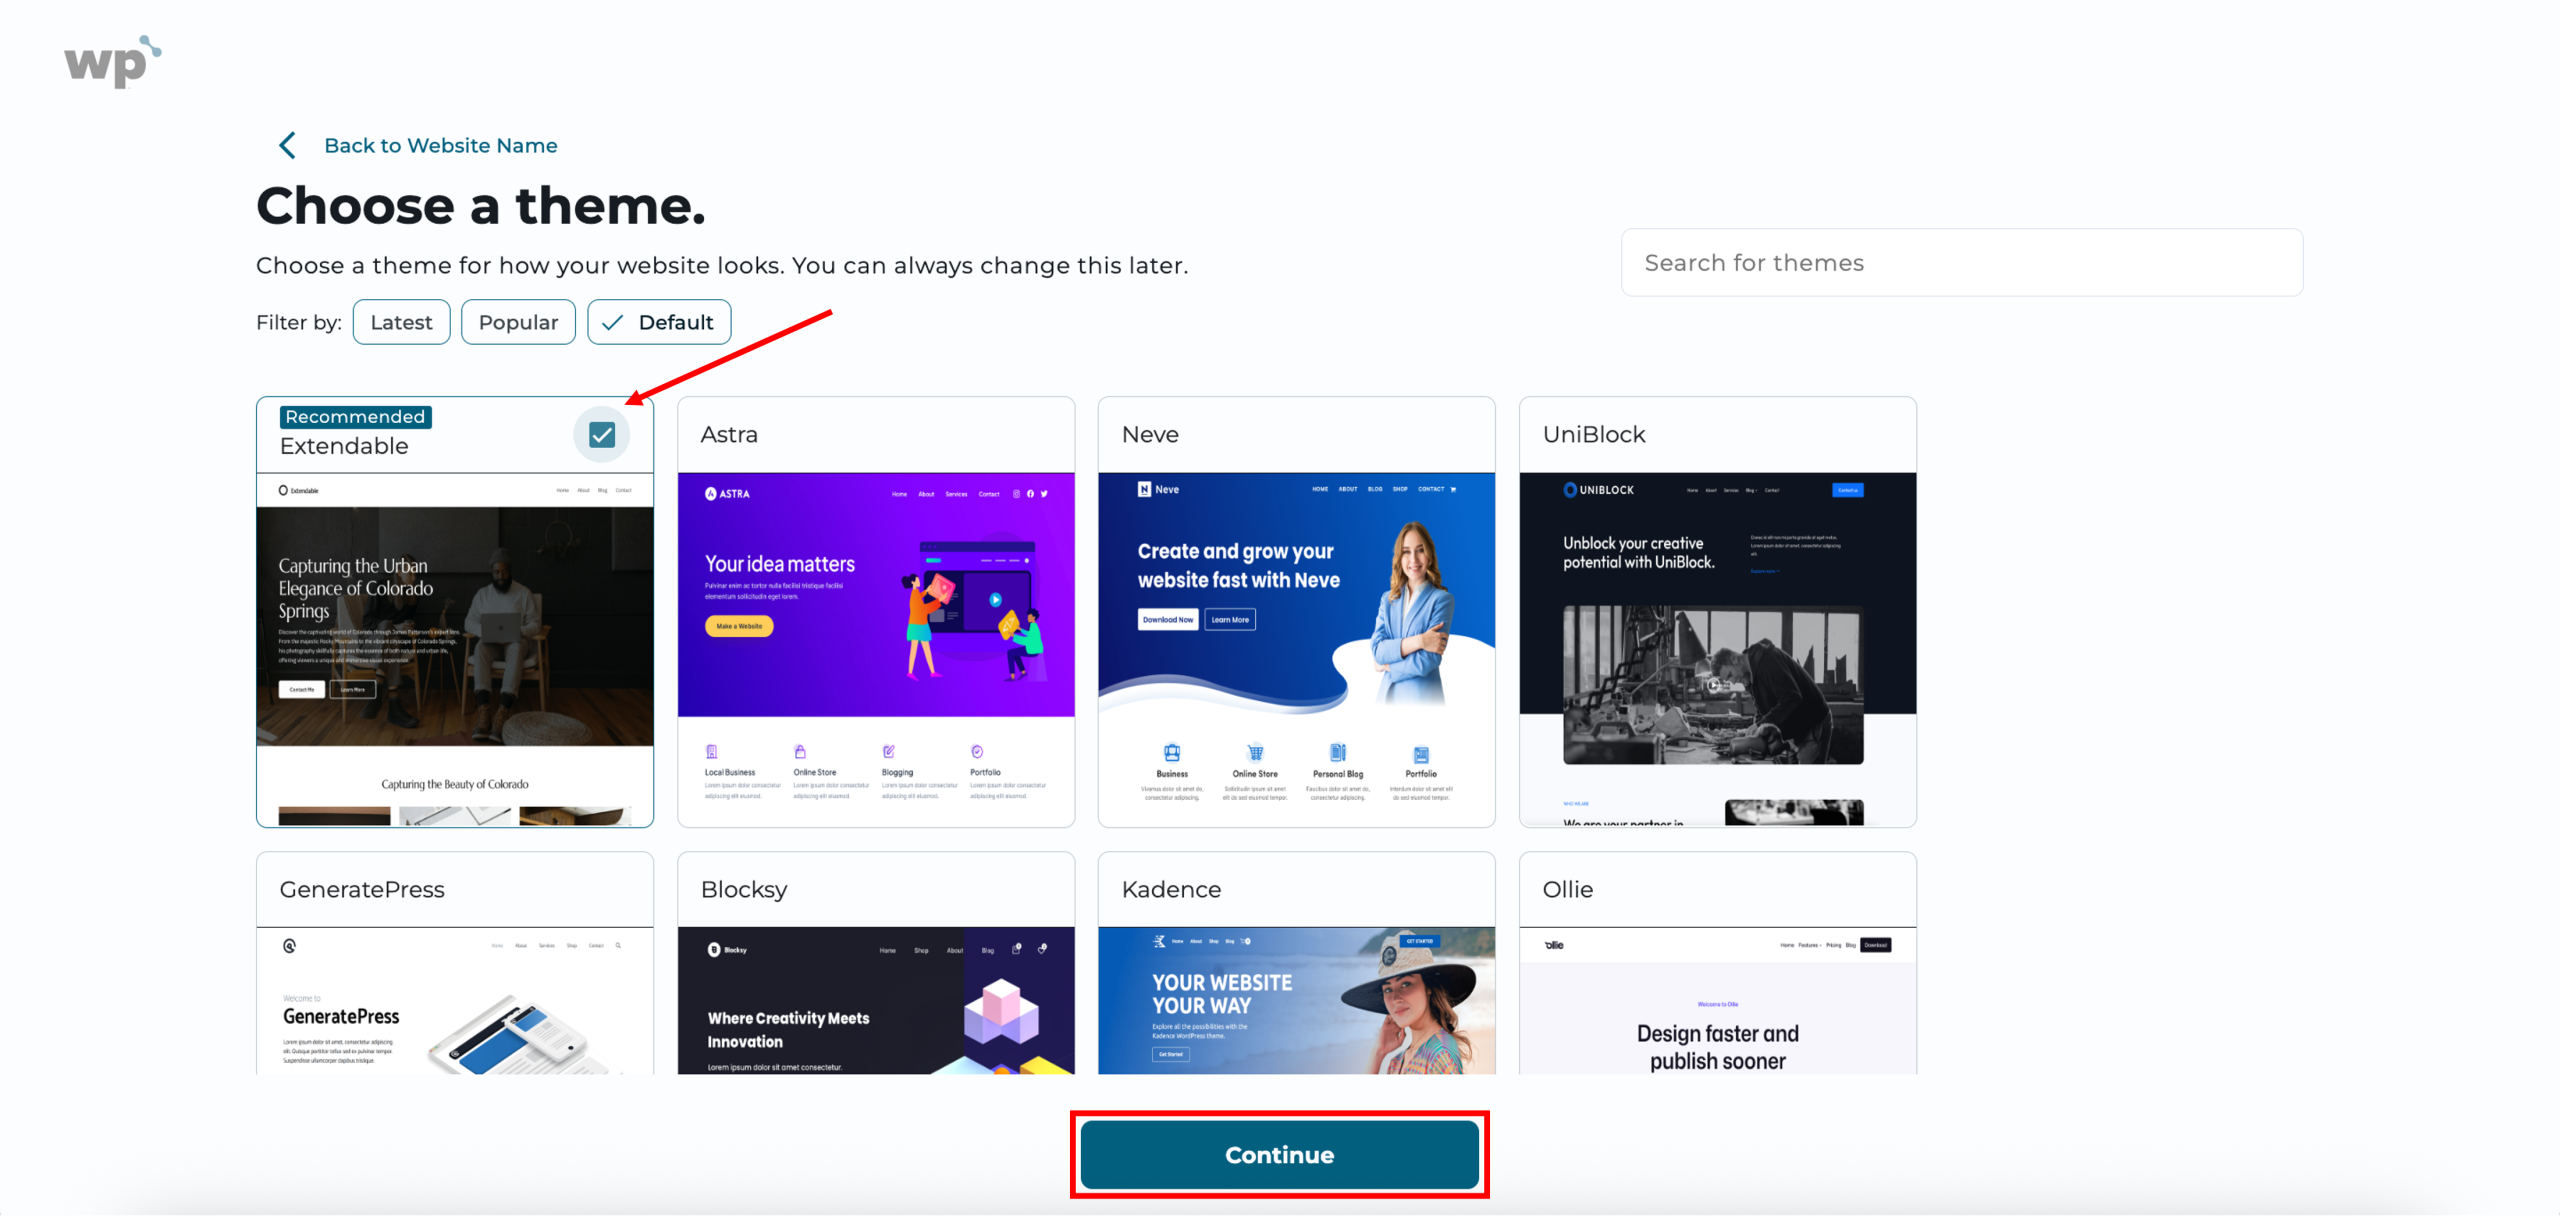
4. Choose a theme for how your website looks. You can always change this later. Once done, click Continue.
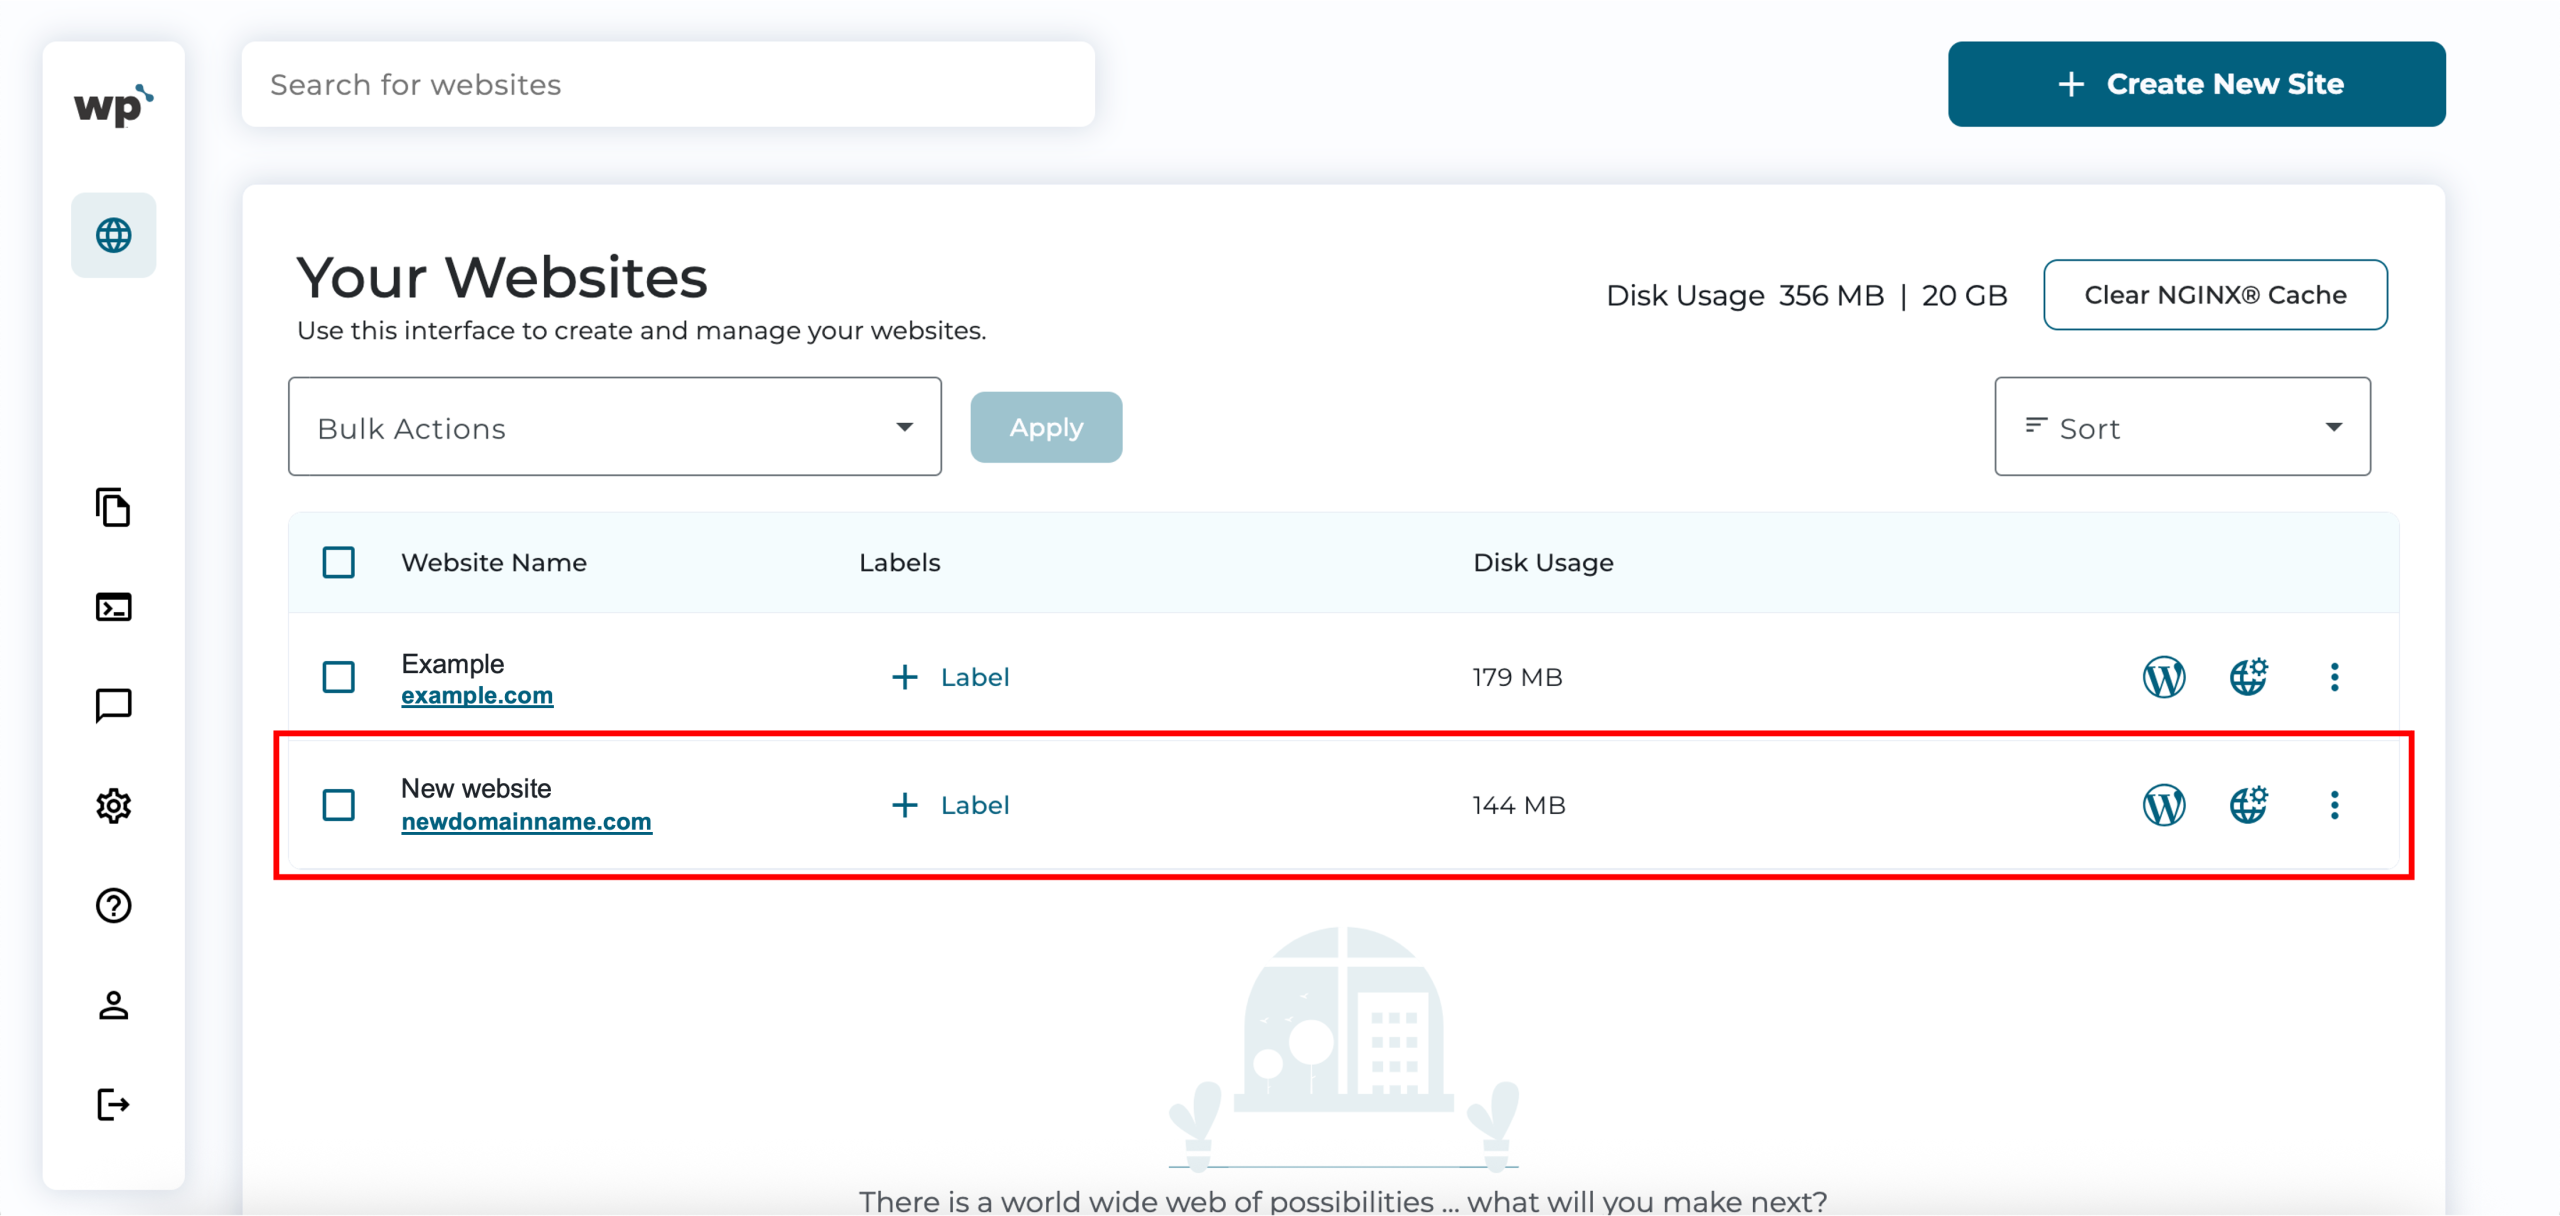
5. Done! Once the setup, which may take a few minutes, is complete, you should be redirected to your WP Squared dashboard. Here, you will see the new domain name successfully added to your list of websites.
To check and enable free SSL for your website:
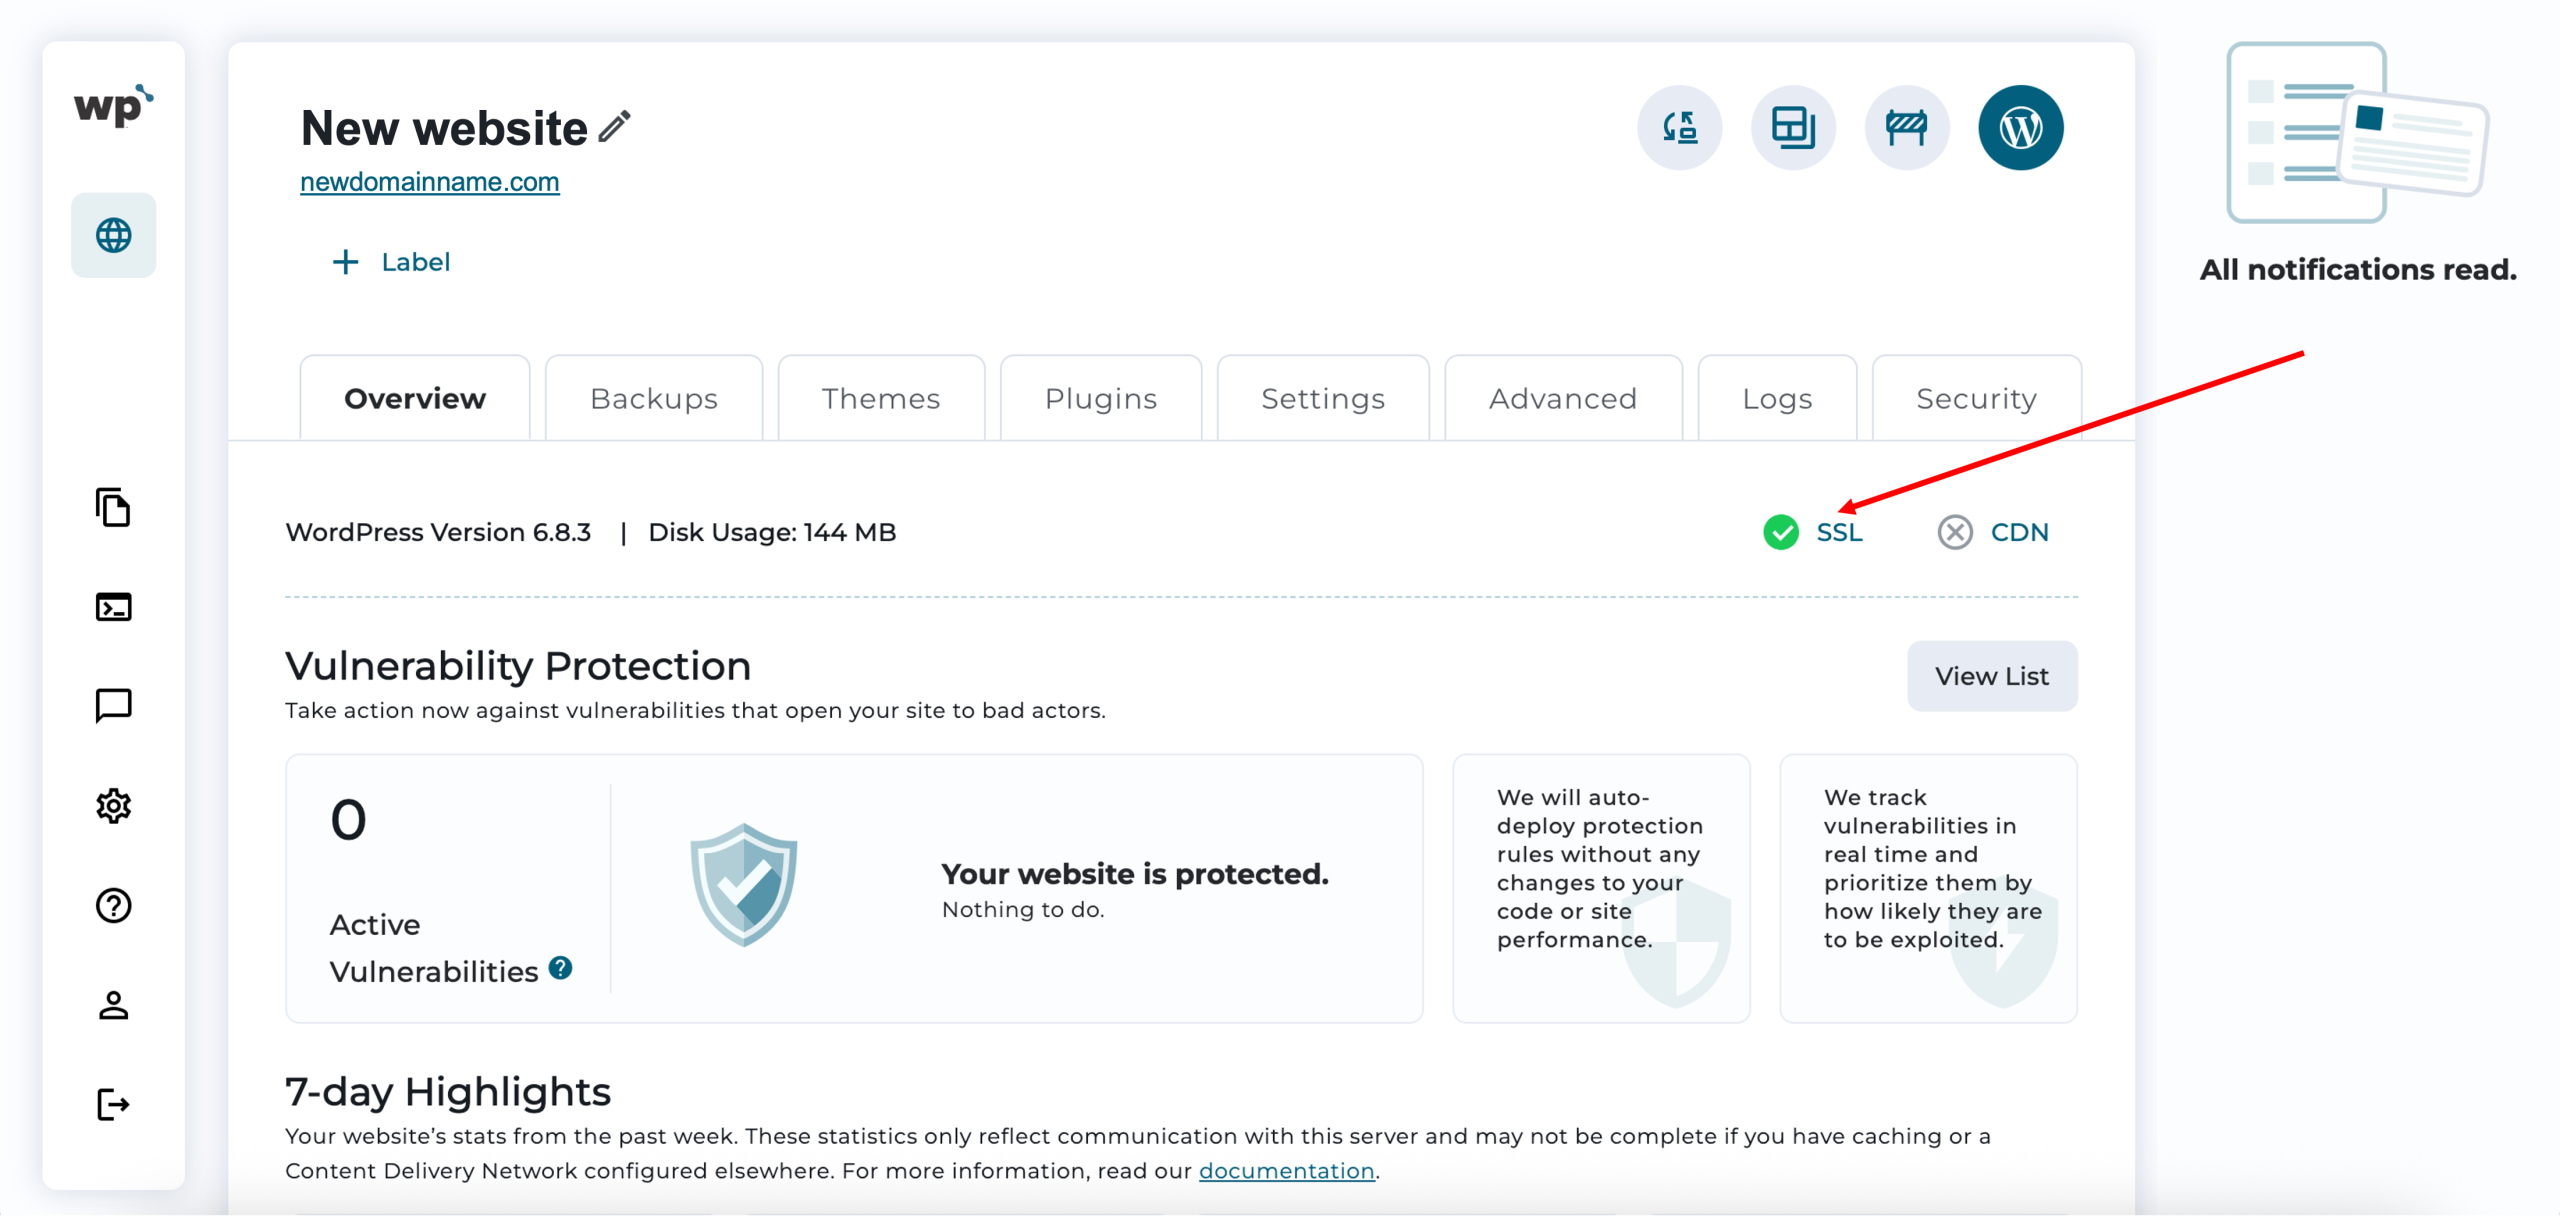
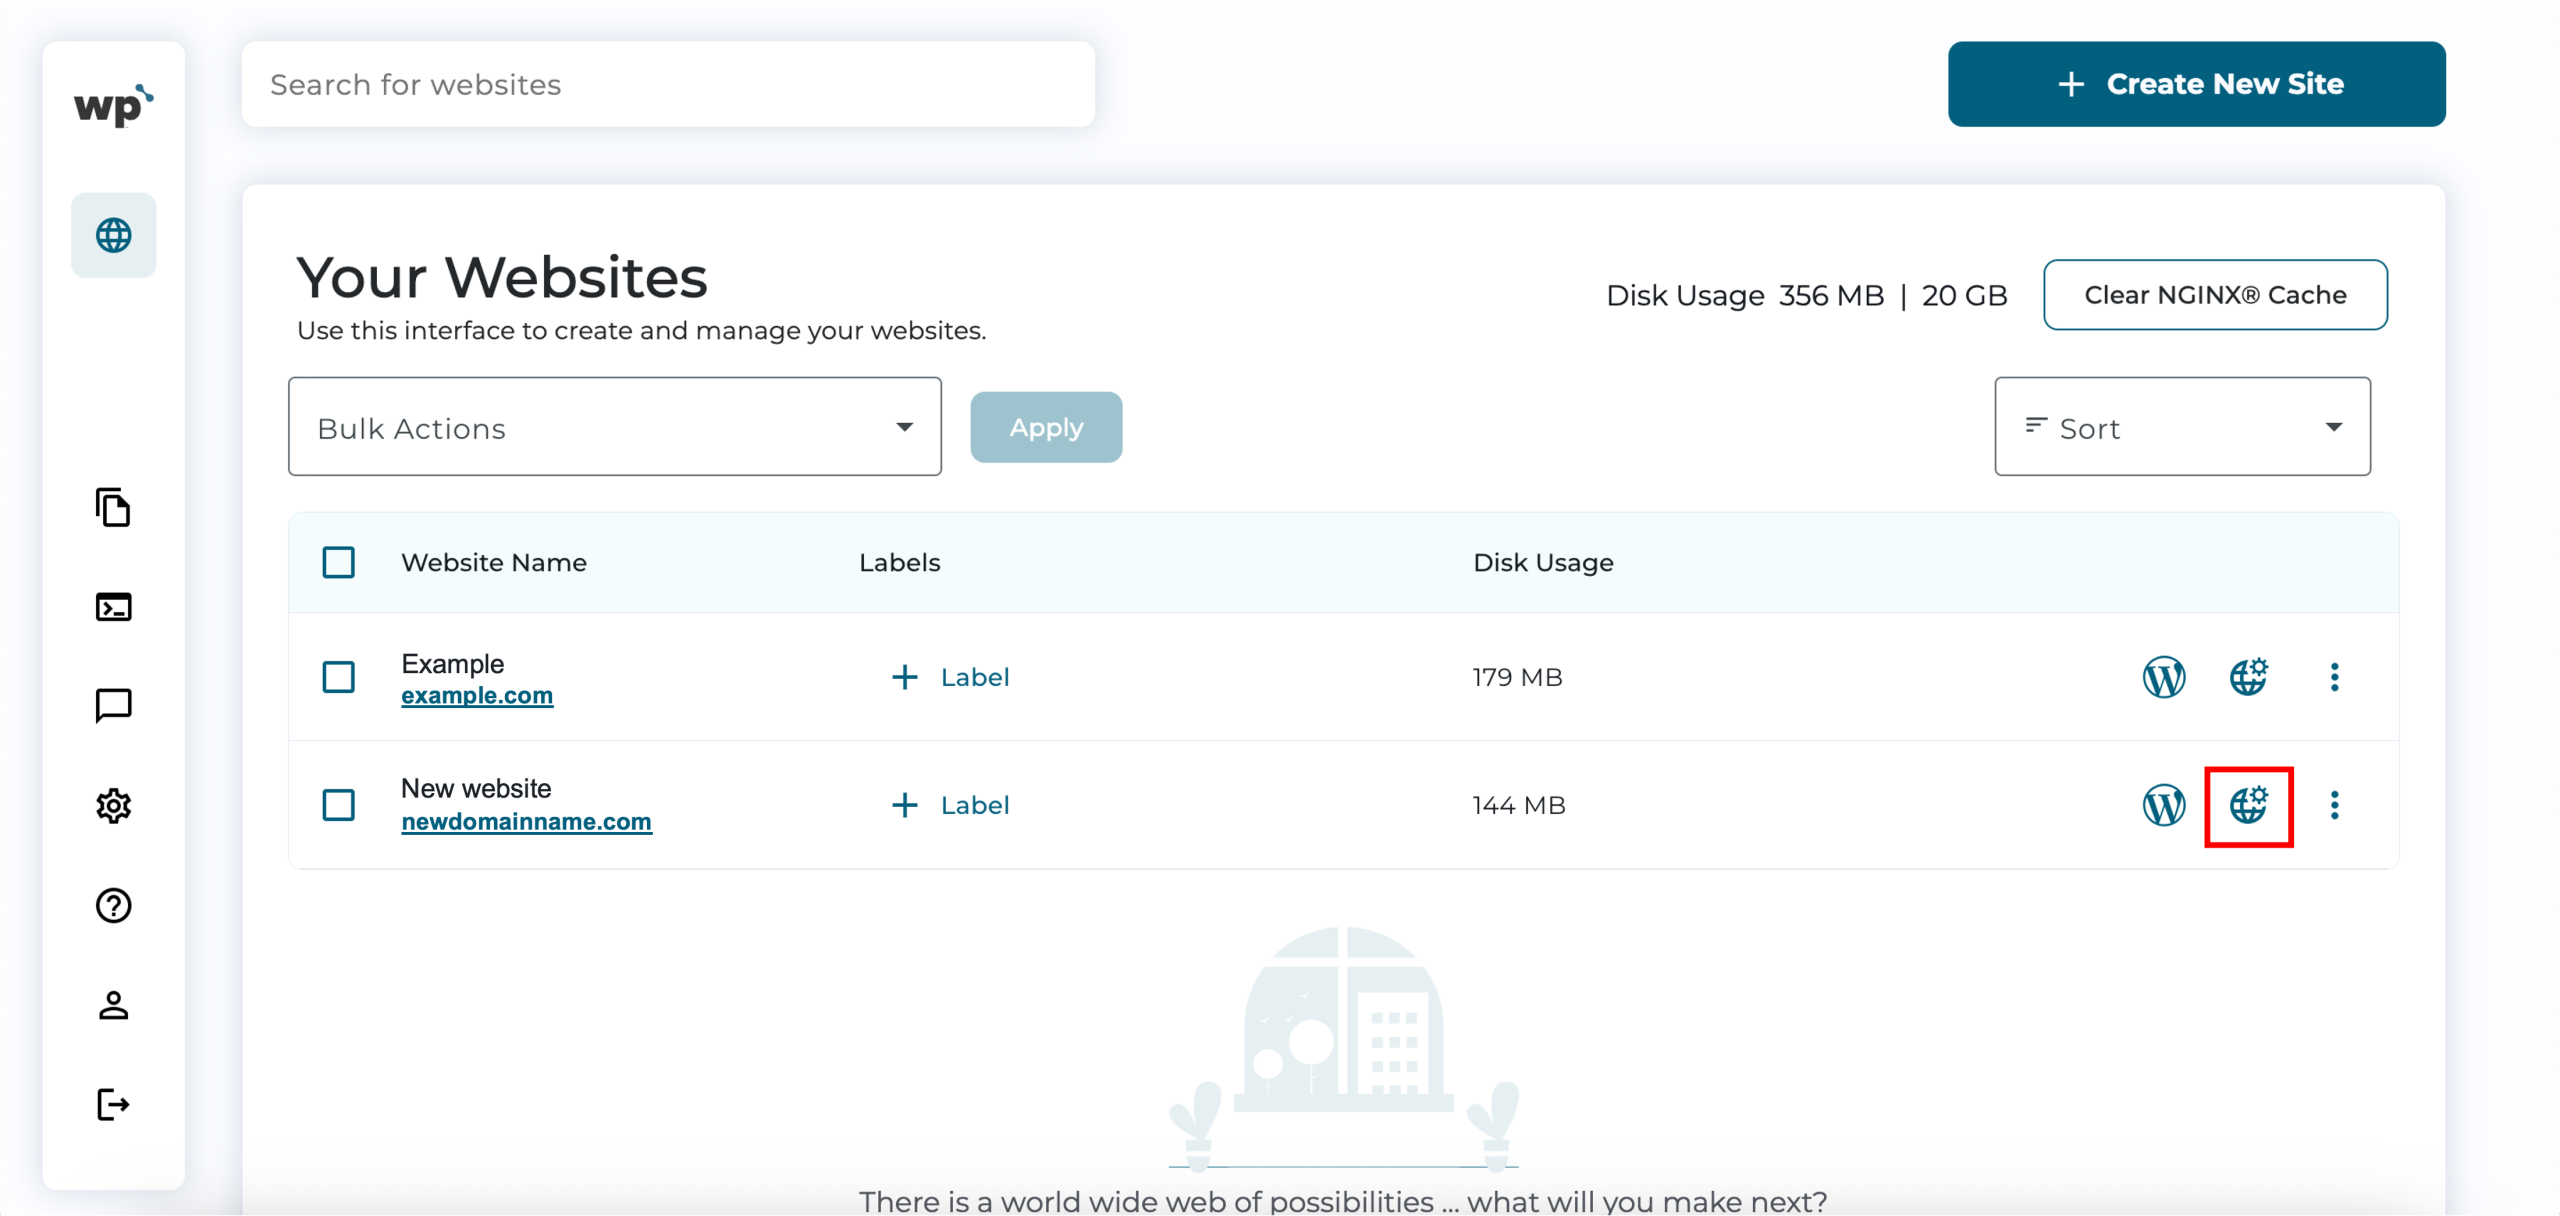
1. Kindly note that WP Squared automatically installs an SSL certificate for each domain. To check for free SSL for your website, click Manage Website, which is aligned with your website.
2. Under Overview, you will see the SSL status indicator on the right side. The SSL status indicator will display a green check mark when your certificate is valid and requires no further action.