Example :
How to set up an email or change my account settings.
- Help Center
- WordPress Hosting
- WordPress Management
- How to enable CDN cache using the WP Squared dashboard
How to enable CDN cache using the WP Squared dashboard
Enabling CDN cache helps your WordPress website load faster by serving cached content from servers located closer to your visitors. This improves page loading speed and provides a smoother experience, especially for users accessing your website from different locations.
With the WP Squared dashboard, you can enable CDN caching easily without installing additional plugins or making manual configurations. This guide shows you how to turn on CDN cache for your WordPress website using the WP Squared dashboard.
*Before you begin: To enable CDN caching, you must have an active Cloudflare account. If you do not already have one, you will need to create a free Cloudflare account before proceeding.
Cloudflare is the CDN provider used by WP Squared to help improve website loading speed by caching and delivering content more efficiently.
Note:
• CDN cache stores copies of your website’s static content (such as images, CSS, and JavaScript files) to improve loading speed.
• Enabling CDN cache does not change your website’s content or design.
• Changes may take a short time to take effect after enabling CDN cache.
• If you make updates to your website and do not see the changes immediately, you may need to clear the CDN cache.
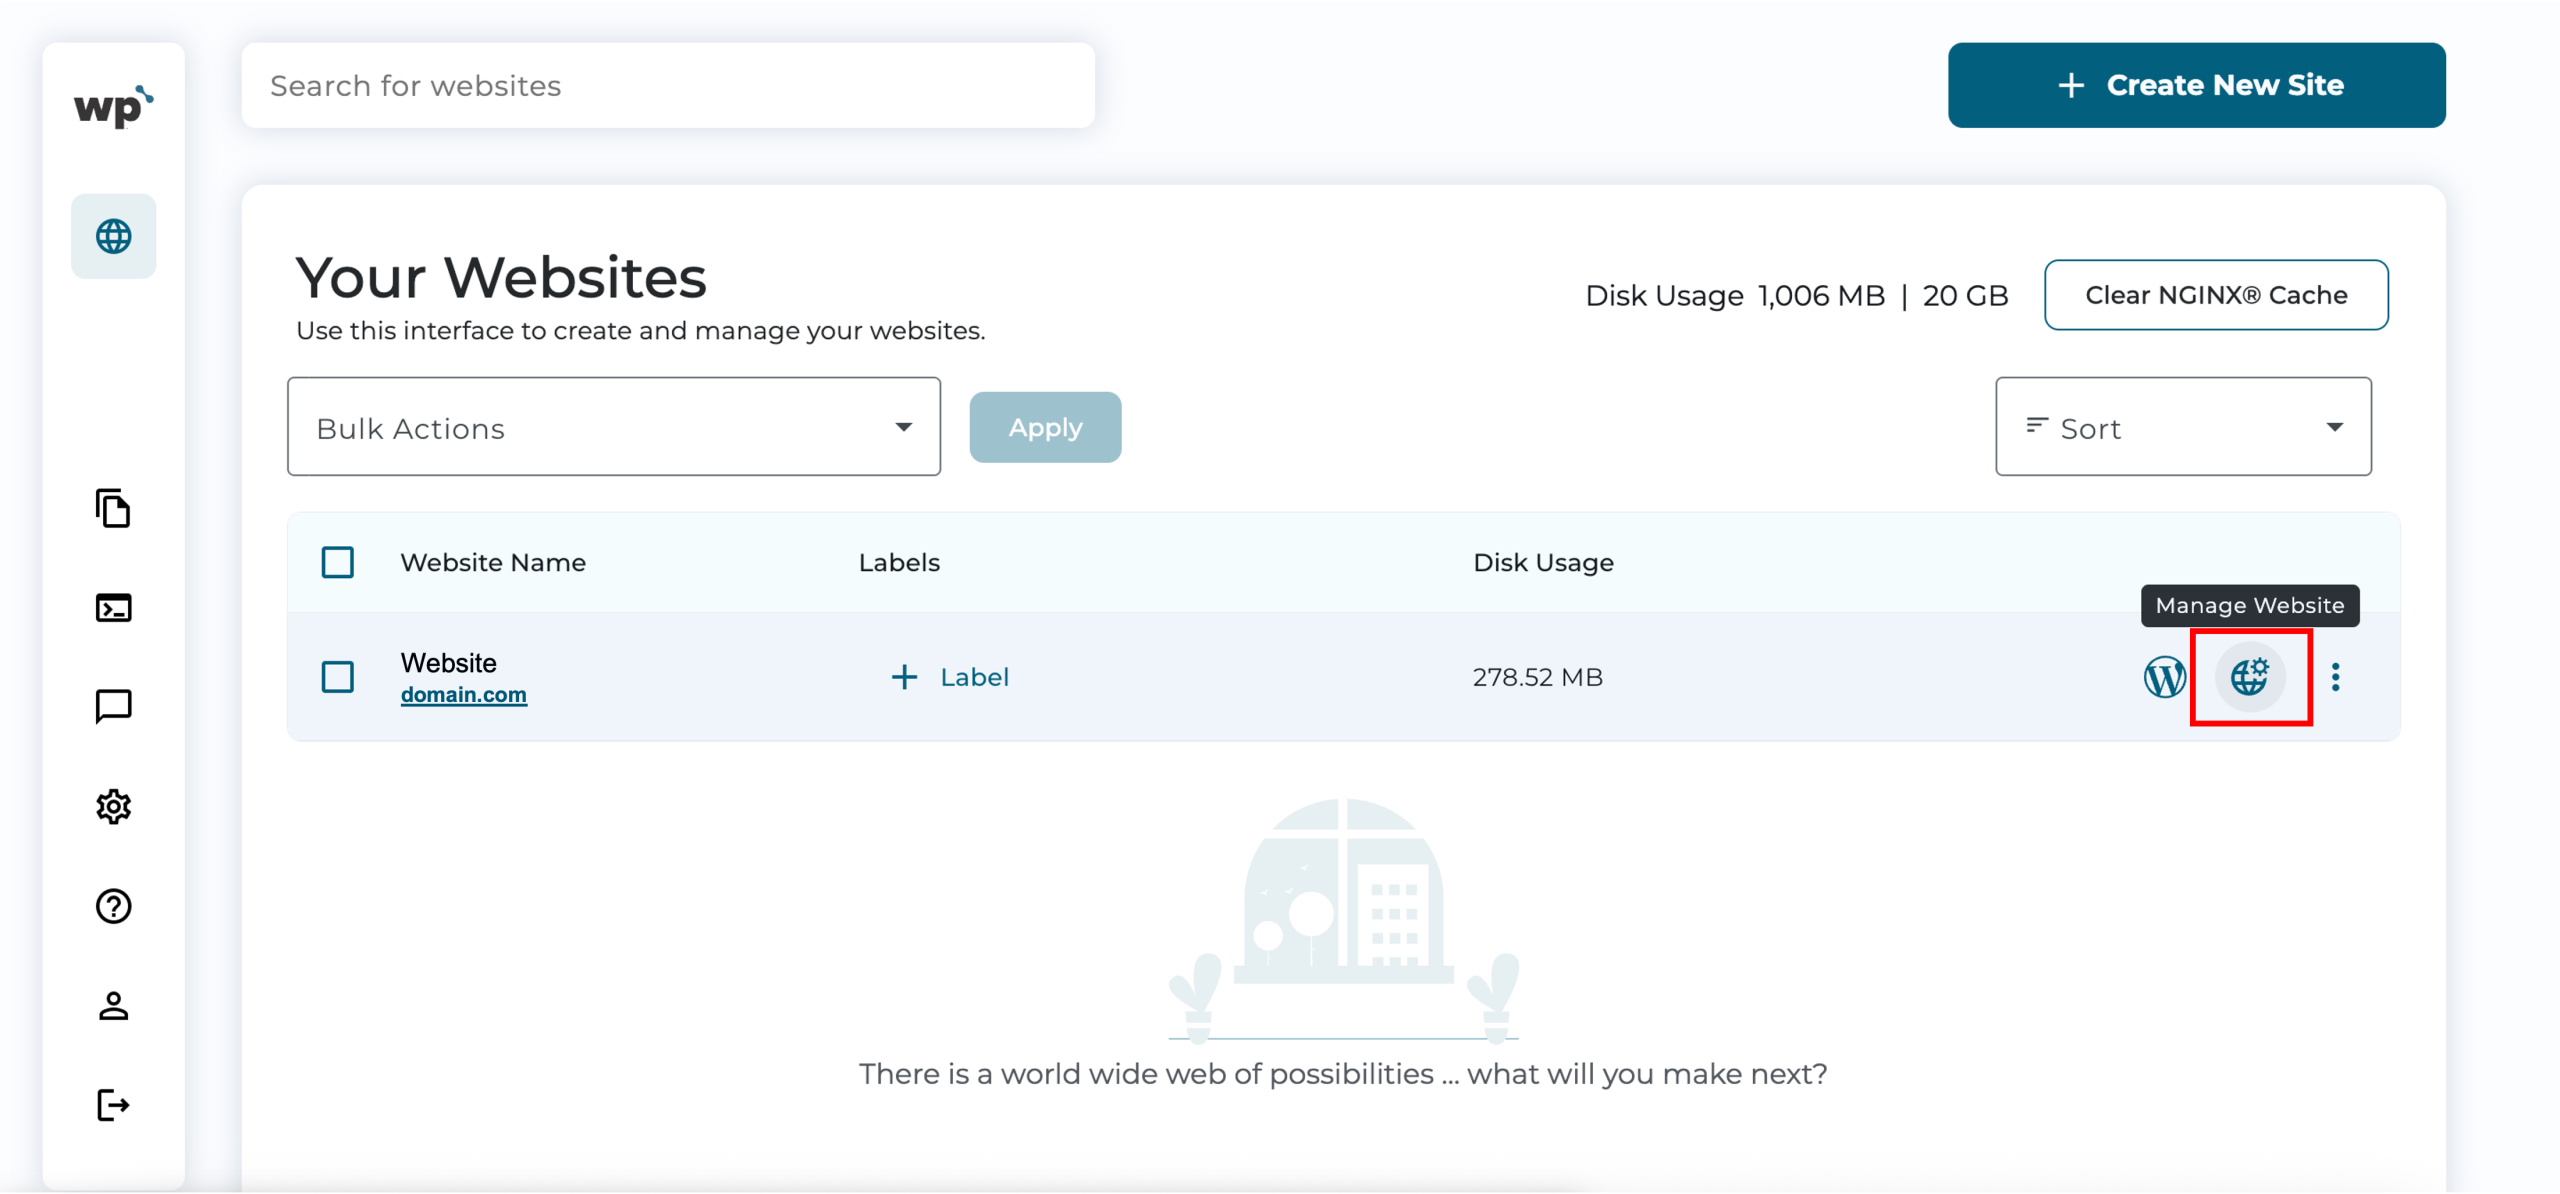
1. Upon reaching your WP Squared dashboard, click Manage Website next to the website you wish to enable CDN cache for.
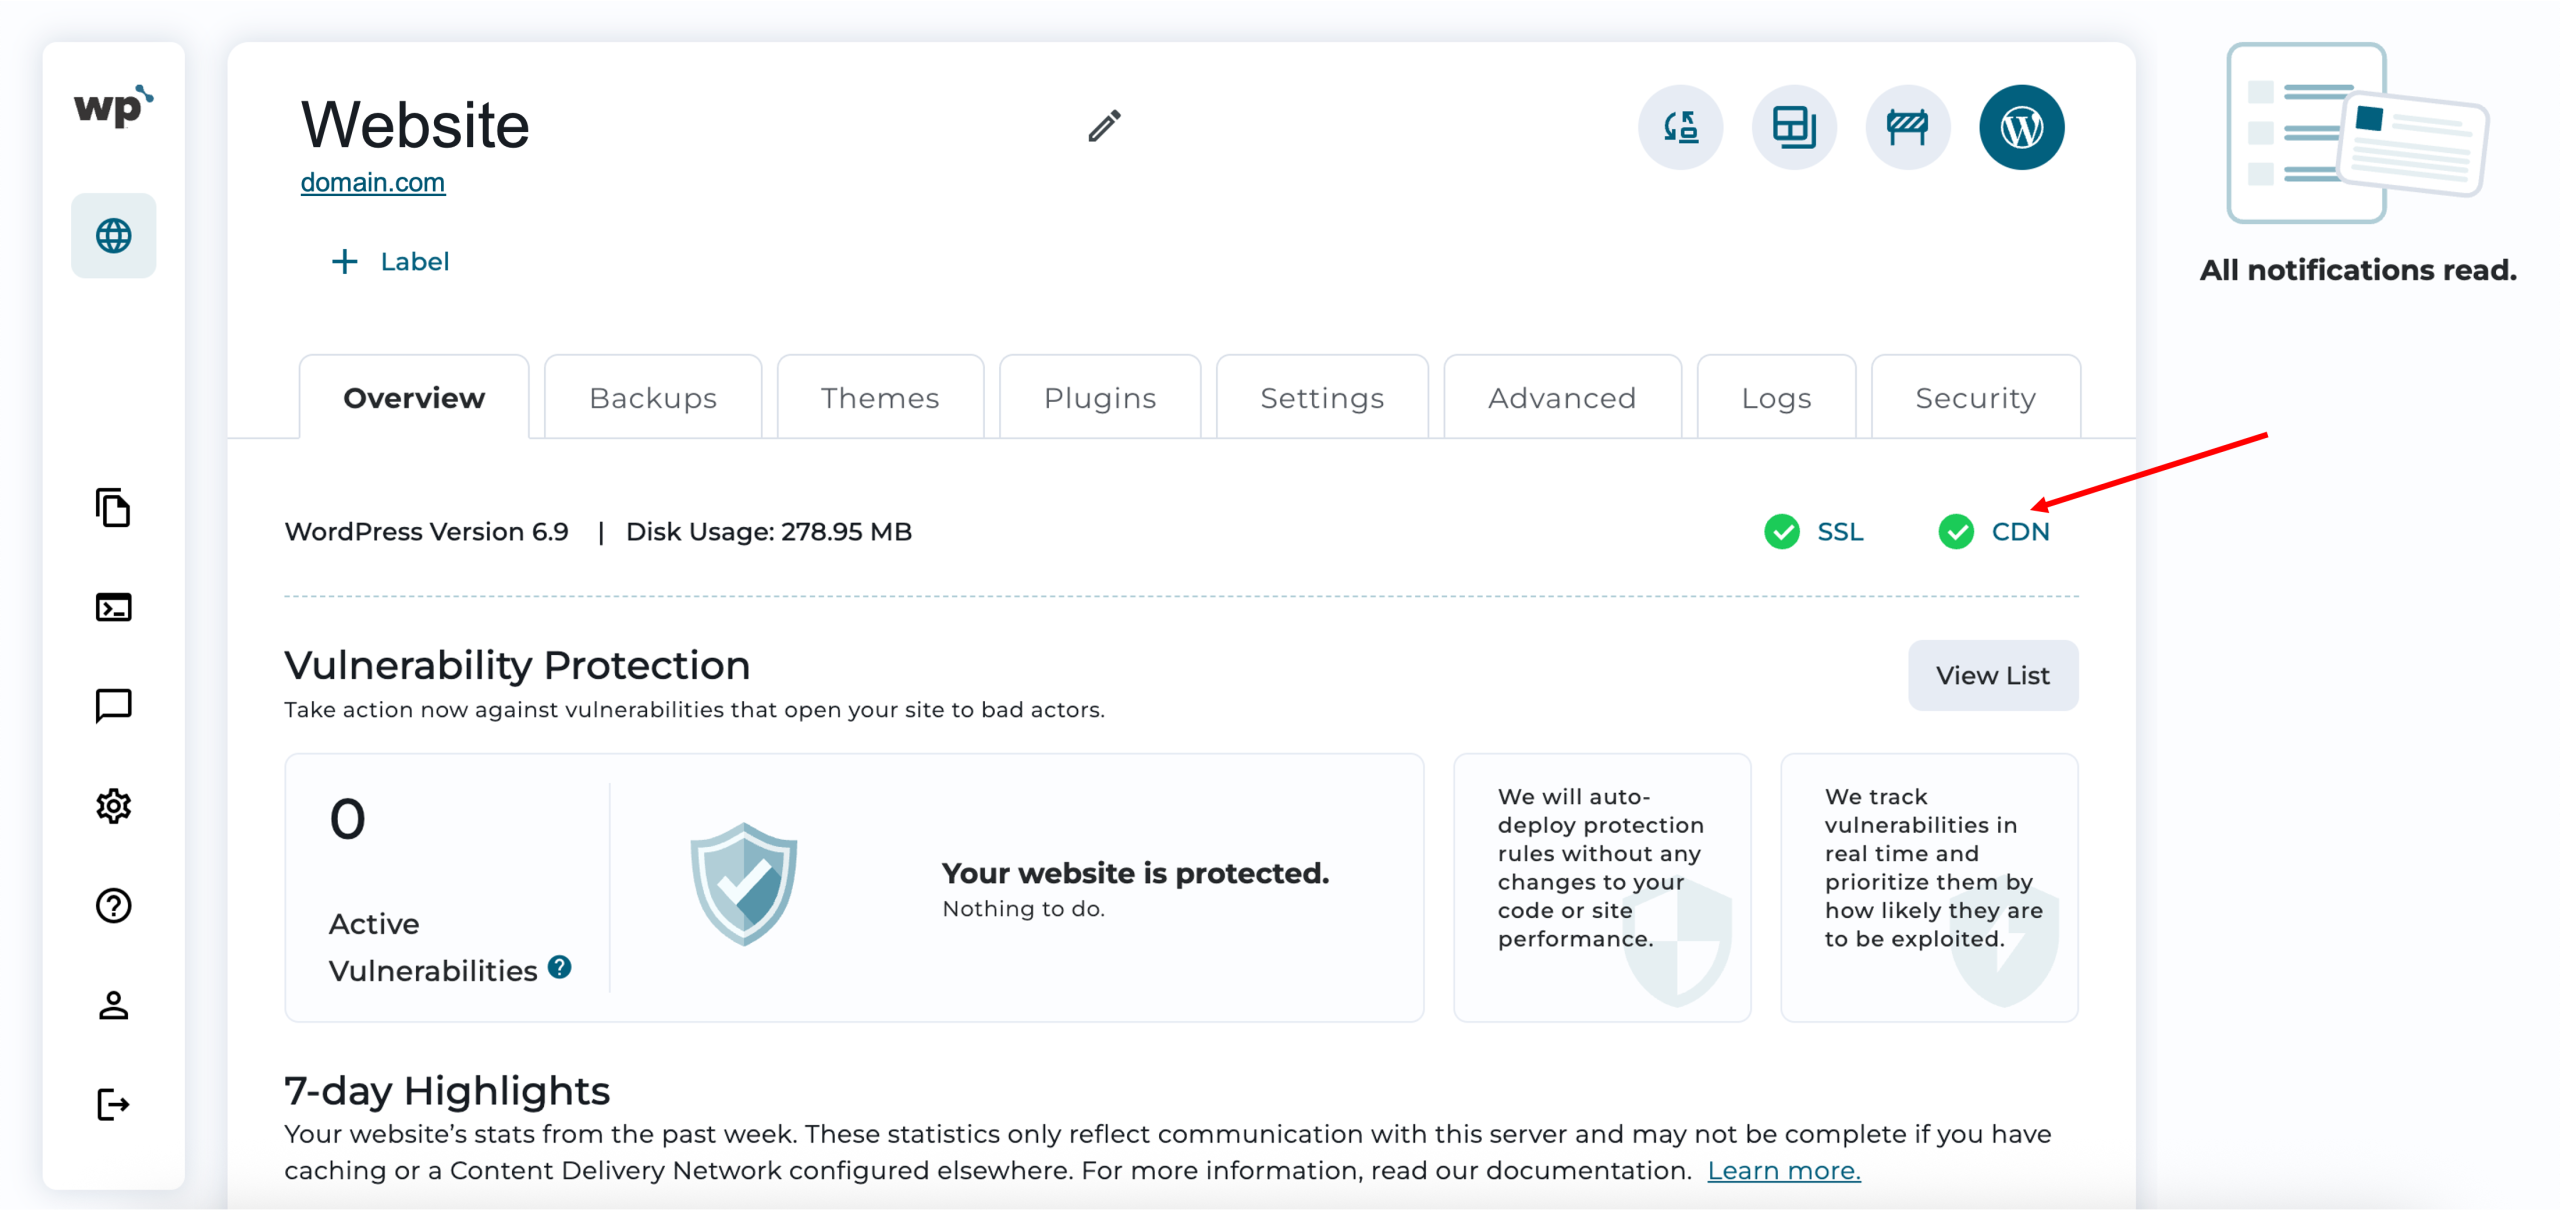
2. Once redirected to the Overview page, on the right-hand side, next to SSL, you should see your CDN status right away. Click the CDN status directly, or the Advanced tab; either method takes you to the same page.
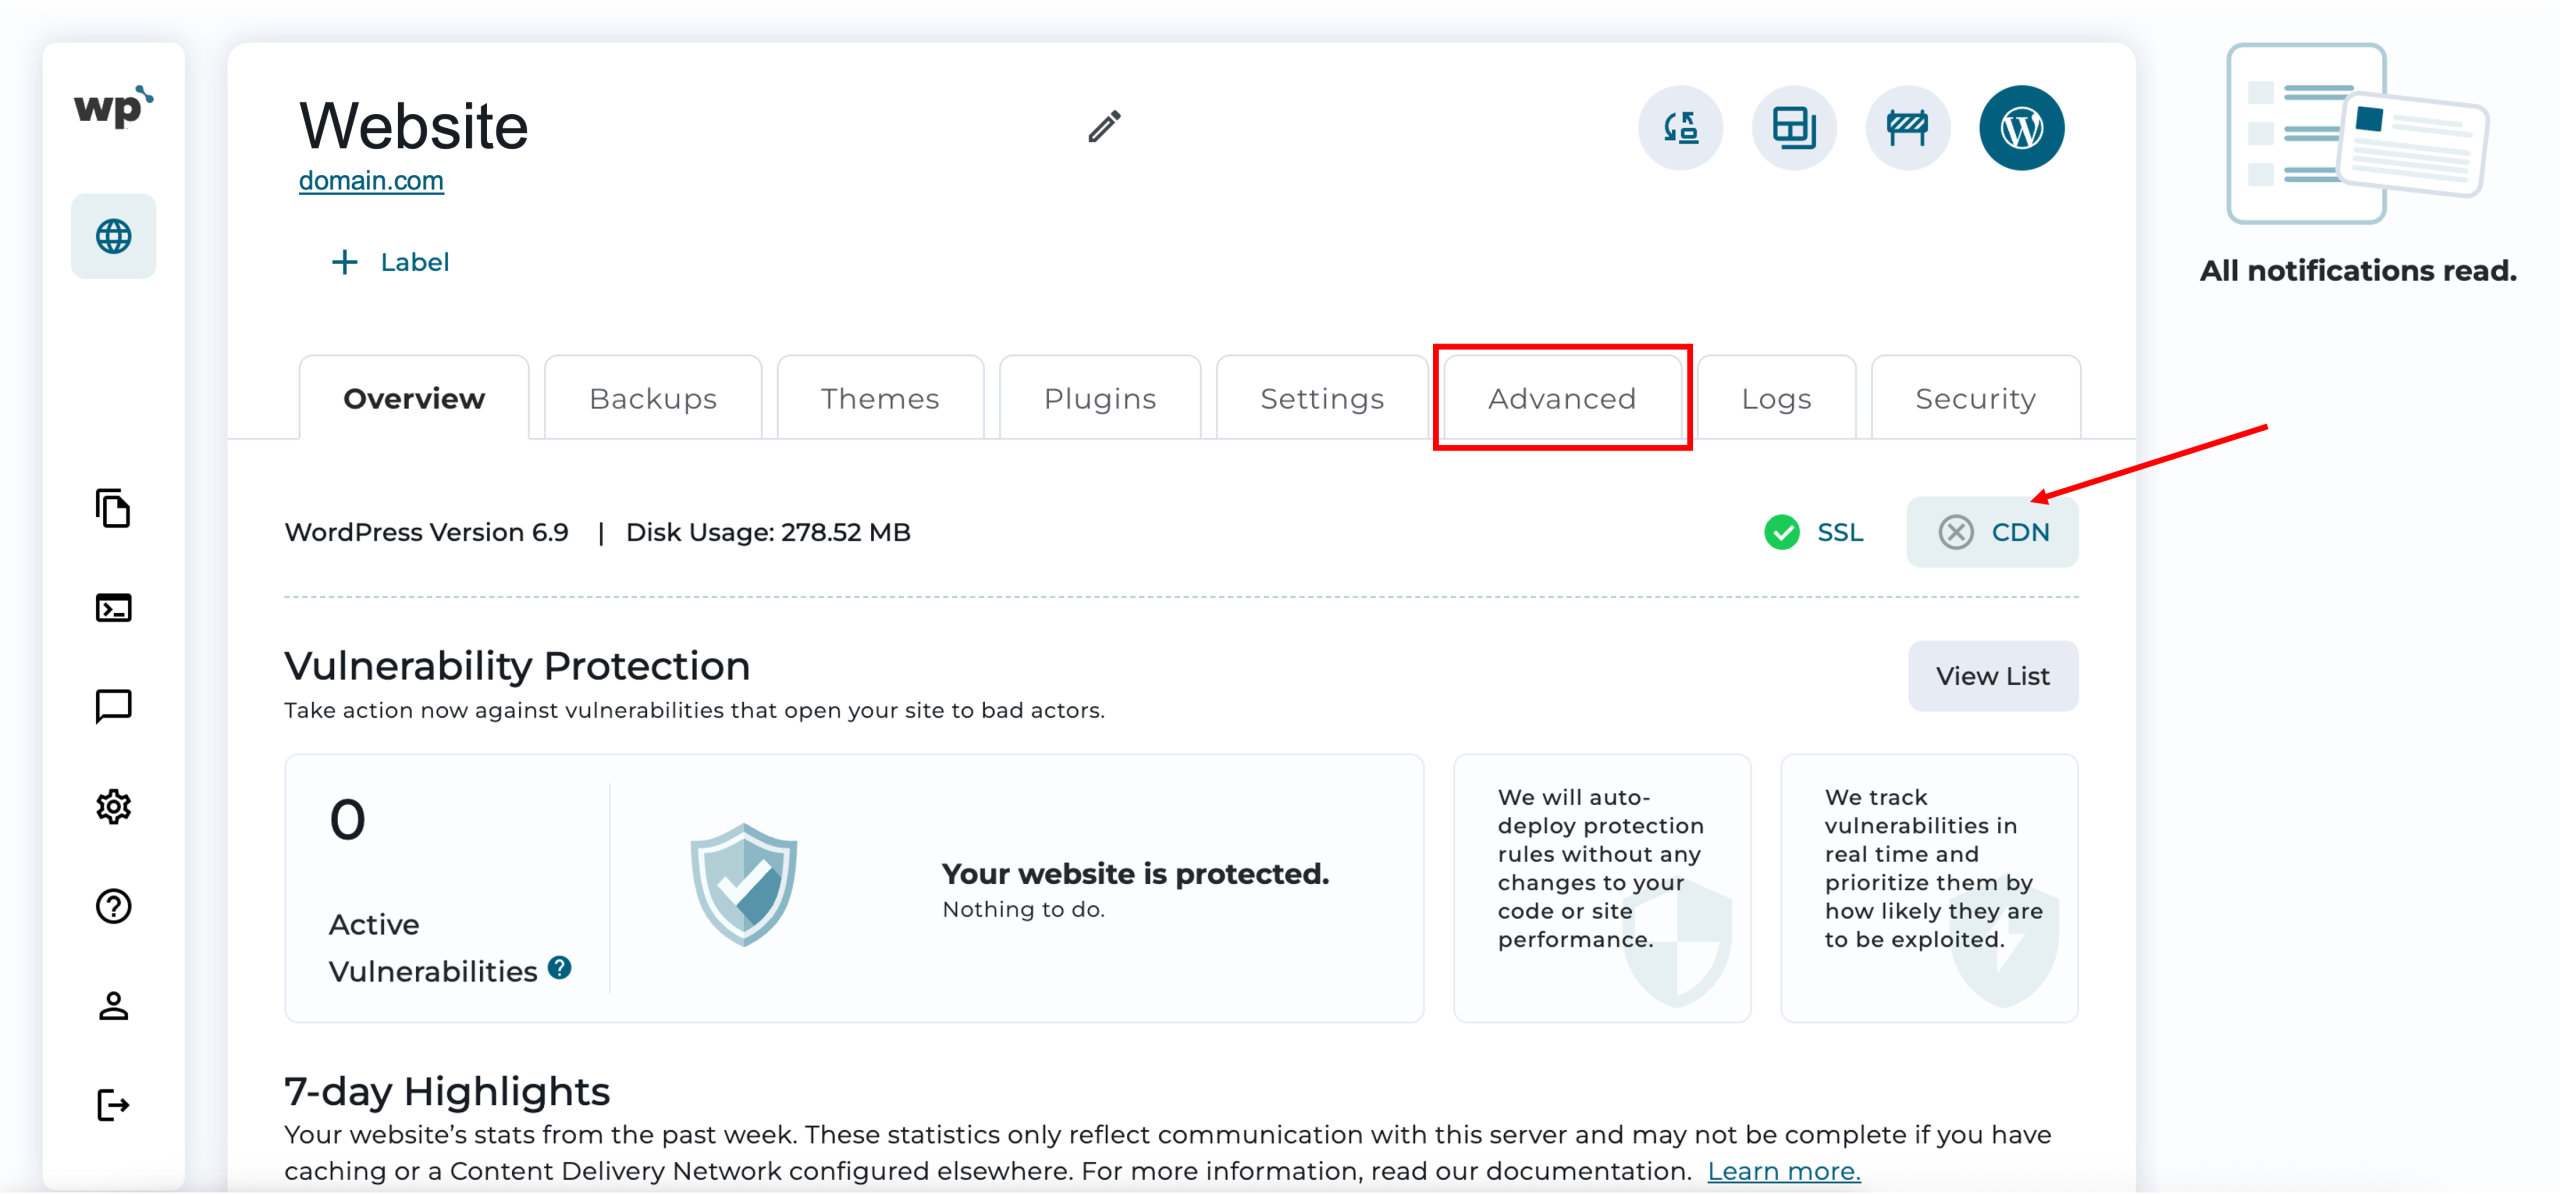
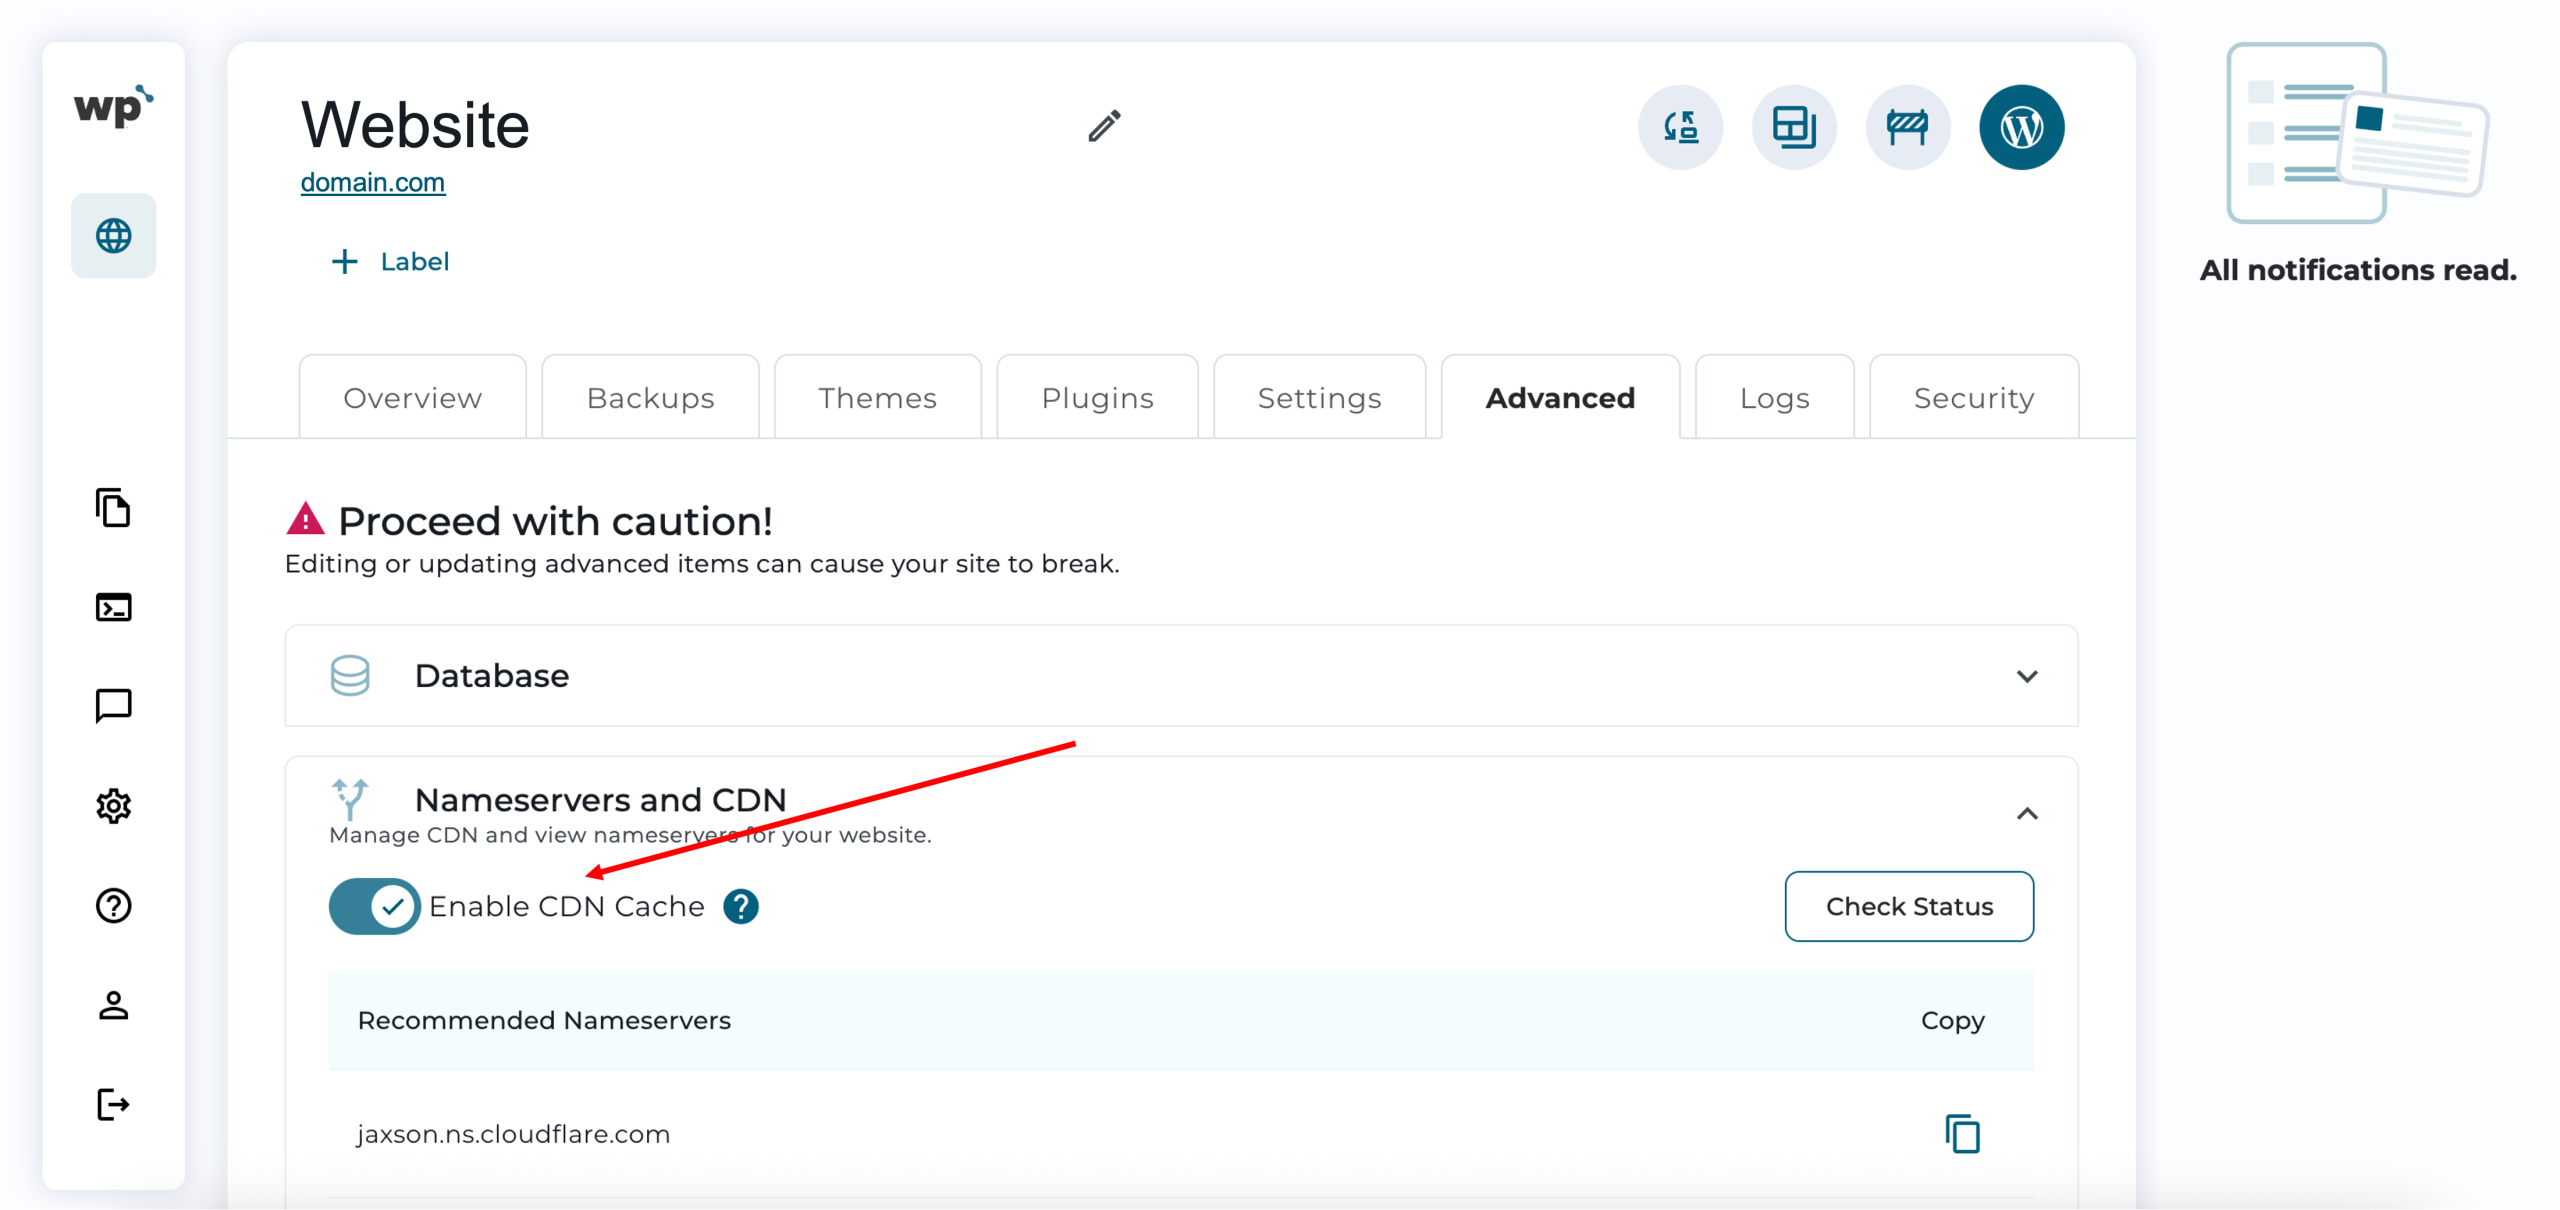
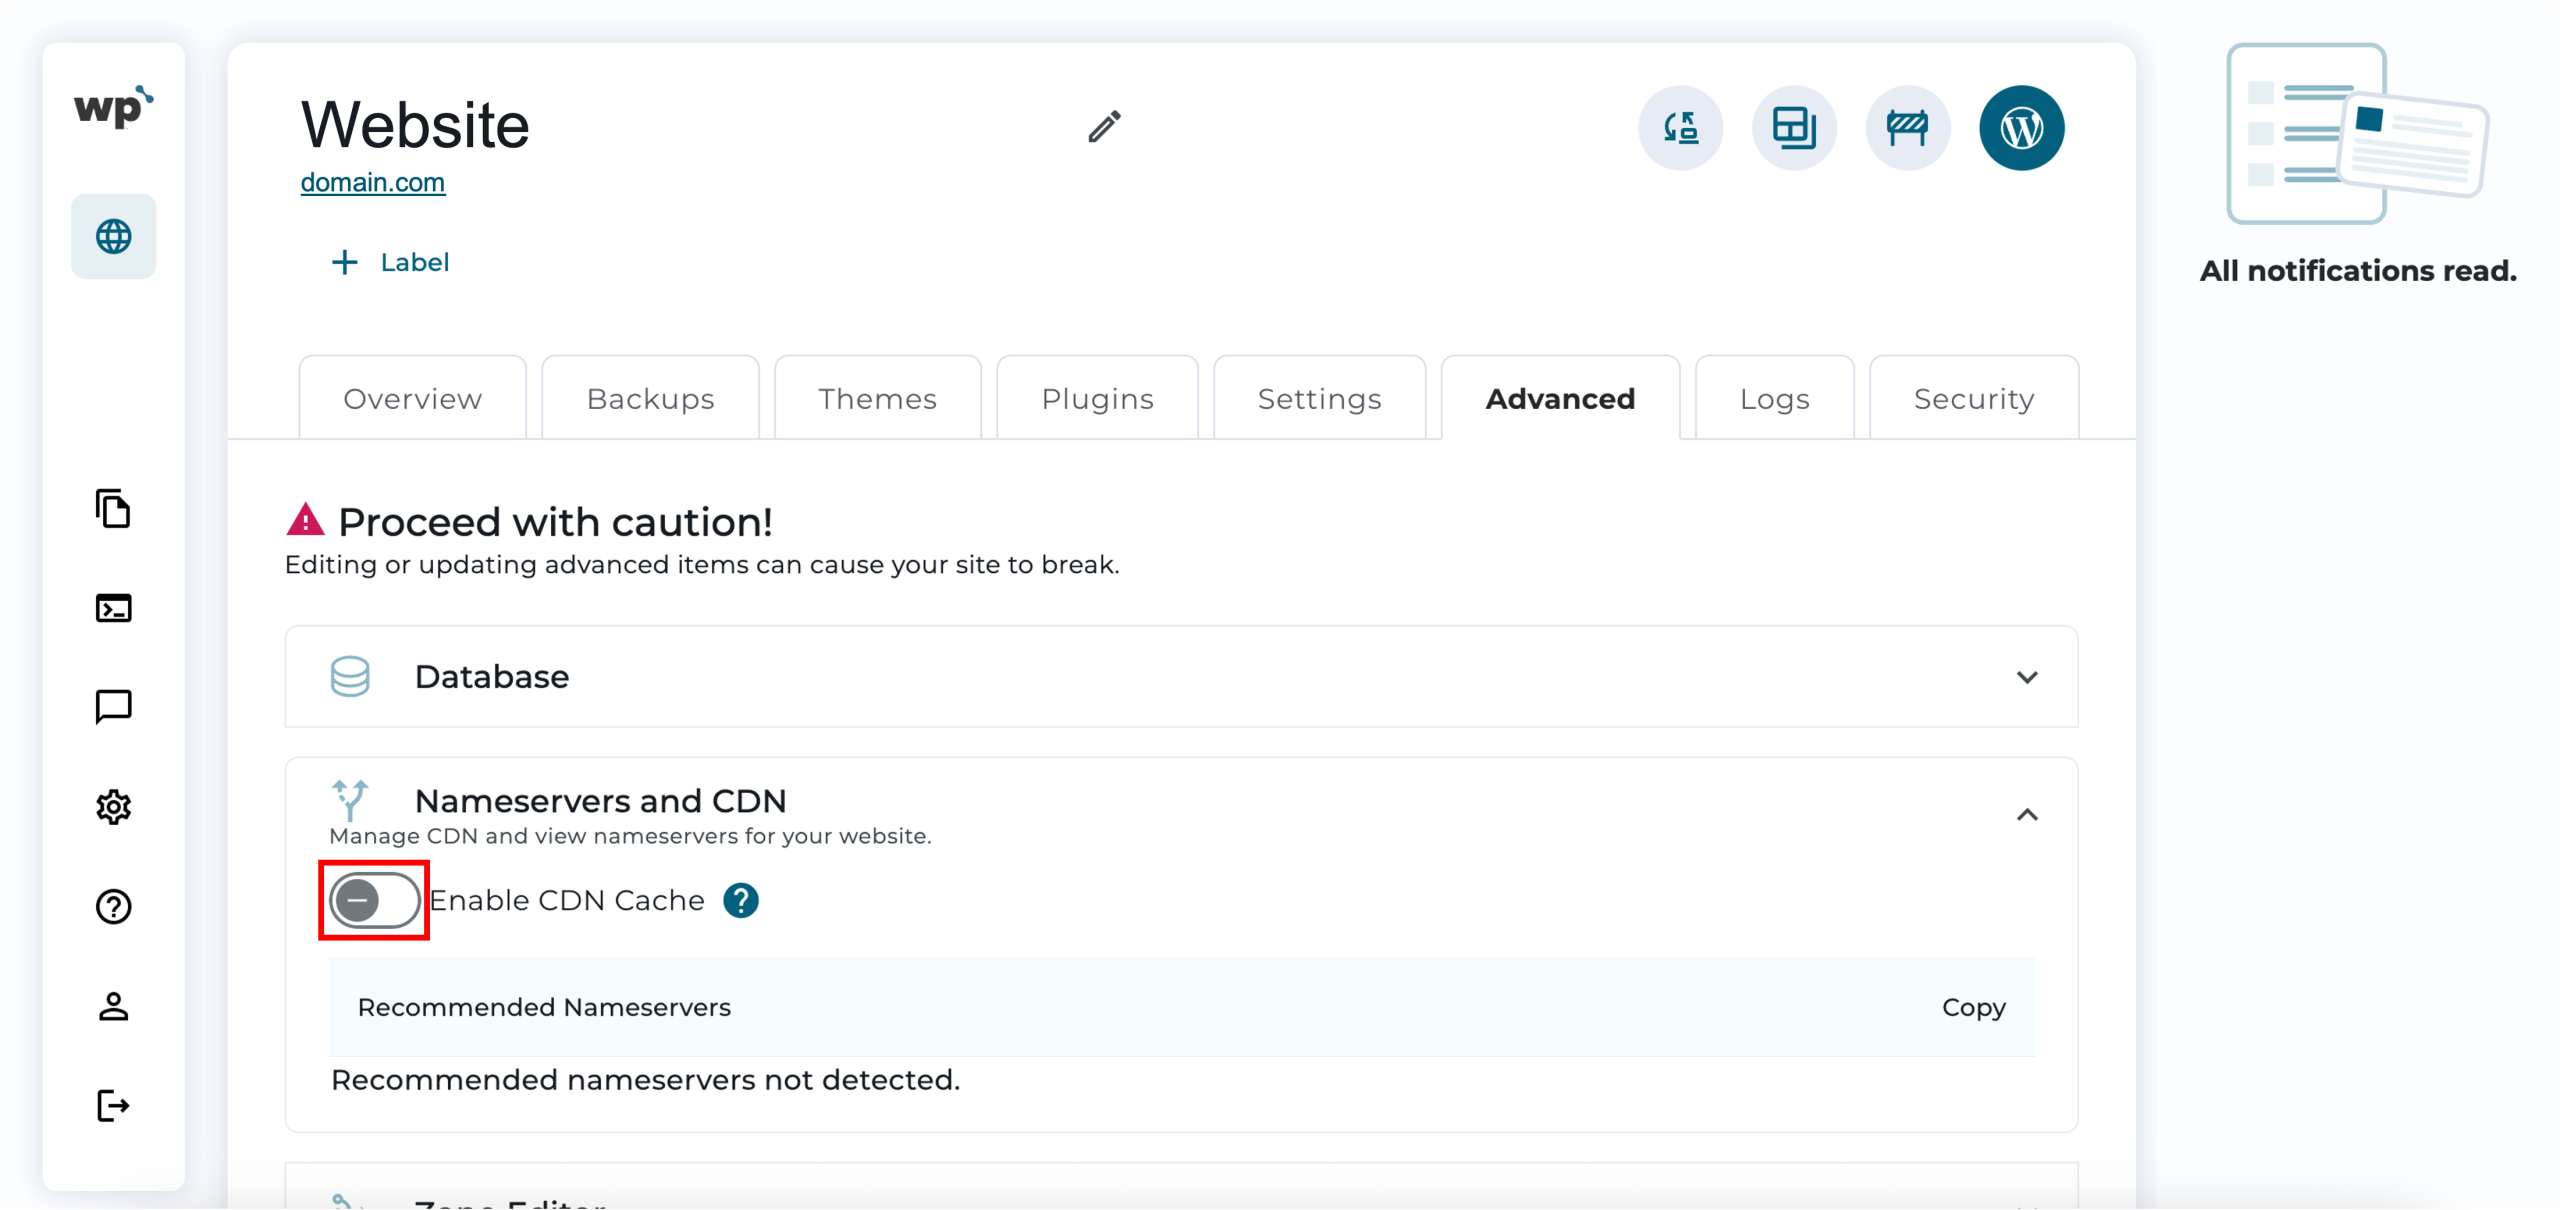
3. Under Nameservers and CDN, you should be able to locate the CDN Cache toggle. Click on the toggle to enable CDN cache.
4. A Content Delivery Network (CDN) prompt will appear. The CDN provider will be automatically selected for you*. Enter the global API key information, such as the email address used for your Cloudflare account, the API key, and the description. Once done, click Submit.
*WP Squared uses Cloudflare as its built-in CDN provider, which is why Cloudflare is automatically selected, and no other CDN options are shown.
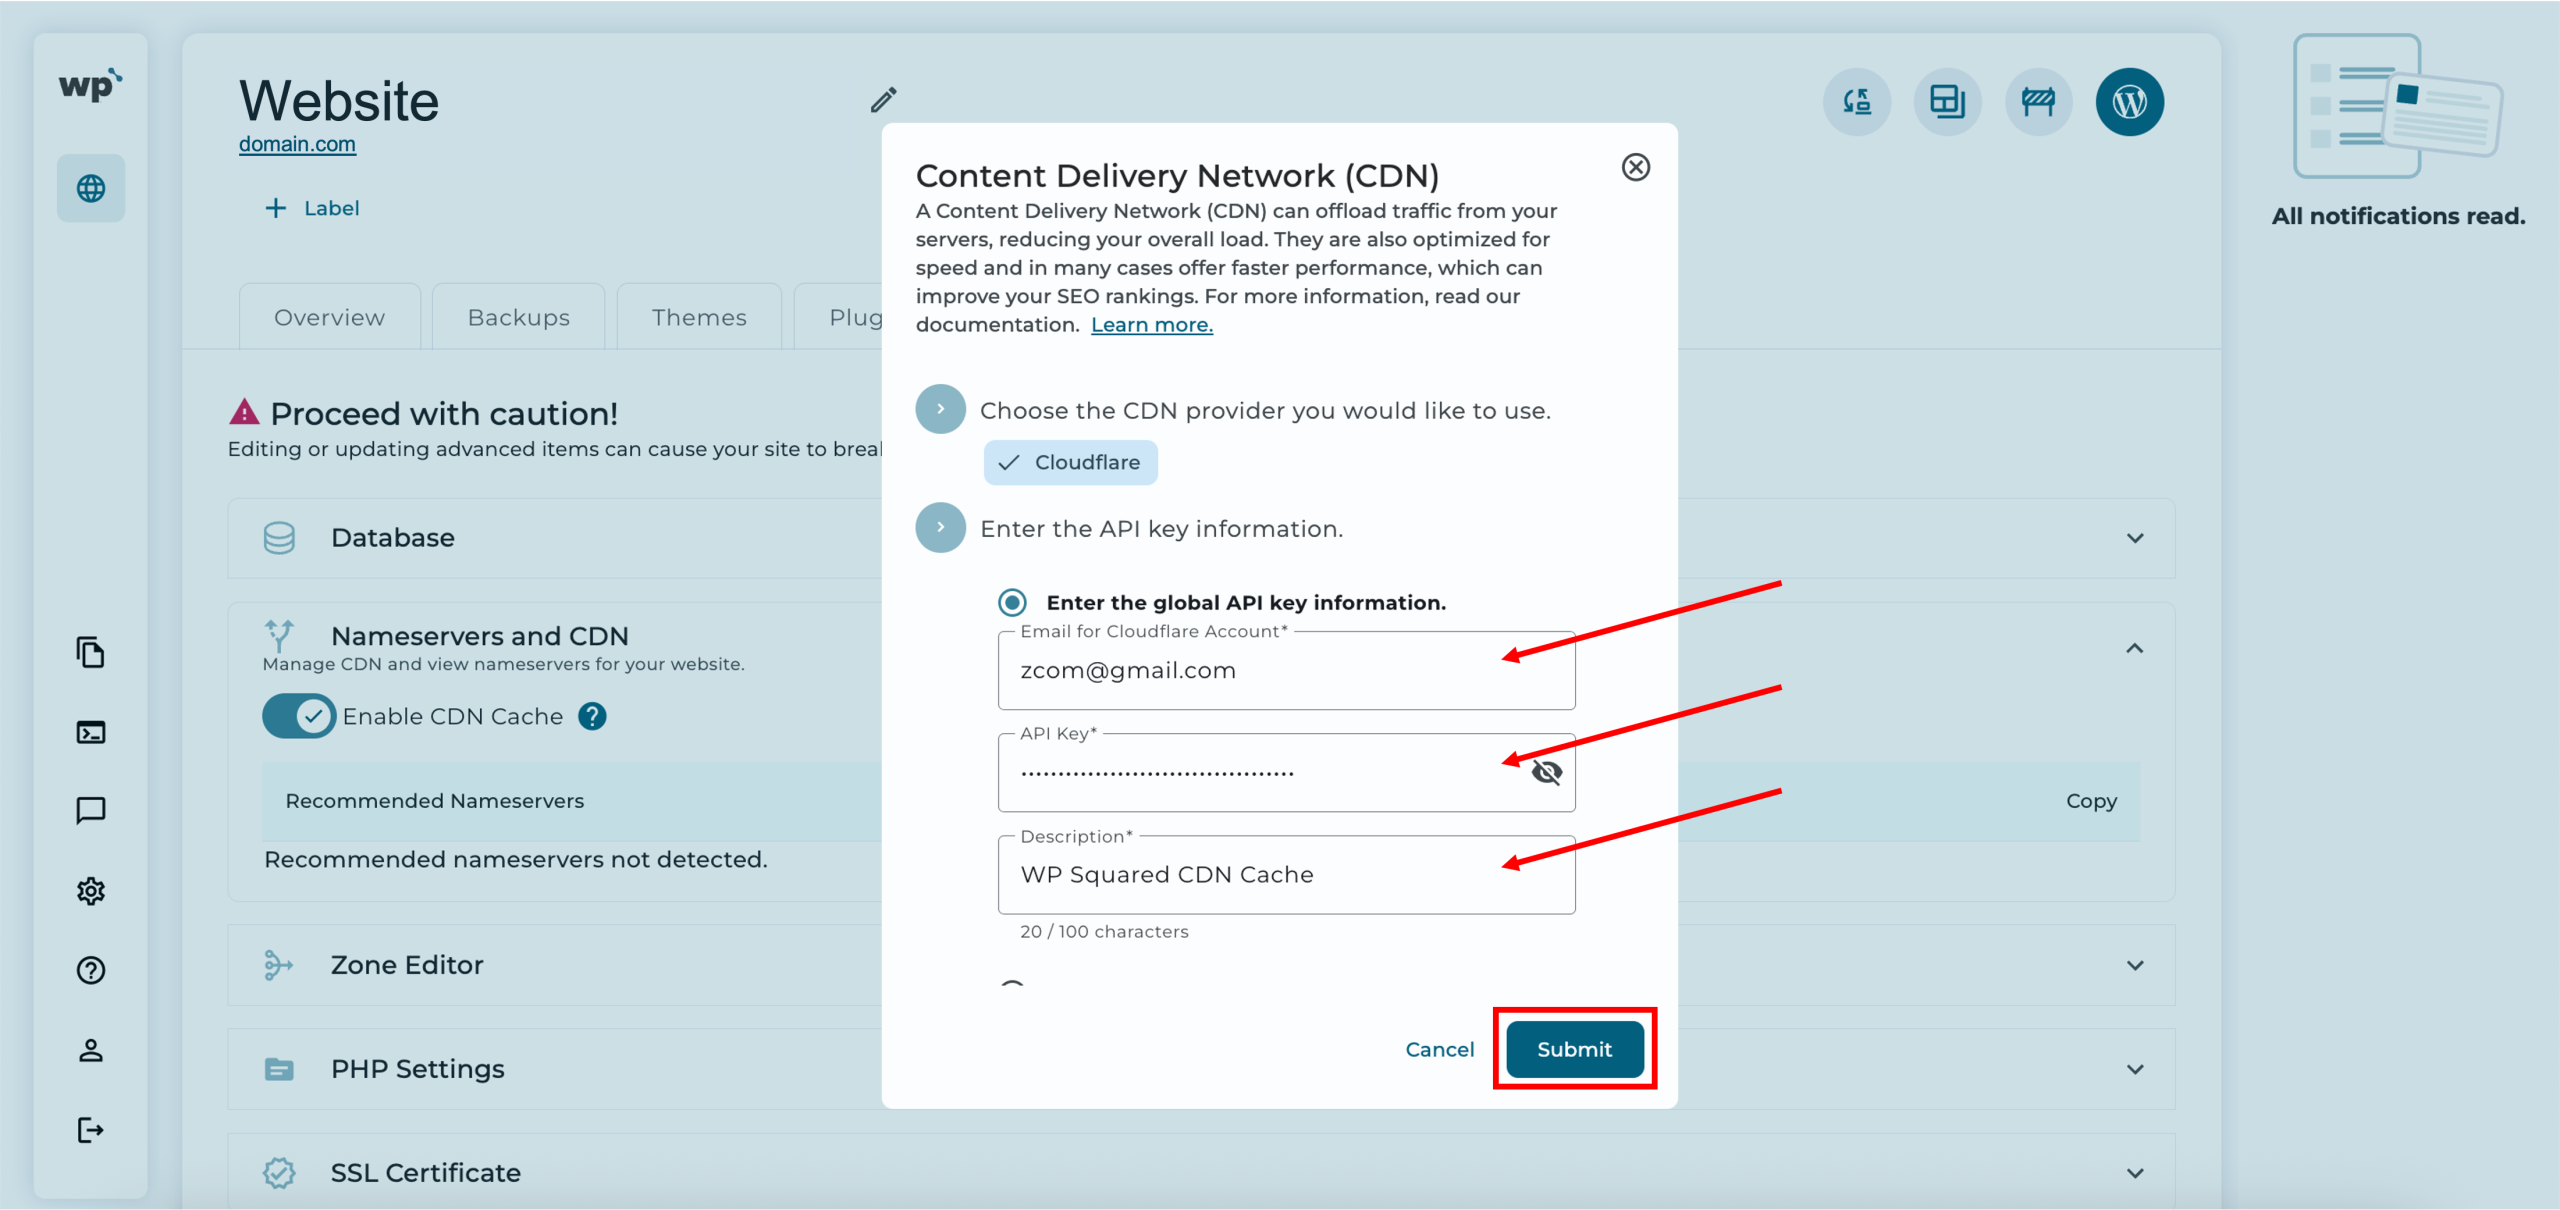
Note: The description field is for reference only and does not affect CDN caching. You may enter any label (e.g., WP Squared CDN Cache) to help identify the API key.
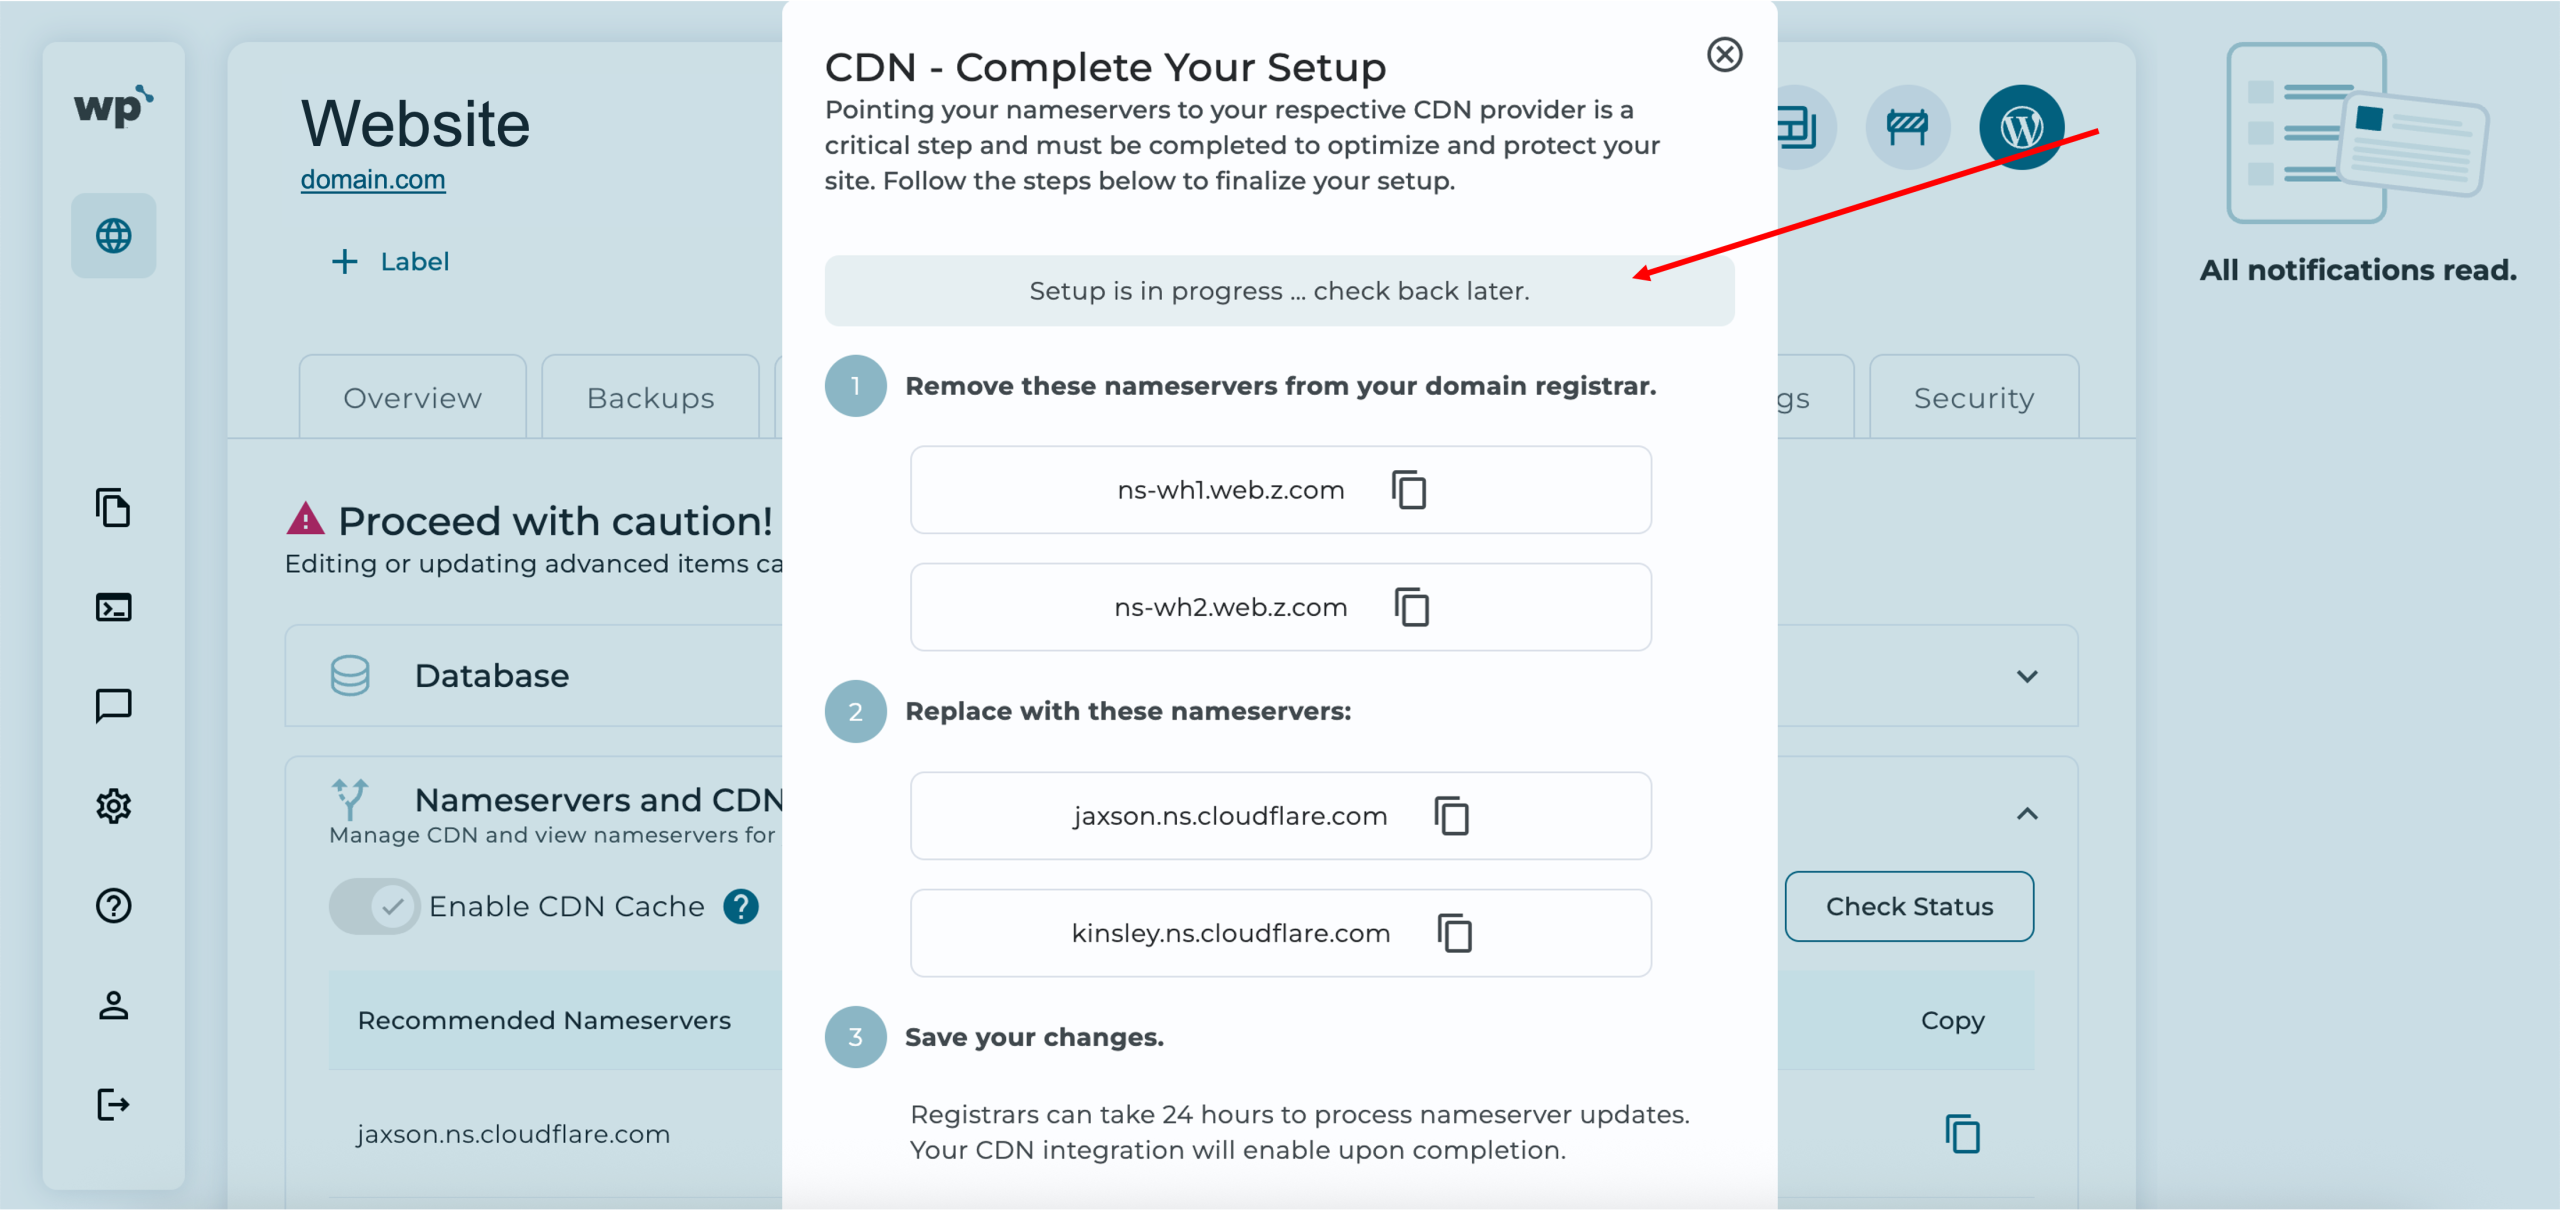
5. Remove and replace the current nameservers, as instructed. You may click here for a guide on editing your domain’s DNS. Once done, click Finish.
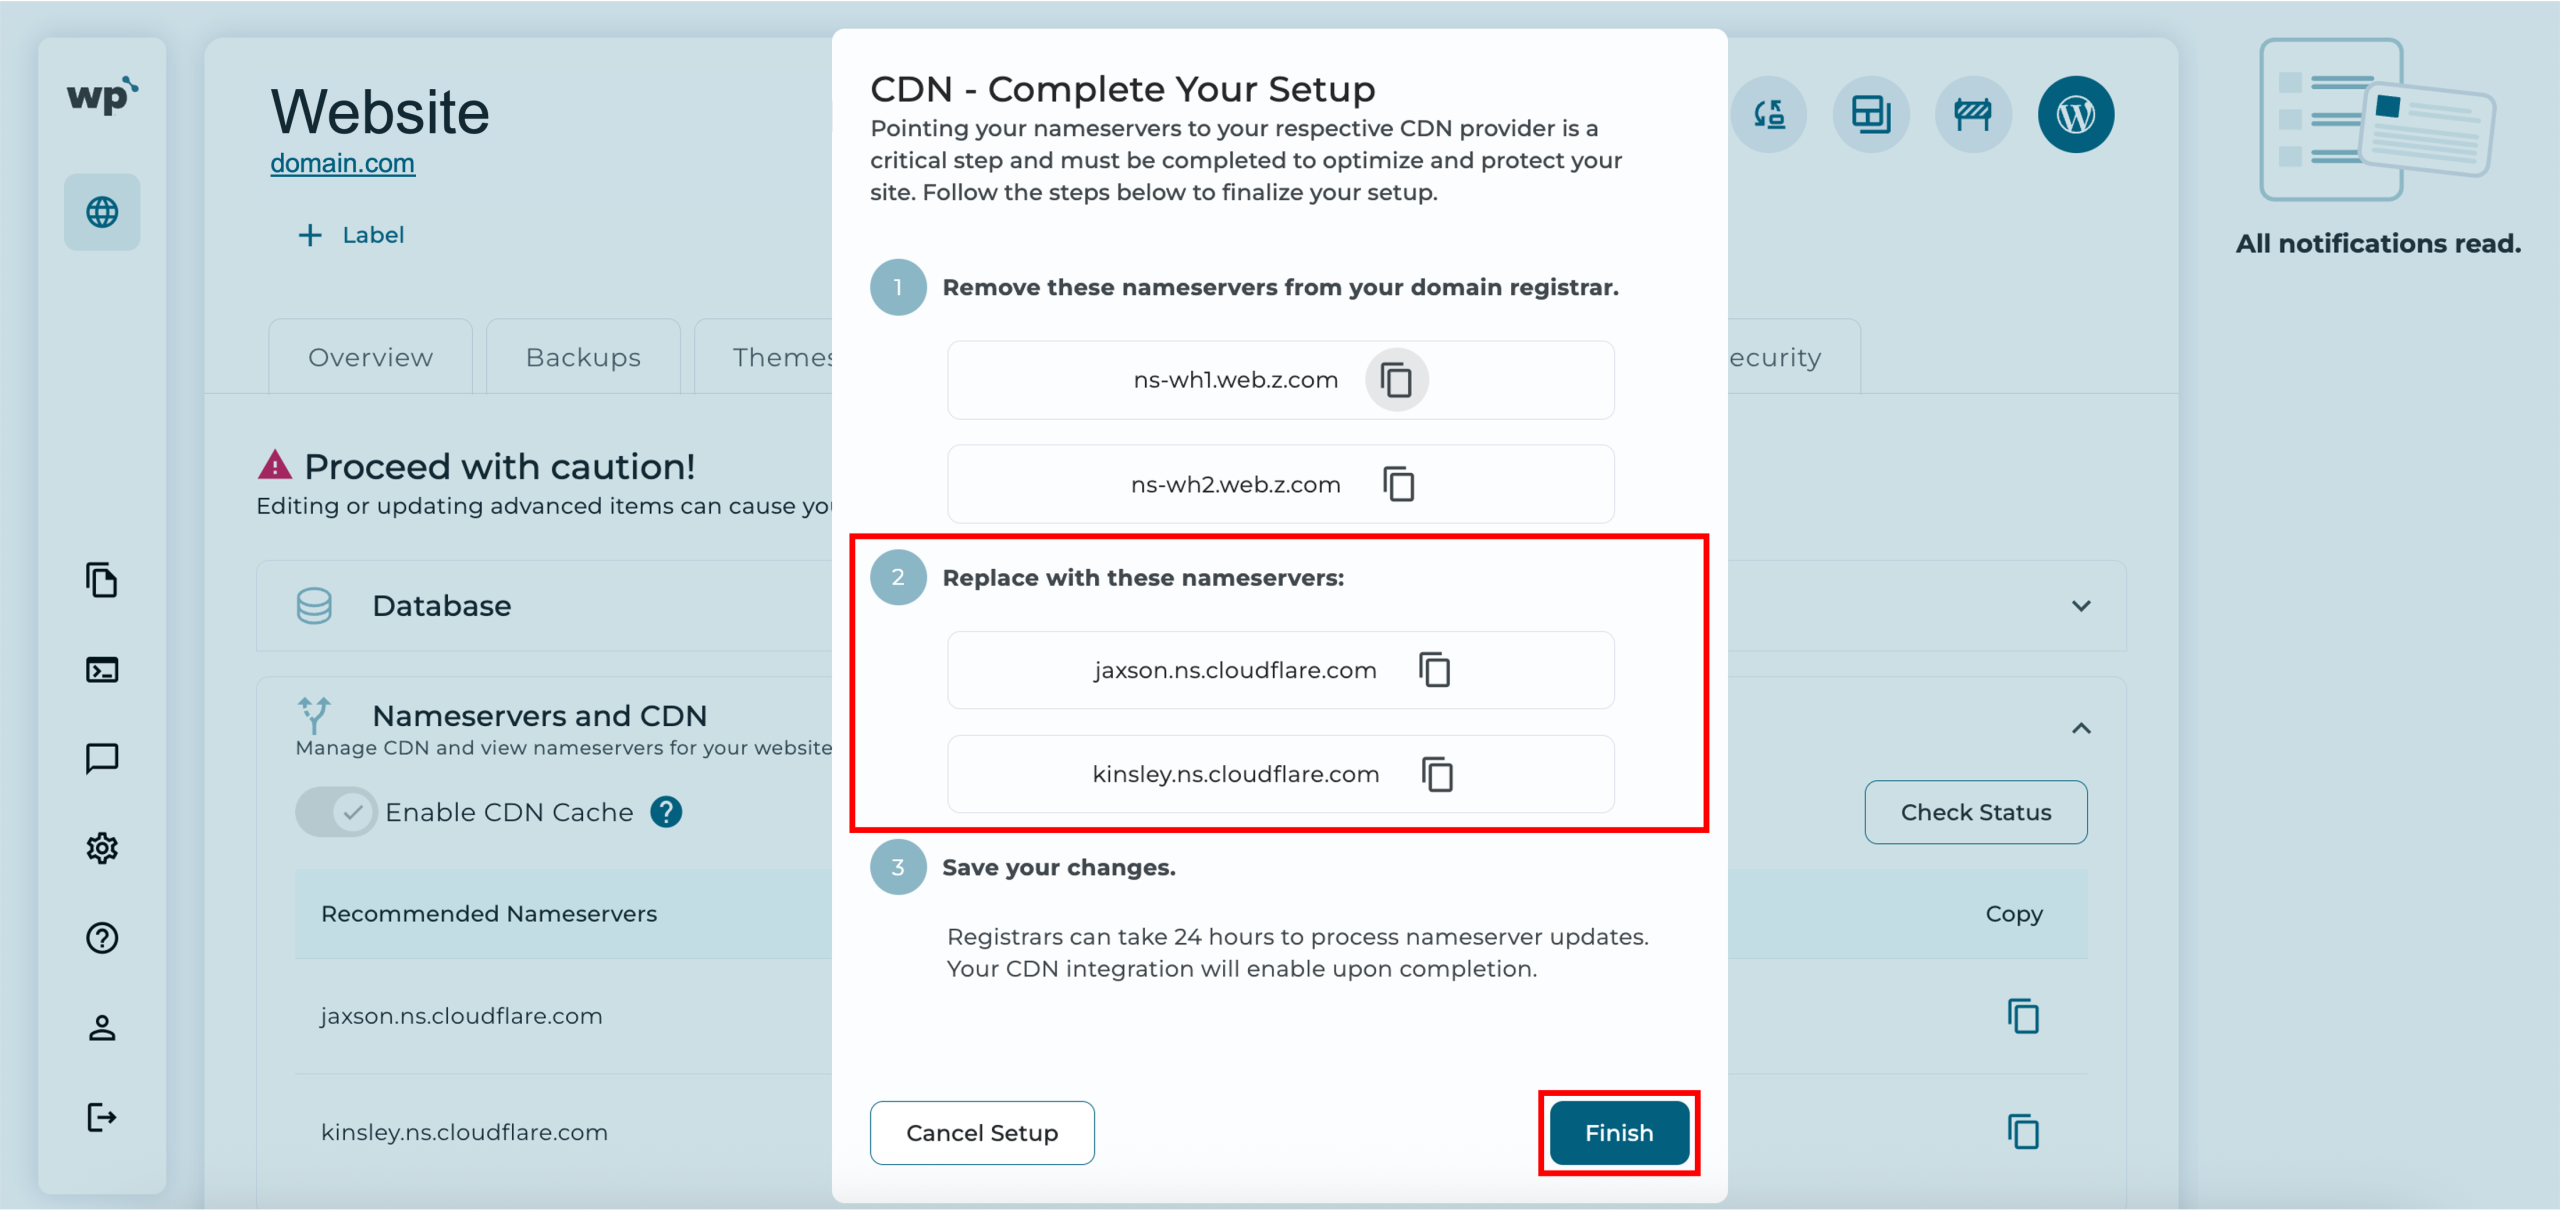
6. Nameserver updates may take up to 24 hours to take effect. Once completed, your CDN integration will be automatically enabled. Successfully enabled CDN cache should look like the following.