Example :
How to set up an email or change my account settings.
- Help Center
- WordPress Hosting
- WordPress Management
- How to install plugins on your WordPress hosting service
How to install plugins on your WordPress hosting service
Plugins let you extend your WordPress website’s functionality without writing code. From security and performance enhancements to contact forms and SEO tools, plugins help customise how your website works.
With WordPress hosting, you can easily install and manage plugins either through the 1) WP Squared dashboard or directly from the 2) WordPress admin dashboard, depending on your preference and workflow.
Note:
• You can install both free and paid WordPress plugins.
• Installing plugins using the WP Squared dashboard is convenient for quick management, while the WordPress admin dashboard provides access to plugin details, ratings, and settings.
• Only one plugin that does a specific job should be active at a time to prevent conflicts.
• Only install plugins that are compatible with your WordPress and PHP versions to avoid potential issues.
Table of contents
1. WP Squared dashboard plugins installation
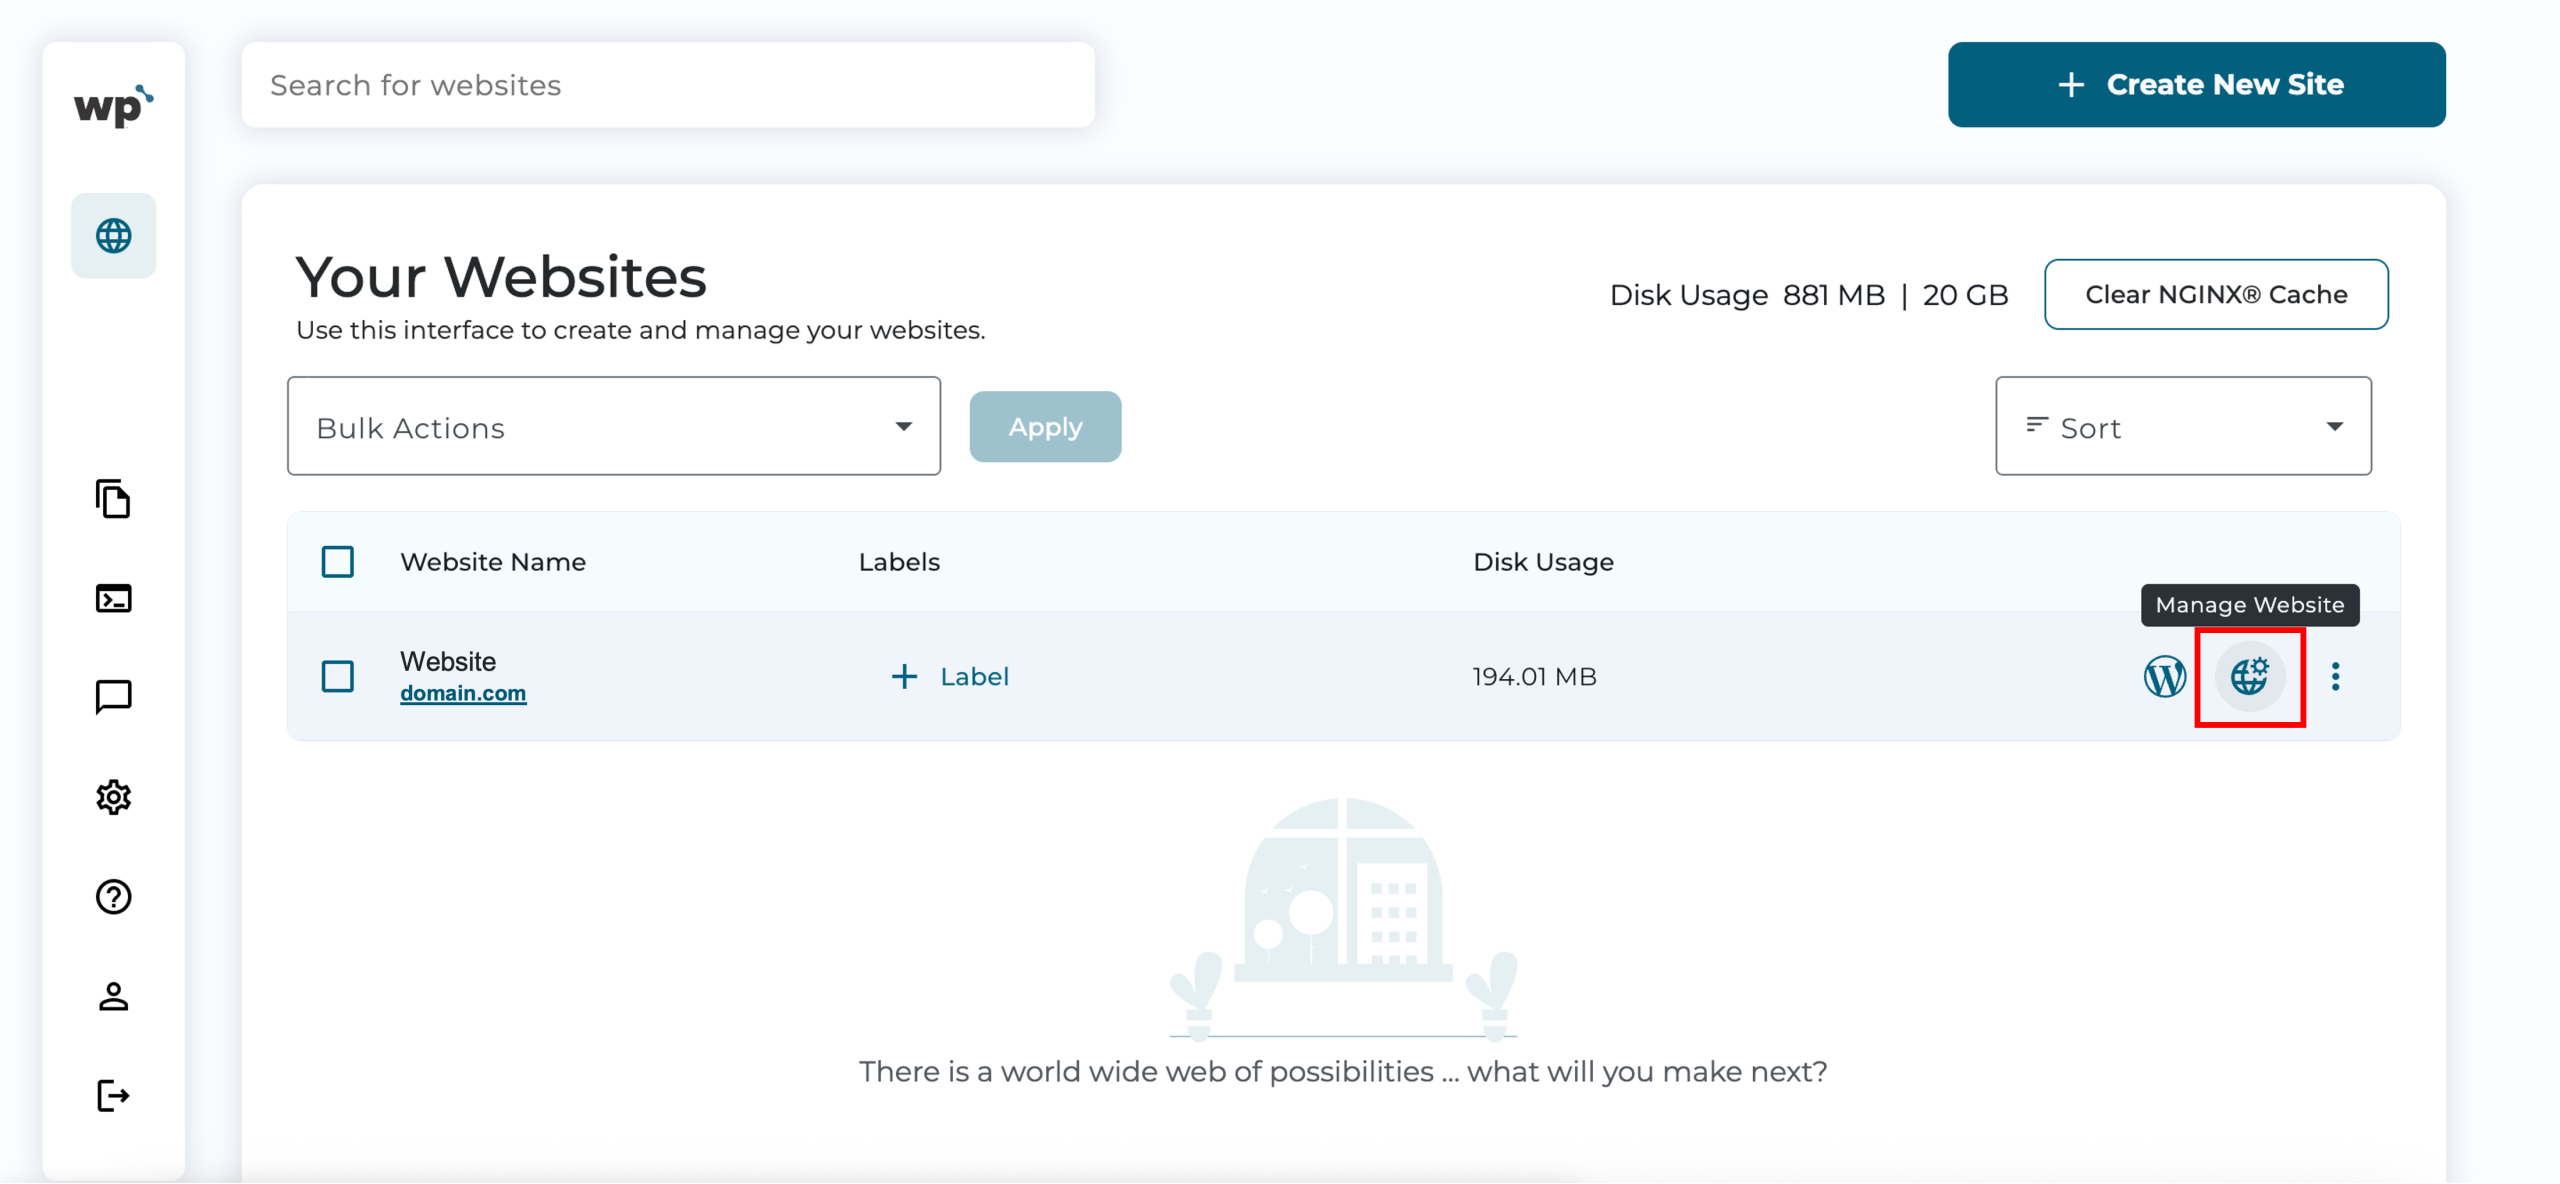
1. Upon reaching your WP Squared dashboard, click Manage Website next to the website you wish to install plugins for.
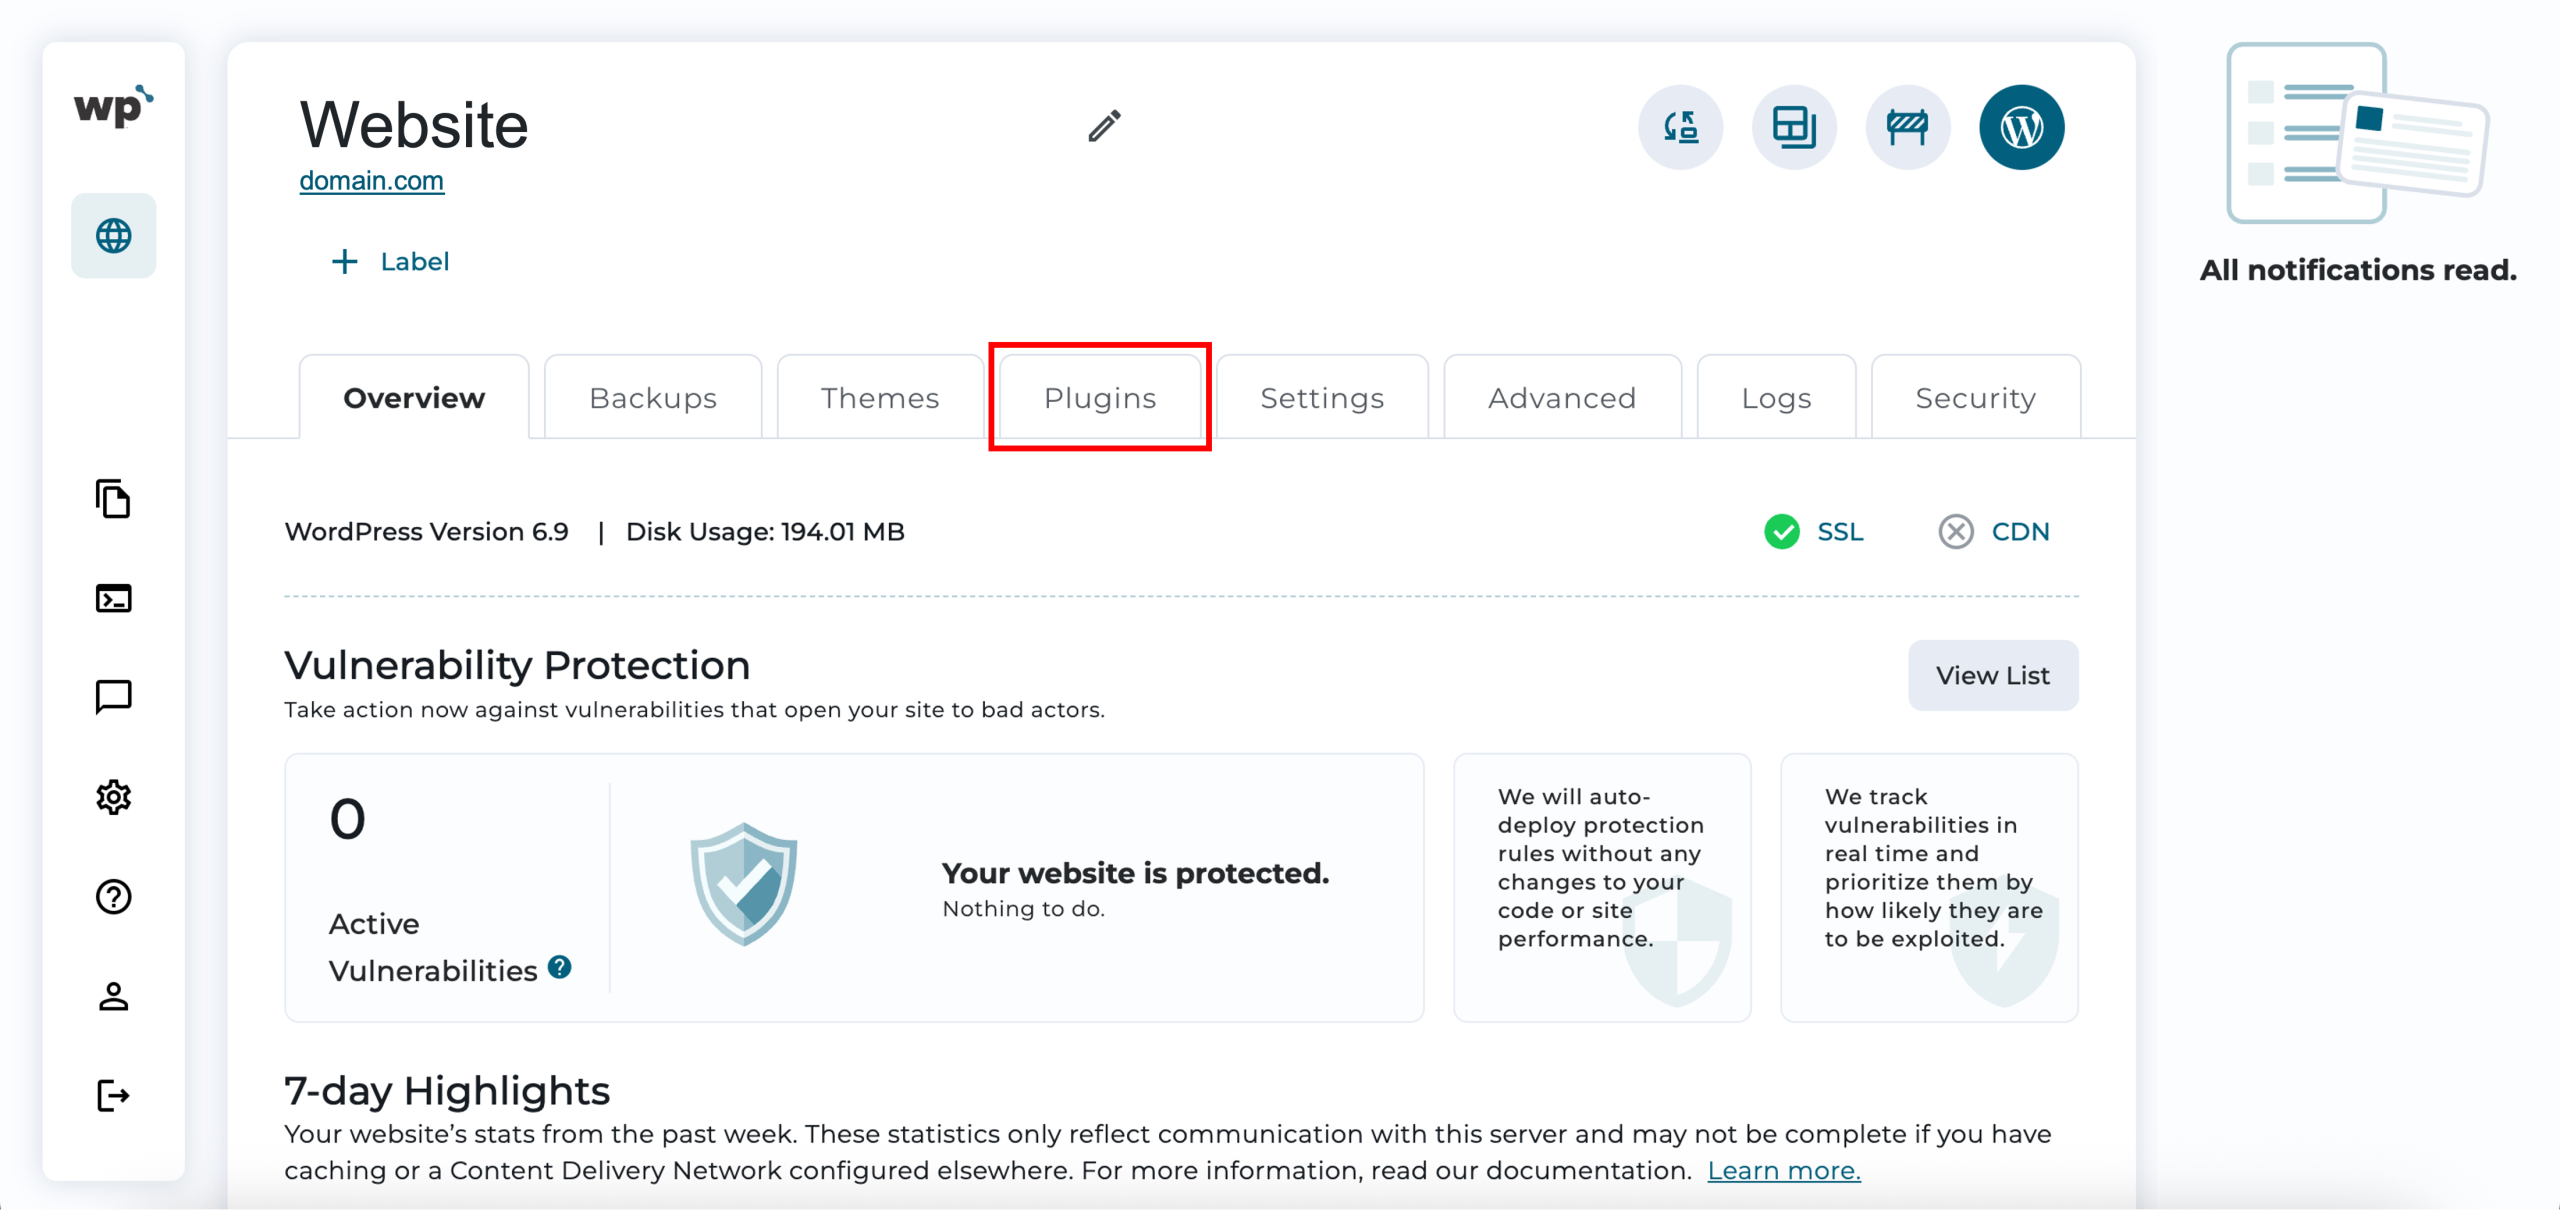
2. Click on the Plugins tab.
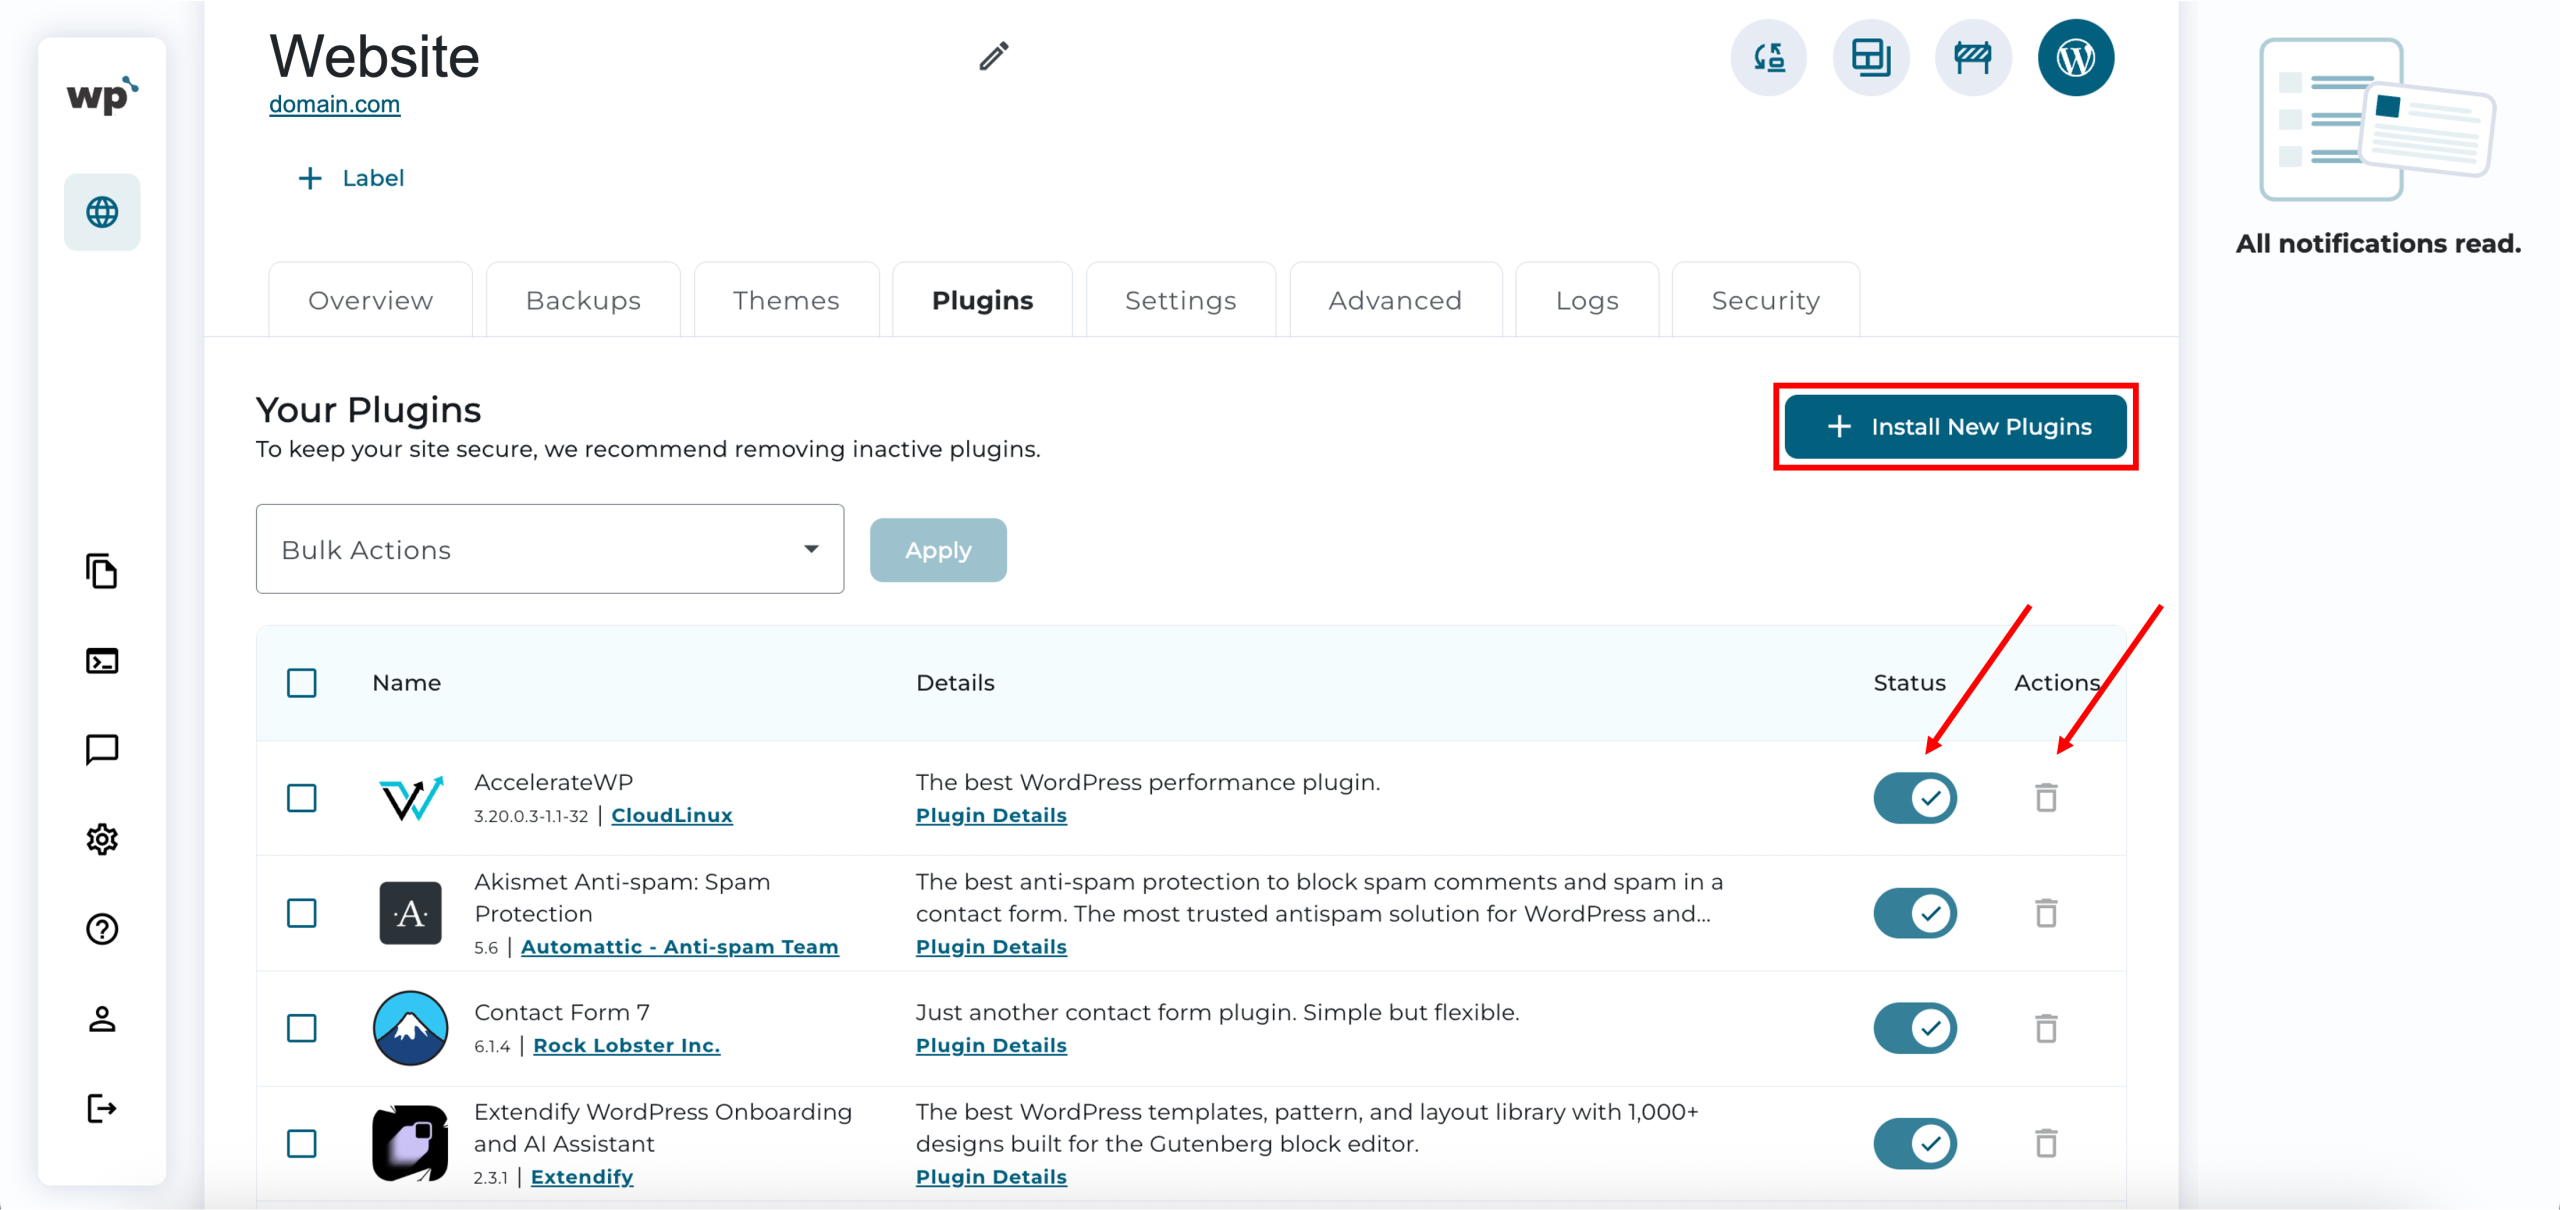
3. Click + Install New Plugins.
*Under Your Plugins, you should see a list of existing installed plugins with their status. You can toggle the status bar to deactivate or activate an existing plugin, or delete it by clicking the trash can icon under Actions.
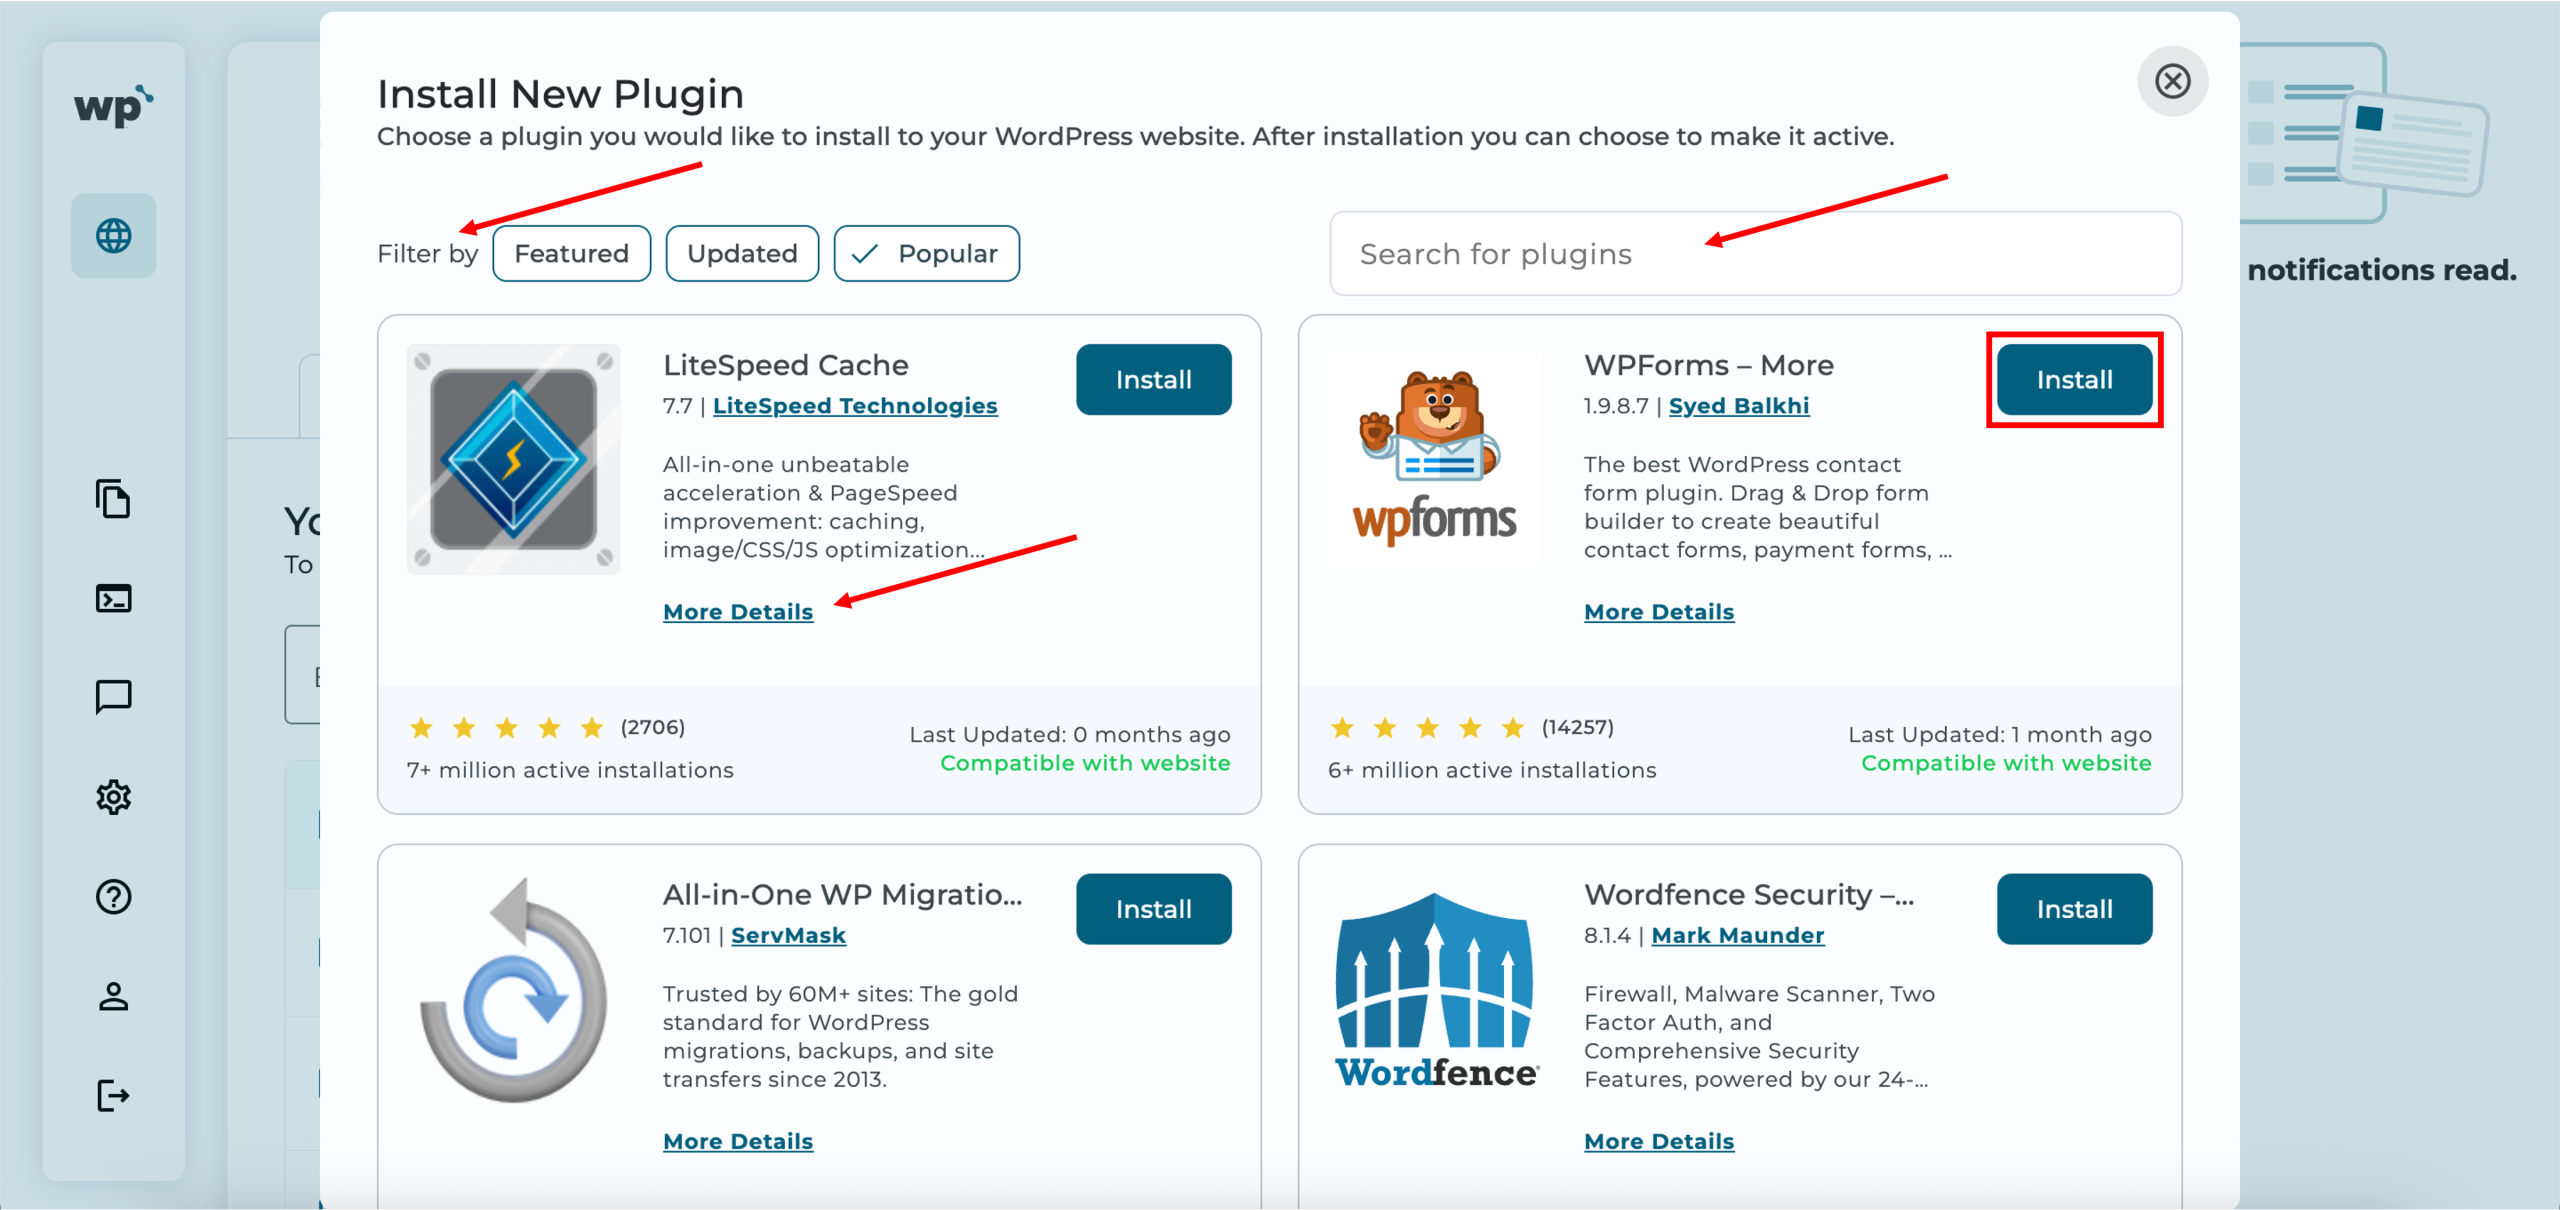
4. Browse the available plugins using the filters or search bar. You can view its details before selecting the one you want to install. Once done, click Install.
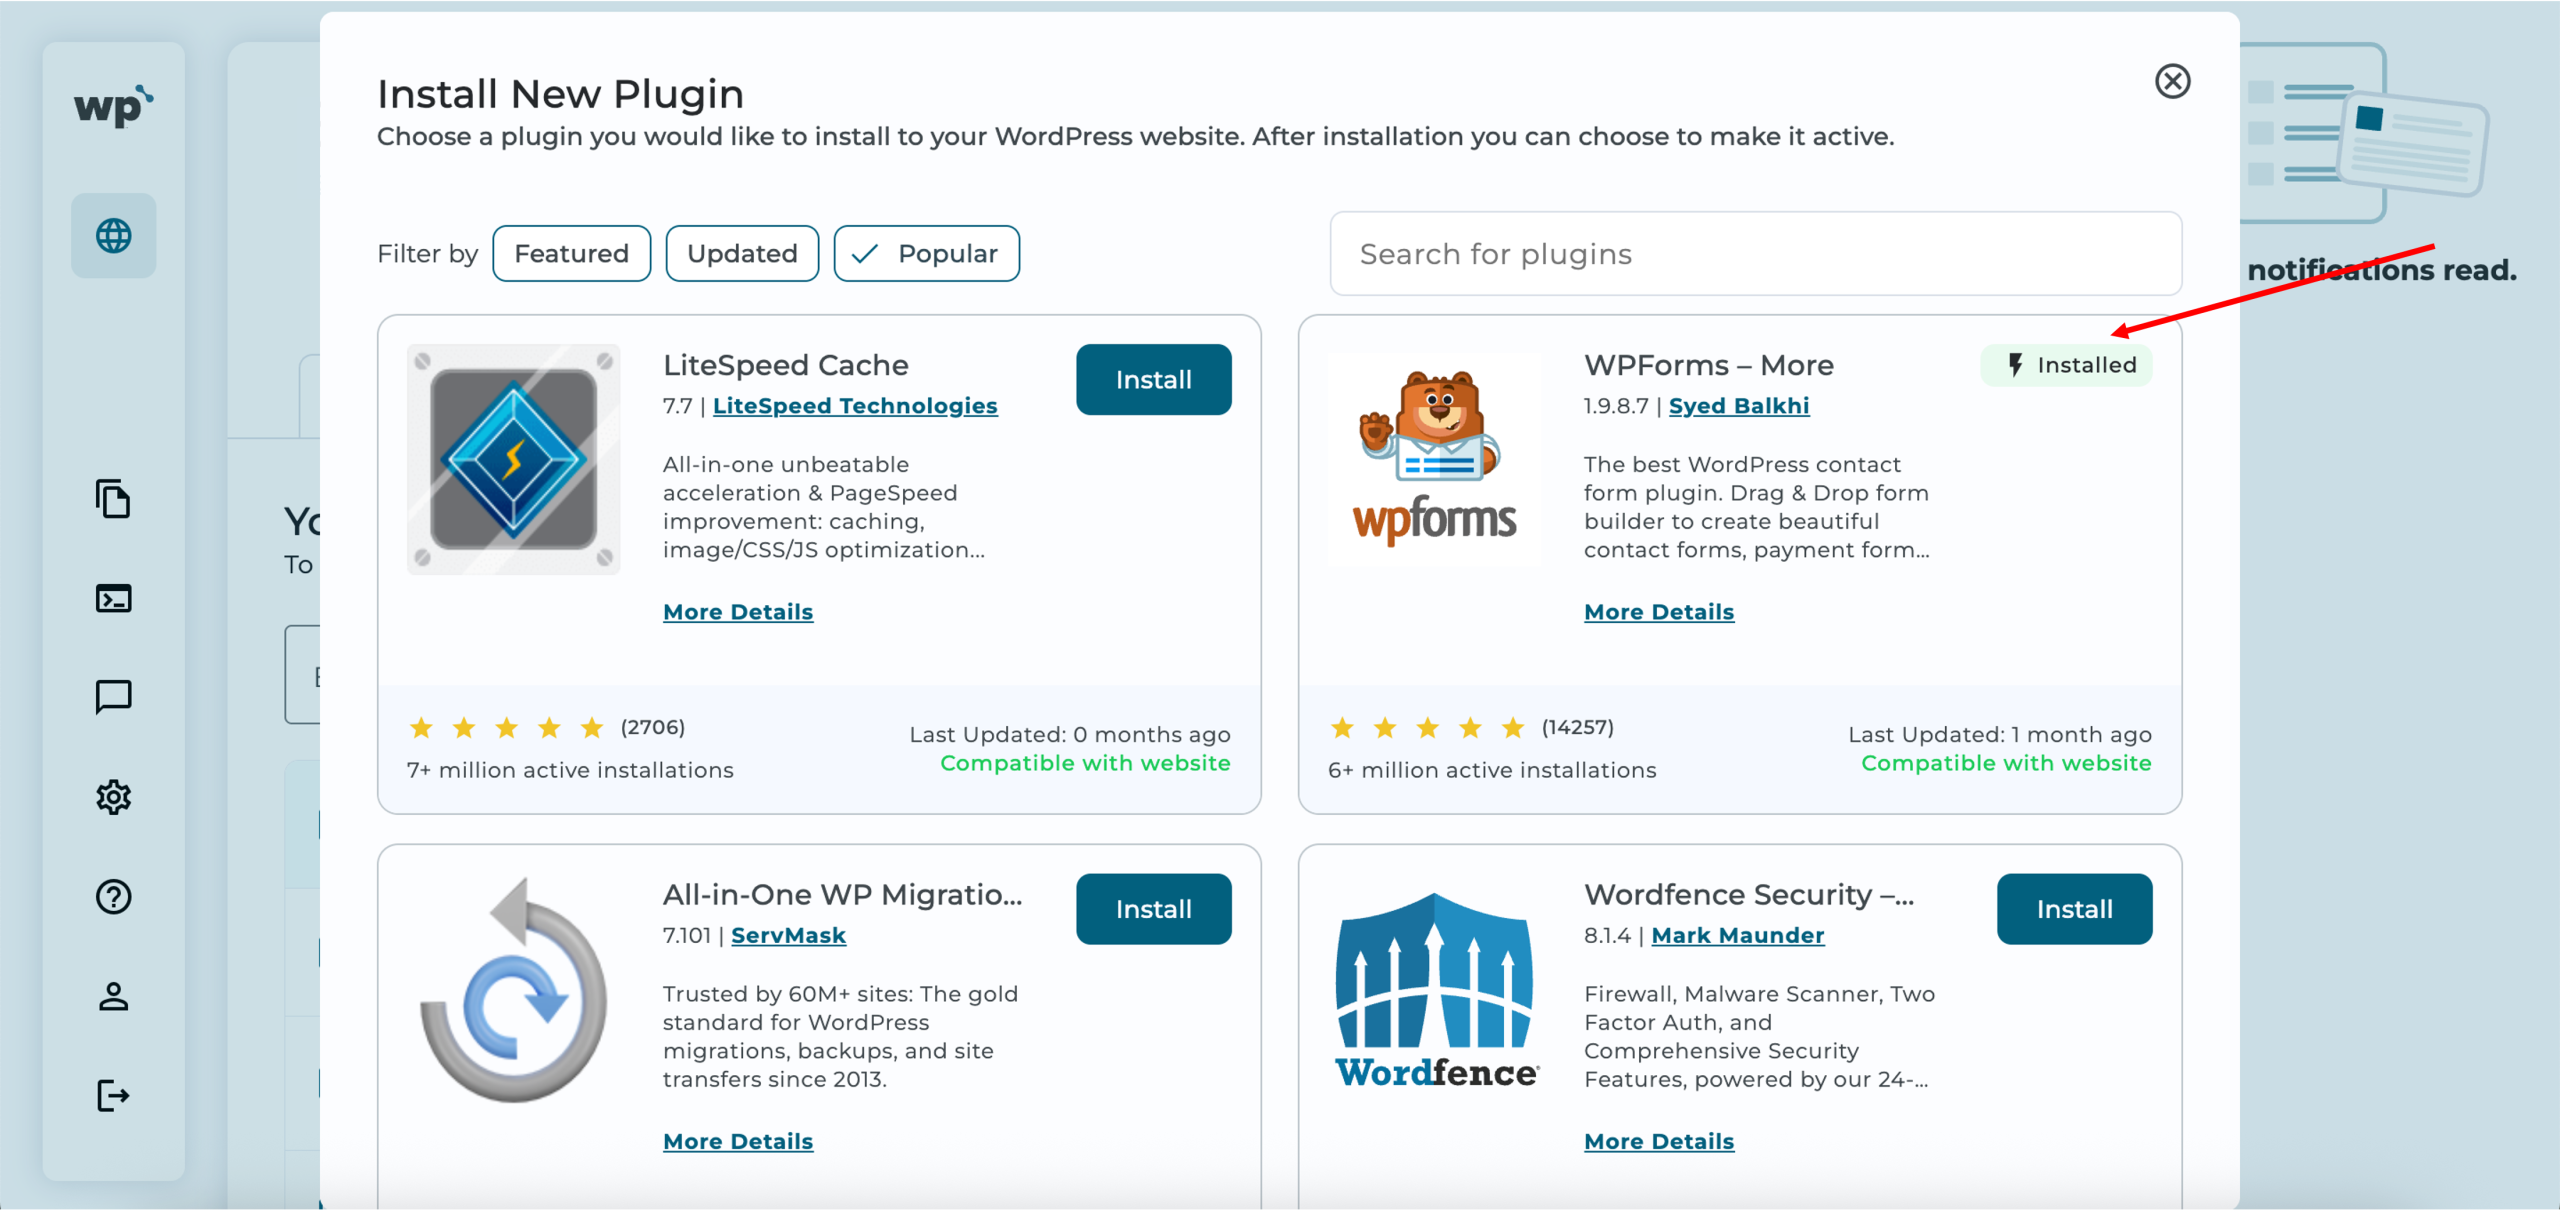
5. Done! Successfully installing the plugin will look like the following, with the installed prompt. It should also be listed under your plugins.
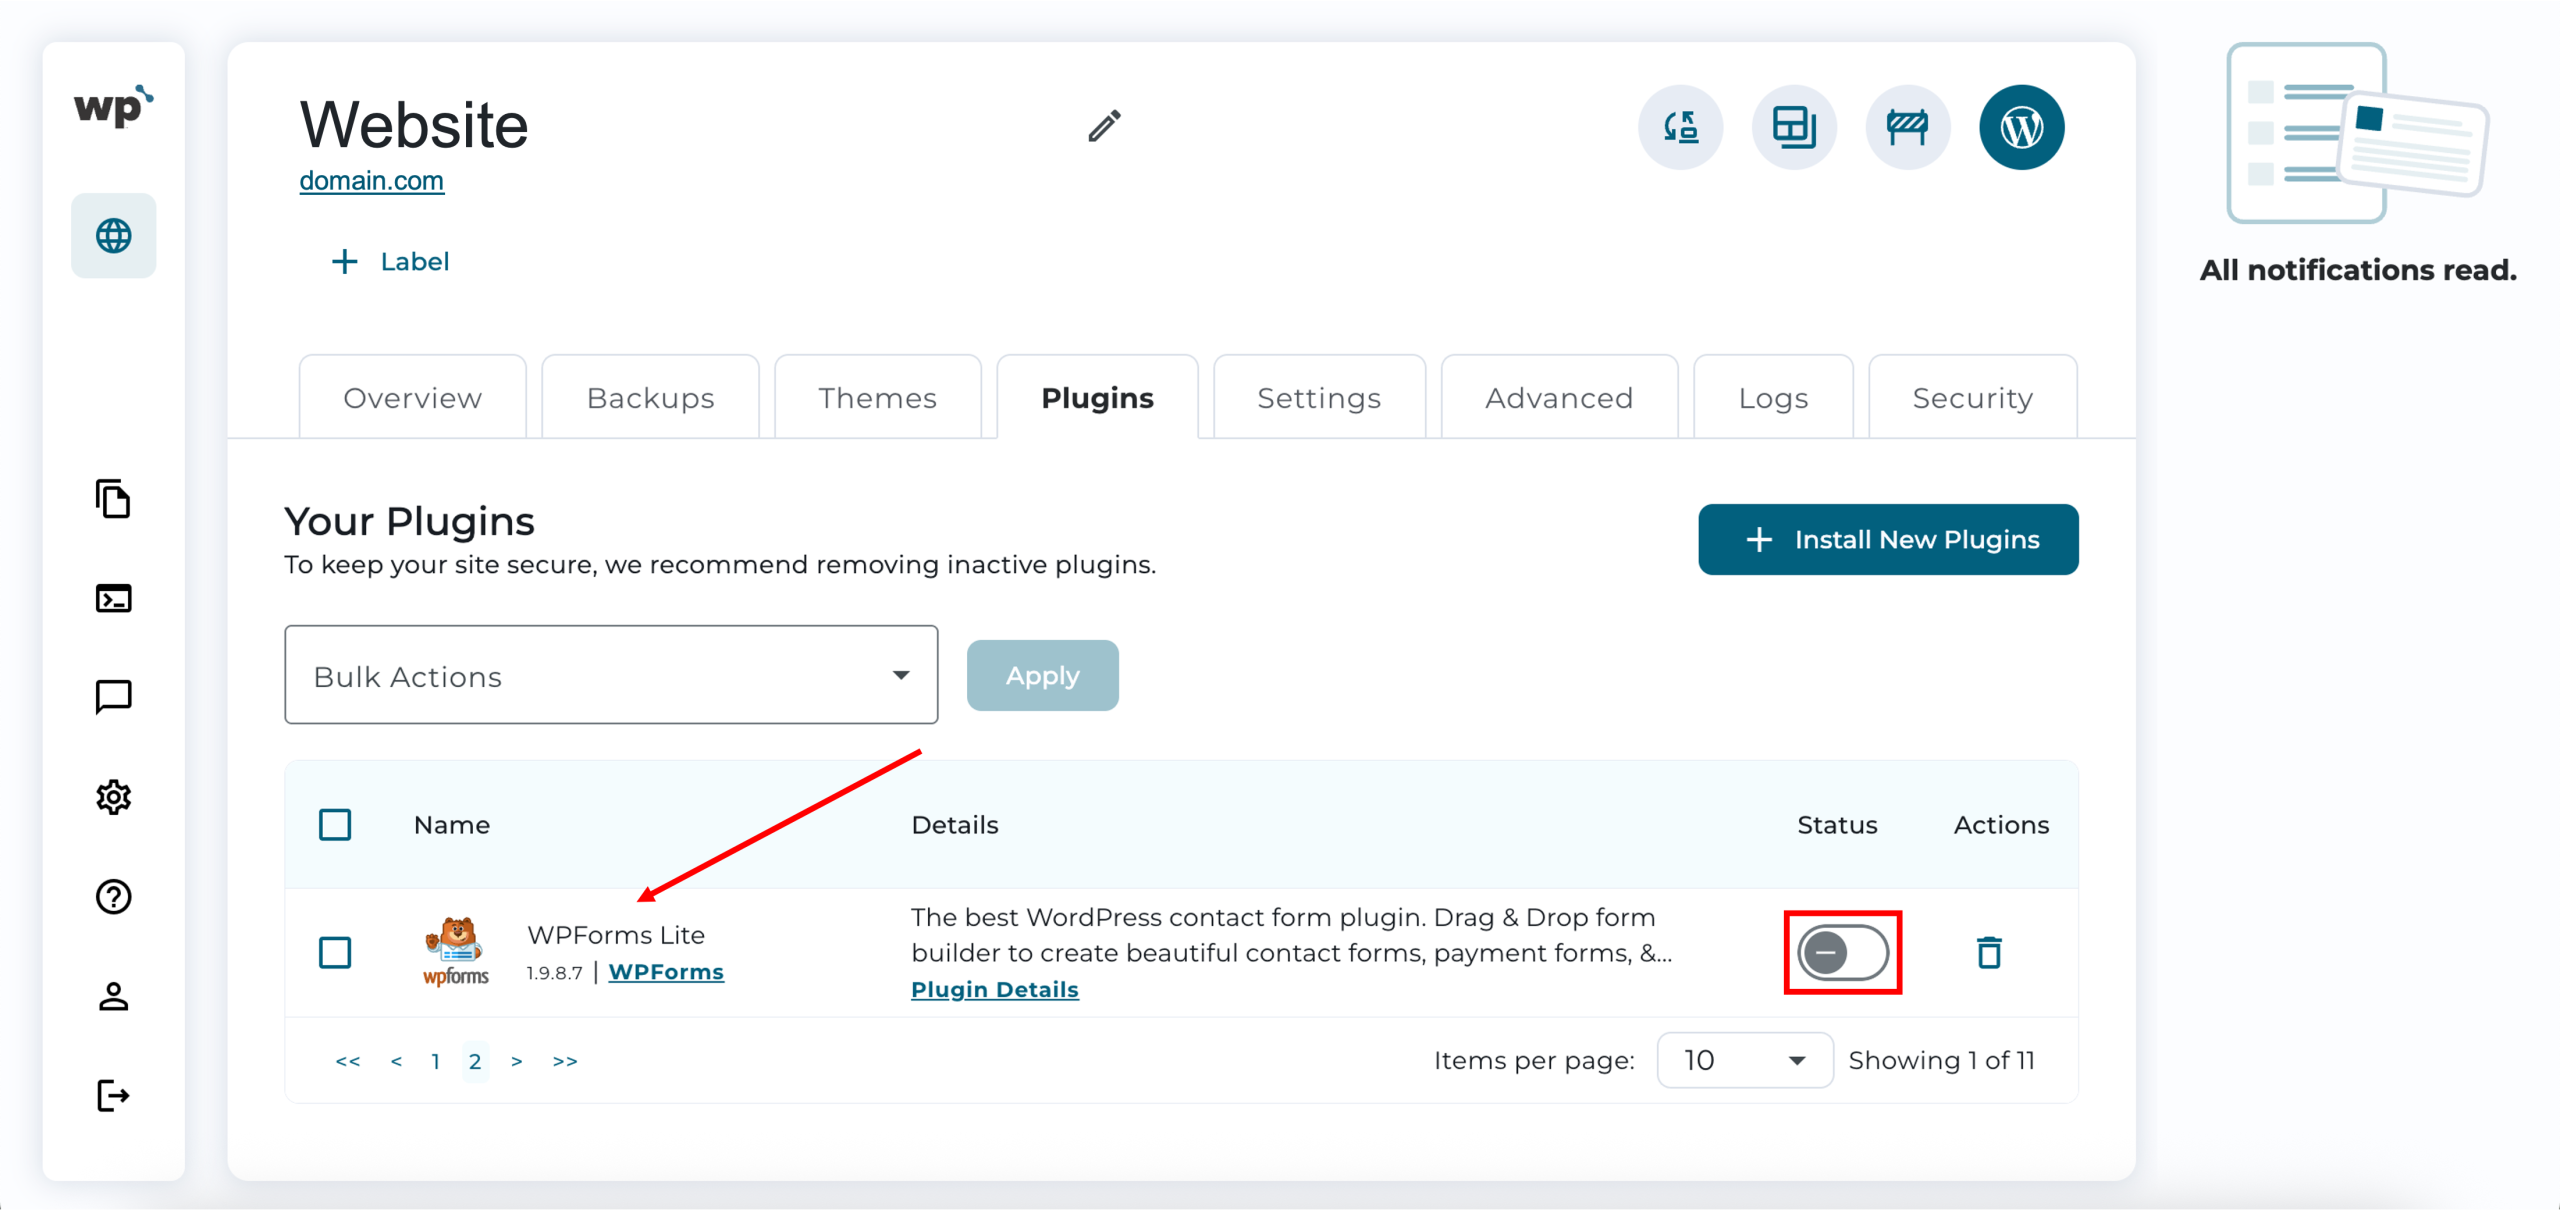
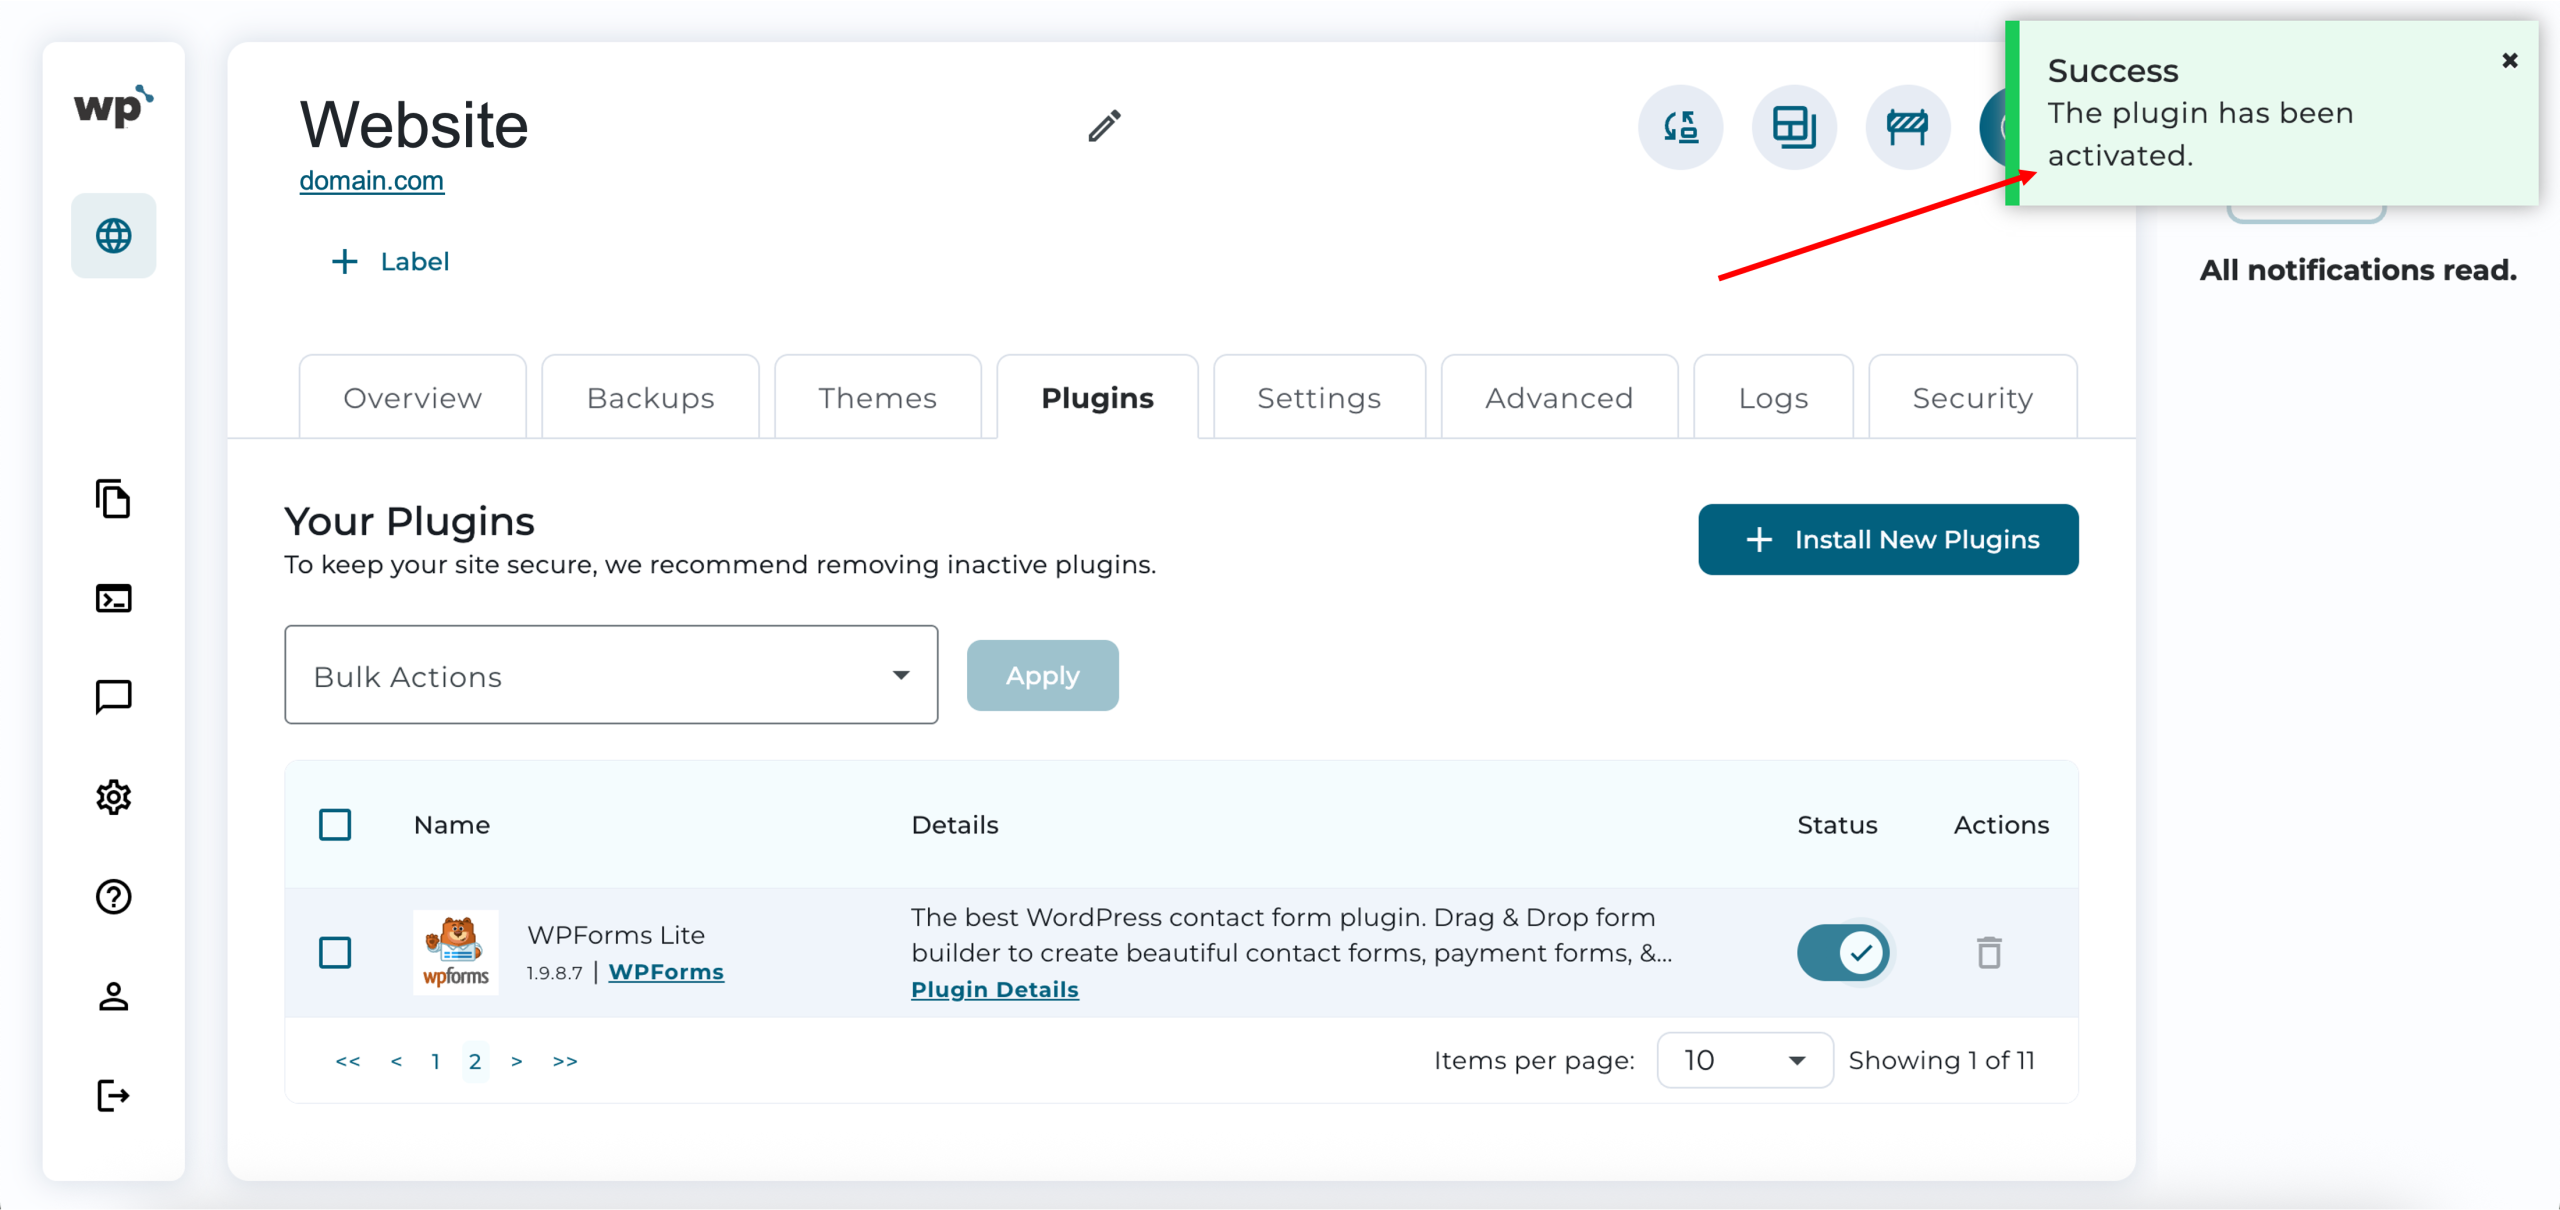
6. To use the installed plugin, toggle the status bar to activate. Successfully activating the plugin will look like the following, with the plugin activation prompt.
2. WordPress admin dashboard plugins Installation
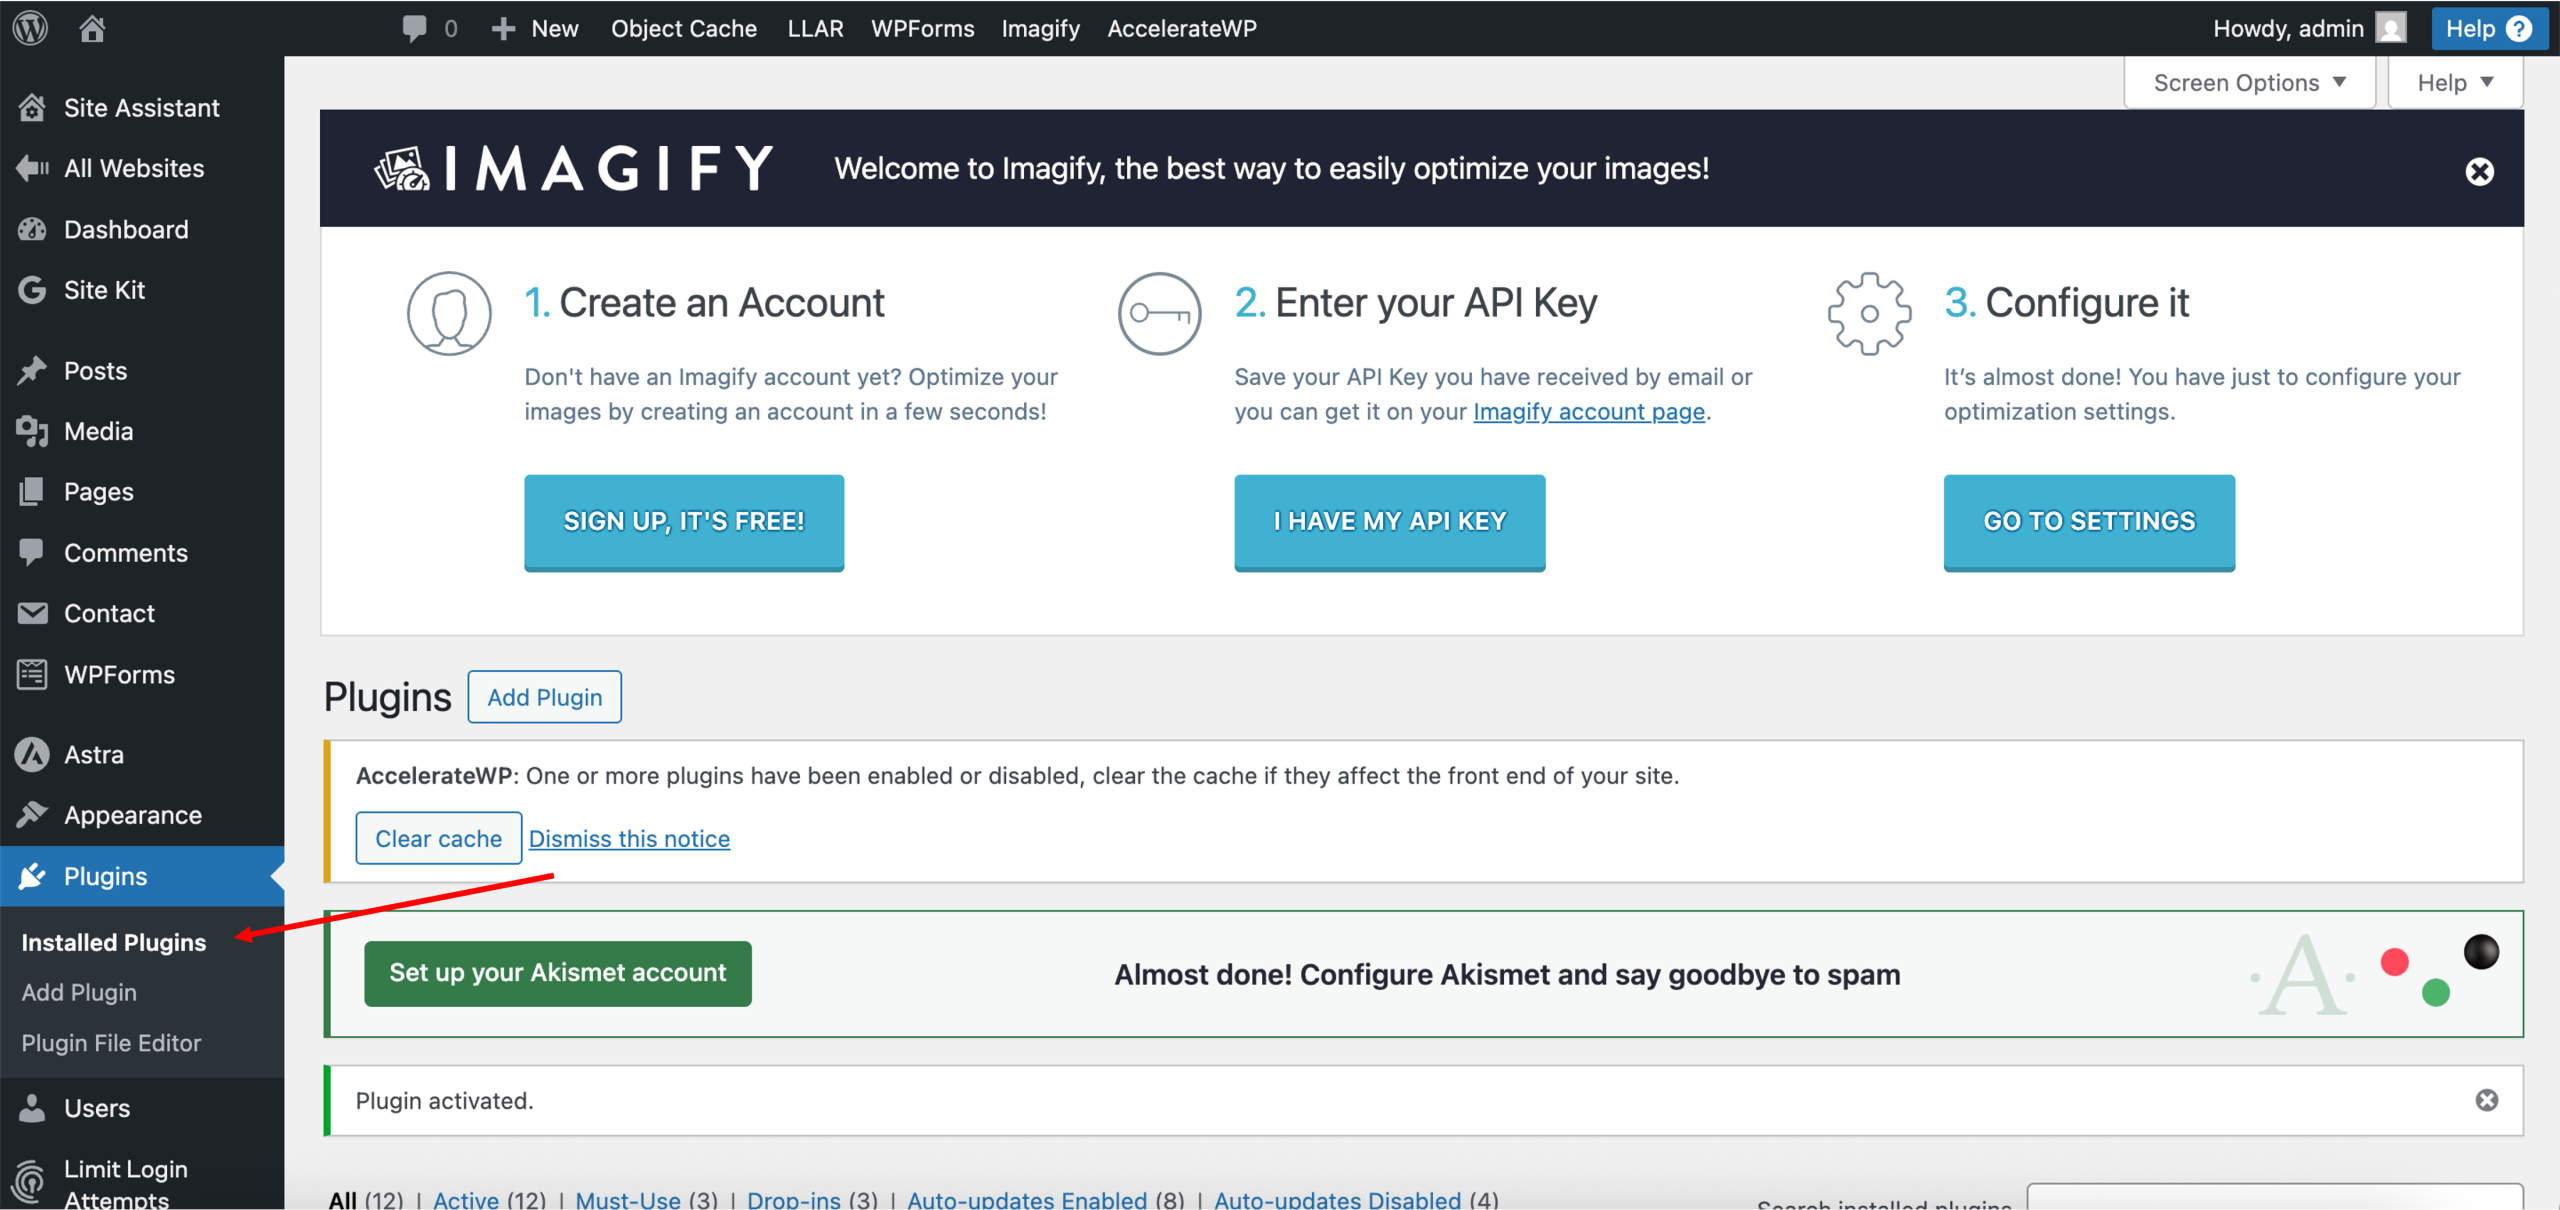
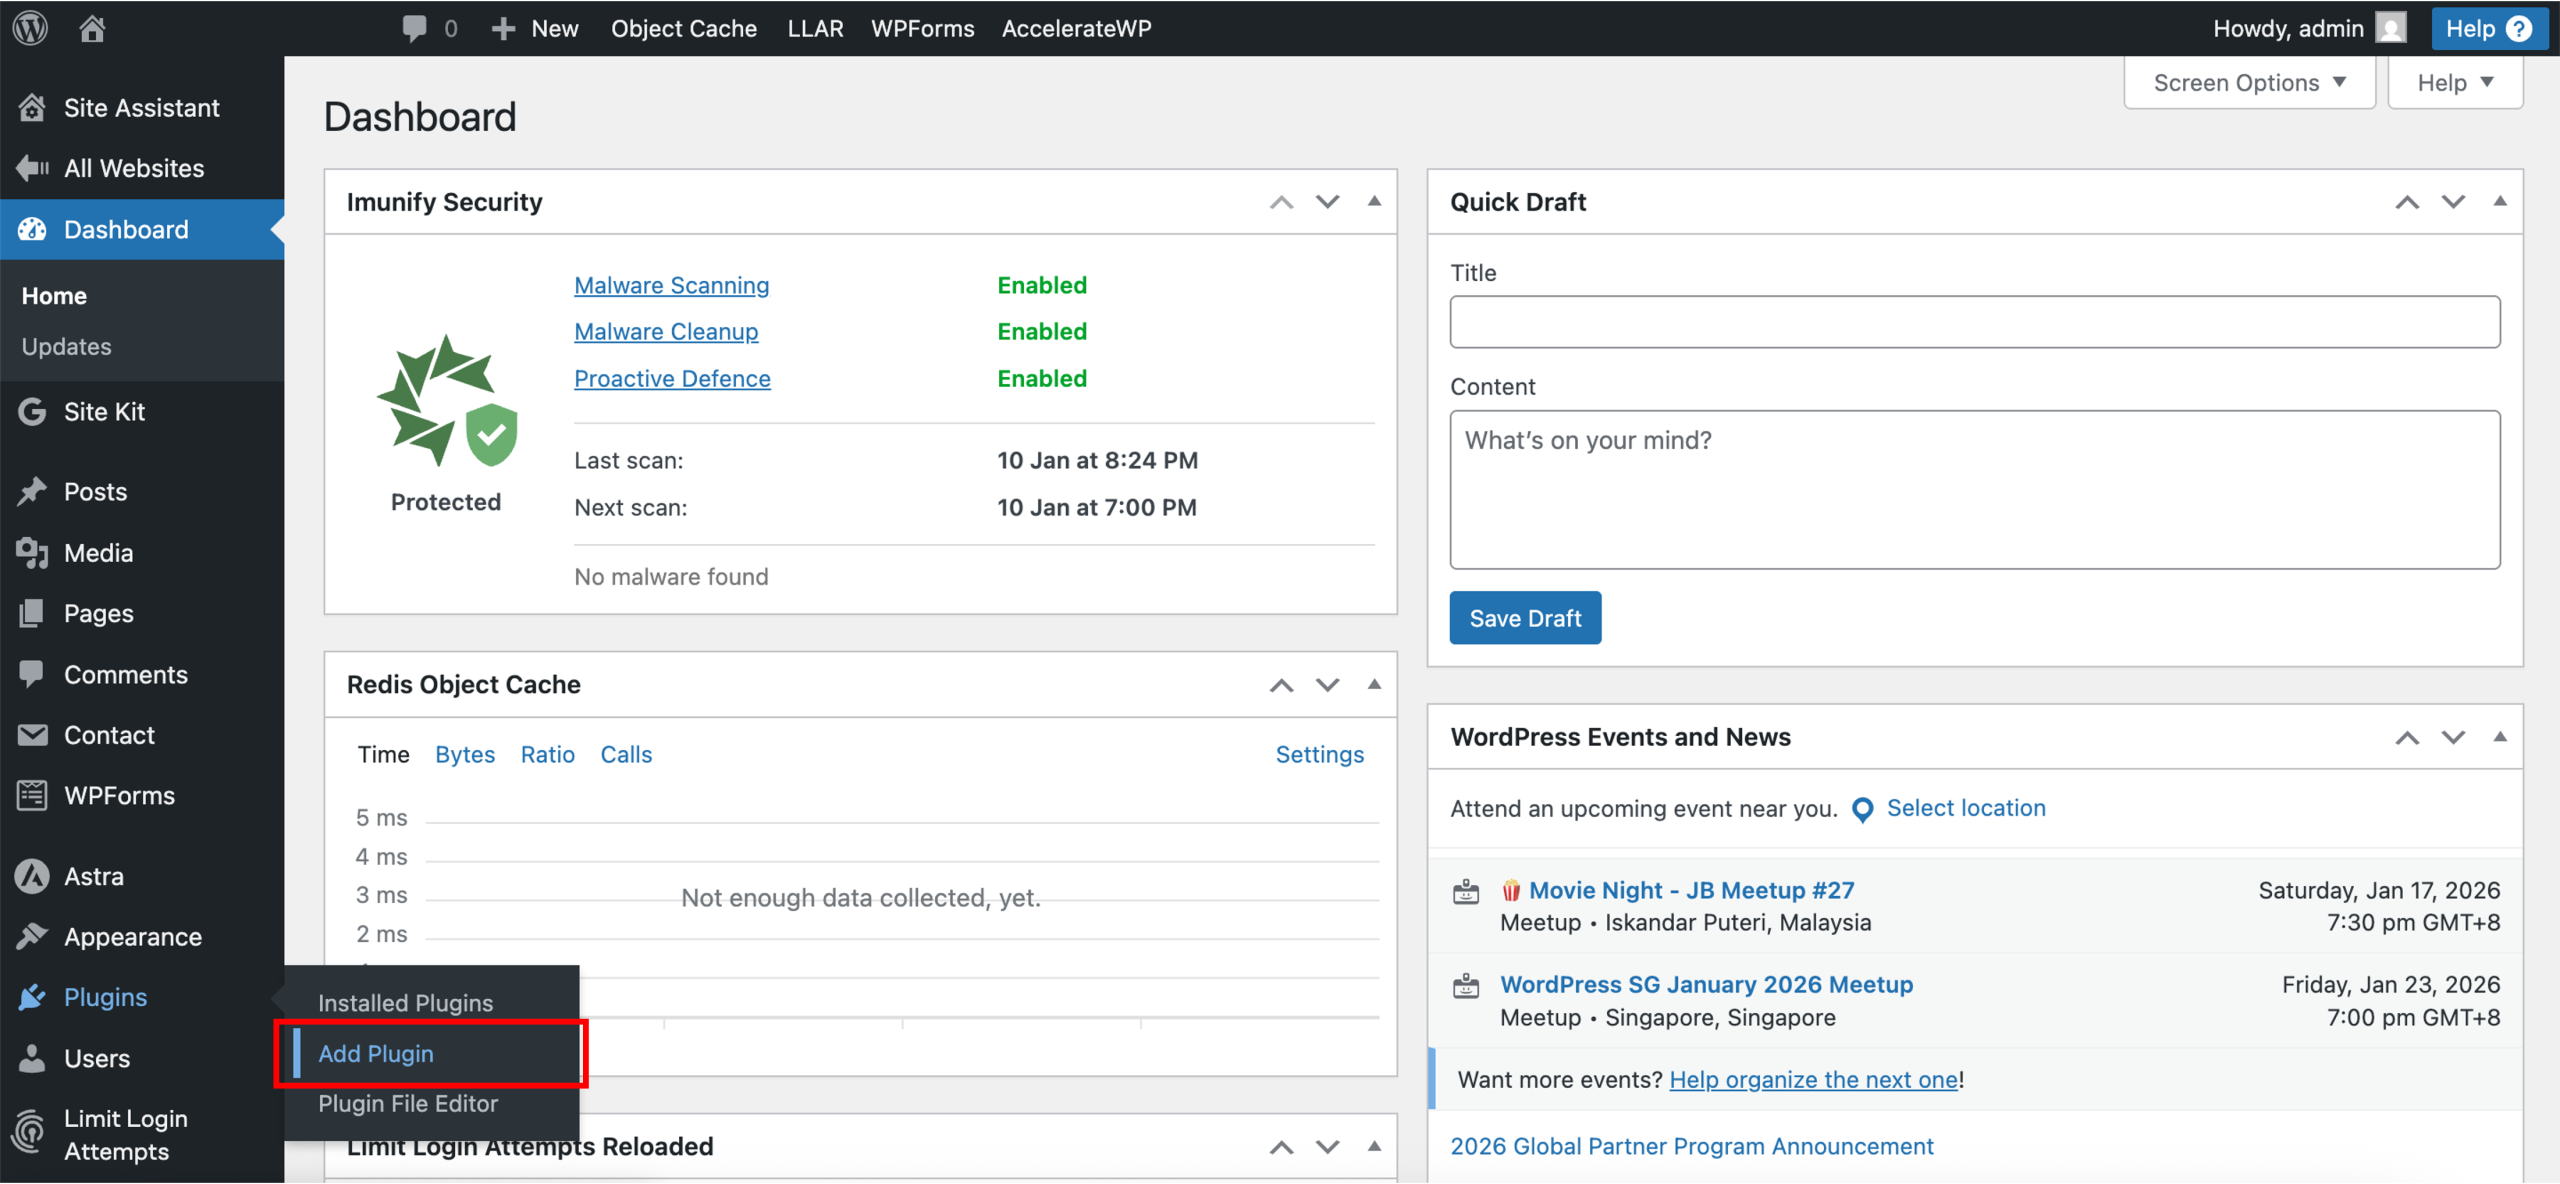
1. Upon reaching your WordPress admin dashboard, click Plugins > Add Plugin.
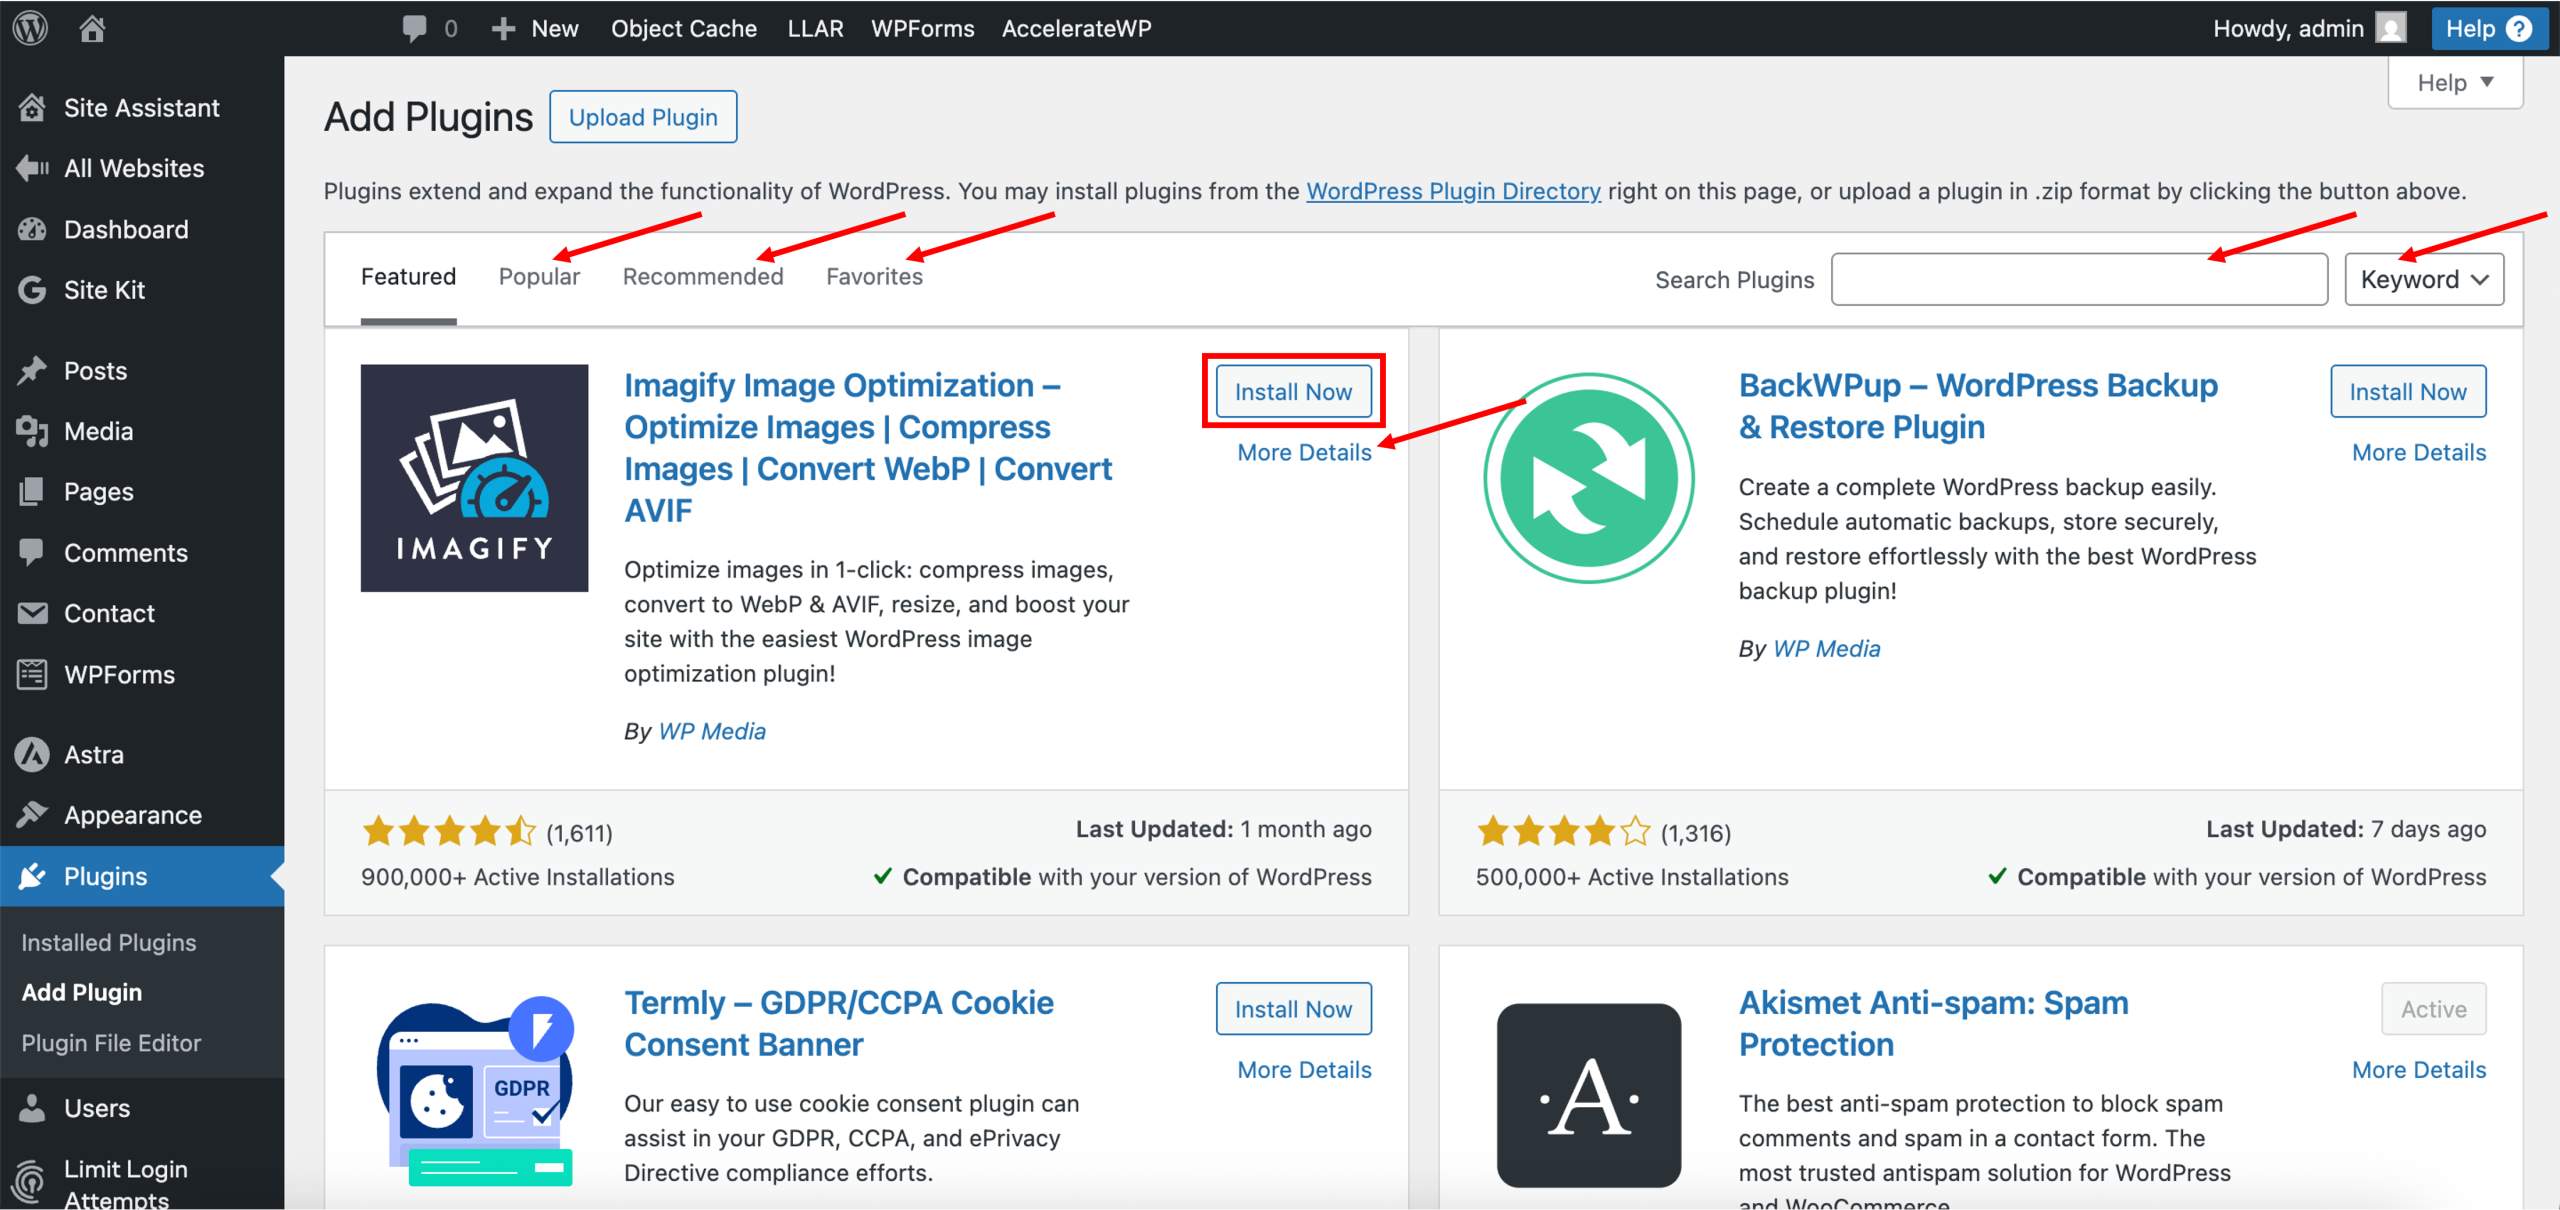
2. Browse the available plugins using the filters or search bar. You can view its details before selecting the one you want to install. Once done, click Install Now.
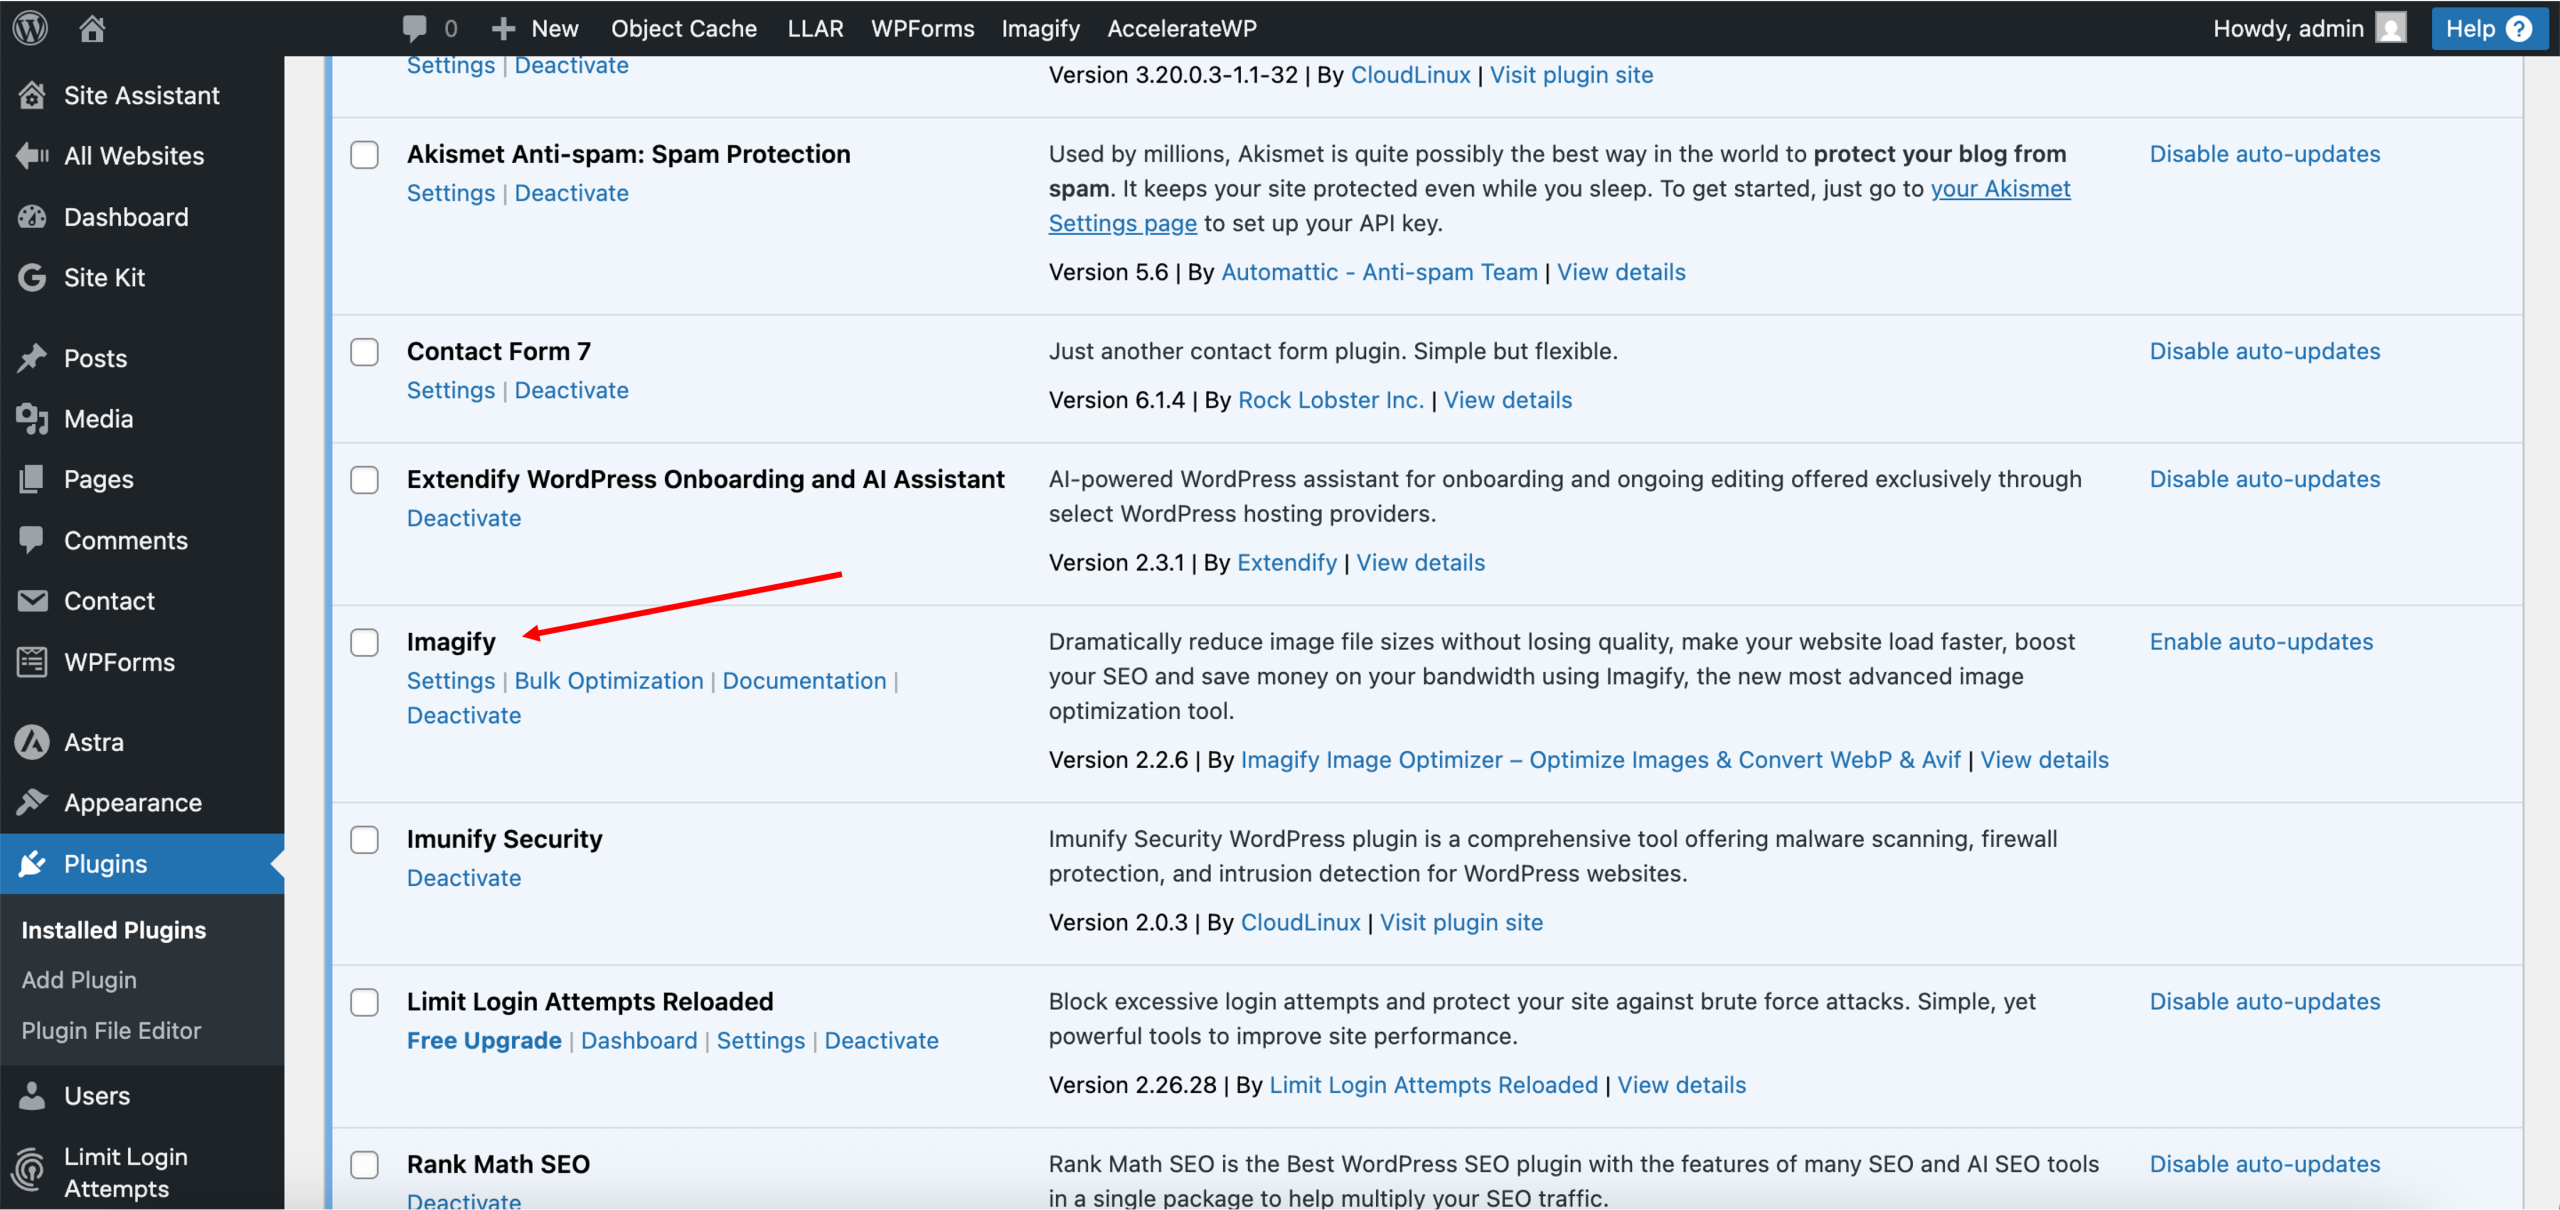
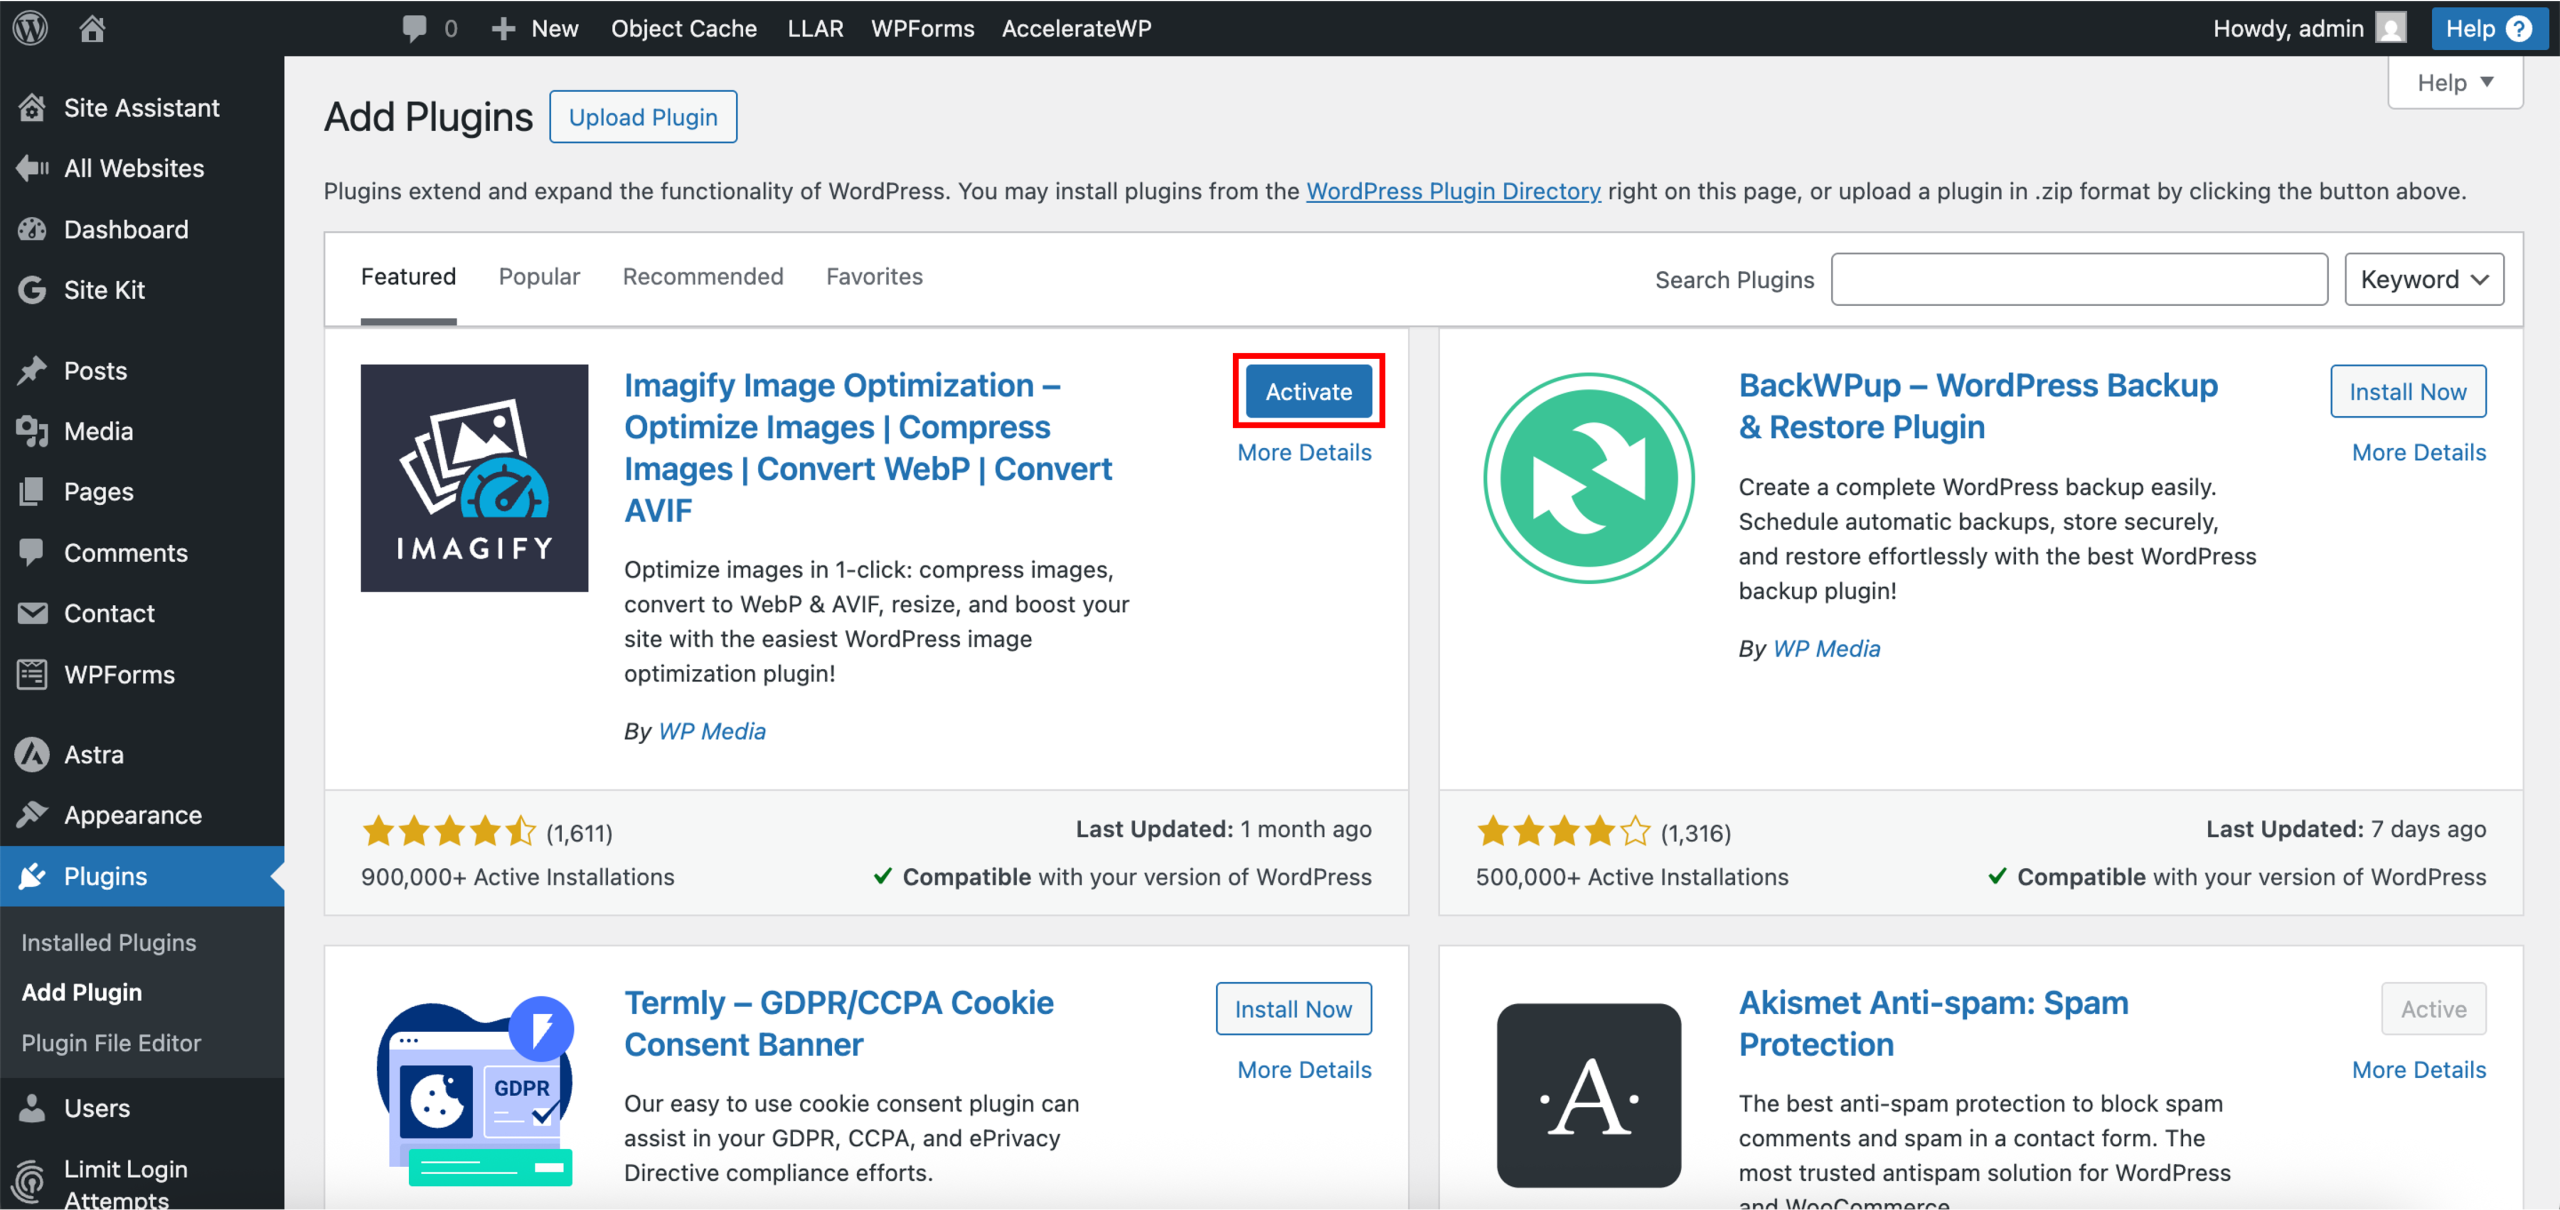
3. Done! Successful installation of the plugin will look like the following, with the Activate option enabled. To use the installed plugin, click Activate.
4. Activating the plugin successfully redirects you to the Installed Plugins page, which lists your existing installed plugins.